Loading ...
Loading ...
Loading ...
DDNS Setup (Advanced)23
3. Select your recorder warranty from the dropdown next to Warranty. Enter the rest of your
product information.
NOTE
• The Device Name can be any name of your choice (for example, “Store Security System”).
• You can find your recorder’s MAC Address in the system information window on the recorder. From
the Live View display, right-click and click Info, or click on the Navigation Bar.
4. Click Add Device.
Once submitted, your DDNS account information will be summarized under My DDNS De-
vices. Make a note of your DDNS URL, Username and Password, as they will be needed
to complete DDNS setup.
23.5 STEP 5: Enable DDNS on the Recorder
Enter your DDNS information into the menu of your recorder. You can find the information ref-
erenced below on your My Lorex account, or on the confirmation email sent to you after regis-
tering for DDNS service.
To configure DDNS in the recorder:
1. From the Live View display, right-click to open the Quick Menu, then click Main Menu.
2. Click NETWORK, then click the DDNS tab on the side panel.
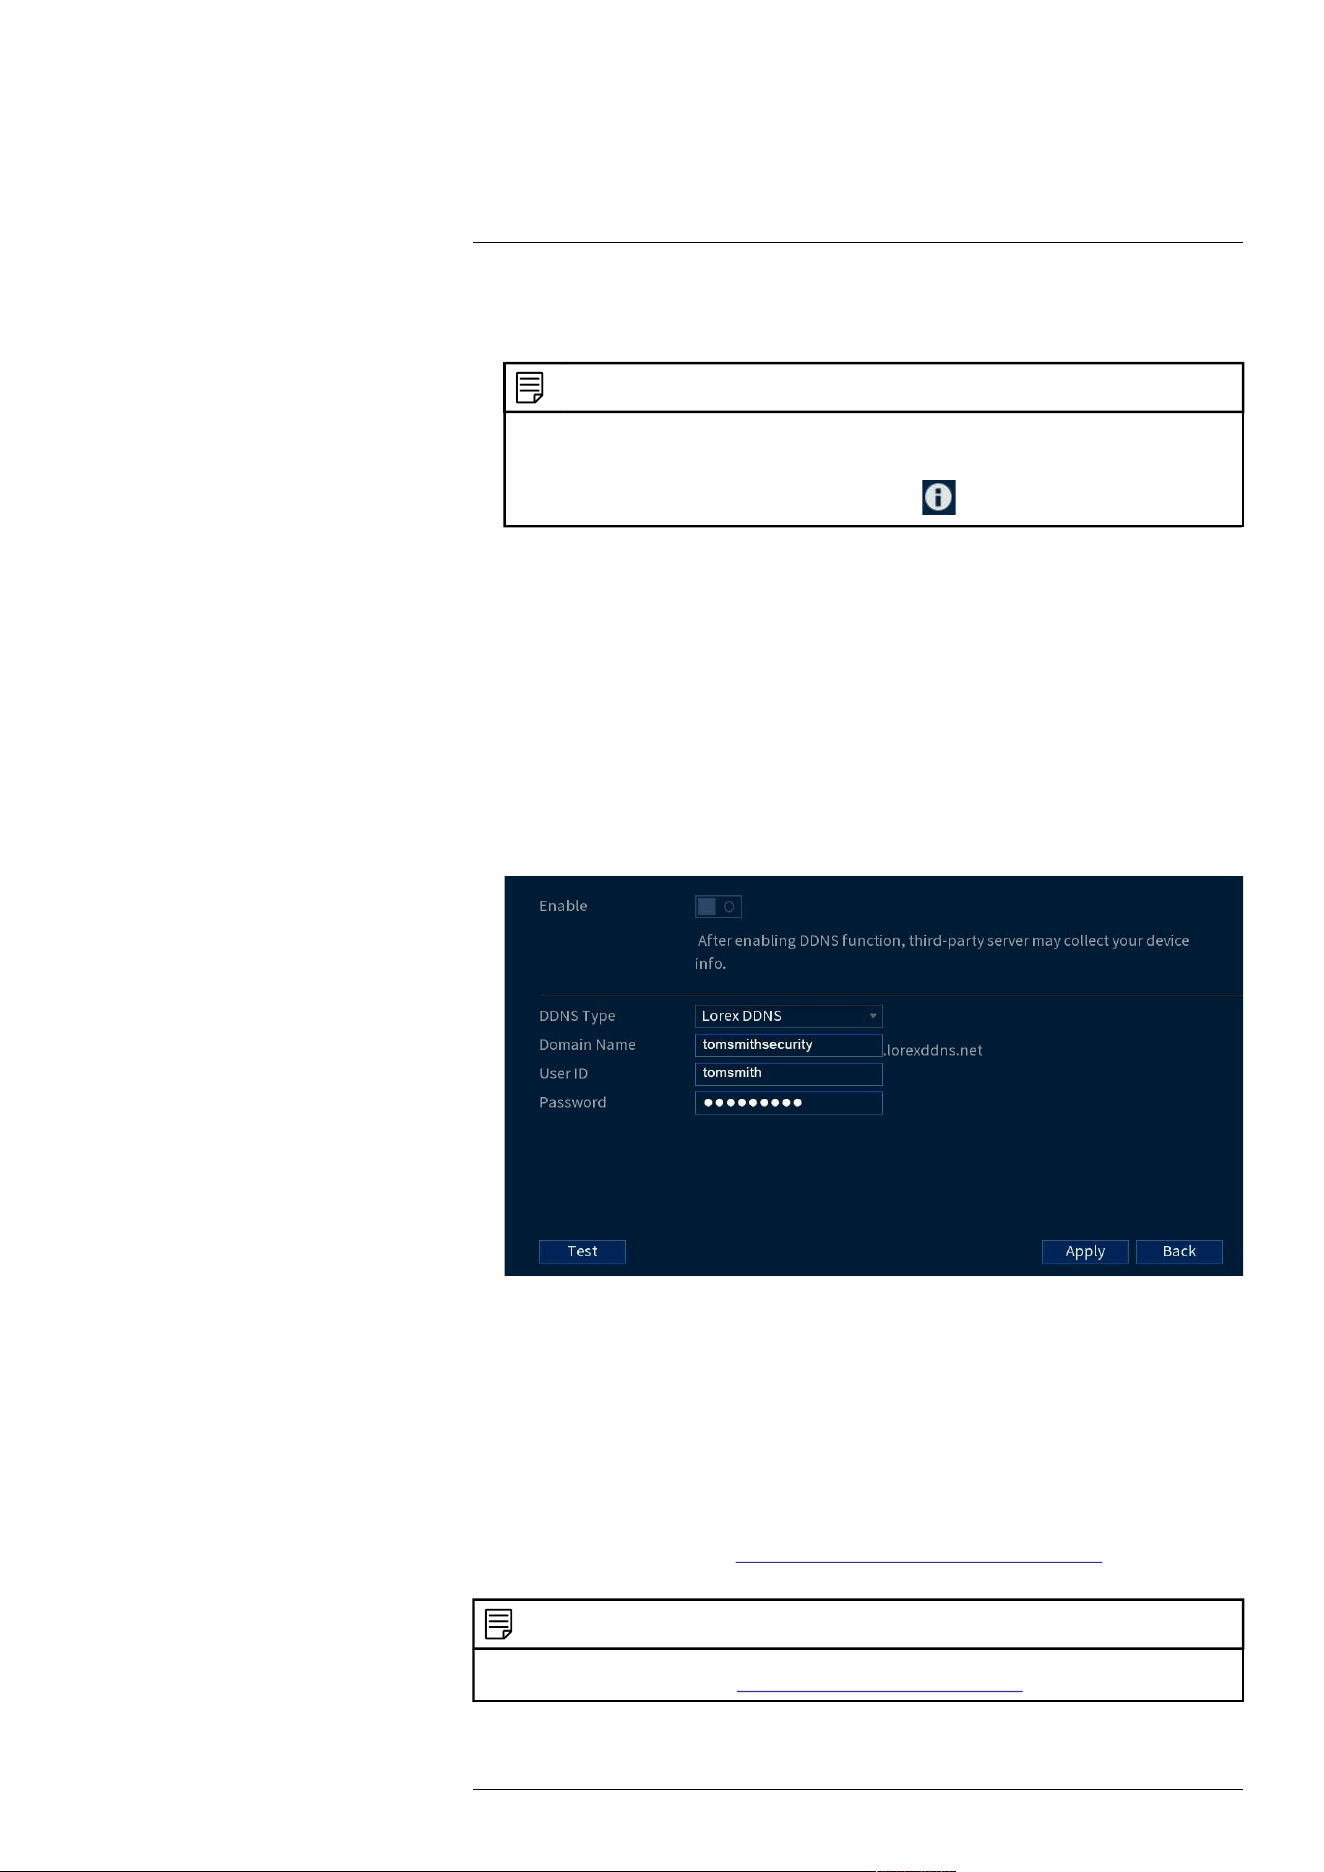
3. Check to enable DDNS connectivity.
4. Configure the following:
• DDNS Type: Select Lorex DDNS.
• Domain Name: Enter the first part of the DDNS domain that you requested during setup.
• User ID: Enter the username provided in the DDNS confirmation email.
• Password: Enter the password provided in the DDNS confirmation email.
5. Click Apply.
You will now be able to access your system remotely using DDNS. Enter the full domain
name into a web browser (e.g., http://www.tomsmithsecurity.lorexddns.net) and login using
the provided credentials.
NOTE
If your system uses an HTTP port other than 80, you will need to add a colon to the end of your DDNS domain
name and enter the port number (e.g., http://www.tomsmithsecurity.lorexddns.net:81)
#LX400113; r. 7.0/56940/56940; en-US 107
Loading ...
Loading ...
Loading ...