Loading ...
Loading ...
Loading ...
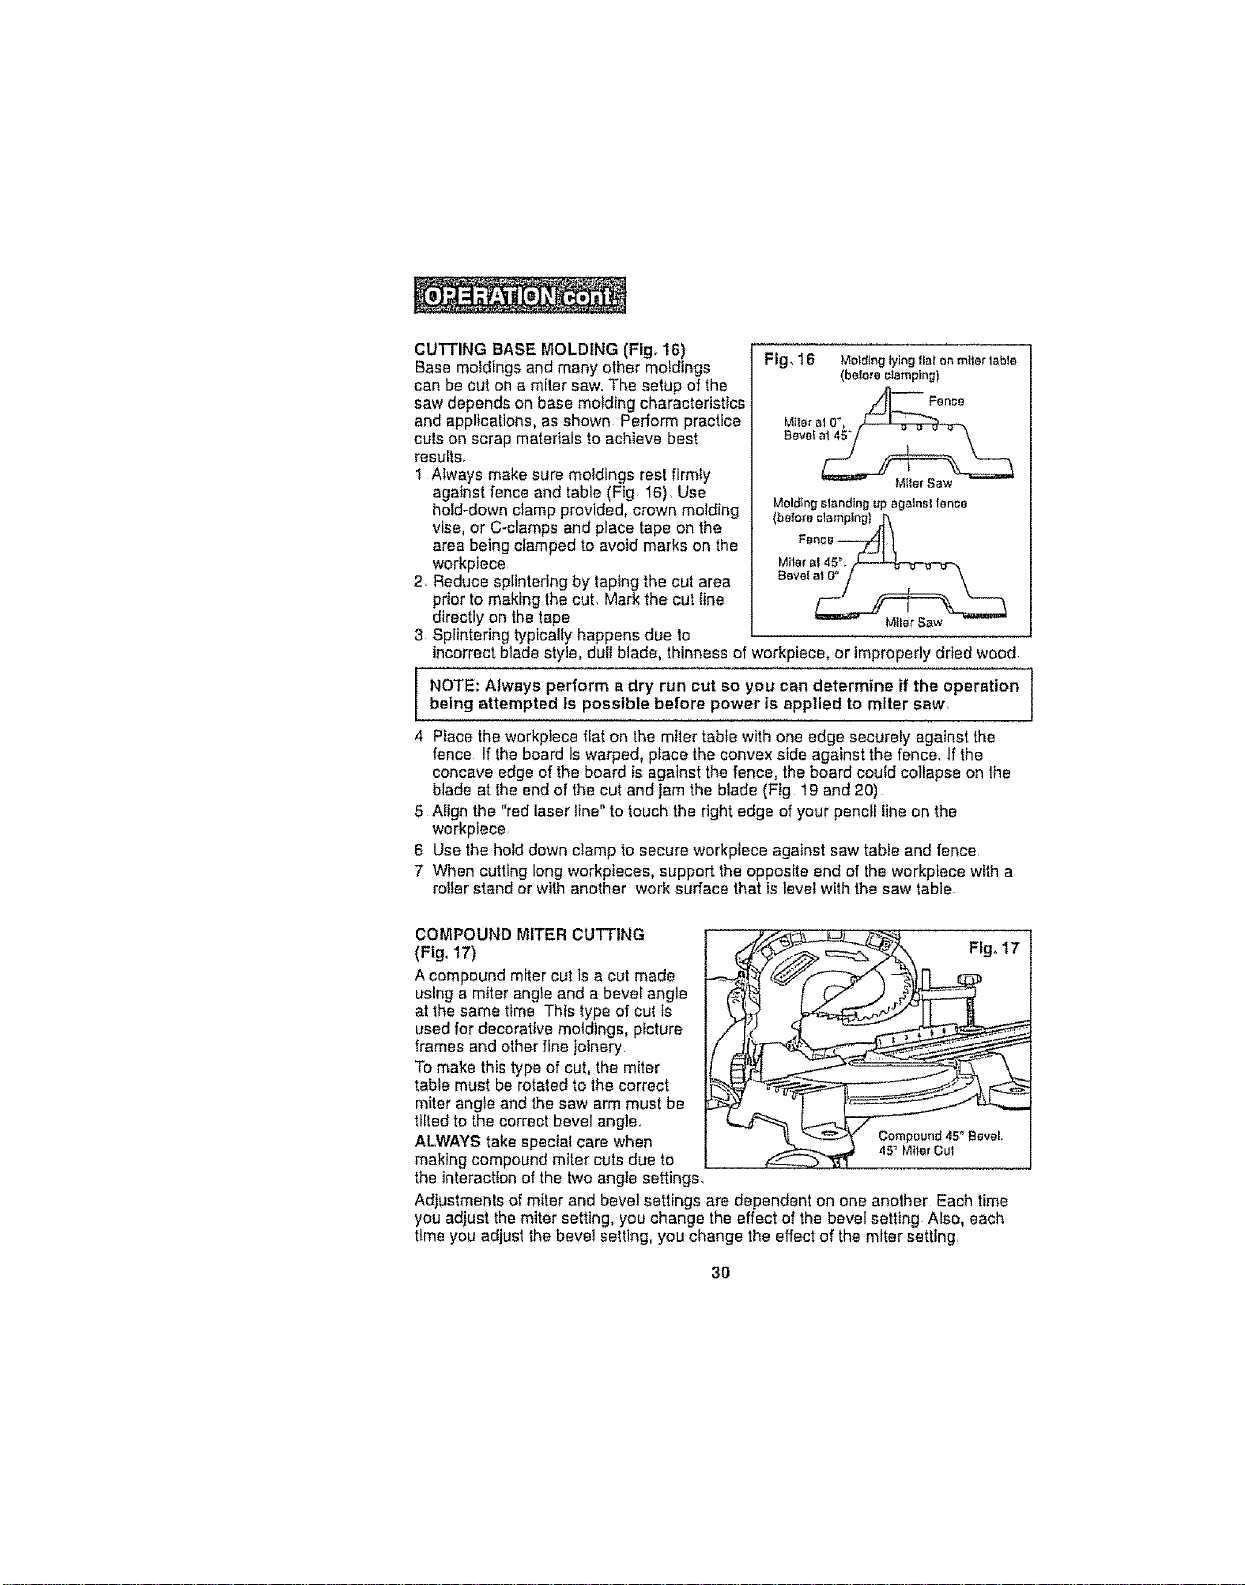
CUTTING BASE MOLDING (Fig_ 16)
Base moldings and many other moldings
can be cut on a miter saw. The setup of the
saw depends on base molding characteristics
and applications, as shown Perform practice
cuts on scrap materials to achieve best
results.
1 Always make sure moldings rest firmly
against fence and table (Fig 16). Use
hold-down cfarnp provided, crown molding
vise, or C-clamps and place tape on the
area being clamped to avoid marks on the
workpiece
2. Reduce splintering by taping the cut area
prior to making the cut. Mark the cut line
directly on the tape
3 Splintering typically happens due to
FIg_ 16 Mold{ng lying flat or, miler labia
(bale:re clamping)
,_, FenctJ
Miter at O',
BeveI a_
...... _llef N_W
Molding slendieg up agatnsl fence
(before clamping} _,
Bore{ _
M_ler Saw
incorrect blade style, du{lblade, thinness of workpiece, or Improperly dried wood
NOTE: Always perform a dry run cut so you can determine if the operation {
being attempted ls possible before power is applied to miter sew.
t
4 Place the workp]ece flat on the miter table with one edge securely agalnsf the
fence If the board is warped, place the convex side against the fence. If the
concave edge of the board is against the fence, the board cou{d collapse on the
blade at the end of the cut and jam the blade (Fig 19 and 20)
5 Align the "red laser line" to touch the right edge of your pencil line on the
workplace
6 Use the hold down clamp to secure workplece against saw table and fence
7 When cutting long workpteces, support the opposite end of the workptece with a
roiter stand or with another work surface that is level with the saw table
COMPOUND MITER CUTTING
(Fig. 17)
A compound miter cut is a cut made
using s m{ter angle and a bevel angle
at the same time This type of cut ts
used for decorative moldings, picture
frames and olher fine joinery
To make this type of cut, the miter
table must be rotated to the correct
miter ang}e and the saw arm must be
tlt!ed to the correct bevel angle_
ALWAYS take special care when Oompeund45_Bevel,
45 _ M_ler Gut
making compound miter cuts due to
the interactbn of the two angle settings,
Adjustmenls of miter and bevel settings are dependent on one another Each time
you adjust the miter setting, you change the effect of the bevel setting Also, each
time you adjust the bevel settlng, you change the effect of the miter setting,
Flgo17 I
3O
Loading ...
Loading ...
Loading ...