Loading ...
Loading ...
Loading ...
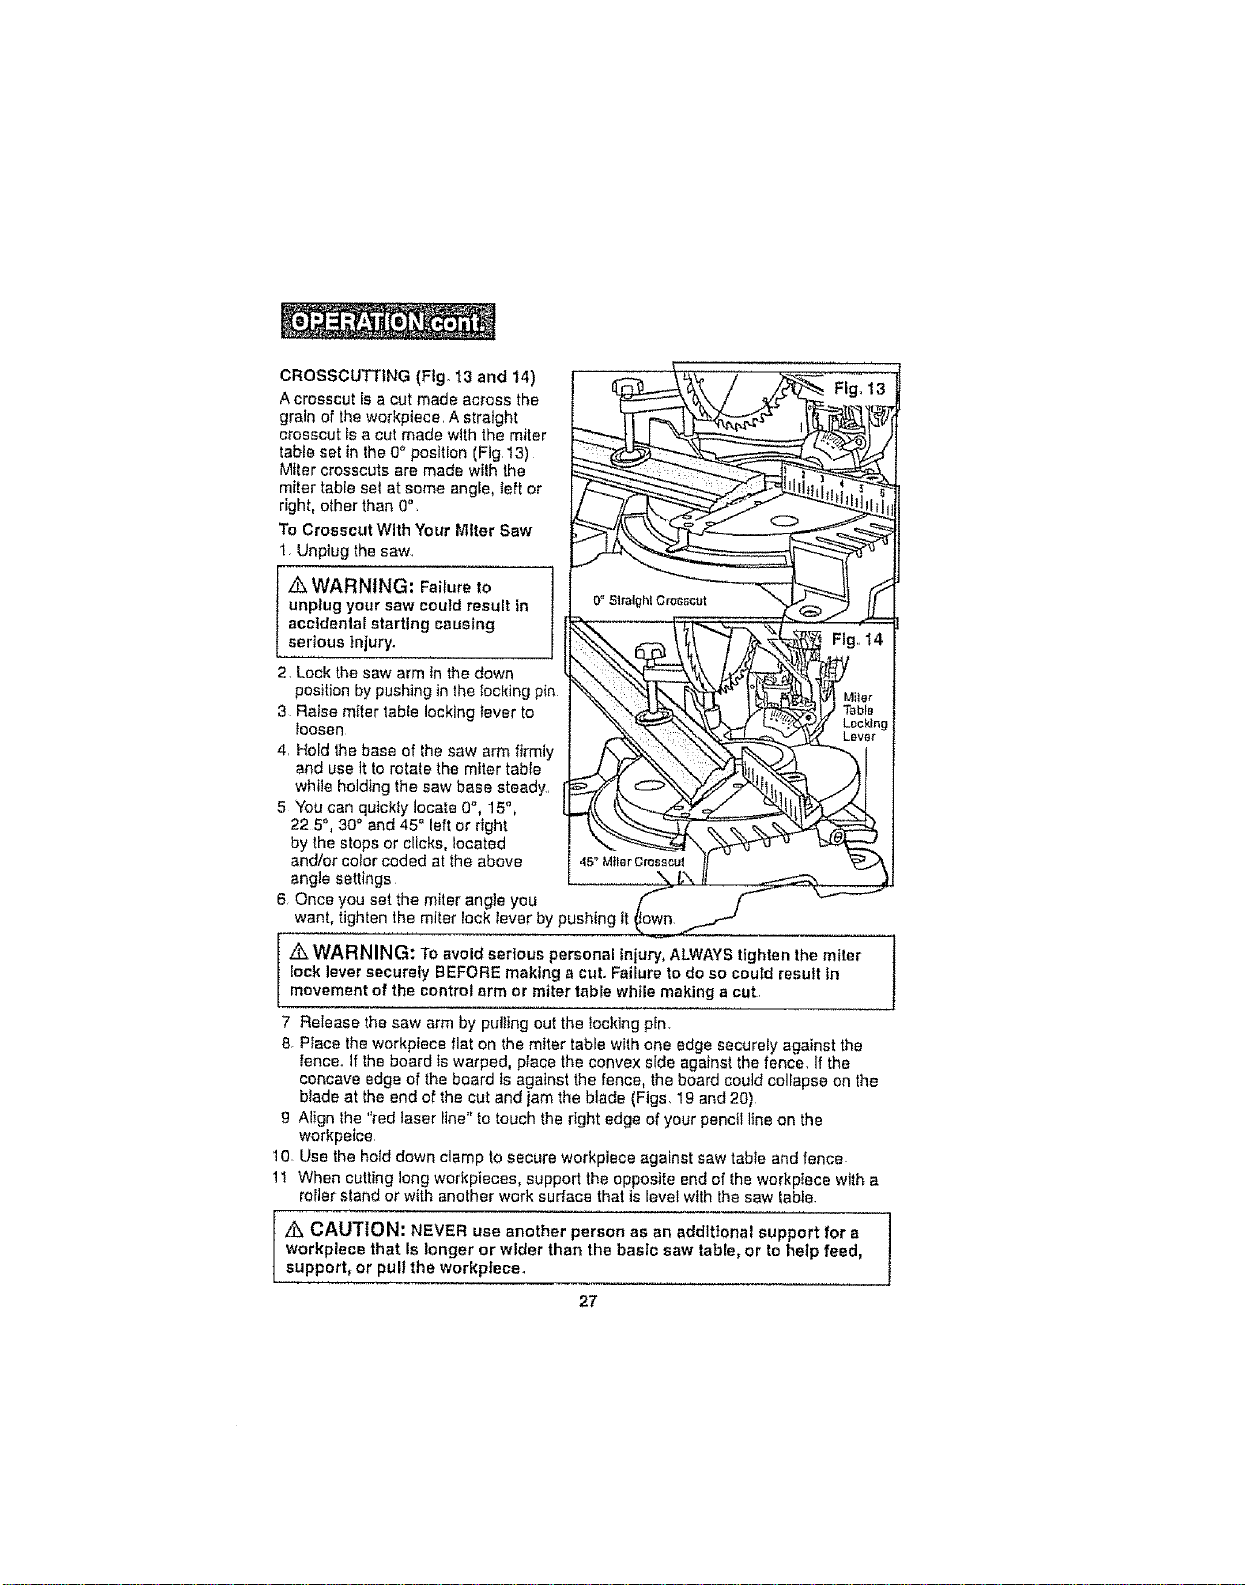
CROSSCUTTING (Fig° 13 and 14) _ _'_ , ; .... "_---- ........
A crosscut is a out made across the '_ _ _"_ 'L'I_._..._'__ .,,__
grain of the workpiece. A straight _1 _-. _ _"L_ _ ,f_l'l_'[},_)
crosscut is a cut made with the miter _ LJ _ _t ,,
table set in the 0° position (Fig 13) _ '_"_. _"__q'-_;_._.)..d /
Miter crosscuts are made wilh the _
miter table sol at some angle, left or _L-"_-"'_ _ _th_..__
ToOroeocutW,thYoorM,tor,ow
l Unplug the saw, _ _-"_
I unptug your saw could resuit in _ 0°SlralghlO,o_cut _l.J_,'_ t1
j accidental starting causing ,.-- i _"_-_---_ _/"_._J_, ".'_--.
thesawarm,nthedown
position by pushing in the locking pin _.__ I°_L_.) ._,._,,e,
3 Raise miler table locking lever to "%._t_r--_l_z i _:ab_,
4, Hold 1hebase of the saw arm firmly i',,.,.,..x_>_._,__X. \\",_t%,._'_-'_ _x I
and use it to rotate the miter table _._ _" X_'X7_ ._7_t,,_ ._I
whi_e holding the saw base steady., _f_L O__t_j) t
5 Youcanqutckly locate 0 , 15", ..,_t k_"--_,_"y",=_ll_,,h_.
22 5,30 and 45 `=left or right _"_-_"__.. _
by the stops or clicks, located "_"-_'X _ u
and/or color coded at the above 4s_M_lerCl"osscut l/
angle settings __ I,",, II
6 Once you set the miter angle you _ _ W
want, tighten the miler lock levar by pushing tt own,
Ztl WARNING: To avoid serious personal tniury, ALWAYS tighten the miter
lock lever securely BEFORE making a cut. Failure to do so could result In
movement of the control arm or miter table while making a cut.
Release the saw arm by pulling out the locking p_n,
8. Pface the workpiece flat on the miter table with one edge securety against the
fence. If the board ts warped, place the convex side against the fence, If the
concave edge of the board ts agatnst the fence, the board could collapse on the
blade at the end of the cut and iam the blade (Figs, 19 and 20)
g Align lhe "red laser line" to touch the right edge of your pencil Itne on the
workpeice
10. Use the hold down clamp to secure workpiece against saw table and fence
11 When cutting long workpieces, supped the opposite end of the workptece with a
roller stand or with another work surface that is level with the saw table.
Zi&CAUTION: NEVER use another person as an additional support for a /
workplece that Is longer or wider than the basic saw table, or to help feed,
J
support, or pull the workpIece.
27
Loading ...
Loading ...
Loading ...