Loading ...
Loading ...
Loading ...
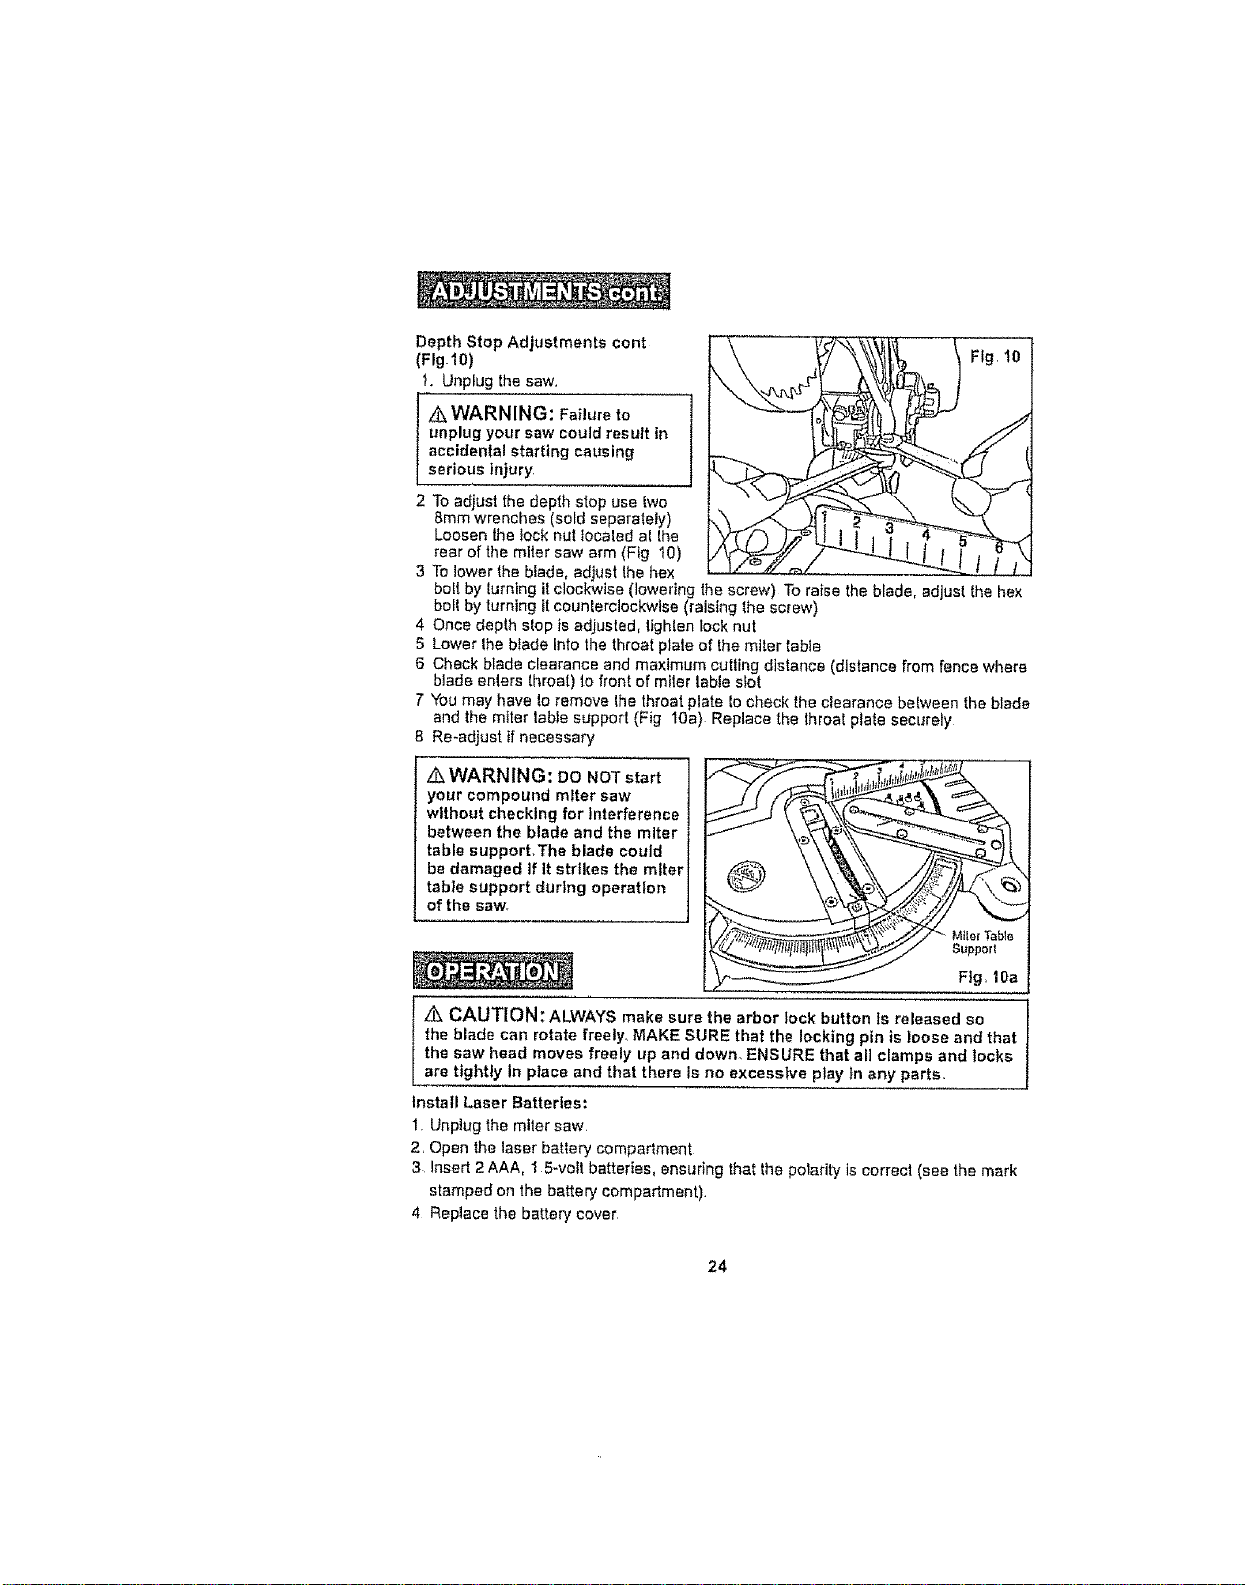
Depth Stop Adjustments cent
(FIg-lO)
t. Unplug the saw.
I _WARNING: Failure to
unplug your saw could result in
accidental starting causing
serious Injury,
2 To adjust the depth stop use two
8ram wrenches (sold separately)
Loosen the lock nut tocated at the
rear of the miter saw arm (Fig 10)
3 To lower the blade, adjust the hex
bo!l by turning it clockwise (lowering the screw) To ra+se the blade, adjust the hex
belt by turning +tcounterclockwise (raising the screw)
4 Once depth stop is adjusted, lighten lock nut
5 Lower Ihe blade Into the throat plate of the miter table
6 Check blade clearance and maximum culling distance (distance from fence where
blade enters throat) to front of miler table slot
7 You may have to remove the throat plate to check the clearance between the blade
and the m+ler table support (F+g 10a) Replace the throat plate securely
8 Re-adjust tf necessary.
Z_WARNING: DONOTstart
your compound miter saw
without checking for Interference
between the blade and the miter
table support,The blade could
be damaged If It strikes the miter
tabte support during operation
of the saw,
z_ CAUTION: ALWAYS make sure the arbor lock button Is released so
the blade can rotate freely. MAKE SURE that the locking pin is loose and that
the saw head moves freely up and down. ENSURE that all clamps and locks
are tightly In place and that there is no excessive play tn any parts.
Install Laser Batteries:
1. Unplug the miler saw.
2. Open the laser battery compartment
3 lnsert 2 AAA, ! 5-volt batteries, ensuring that the polarity is correct (see the mark
stamped on the battery compadment)
4 Replace the battery cover
24
Loading ...
Loading ...
Loading ...