Loading ...
Loading ...
Loading ...
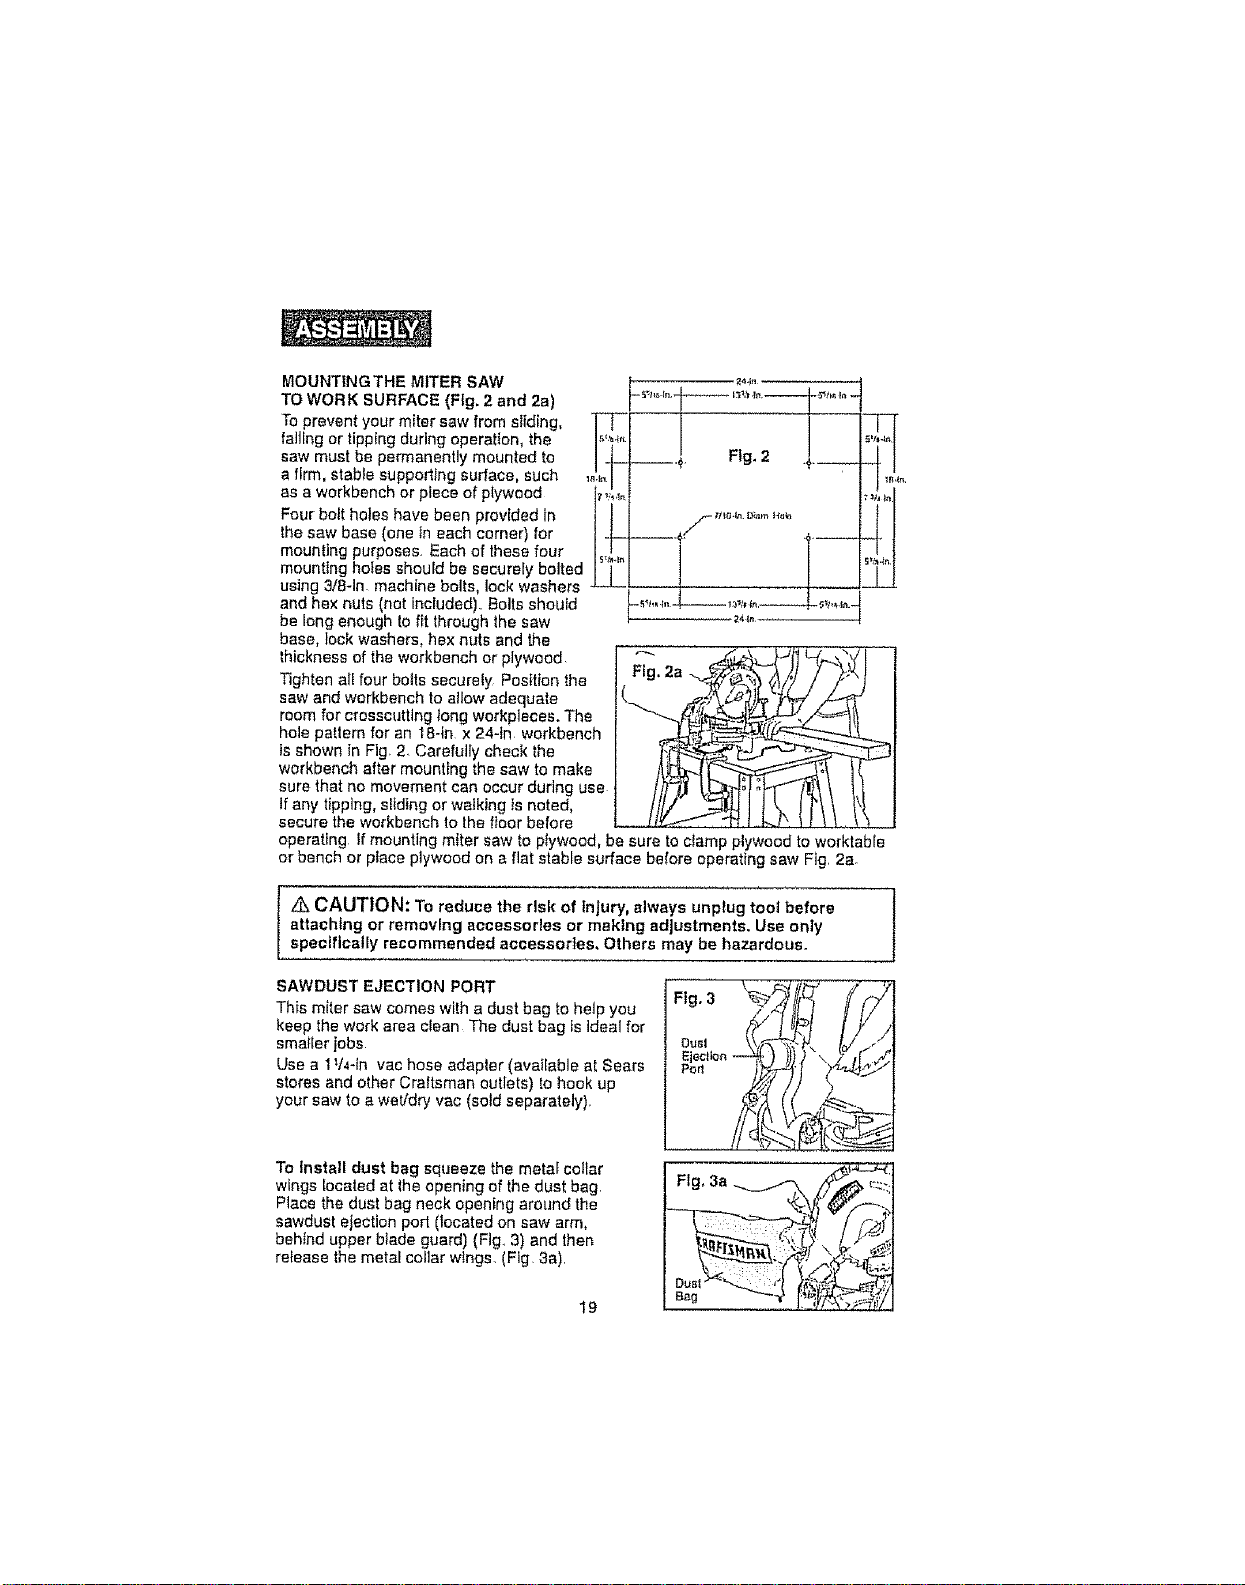
MOUNTINGTHEtvltTER SAW
TO WORK SURFACE (Fig. 2 and 2a)
To prevent your miter saw from sliding, it
saw must be permanently mounted to
a firm, stable supporting surface, such ,,,
as a workbench or piece of plywood i_.,_._.
Four bolt holes have been provided in
the saw base (one in each corner) for
mounting purposes. Each of these four
mounting holes should be securely bolted
using 3t8-1n. machine bolts, lock washers
and hex nuts (not included). Bolts should
be long enough to fit through lhe saw
base, lock washers, hex nuts and the
thickness of the workbench or plywood [ "-"
Tighten eli four bolts securely Position the I Flg. 2a
saw and workbench to allow adequate
room for crosscutting tong workpleces. The
hole pattern for an 1a-in x 24-1n workbench
is shown in Fig 2. Carefully check the
workbench after mounting the saw to make
sure that no movement can occur during use
If any tipping, sfld]ng or walking Is noted,
secure the workbench to the floor before
operating tf mounting miter saw to plywood, be sure to clamp plywood to worktable
or bench or place plywood on a flat stable surface before operating saw Fig. 2a.
244n
"1
Z_CAUTION: To reduce the risk of Injury, always unplug tool before
attaching or removing accessories or making adjustments. Use only
I
specifically recommended accessories, Others may be hazardous.
SAWDUST EJECTION PORT
This miter saw comes with a dust bag to help you
keep the work area cEean The dust bag _sideal for
smaller jobs
Use a 11/4-tn vac hose adapter (available at Sears
stores and other Craltsman outlets) to hook up
your saw to a wet/dry vac (sold separately).
To Install dust bag squeeze the metaf collar
wings located at lhe opening of the dust bag
Place the dust bag neck opening around the
sawdust ejection port (located on saw arm,
behind upper blade guard) (Fig, 3) and lhen
release the metal collar wtngs. (Fig. 3a).
I9
Fig, 3a
Loading ...
Loading ...
Loading ...