Loading ...
Loading ...
Loading ...
3231
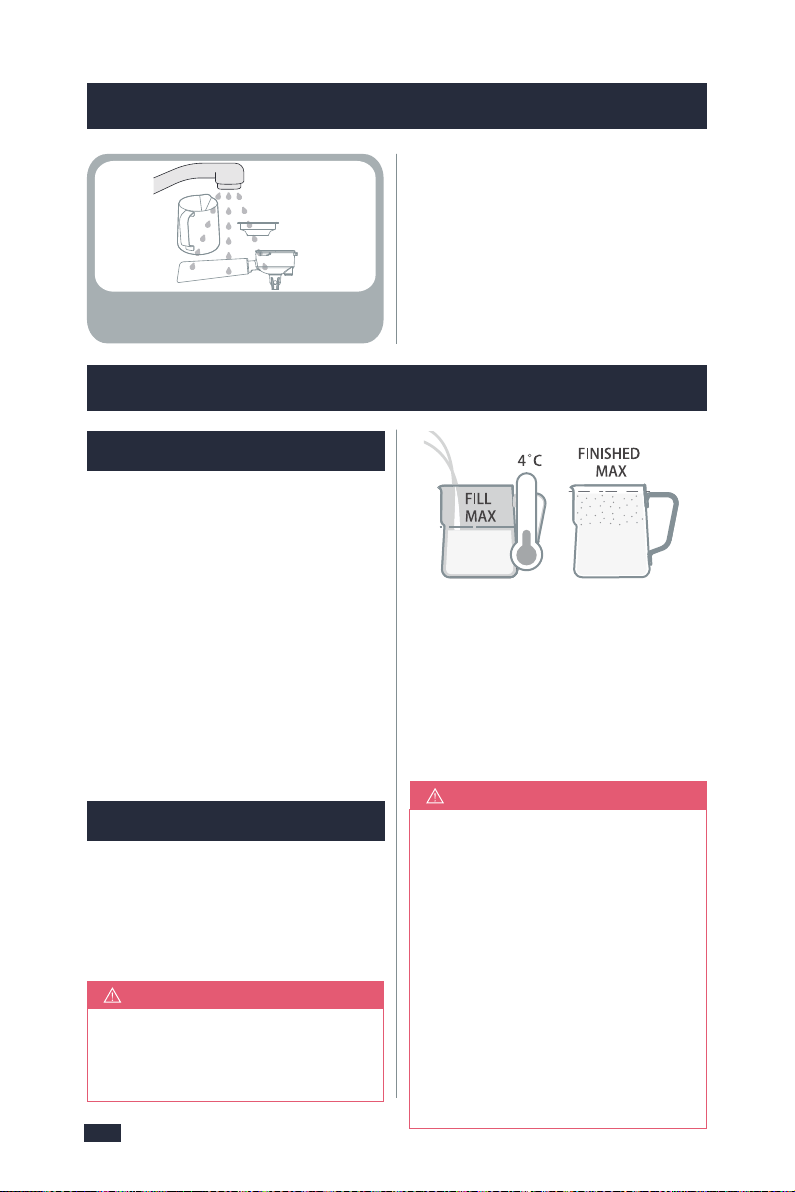
Use the 12 Oz (350mL) milk Jug.
Wash parts with warm water.
7. Milk Frothing Guide
7. Milk Frothing Guide
Milk frothing is the steaming of milk.
Key Elements of Frothed Milk
Milk that has been frothing correctly
has a thick, rich microfoam with a
silky sheen. Frothed involves both
heating and aeratingmilk using steam.
Vital elements includepositioning of
the Steam Wand, when to adjust the
Milk Jug position and reaching the
correct temperature. Use the below
steps tohelp you create café-style
microfoam.
1. Fill Milk Jug:
Add 100-150mL of cold milk around
4°C(40℉) into a chilled clean stainless
steel Milk Jug. Fill to the bottom of the
Milk Jug spout.
7.1 Brief Introduction
7.2 Tips For Milk Frothing
The volume of milk will increase
or stretch during frothing , so
don’t overfill the Jug.
NOTE
For best milk frothing results every
time, ensure steam has warmed
up before frothing milk . Steam is
ready when steam button light is
fully ON.
Place a cup under the froth nozzle,
then turn on the DIAL to STEAM.
Wait about a few seconds, there
will be water coming out from the
nozzle. Be careful of the hot steam.
Then pour away the water of the cup.
Once any water has been purged
NOTE
stop the steam by returning DIAL.
Be careful not to get burned by
the steam.
2. Steam Warm Up:
Steam is ready when Steam/Hot water
indicatoris fully ON. Turn DIAL to STEAM.
For You will also hear the Pump start.
Pause steam by returning DIAL to the
vertical position.
3. Position:
Place the Steam Wand Arm in the Jug
spout at the 12 o'clock position, with
the Froth nozzle in the milk at the 3
o'clock position, a finger width away
from the edge of the Jug. Keep Steam
Wand tip just under the surface of the
milk. Turn DIAL back to STEAM position
to start frothing. A whirlpool action
should be created in the Jug.
4. Sound:
How air is introduced to the milk
determines the consistency of the
foam. If large gulps of air are added
to the milk, the foam will have large
bubbles. Introducing air to the milk
in a controlled, gentle fashion
indicated by a gentle hissing sound,
will ensure the milk has fine aerated
micro foams.
Barista Tip: Milk Frothing Sounds
- Gurgling: Tip not deep enough, raise
Jug.
- Smooth Hissing: Just right for latte.
- Screeching: Tip too deep, lower Jug.
5.Keeping Froth nozzlePosition:
As the steam heats & frothing the milk,
the milk will stretch causing the level
of the milk in the Jug rise. As this
happens follow the level of the milk
by lowering the Jug , keeping the
Froth nozzle just below the surface.
Some adjustments to technique
will be required when using non-
dairy milk.
NOTE
6. Amount of Foam:
Create the amount of micro foams you
want. Cappuccinos traditionally have
more micro foams than flat whites.
7. Immerse Tip:
After creating the desired amount of
foams, immerse the Steam Wand half
depth way into the milk. This heats
all the milk and pulls in milk instead
of air. This ensures that the milk &
foam are blended together, making
it denser & smoother.
6. Espresso Guide
Loading ...
Loading ...
Loading ...