
Loading ...
Loading ...
Loading ...
3.Placetheheadof a combinationsquarein the
GROOVE..adjustbladeof square sothat it just
touches the t1p of the MARKED tooth.
4. Move square to REAR, rotate blade to see if
MARKED tooth again touches blade of square.
5, If tooth touchessquareat FRONT and REAR .
sawblade is PARALLEL to MITER GAUGE
GROOVE
ii,r
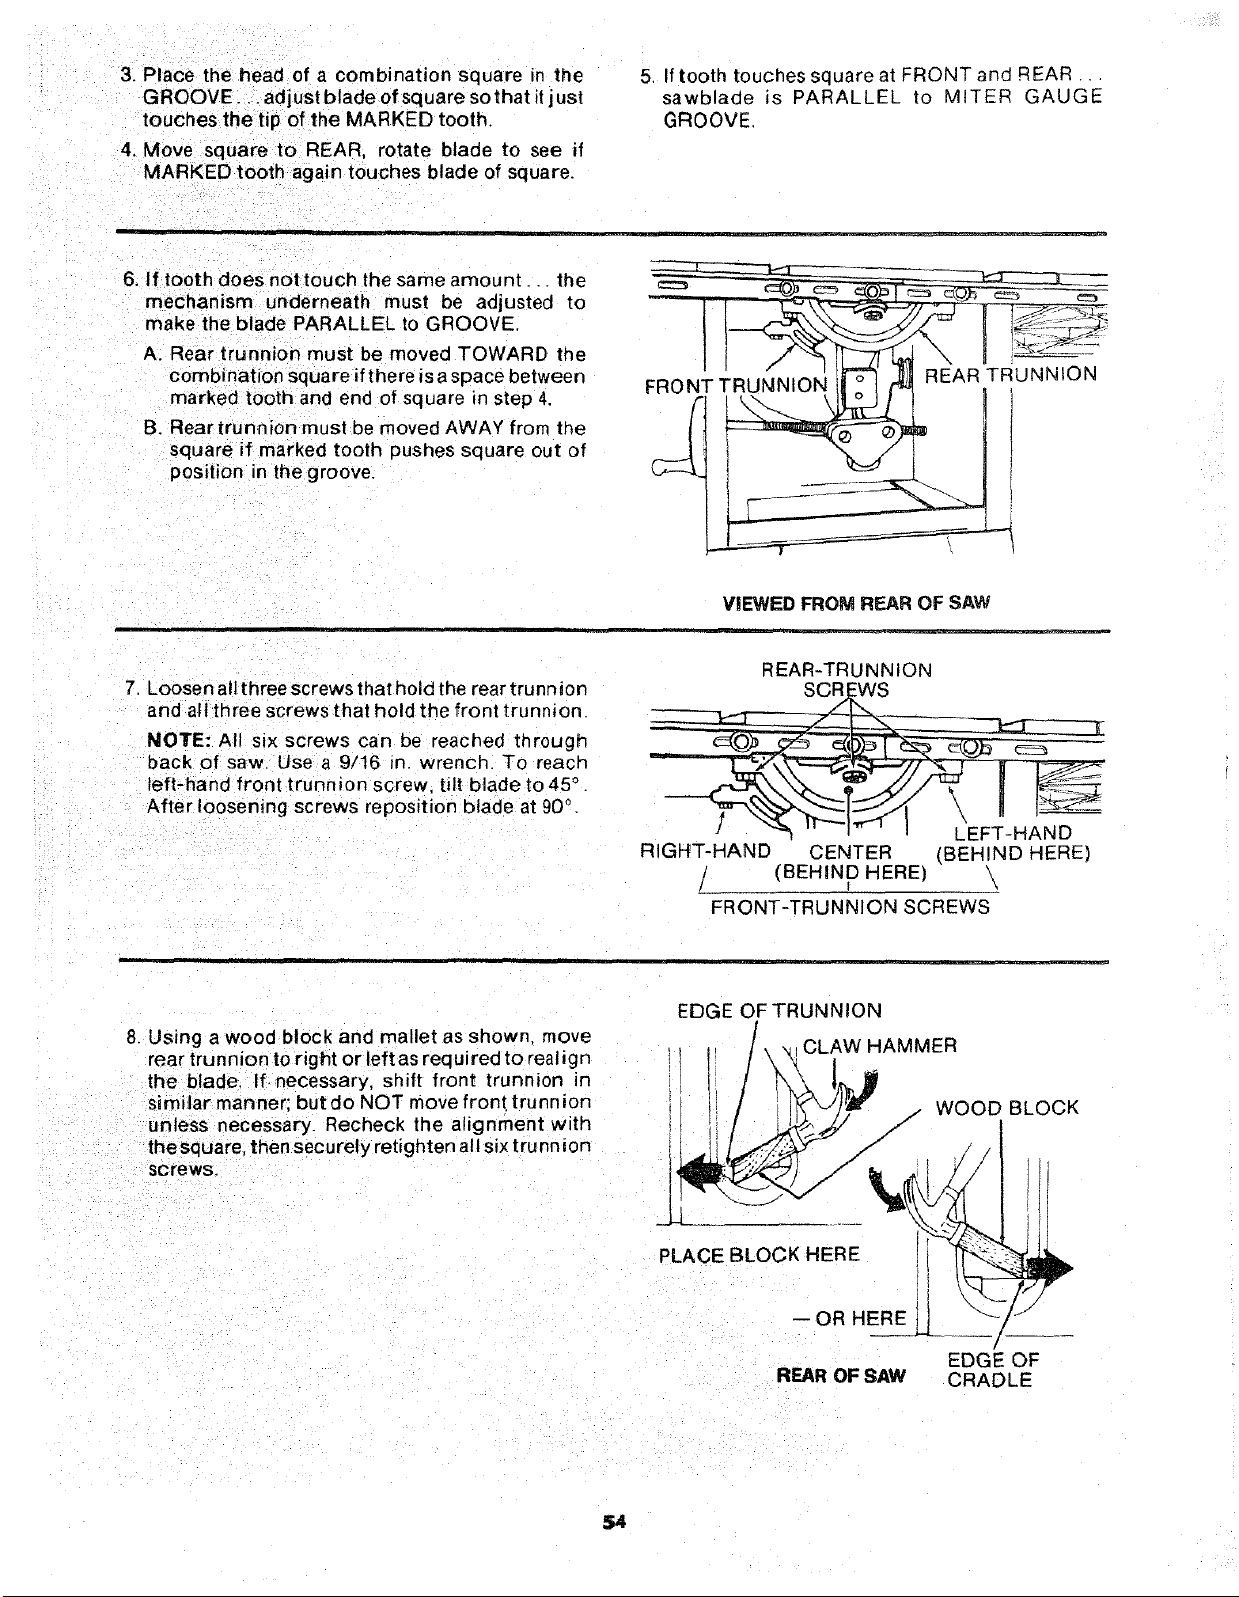
6. If tooth does nottouch the same amount.. _the
mechanism underneath must be adjusted to
make the blade PARALLEL to GROOVE.
A. Rear trunnion must be moved TOWARD the
combination square if there is a space between
marked tooth and end of square in step 4.
B. Rear trunnion must be moved AWAY from the
square if marked tooth pushes square out of
position in the groove.
VIEWED FROM RF_.AROF SAW
7. Loosen all threescrews that hold the rear trunnion
and all three screws that hold the front trunnion.
NOTE: All six screws can be reached through
back of saw. Use a 9/16 in. wrench. To reach
left-hand front trunmon screw, tilt blade to 45 °
After loosening screws reposition blade at 90°.
REAR-TRUNNION
T
A_GHT-HAND CENTER (BEHIND HERE)
/ (BEHIND HERE) \
FRONT-TRUNNION SCREWS
8. Using a wood block and mallet as shown, move
rear trunnion to right or left as required to real ign
the blade. If, necessary, shift front trunnion _n
similar manner; but do NOT move front trunnion
unless necessary Recheck the alignment with
thesquare, then securely retighten all six trunn ion
screws.
EDGE OFTRUNNION
CLAW HAMMER
/ WOOD BLOCK
f
PLACE BLOCK HERE
-- OR HERE
REAR OF SAW
EDGe: OF
CRADLE
$4
Loading ...
Loading ...
Loading ...