
Loading ...
Loading ...
Loading ...
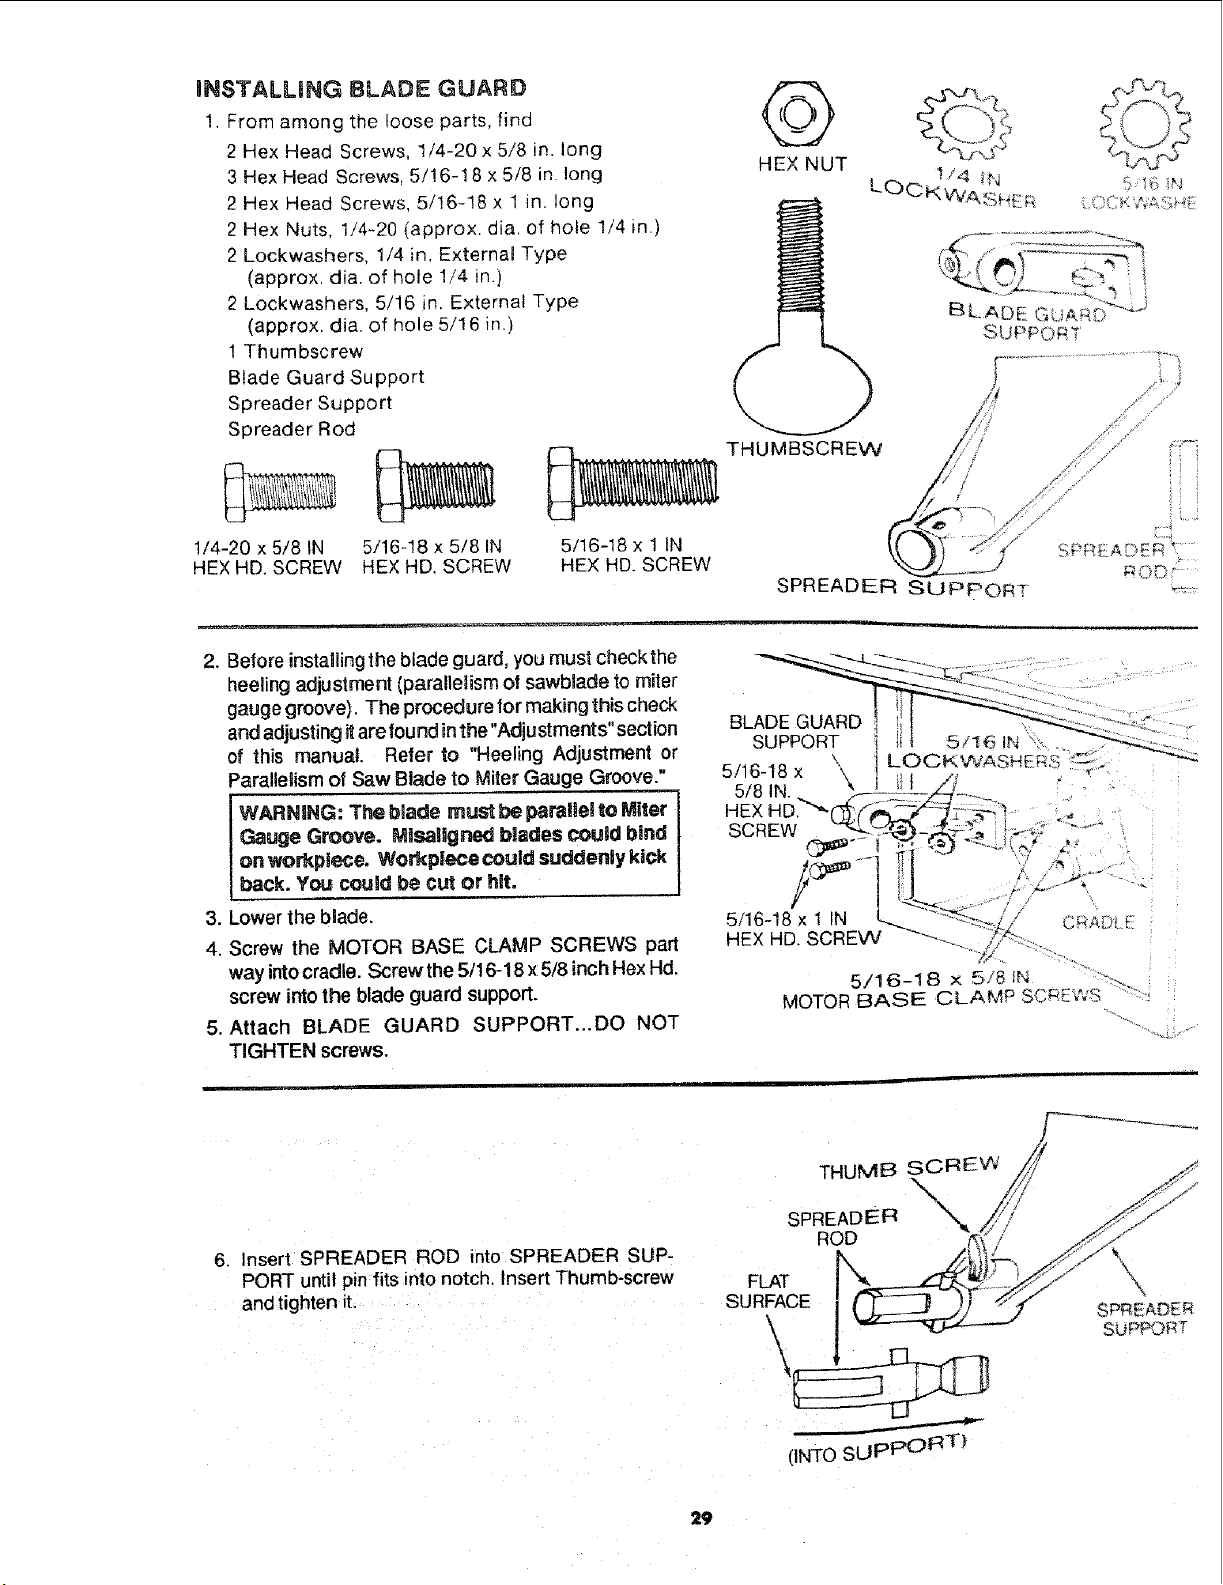
iNSTALLiNG BLADE GUARD
1. From among the loose parts, find
2 Hex Head Screws, 1/4-20 x 5/8 in. long
3 Hex Head Screws, 5/16-18 x 5/8 in. long
2 Hex Head Screws, 5/16-18 x 1 in. long
2 Hex Nuts, 1/4-20 (approx. dia. of hole 1/4 in.)
2 Lockwashers, 1/4 in. External Type
(approx. alia. of hole 1/4 in.)
2 Lockwashers, 5/16 in. External Type
(approx. dia. of hole 5/16 in.)
1 Thumbscrew
Blade Guard Support
Spreader Support
Spreader Rod
1/4-20 x 5/8 IN 5/16-18 x 5/8 IN
HEX HD. SCREW HEX HD. SCREW
Q
HEX NUT
°"{::_: 2jZ,j:::4.4;:
,¸¸
_ THUMBSCREW ,:
/ ii i
/
5116-18x I IN ....._'
HEX HD. SCREW _OD :-
SPREADER SUPPORT ":::
2. Before installingthe blade guard, you must checkthe
heeling adjustment (parallelism of sawblade to miter
gauge groove). The procedure for making this check
and adjusting it are found in the "Adjustments" section
of this manual Refer to "Heeling Adjustment or
Parallelism of Saw Blade to Miler Gauge Groove."
I WARNING: The blade must be to Miler
parallel
Gauge Groove. Mlsaligned blades could bind
on workplece, Workp|ece could suddenly kick
beck. You could be cut or hit.
3. Lower the blade,
4. Screw the MOTOR BASE CLAMP SCREWS part
way intocradle. Screw the 5/16-18 x 5/8 inch Hex Hd.
screw intothe blade guard support.
5. Attach BLADE GUARD SUPPORT...DO NOT
TIGHTEN screws.
L
6. Insert SPREADER ROD into SPREADER SUP-
PORT until pin fits into notch. Insert Thumb-screw
and tighten it.
THUMB ScREVV
\
SPREADER \
ROD
FLAT IX
SURFACE__j
(INTO SO PPORT_
SPREADER
SuPPO_ i
29
Loading ...
Loading ...
Loading ...