
Loading ...
Loading ...
Loading ...
NEVER OPERATE THE SAW WITHOUT THE
PROPER INSERT IN PLACE. USE THE SAW BLADE
INSERT WHEN SAWING. USE THE COiVlBINATION
DADO MOLDING INSERT WHEN DADOING OR
MOLDING.
g REMOVING AND INSTALLING SAWBLADE.
WARNING: To avoid injury from accidental
start, turn switch "OFF" end remove plug
from power sourceoutBet before removing or
Instaiilng sawblade.
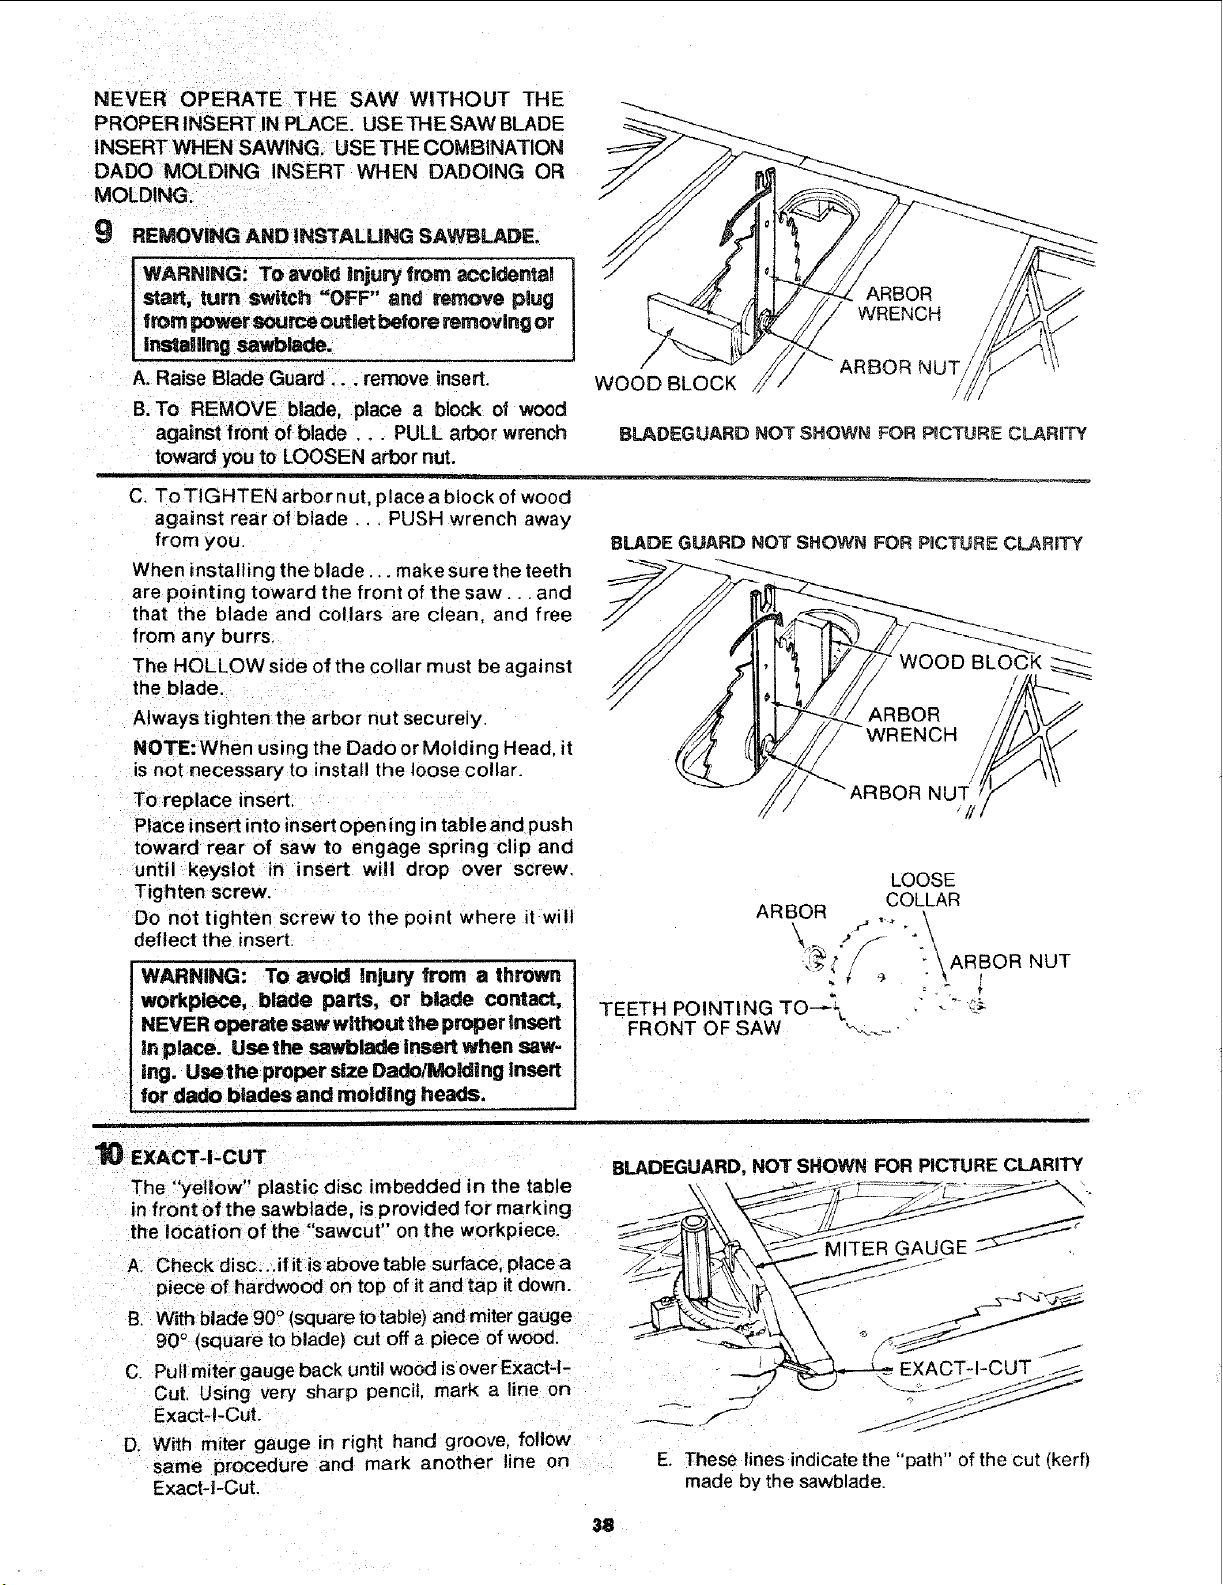
A. Raise Blade Guard ... remove insert.
/
f
WOOD BLOCK
ARBOR
WRENCH
ARBOR NUT
B. To REMOVE blade, place a block of wood
against front of blade,.. PULL arbor wrench BLADEGUARD NOT SHOWN FOR PUCTURECLARrrY
toward you to LOOSEN arbor nut.
BLADE GUARD NOT SHOWN FOR PaCTURE CLARITY
C. ToTIGHTEN arbor nut, place a block of wood
against rear of blade... PUSH wrench away
from you.
When installing the blade..• make sure the teeth
are pointing toward the front of the saw.., and
that the blade and collars are clean, and free
from any burrs.
The HOLLOW side of the collar must be against
the blade.
Always tighten the arbor nut securely.
NOTE: When using the Dado or Molding Head. it
is not necessary to install the loose collar.
To replace insert.
Place insert into insert open ing in table and push
toward rear of saw to engage spnng clip and
until keyslot in insert will drop over screw.
Tighten screw.
Do not tighten screw to the point where it will
deflect the insert.
LOOSE
COLLAR
ARBOR
\ :s
_ \ARBOR NUT
TEETH POINTING TO--_-
FRONT OF SAW "-_,__
WARNING: To avoid injury from a thrown
workplece, blade parts, or blade contact,
NEVER operate saw without the proper Insert
in place. Use the sawblade insert when saw-
ing. Usethe proper size Dado/IMoldlng Insert
for dado blades and molding heads.
BLADEGUARD, NOT SHOWN FOR PICTURE CLARITY
MITER GAUGE
10 EXACT-I-CUT
The "yellow" plastic disc imbedded in the table
in front of the sawblade, is provided for marking
the location of the "sawcut" on the workpiece.
A. Check disc...if it is above table surface, place a
piece of hardwood on top of it and tap it down.
B. With blade 90° {squareto table) and miter gauge
90 ° (square to blade) cut off a piece of wood.
C. Pull miter gauge back until wood is over Exact-I-
Cut, Using very sharp pencil, mark a line on
Exact-I-Cut.
D With miter gauge in right hand groove, follow
same procedure and mark another line on
Exact-l-Cut.
E. These lines indicate the "'path" of the cut (kerft
made by the sawblade.
38
Loading ...
Loading ...
Loading ...