
Loading ...
Loading ...
Loading ...
A. Adjusting Fence Racks
1. Look under front fer_ceguide bars. The racks
should be approximately 1-1/8 inch apa_
between the ends of both racks as ilJustrated.
2. Adjust the racks by loosening t helout screws
that mount each rack. Stide both racks to the
1-1/8 inch measurement and tighten all
screws.
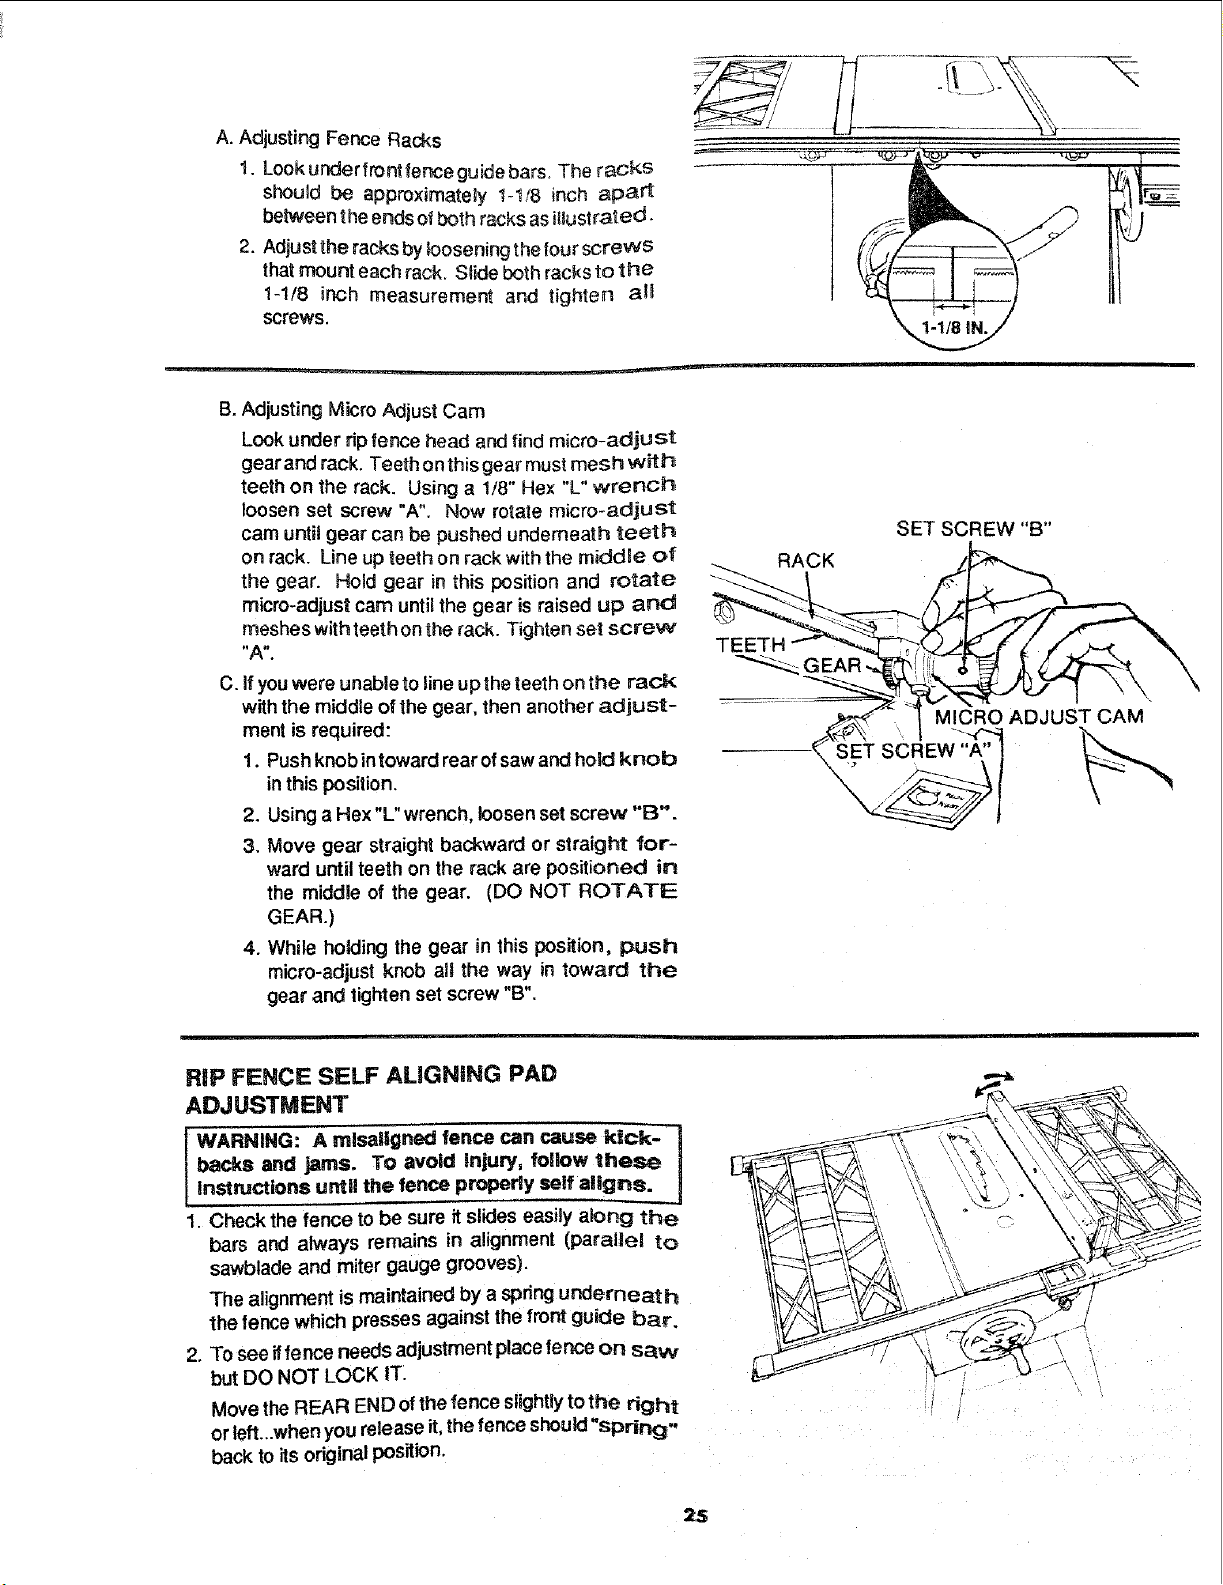
B. Adjusting Micro Adjust Cam
Look under rip fence head and find micro-adjust
gearand rack. Teeth on this gear must mesh with
teeth on the rack. Using a 1/8" Hex "L" wrer_h
loosen set screw "A". Now rotate micro-adjust
cam until gear can be pushed underneath teeth
on rack. Line up teeth on rack with the middle of
the gear. Hold gear in this position and rotate
micro-adjust cam until the gear is raised up and
meshes with teeth on the rack. Tighten set screw
C. If you were unable to line up the teeth on the rack
with the middle of the gear, then another adjust-
ment is required:
1. Push knob intoward rear of saw and hold knob
in this position.
2. Using a Hex "L" wrench, loosen set screw "B".
3. Move gear straight backward or straight for-
ward until teeth on the rack are positioned in
the middle of the gear. (DO NOT ROTATE
GEAR.)
4. While holding the gear in this position, push
micro-adjust knob all the way in toward the
gear and tighten set screw "B".
RACK
SET SCREW "B"
MICRO ADJUST CAM
SET SCR EwW"A'_
RiP FENCE SELF ALIGNING PAD
ADJUSTMENT
I WARNING: A mlsallgned fence can cause kick-
backs and jams. To avoid injury, follow these
instructions until the fence properly self aligns.
1. Check the fence to be sure it slides easily aioP.g the
bars and always remains in alignmenl (parallel to
sawblade and miter gauge grooves).
The alignment is maintained by a spring underneath
the fence which presses against the front guide ba r.
2. To see ifre nce needs adjustment place fence on saw
but DO NOT LOCK IT.
Move the REAR END of the fence slightly to the right
or left...when you release it, the fence should"sprir_j-
back to its original position.
25
Loading ...
Loading ...
Loading ...