
Loading ...
Loading ...
Loading ...
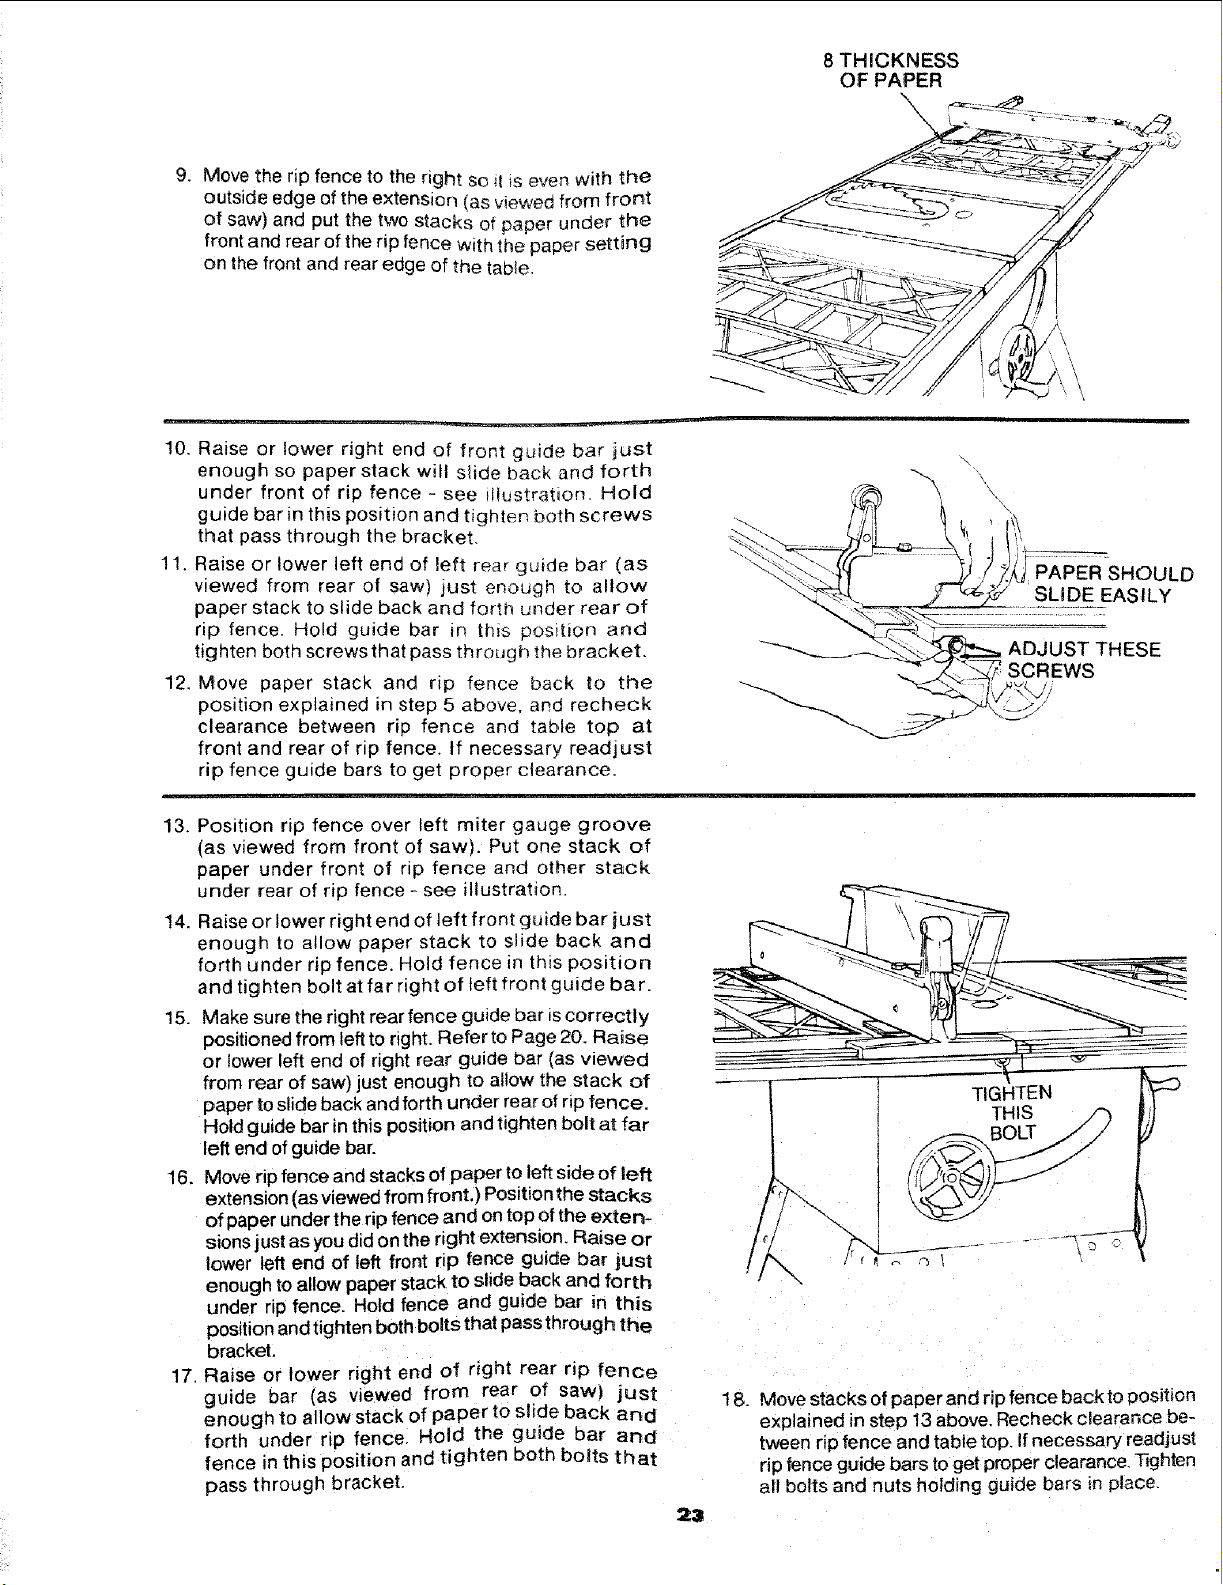
8 THICKNESS
OF PAPER
\
9. Move the rip fence to the right so it is even with the
outside edge of the extension (as viewed from front
of saw) and put the two stacks of paper under the
front and rear of the rip fence with the paper setting
on the front and rear edge of the table_
10. Raise or lower right end of front guide bar just
enough so paper stack will slide back and forth
under front of rip fence-see illustration Hold
guide barin this position and tighten both screws
that pass through the brackeL
11. Raise or lower left end of left rear guide bar (as
viewed from rear of saw) just enough to allow
paper stack to slide back and forth under rear of
rip fence. Hold guide bar in this position and
tighten both screws that pass through the bracket.
12. Move paper stack and rip fence back to the
position explained in step 5 above, and recheck
clearance between rip fence and table top at
front and rear of rip fence. If necessary readjust
rip fence guide bars to get proper clearance.
\ \
\
\
\
\
\
\.
\\
PAPER SHOULD
SLIDE EASILY
ADJUST THESE
SCREWS
13. Position rip fence over left miter gauge groove
(as viewed from front of saw). Put one stack of
paper under front of rip fence and other stack
under rear of rip fence - see illustration.
14. Raise or lower right end of left front guide bar just
enough to allow paper stack to slide back and
forth under rip fence. Hold fence in this position
and tighten bolt at far right of left front guide bar.
15. Make sure the right rear fence guide bar is correctly
positioned from left to right. Refer to Page 20. Raise
or lower left end of right rear guide bar (as viewed
from rear of saw) just enough to allow the stack of
paper to slide back and forth under rear of rip fence.
Hold guide bar in this position and tighten bolt at far
left end of guide bar.
16. Move rip fence and stacks of paper to left side of left
extension (as viewed from front.) Position the stacks
of paper under the rip fence and on top of the exten-
sions just as you did on the right extension. Raise or
lower left end of left front rip fence guide bar just
enough to allow paper stack to slide back and forth
under rip fence. Hold fence and guide bar in this
position and tighten both bolts that pass through the
bracket.
17. Raise or lower right end of right rear rip fence
guide bar (as viewed from rear of saw) just
enough to allow stack of paper to slide back an d
forth under rip fence. Hold the guide bar and
fence in this position and tighten both bolts that
pass through bracket.
18. Move stacks of paper and rip fence back to !3osition
explained in step 13 above. Recheck clearance be-
tween rip fence and table top. If necessary readjus!
rip fence guide bars to get proper clearance, Tighten
all bolts and nuts holding guide bars in place.
23
Loading ...
Loading ...
Loading ...