Loading ...
Loading ...
Loading ...
Fuses and bulbs
–
Open the lug
g
ag
e compartment to access
the rainduct area.
–
Take the screwdriver or a Torx 20 key (T20)
from the vehicle tool kit and loosen (turn-
ing anti-clockwise) and remove the two re-
taining screws that secure the front of the
light ››› Fig. 98
1
, taking care not to lose
them.
–
Pull the rear light unit backward (›
›
›
Fig. 98
2
) to remove the light from its housing.
Removing the bulb holder
Fig. 99 Light connector at the rear of the rear
light
u
nit
.
Fig. 100 Retaining screws on reverse side of
rear light
unit.
–
Disconnect the light connector
A
››› Fig. 99 by mo
ving its side levers (arrows)
and pulling the connector outwards.
–
Place the light on a level, horizontal surface
on top of a sof
t cloth so as not to scratch
the outer glass.
–
Unscrew the four retaining screws from the
bulb holder anti-clockwise using a screw-
driver or a Torx 20 key (T20) from the vehi-
cle tool kit ››› Fig. 100. Take care not to lose
the bulb holder retaining screws.
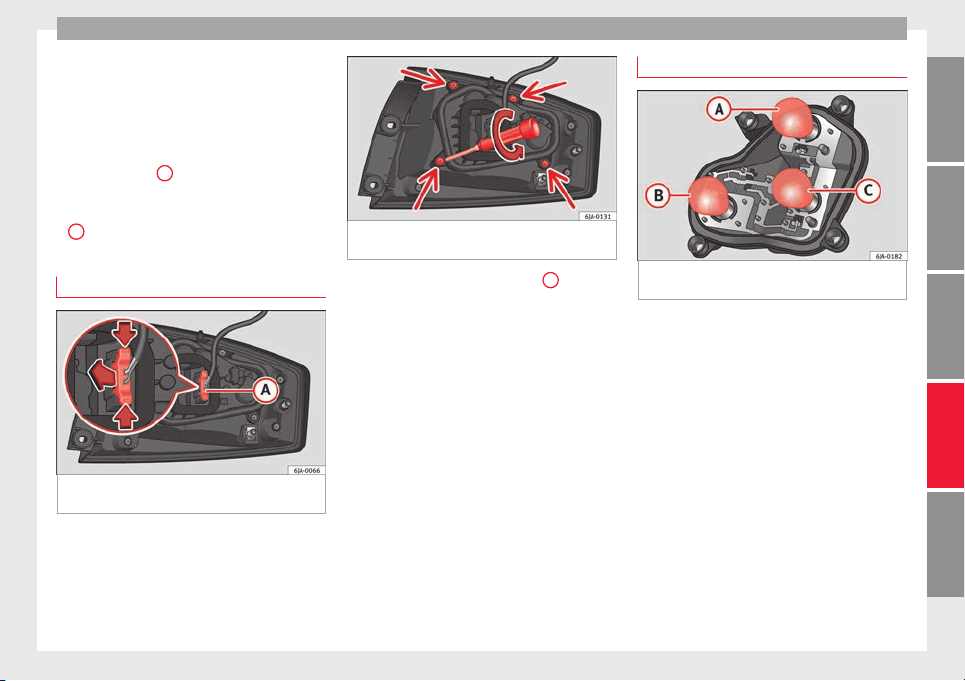
Changing bulbs
Fig. 101 Position of the bulbs in the bulb
ho
l
der
The bulbs are secured with a bayonet fasten-
er
.
The t
able below gives an overview of the
bulb positions.
–
Lightly press the defective bulb into the
bulb holder, then turn it anti-clockwise and
remove it.
–
Fit the new bulb, pressing it into the bulb
holder and turn it clockwise as far as it will
go.
–
Use a cloth to remove any fingerprints from
the glass part of the bulb.
–
Check that the new bulb works properly.
–
Replace the bulb holder.
–
Screw in the bulb holder using the four
screws, turning them clockwise.
»
89
Technical dataAdviceOperationEmergenciesSafety
Loading ...
Loading ...
Loading ...