Loading ...
Loading ...
Loading ...
Checking and refilling levels
–
Open the b
att
er
y cover in the direction indi-
cated by the arrow ››› Fig. 210.
–
The positive terminal (+) of the battery is
connected in reverse order.
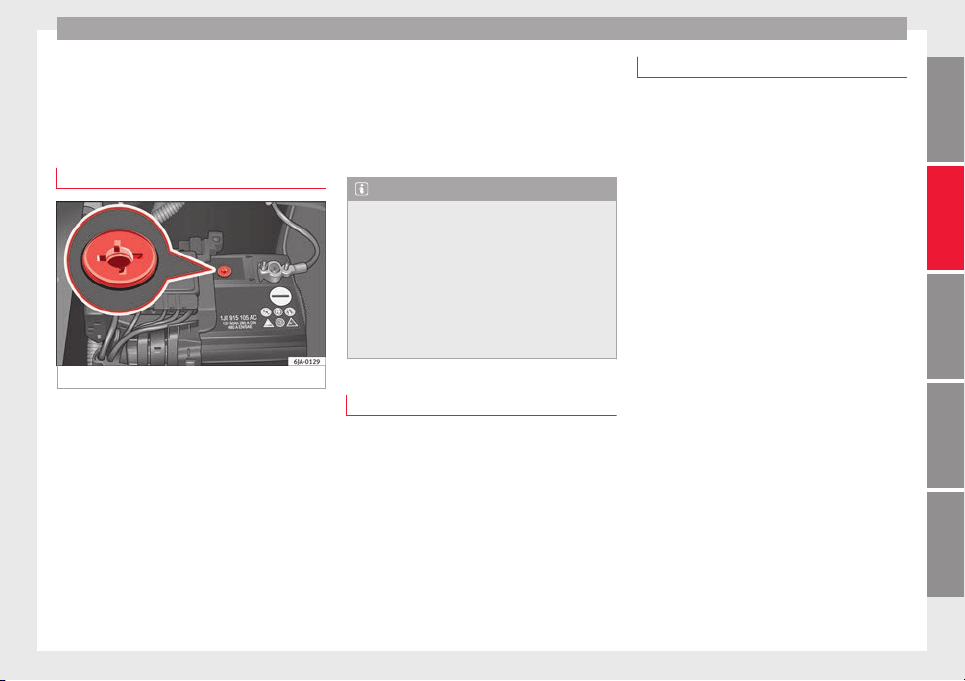
Checking the battery electrolyte level
Fig. 211 Battery: Electrolyte level indicator.
We recommend you have the acid level regu-
l
arly
c
hecked at an official technical service,
particularly in the following cases.
●
At high outside temperatures.
●
On long daily trips.
●
Whenever the vehicle is loaded
››› page 215, Charging the battery.
In vehicles equipped with a battery with col-
our indicator, the so-called magic eye
››› Fig. 211 changes colour to indicate the
acid level.
Air bubbles can influence the colour of the in-
dicator. Therefore, carefully knock the indica-
tor before checking the acid level.
●
Black – the acid level is correct.
●
Colourless or light yellow – acid level too
low, battery must be changed.
Note
●
The batter
y acid level is also regularly
checked during servicing at authorised SEAT
dealers.
●
The electrolyte level on “AGM” batteries
cannot be checked for technical reasons.
●
Vehicles equipped with the “Start-Stop”
system include a battery control unit to con-
trol the battery level for repeated engine
starting.
Winter service
At low temperatures the battery provides only
a fr
action of
the s
tarting power it has at nor-
mal temperatures.
A flat battery can also freeze at temperatures
slightly below 0°C (+32°F).
We therefore recommend you have the bat-
tery checked and, if necessary, charged at an
official SEAT technical service before the start
of winter.
Charging the battery
A fully-charged battery is essential for relia-
ble s
tarting.
–
Switch off the ignition and all electrical
equipment.
–
For “fast-charging” only: disconnect both
battery connection cables (first the “nega-
tive” terminal and then the “positive”).
–
Connect the charger cables to the battery
terminals (red = “positive”, black = “nega-
tive”).
–
Plug in the battery charger and switch on.
–
After charging the battery: Switch off the
batter
y charger and disconnect the cable.
–
Remove the charger cables.
–
If necessary, reconnect both battery cables
to the battery (first the “positive” cable,
then the “negative” cable).
When charging with a low current (e.g. with a
small battery charger), the battery does not
normally have to be disconnected. The in-
structions of the battery charger manufactur-
er must be followed.
Use a current equivalent to or lower than
10% of the battery capacity to fully charge
the battery.
Before “fast-charging” the battery however,
both battery cables must be disconnected.
»
215
Technical dataAdviceOperationEmergenciesSafety
Loading ...
Loading ...
Loading ...