Loading ...
Loading ...
Loading ...
88
4.6.3 Assembling and installing the metal fixture and mounting the plasma display (same procedure
as for the PDK-4003)
1) Preparation
Assembling the PDK-4002 fixture requires the following tools. Prepare them before starting work. (The PDK-4003 is
assembled using the same tools.)
• Wrench or spanner (side size: 12 mm)
• Hexagonal wrench (side size: 4 mm: for M5)
• Hexagonal wrench (side size: 5 mm for M6)
• Hexagonal wrench (side size: 6 mm for M8)
• Hexagonal wrench (side size: 8 mm for M10)
In addition, the installation work requires a drill to machine the ceiling. Be sure to have one on hand.
2) Assembling and installing the metal fixture (The same assembly and installation procedures are used for the
PDK-4003.)
1. Check that the left and right monitor brackets are firmly mounted on the monitor frame.
Next, pass the center rod through the monitor frame and spacer. Insert the rod into the support COMP, pass it all the
way through, and tighten it using two M8 × 75 hexagonal socket head bolts.
2. Tighten the M5 × 16 hexagonal socket head bolt to eliminate backlash.
3. Decide where to install the fixture, and apply the supplied pattern paper to the ceiling. Make a hole in the ceiling
according to the pattern and mount the ceiling flange COMP.
The fixing screws and nuts must be chosen according to the material, structure, and strength of the part of the
ceiling on which the fixture is installed. Provide high-quality screws and nuts.
4. Pass two M10 × 85 hexagonal socket head bolts through the ceiling flange and tighten the support COMP.
5. Tighten the M6 × 10 hexagonal socket head bolt to eliminate backlash.
• Firmly tighten the bolt.
• After installing the fixture, check the strength of the fixture and ceiling installation before mounting the plasma
display.
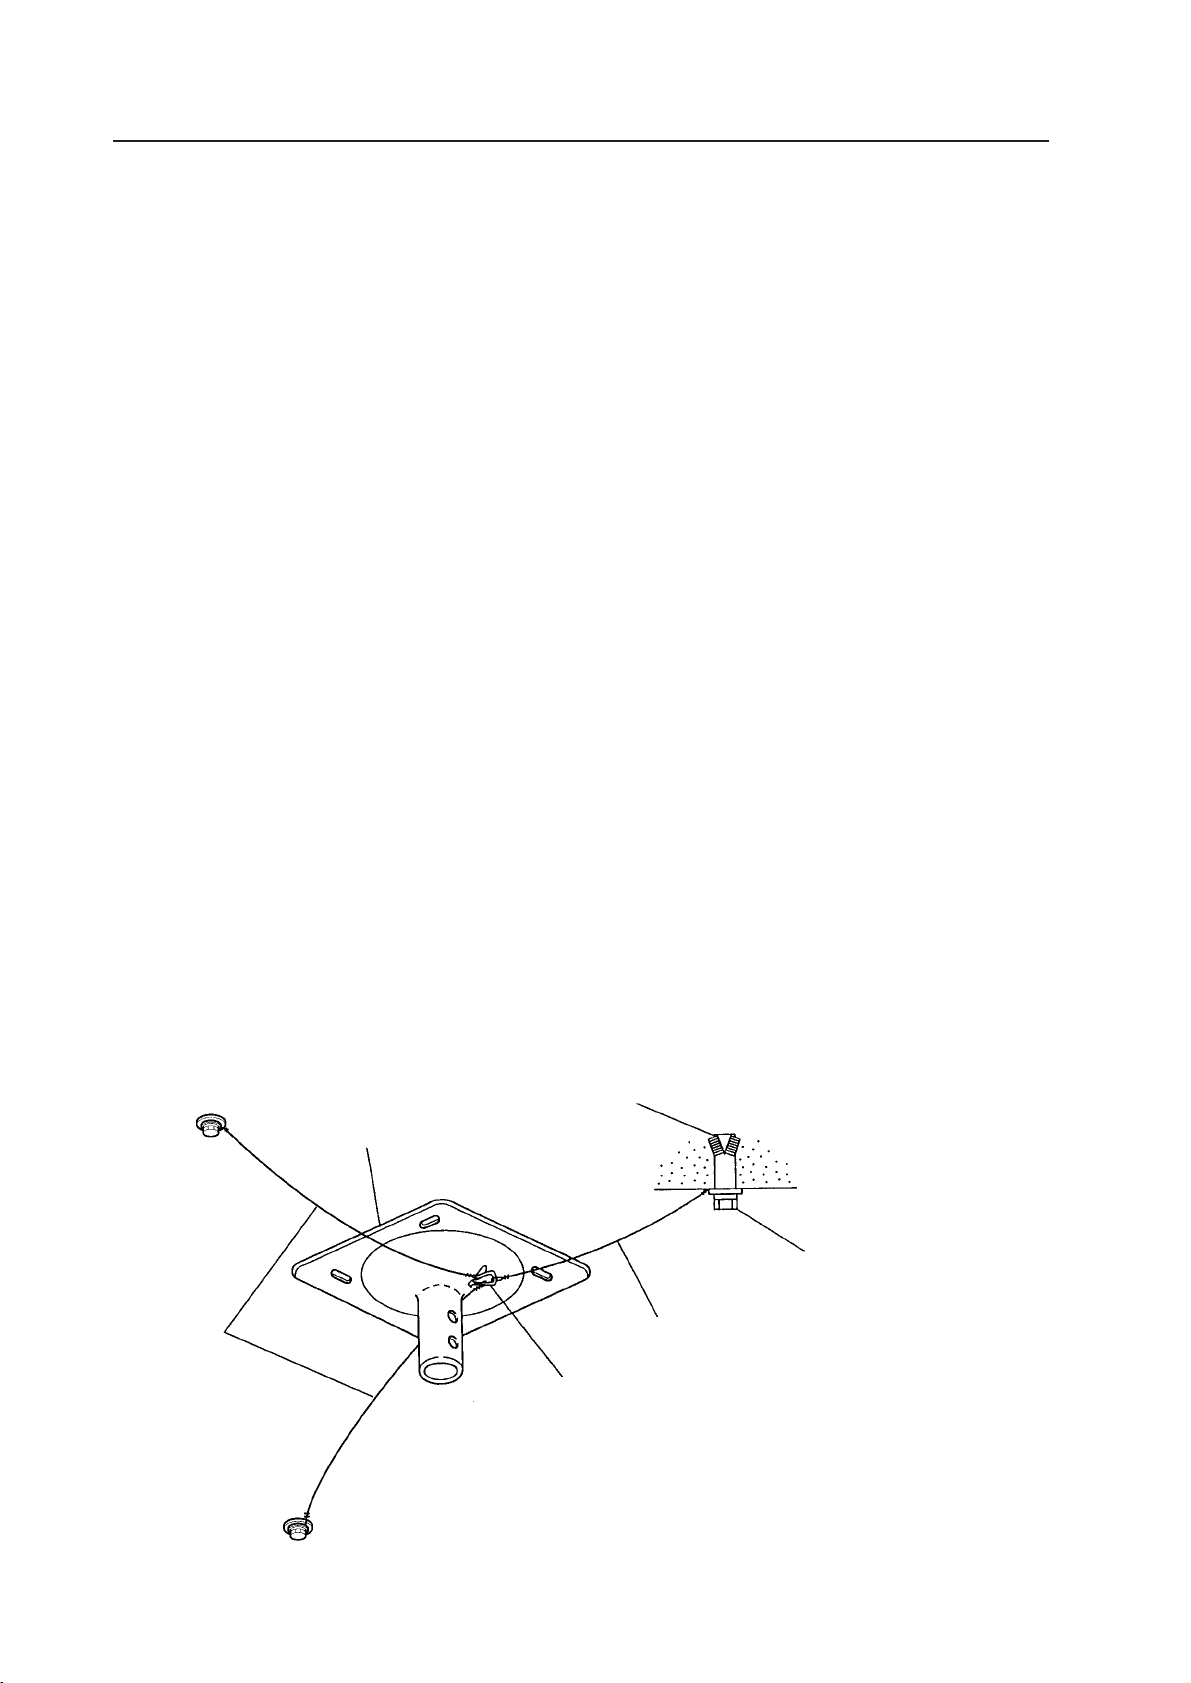
• Double-check the safety of the installation by using the hole made in the ceiling flange COMP, as illustrated. (Use
parts with sufficient strength to withstand the weight of this product.)
How to mount standard optional items (PDK-4002)
Reference example:
The shackle and safety wire are
used to fix the fixture onto the
foundation ceiling.
Ceiling flange COMP
Anchor
Foundation ceiling
Shackle
Safety wire
Bolt
Safety wire
Loading ...
Loading ...
Loading ...