Loading ...
Loading ...
Loading ...
56
Dubbing
Dubbing along with bilingual
recording audio (dual audio) /
surround audio / subtitles
Refer to Recording along with bilingual audio (dual audio) /
multi audio / surround audio / subtitles on page 30.
Note
Please use the HDD as a temporary data storage device.
It is highly recommended to copy important recordings to
discs.
A title containing still images authored on a video
camcorder or PC cannot be dubbed.
When dubbing from the HDD to a DVD-RW(Video) /-R
(Video) disc, the disc will automatically be finalised.
If you wish to dub multiple titles to a disc, please do it
from the dubbing list.
�
When dubbing from the HDD to a DVD-RW(Video) /-R
(Video) disc, you may need to change the setting
in Settings > Video/Audio > TV Aspect to the
appropriate aspect based on the dubbing source.
This unit can perform dubbing from a DVD to the HDD
only when the title has no copy protection. Copy-once
titles and most commercially available videos cannot be
dubbed.
One Title Dubbing from
Contents List screen
.
HDD
.
.
BD -R E
.
.
BD -R
.
.
DVD
.
>> Preparation
When dubbing from a disc to the HDD, place the disc in
the unit, then press [DISC].
When dubbing from the HDD to a disc, place a
recordable disc in the unit, then press [HDD].
1. Press [CONTENTS LIST] to call up the
Contents List screen.
2. Use [
/ ] to select a title to dub, then
press [SUB MENU].
3. Use [ / ] to select Dubbing, then press
[ ENTER].
A confirmation message will appear. Use [ / ]
to select Yes, then press [
ENTER].
Dubbing will start. DUB will be displayed on the
display of the unit.
To stop dubbing
Press [
]. A confirmation message will appear.
Use [
/ ] to select Yes, then press
[
ENTER].
DUB on the display will disappear when the
dubbing finishes.
♦
When dubbing to a DVD-RW (Video) / -R
(Video) disc
After dubbing finishes, the disc will automatically start
finalising the disc.
Note
From the Contents List screen, only one title dubbing
can be performed at a time.
Dubbing Multiple Titles at
One Time
>> Preparation
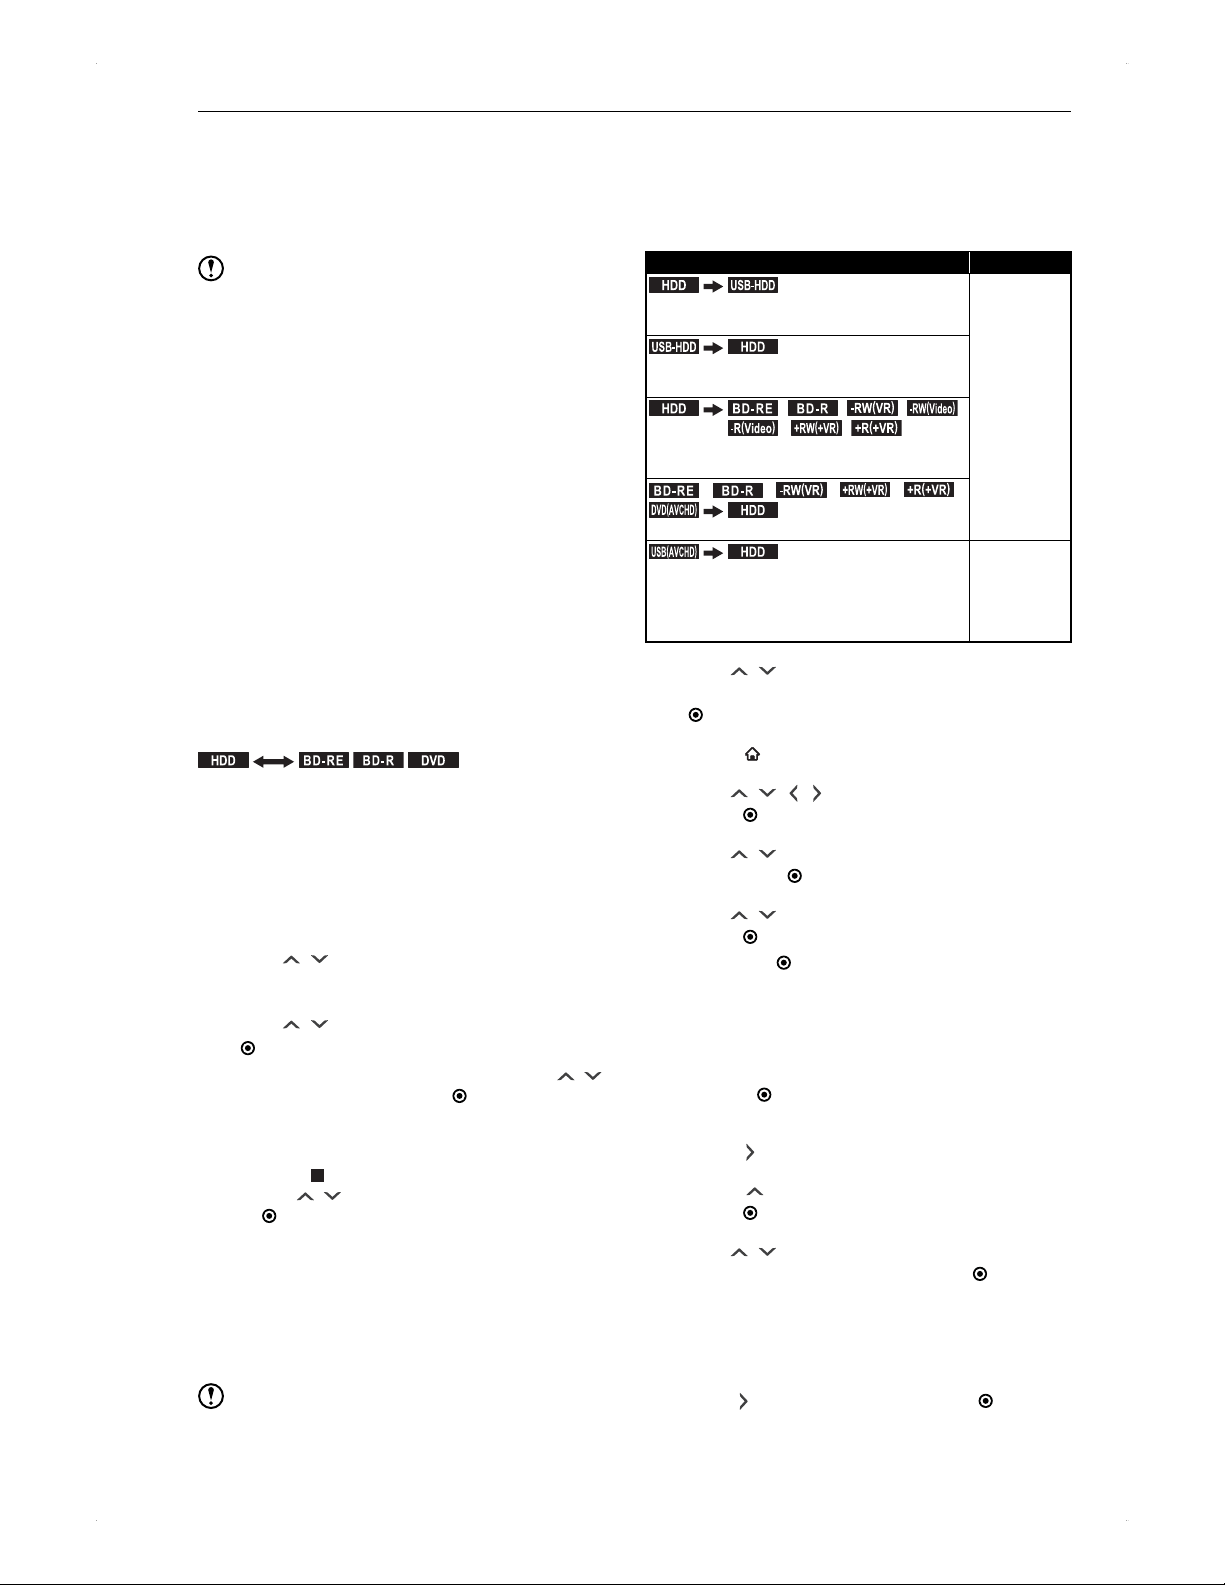
Prepare as follows according to the dubbing media.
Dubbing direction & Preparation Proceed to ...
.
HDD
.
.
USB-HDD
.
Connect a USB-HDD to dub to (as a
recording media).
Step 2
.
USB-HDD
.
.
HDD
.
Connect a USB-HDD to dub from (as a
source).
.
HDD
.
.
BD -R E
.
/
.
BD -R
.
/
.-RW
(
VR
)
.
/
.-RW
(
Video
)
.
.-R
(
Video
)
.
/
.+RW
(
+VR
)
.
/
.+R
(
+VR
)
.
Place a disc to dub to (as a recording
media).
.
BD -R E
.
/
.
BD -R
.
/
.-RW
(
VR
)
.
/
.+RW
(
+VR
)
.
/
.+R
(
+VR
)
.
/
.
DVD
(
AVCHD
)
.
.
HDD
.
Place a disc to dub from (as a source).
.
USB
(
AVCHD
)
.
.
HDD
.
Connect a USB device (USB memory
stick) to dub from (as a source). The
selection screen will automatically
appear.
Step 1
1. Use [ / ] to select
Copy AVCHD to HDD, then press
[ ENTER], then proceed to step 5.
2. Press [ HOME] to call up the home menu.
3. Use [ / / / ] to select Dubbing, then
press [ ENTER].
4. Use [ / ] to select the dubbing direction,
then press [ ENTER].
5. Use [
/ ] to select a title to dub, then
press [ ENTER].
Pressing [ ENTER] will show the numbers of the
dubbing order next to the titles.
To continue to select another title
Repeat the same procedure.
To deselect a title
Highlight the title you wish to deselect, then
press [
ENTER].
6. After you have selected all the desired titles,
press [ ].
7. Press [
] to select Picture quality, then
press [ ENTER].
8. Use [
/ ] to select your desired recording
mode (image quality), then press [ ENTER].
Available recording modes differ depending on the
recording mode of the source title and the recording
method on the media.
9. After having selected the recording mode,
press [ ] to select OK, then press [ ENTER].
Please confirm the dubbing list. If you wish to
modify the list, see the following.
Loading ...
Loading ...
Loading ...