Loading ...
Loading ...
Loading ...
Maintenance
68
Changing the Ink Tank (part 2)
4
44
4
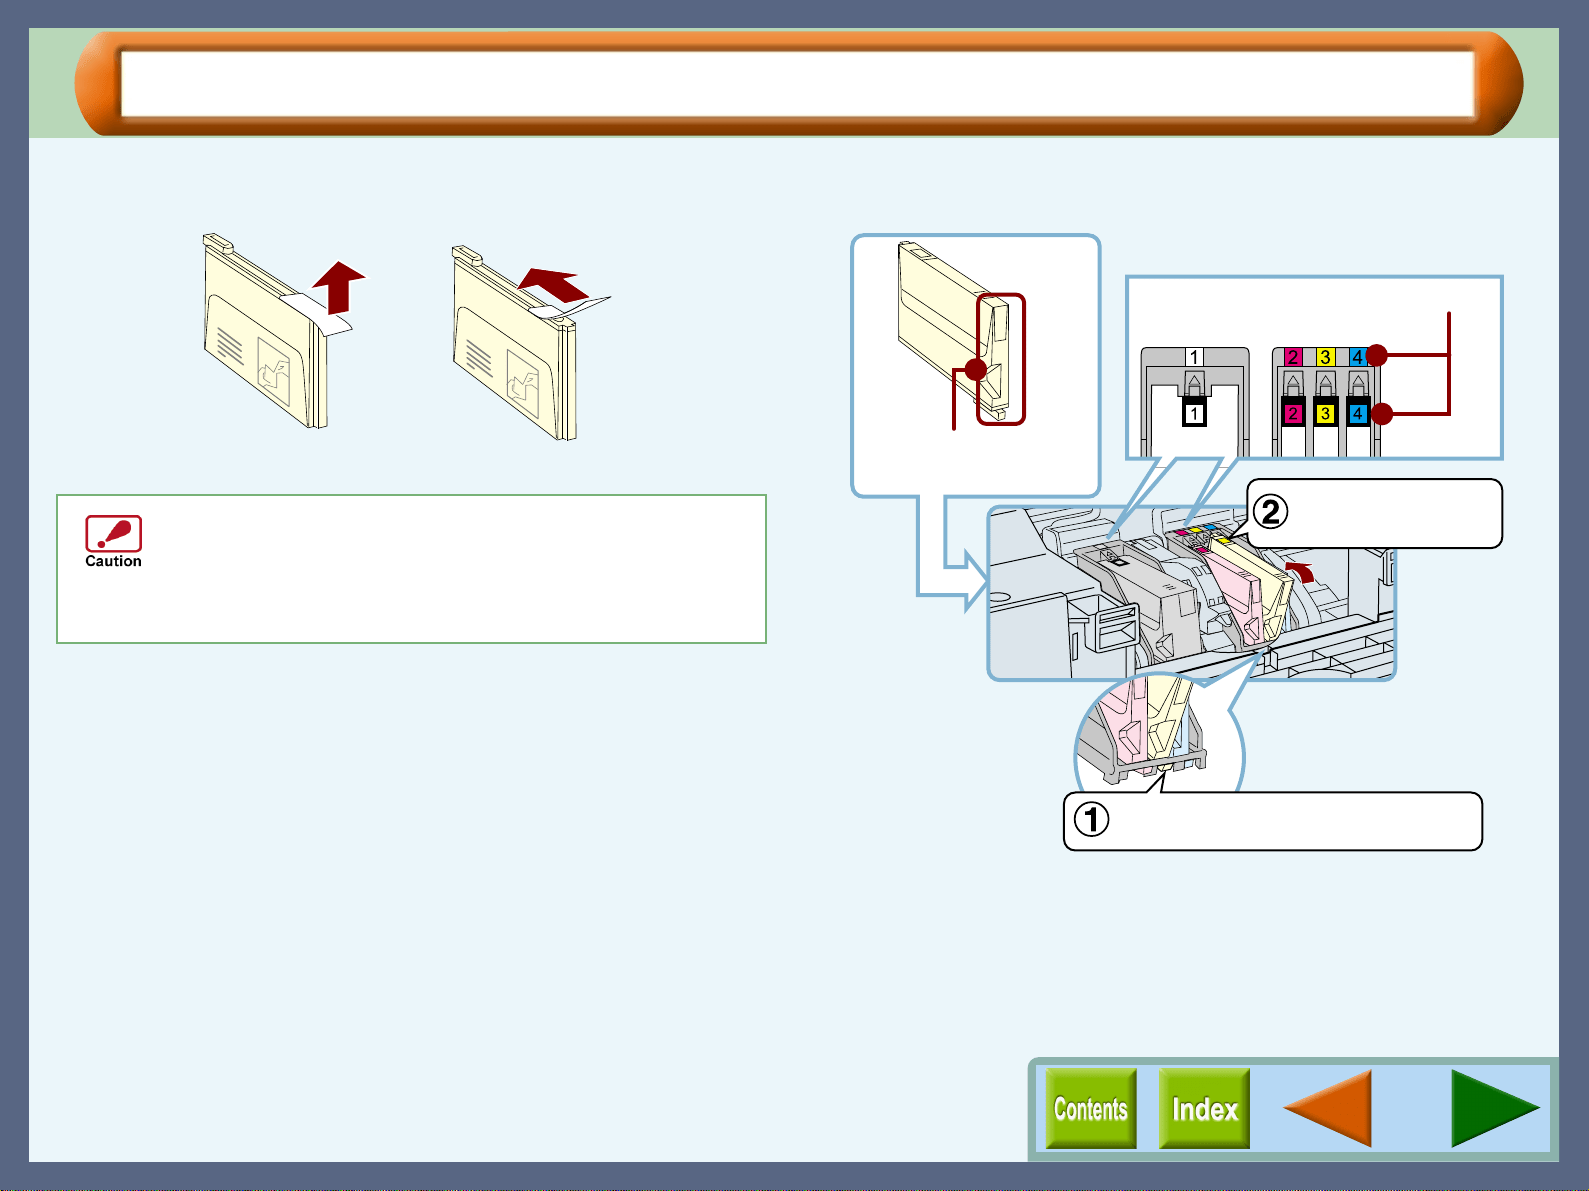
Unpack the ink tank from its protective wrapping
and slowly remove the tape.
5
55
5
Turn the ink upside down, and then immediately
insert it to the print head of corresponding number.
! Hold the tank upright when removing the tape. Do
not touch the uncovered opening on the ink tank, as
ink will get on your hands.
! Ensure that there are no pieces of tape remaining on
the ink tank.
Example: Removing the tape of the yellow ink tank
Example: Inserting the yellow ink tank
Properly align the tab when inserting
the ink tank.
Make sure that each tab
securely locks the ink
tank by pressing here.
Do not touch this area.
The unit may not print
if it is dirty.
Match the ink tank number to the
print head number.
Loading ...
Loading ...
Loading ...