Loading ...
Loading ...
Loading ...
Fuses and bulbs
Replace a blown fuse
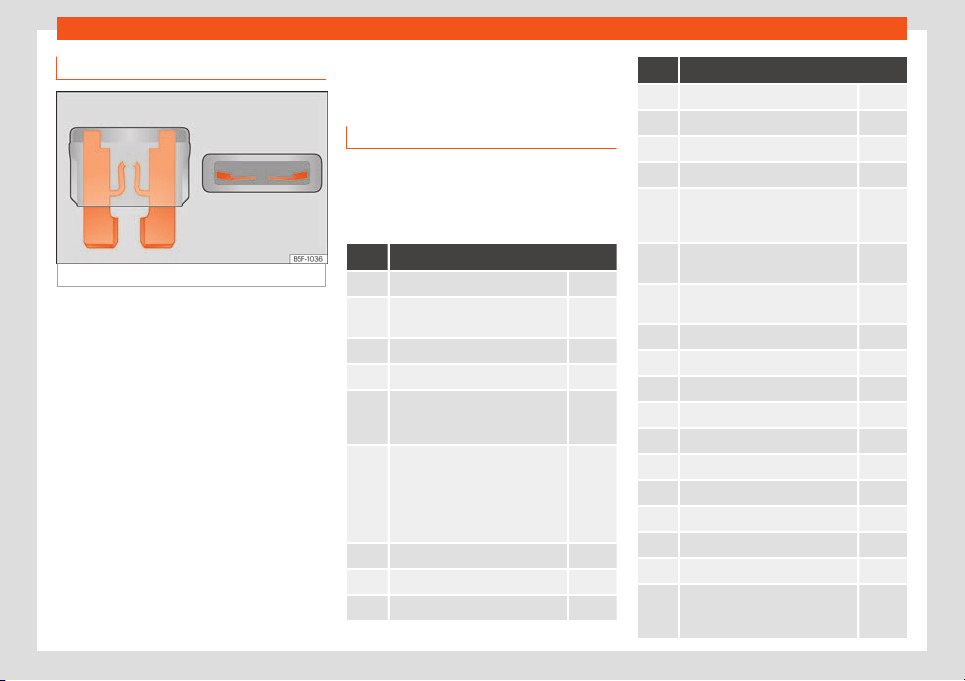
Fig. 52
Image of a blown fuse.
Preparations
●
Switch off the ignition, lights and all electri-
cal equipment.
●
Open the corresponding fuse box
›
››
page 59,
›››
page 60.
Recognise a blown fuse
A fuse is blown if its metal strip is ruptured
›››
Fig. 52.
●
Point a lamp at the fuse to see if it has
blown.
To replace a fuse
●
Remove the fuse.
●
Replace the blown fuse by one with an
identical amperage rating (same colour and
markings) and identical size.
●
Replace the cover again or close the fuse
box lid.
Fuse placement
Only replace fuses with a fuse of the same
amper
age (same colour and markings) and
size.
Fuses in the vehicle interior
No. Consumers/Amps
1 Adblue (SCR) 30
4
DWA warning horn, on-board
comput
er
7.5
5 Gateway 7.5
6 Automatic gearbox lever 7.5
7
Air conditioning and heating con-
tr
ol panel, back window heating,
auxiliary heating, rear heating
10
8
Diagnosis, electronic parking
br
ake switch, light switch, reverse
light, interior lighting, driving
mode, lit-up door sill, light/humid-
ity/rain sensor, curve lighting con-
trol unit
7.5
9 Steering column control unit 7.5
10 Radio display 7.5
11 On-board computer control unit 40
No. Consumers/Amps
12 Infotainment radio 30
13 Driver seat belt pre-tensioner 25
14 Air conditioner fan 40
15 Steering column release 10
16
GSM signal reception and stabili-
sation, mobil
e phone interface,
USB connections control unit
7.5
17
Dashboard, OCU navigation in-
t
erface
7.5
18
Surroundings camera and rear
camer
a control unit
7.5
19 Kessy 7.5
20 SCT 1.5 L engine vacuum pump 7.5/15
21 4x4 Haldex Control Unit 15
22 Trailer 15
23 Electric sunroof 20
24 On-board computer 40
25 Left doors 30
26 Heated seats 30
27 Interior light 30
28 Trailer 25
30
PHEV. Switching off the high volt-
age system for rescue tasks. Iden-
tified by a yellow label.
10
»
61
Loading ...
Loading ...
Loading ...