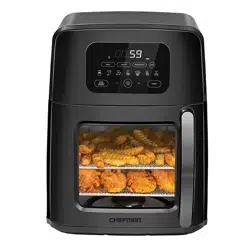
Chefman AUTO-STIR Air Fryer Convection Oven, Large 12-Quart, Rotisserie, Bake, Touch Control

Quick Start Guide • User Guide • Cookbook

For AUTO-STIR.

PDF File Manual, 62 pages, Read Online | Download pdf file

AUTO-STIR photo
background
Auto-Stir
AIR FRYER
OVEN +
TURBOFRY
Air Fryer
QUICK LINKS
Quick Start Guide
User Guide
Cookbook
This is your one-stop guide to using
your product. From the below links,
you can jump ahead to a specific
document if desired.
Loading page 2...
Loading page 3...
Loading page 4...
Loading page 5...
Loading page 6...
Loading page 7...
Loading page 8...
Loading page 9...
Loading page 10...
Loading page 11...
Loading page 12...
Loading page 13...
Loading page 14...
Loading page 15...
Loading page 16...
Loading page 17...
Loading page 18...
Loading page 19...
Loading page 20...
Loading page 21...
Loading page 22...
Loading page 23...
Loading page 24...
Loading page 25...
Loading page 26...
Loading page 27...
Loading page 28...
Loading page 29...
Loading page 30...
Loading page 31...
Loading page 32...
Loading page 33...
Loading page 34...
Loading page 35...
Loading page 36...
Loading page 37...
Loading page 38...
Loading page 39...
Loading page 40...
Loading page 41...
Loading page 42...
Loading page 43...
Loading page 44...
Loading page 45...
Loading page 46...
Loading page 47...
Loading page 48...
Loading page 49...
Loading page 50...
Loading page 51...
Loading page 52...
Loading page 53...
Loading page 54...
Loading page 55...
Loading page 56...
Loading page 57...
Loading page 58...
Loading page 59...
Loading page 60...
Loading page 61...
Loading page 62...

Other documents for Chefman AUTO-STIR

The following documents are available:
User Manual Specification Photos

Specifications

Quick Start Guide • User Guide • Cookbook - Transcript

  • Page 1 - English - : AutoStir AIR FRYER OVEN TURBOFRY Air Fryer QUICK LINKS Quick Start Guide User Guide Cookbook This is your onestop guide to using your product From the below links you can jump ahead to a specific document if desired
  • Page 2 - English - : 2 3 QUICK START GUIDE BEFORE FIRST USE 1 Remove all packaging materials such as plastic bags and foam inserts 2 Read and remove all stickers on unit 3 Check to ensure that all parts and accessories are accounted for 4 Wipe down the exterior with a damp cloth 5 Wash the fry basket wire roating rack stirring attachment wire racks and drip tray with warm soapy water Dry thoroughly NOTE On first use unit may emit a slight odor which is normal and will dissipate with use 1 Unit 2 Control Panel 3 Viewing Window 4 Rack Slots 5 Fan and Infrared Heating Housing 6 Handle 7 Rotator 8 Bottom Heating Coil 9 Venting Fan 10 Plug Outlet 11 Nonstick Drip Tray 12 Wire Chicken Roasting Rack 13 Stir Attachment Fry Basket 55L 15 Wire Racks 2 16 Power Cord WHATS IN THE BOX
  • Page 3 - English - : 2 3 QUICK START GUIDE BEFORE FIRST USE 1 Remove all packaging materials such as plastic bags and foam inserts 2 Read and remove all stickers on unit 3 Check to ensure that all parts and accessories are accounted for 4 Wipe down the exterior with a damp cloth 5 Wash the fry basket wire roating rack stirring attachment wire racks and drip tray with warm soapy water Dry thoroughly NOTE On first use unit may emit a slight odor which is normal and will dissipate with use 1 Unit 2 Control Panel 3 Viewing Window 4 Rack Slots 5 Fan and Infrared Heating Housing 6 Handle 7 Rotator 8 Bottom Heating Coil 9 Venting Fan 10 Plug Outlet 11 Nonstick Drip Tray 12 Wire Chicken Roasting Rack 13 Stir Attachment Fry Basket 55L 15 Wire Racks 2 16 Power Cord WHATS IN THE BOX
  • Page 4 - English - : 4 5 GETTING STARTEDGETTING STARTED Put food on wire racks pan or in fry basket STEP Insert racks or basket into the Air Fryer Oven and shut the door If using the fry basket with the stir attachment insert the basket into the lowest possible position so that its base will connect to the rotator STEP 2 Select the cooking function you would like to use and use the TIMETEMP controls to adjust the parameters if desired STEP 3 When cooking time expires carefully remove food and enjoy STEP 5 Press Start STEP 4
  • Page 5 - English - : 4 5 GETTING STARTEDGETTING STARTED Put food on wire racks pan or in fry basket STEP Insert racks or basket into the Air Fryer Oven and shut the door If using the fry basket with the stir attachment insert the basket into the lowest possible position so that its base will connect to the rotator STEP 2 Select the cooking function you would like to use and use the TIMETEMP controls to adjust the parameters if desired STEP 3 When cooking time expires carefully remove food and enjoy STEP 5 Press Start STEP 4
  • Page 6 - English - : CLEANING AND MAINTENANCE Before cleaning ensure the Air Fryer Oven is unplugged and cool Once cool remove any accessories if necessary The fry basket stir attachment wire racks and drip tray are all toprack dishwasher safe Never use harsh cleaning products which could damage the surfaces Never immerse the Air Fryer Oven or its plug in water or any other liquid Dry all parts thoroughly before storage and store the Air Fryer Oven in a cool dry place
  • Page 7 - English - : CLEANING AND MAINTENANCE Before cleaning ensure the Air Fryer Oven is unplugged and cool Once cool remove any accessories if necessary The fry basket stir attachment wire racks and drip tray are all toprack dishwasher safe Never use harsh cleaning products which could damage the surfaces Never immerse the Air Fryer Oven or its plug in water or any other liquid Dry all parts thoroughly before storage and store the Air Fryer Oven in a cool dry place
  • Page 8 - English - : READ ALL INSTRUCTIONS BEFORE USE For your safety and continued enjoyment of this product always read the instruction manual before using USER GUIDE COOKING FORWARD Welcome Whether this is your first Chefman appliance purchase or youre already part of our family were happy to be cooking with you With your new AutoStir Air Oven Fryer you can not only air fry foods to crisp perfection with NO oil you can also bake delicious treats roast the juiciest rotisserie style chicken and dehydrate fruits and veggies for healthy eating And thanks to its dual heating elements highspeed fan and autostir option foods cook up quicker and better than ever We know youre excited to get cooking but please take a few minutes to read our directions safety instructions and warranty information And do check out the recipes included in our separate fullcolor cookbook Developed by our talented test kitchen staff they will get you acquainted with cooking with the Air Fryer Oven in the most delicious way possible From our kitchen to yours The Chefman Team 1 Safety Instructions F eatures Oper ating Instructions 19 Cooking Tips Cleaning and Maint enance Not es 25 Terms and Conditions Chefman Warranty Registration CONTENTS
  • Page 9 - English - : READ ALL INSTRUCTIONS BEFORE USE For your safety and continued enjoyment of this product always read the instruction manual before using USER GUIDE COOKING FORWARD Welcome Whether this is your first Chefman appliance purchase or youre already part of our family were happy to be cooking with you With your new AutoStir Air Oven Fryer you can not only air fry foods to crisp perfection with NO oil you can also bake delicious treats roast the juiciest rotisserie style chicken and dehydrate fruits and veggies for healthy eating And thanks to its dual heating elements highspeed fan and autostir option foods cook up quicker and better than ever We know youre excited to get cooking but please take a few minutes to read our directions safety instructions and warranty information And do check out the recipes included in our separate fullcolor cookbook Developed by our talented test kitchen staff they will get you acquainted with cooking with the Air Fryer Oven in the most delicious way possible From our kitchen to yours The Chefman Team 1 Safety Instructions F eatures Oper ating Instructions 19 Cooking Tips Cleaning and Maint enance Not es 25 Terms and Conditions Chefman Warranty Registration CONTENTS
  • Page 10 - English - : 1 2 SAFETY INSTRUCTIONS SAFETY INSTRUCTIONS IMPORTANT SAFEGUARDS IMPORTANT SAFEGUARDS This appliance is for HOUSEHOLD USE ONLY WARNING When using electrical appliances basic safety precautions should always be followed including the following 1 Read all instructions 2 Do not touch hot surfaces Use handles or knobs 3 To protect against electrical shock do not immerse cord or plug in water or other liquid 4 Close supervision is necessary when any appliance is used by or near children 5 Unplug from outlet when not in use and before cleaning Allow to cool before putting on or taking off parts 6 Do not operate any appliance with a damaged cord or plug or after the appliance malfunctions or has been damaged in any manner Contact Chefman Customer Support 7 The use of accessory attachments not recommended by the appliance manufacturer may cause injuries 8 Do not use outdoors 9 Do not let cord hang over edge of table or counter or touch hot surfaces 10 Do not place on or near a hot gas or electric burner or in a heated oven 11 Extreme caution must be used when moving an appliance containing hot oil or other hot liquids 12 To disconnect turn any control to off then remove plug from wall outlet 13 Do not use appliance for other than intended use 14 Use extreme caution when removing tray or disposing of hot grease 15 Do not clean with metal scouring pads Pieces can break off the pad and touch electrical parts creating a risk of electric shock 16 Place the Air Fryer Oven on a flat sturdy heat resistant surface Do not place the Air Fryer Oven near or on any type of heat source such as a gas or electric burner stove or oven Do not use near an open flame or flammable materials 17 The Air Fryer Oven will emit some heat Allow sufficient space around Air Fryer Oven when in use and do not place near other items or appliances
  • Page 11 - English - : 1 2 SAFETY INSTRUCTIONS SAFETY INSTRUCTIONS IMPORTANT SAFEGUARDS IMPORTANT SAFEGUARDS This appliance is for HOUSEHOLD USE ONLY WARNING When using electrical appliances basic safety precautions should always be followed including the following 1 Read all instructions 2 Do not touch hot surfaces Use handles or knobs 3 To protect against electrical shock do not immerse cord or plug in water or other liquid 4 Close supervision is necessary when any appliance is used by or near children 5 Unplug from outlet when not in use and before cleaning Allow to cool before putting on or taking off parts 6 Do not operate any appliance with a damaged cord or plug or after the appliance malfunctions or has been damaged in any manner Contact Chefman Customer Support 7 The use of accessory attachments not recommended by the appliance manufacturer may cause injuries 8 Do not use outdoors 9 Do not let cord hang over edge of table or counter or touch hot surfaces 10 Do not place on or near a hot gas or electric burner or in a heated oven 11 Extreme caution must be used when moving an appliance containing hot oil or other hot liquids 12 To disconnect turn any control to off then remove plug from wall outlet 13 Do not use appliance for other than intended use 14 Use extreme caution when removing tray or disposing of hot grease 15 Do not clean with metal scouring pads Pieces can break off the pad and touch electrical parts creating a risk of electric shock 16 Place the Air Fryer Oven on a flat sturdy heat resistant surface Do not place the Air Fryer Oven near or on any type of heat source such as a gas or electric burner stove or oven Do not use near an open flame or flammable materials 17 The Air Fryer Oven will emit some heat Allow sufficient space around Air Fryer Oven when in use and do not place near other items or appliances
  • Page 12 - English - : 3 4 SAFETY INSTRUCTIONS IMPORTANT SAFEGUARDS 18 Never operate the Air Fryer Oven or any appliance on a gas or electric stovetop even if the stovetop is off and completely cool 19 Appliances may emit heat or steam when in use do not block inlets or outlets 20 Check that your home power supply corresponds with the intended voltage of the Air Fryer Oven 21 Never wrap the cord tightly around the appliance during use or storage this may cause the wire to fray and break 22 This product is not a deep fryer It is NOT meant to be filled with oil Never fill any parts of the Air Fryer Oven with oil If you choose to use oil toss food with oil in a separate bowl and then transfer food to the removeable racks or fry basket 23 Do not leave uncooked ingredients in the Air Fryer Oven for more than a short period of time before cooking raw meat poultry fish fruits and vegetables can spoil 24 Do not move the Air Fryer Oven while it is full of food 25 Do not move the Air Fryer Oven during use During initial use you may notice some smoke andor a slight odor This is normal and should quickly dissipate It should not happen after the appliance has been used a few more times 26 Do not leave the Air Fryer Oven unattended during use 27 Some areas do get HOT during use and touch screen may get warm Do not touch the heating elements Do not place hands or other body parts near the air vents while Air Fryer Oven is in use burns may result Take caution when handling the hot Air Fryer Oven racks and all removable parts 28 Use protective mitts andor tongs to remove hot food from the Air Fryer Oven 29 All removable parts may be washed with a sponge and warm soapy water All removable parts are toprack dishwasher safe 30 All parts may be air dried but it is recommended to towel dry to prevent rust 31 Store Air Fryer Oven in a cool dry place SAVE THESE INSTRUCTIONS SAFETY INSTRUCTIONS IMPORTANT SAFEGUARDS
  • Page 13 - English - : 3 4 SAFETY INSTRUCTIONS IMPORTANT SAFEGUARDS 18 Never operate the Air Fryer Oven or any appliance on a gas or electric stovetop even if the stovetop is off and completely cool 19 Appliances may emit heat or steam when in use do not block inlets or outlets 20 Check that your home power supply corresponds with the intended voltage of the Air Fryer Oven 21 Never wrap the cord tightly around the appliance during use or storage this may cause the wire to fray and break 22 This product is not a deep fryer It is NOT meant to be filled with oil Never fill any parts of the Air Fryer Oven with oil If you choose to use oil toss food with oil in a separate bowl and then transfer food to the removeable racks or fry basket 23 Do not leave uncooked ingredients in the Air Fryer Oven for more than a short period of time before cooking raw meat poultry fish fruits and vegetables can spoil 24 Do not move the Air Fryer Oven while it is full of food 25 Do not move the Air Fryer Oven during use During initial use you may notice some smoke andor a slight odor This is normal and should quickly dissipate It should not happen after the appliance has been used a few more times 26 Do not leave the Air Fryer Oven unattended during use 27 Some areas do get HOT during use and touch screen may get warm Do not touch the heating elements Do not place hands or other body parts near the air vents while Air Fryer Oven is in use burns may result Take caution when handling the hot Air Fryer Oven racks and all removable parts 28 Use protective mitts andor tongs to remove hot food from the Air Fryer Oven 29 All removable parts may be washed with a sponge and warm soapy water All removable parts are toprack dishwasher safe 30 All parts may be air dried but it is recommended to towel dry to prevent rust 31 Store Air Fryer Oven in a cool dry place SAVE THESE INSTRUCTIONS SAFETY INSTRUCTIONS IMPORTANT SAFEGUARDS
  • Page 14 - English - : 5 6 WARNING This appliance has a polarized plug one blade is wider than the other This plug is intended to fit into a polarized outlet only one way If the plug does not fit fully into the outlet reverse the plug If it still does not fit contact a qualified electrician Do not attempt to modify the plug in any way or force it into the outlet This could result in injury or electric shock SHORT CORD INSTRUCTIONS A short power supply cord is provided to reduce the hazards of entanglement or tripping over a longer cord Longer detachable powersupply cords or extension cords are available and may be used if care is exercised in their use If a longer detachable powersupply extension cord is used 1 The marked electrical rating of the extension cord should be at least as great as the electrical rating of the appliance 2 The cord should be arranged so that it will not drape over the countertop or tabletop where it can be pulled on by children or tripped over SAFETY INSTRUCTIONS IMPORTANT SAFEGUARDS POWER CORD SAFETY TIPS 1 Never pull or yank on cord or the appliance 2 To insert plug grasp it firmly and guide it into outlet 3 To disconnect appliance grasp plug and remove it from outlet 4 Before each use inspect the power cord for cuts andor abrasion marks If any are found this indicates that the appliance should be serviced and the power cord replaced Please contact Chefman Customer Support for assistance 5 Never wrap the cord tightly around the appliance as this could place undue stress on the cord where it enters the appliance and cause it to fray and break DO NOT OPERATE APPLIANCE IF THE POWER CORD SHOWS ANY DAMAGE OR IF APPLIANCE WORKS INTERMITTENTLY OR STOPS WORKING ENTIRELY Do not place the appliance on a stovetop or any other heatable surface SAFETY INSTRUCTIONS IMPORTANT SAFEGUARDS
  • Page 15 - English - : 5 6 WARNING This appliance has a polarized plug one blade is wider than the other This plug is intended to fit into a polarized outlet only one way If the plug does not fit fully into the outlet reverse the plug If it still does not fit contact a qualified electrician Do not attempt to modify the plug in any way or force it into the outlet This could result in injury or electric shock SHORT CORD INSTRUCTIONS A short power supply cord is provided to reduce the hazards of entanglement or tripping over a longer cord Longer detachable powersupply cords or extension cords are available and may be used if care is exercised in their use If a longer detachable powersupply extension cord is used 1 The marked electrical rating of the extension cord should be at least as great as the electrical rating of the appliance 2 The cord should be arranged so that it will not drape over the countertop or tabletop where it can be pulled on by children or tripped over SAFETY INSTRUCTIONS IMPORTANT SAFEGUARDS POWER CORD SAFETY TIPS 1 Never pull or yank on cord or the appliance 2 To insert plug grasp it firmly and guide it into outlet 3 To disconnect appliance grasp plug and remove it from outlet 4 Before each use inspect the power cord for cuts andor abrasion marks If any are found this indicates that the appliance should be serviced and the power cord replaced Please contact Chefman Customer Support for assistance 5 Never wrap the cord tightly around the appliance as this could place undue stress on the cord where it enters the appliance and cause it to fray and break DO NOT OPERATE APPLIANCE IF THE POWER CORD SHOWS ANY DAMAGE OR IF APPLIANCE WORKS INTERMITTENTLY OR STOPS WORKING ENTIRELY Do not place the appliance on a stovetop or any other heatable surface SAFETY INSTRUCTIONS IMPORTANT SAFEGUARDS
  • Page 16 - English - : 7 8 FEATURES FEATURES 1 Unit 2 Control Panel 3 Viewing Window 4 Rack Slots 5 Fan and Infrared Heating Housing 6 Handle 7 Rotator 8 Bottom Heating Element 9 Venting Fan 10 Power Cord 11 Nonstick Drip Tray 12 Wire Chicken Roasting Rack 13 Stir Attachment 14 Fry Basket 55L 15 Wire Racks 2
  • Page 17 - English - : 7 8 FEATURES FEATURES 1 Unit 2 Control Panel 3 Viewing Window 4 Rack Slots 5 Fan and Infrared Heating Housing 6 Handle 7 Rotator 8 Bottom Heating Element 9 Venting Fan 10 Power Cord 11 Nonstick Drip Tray 12 Wire Chicken Roasting Rack 13 Stir Attachment 14 Fry Basket 55L 15 Wire Racks 2
  • Page 18 - English - : 9 10 CONTROL PANEL TemperatureTime Display Automatically alternates Hold TempTime button for 5 seconds to choose between Fahrenheit and Celsius Bake Air Fry Dehydrate Sets cooking function Stir Initiates rotator when using fry basket with stir attachment Food PreSet Icons Sets suggested time and temperature for favorite foods StopCancel Stops heating and fan Minus Sign Reduces time and lowers temperature setting TempTime Set Sets time and temperature press to toggle between the two Plus Sign Adds time and increases temperature setting FEATURES OPERATING INSTRUCTIONS The multifunctional Air Fryer Oven requires no preheating and cooks faster than a traditional oven which means you can enjoy your favorite hot foods in mere minutes The touchscreen control panel is intuitive and customized accessories help guarantee delicious results BEFORE FIRST USE For best results follow these steps before using your Air Fryer Oven for the first time 1 Remove all packaging materials such as plastic bags and foam inserts 2 Read and remove all stickers on unit 3 Check to ensure that all parts and accessories are accounted for 4 Wipe down the interior and exterior with a damp cloth 5 Wash the fry basket stirring attachment and drip tray with warm soapy water Dry thoroughly NOTE On first use unit may emit a slight odor which is normal and will dissipate with use
  • Page 19 - English - : 9 10 CONTROL PANEL TemperatureTime Display Automatically alternates Hold TempTime button for 5 seconds to choose between Fahrenheit and Celsius Bake Air Fry Dehydrate Sets cooking function Stir Initiates rotator when using fry basket with stir attachment Food PreSet Icons Sets suggested time and temperature for favorite foods StopCancel Stops heating and fan Minus Sign Reduces time and lowers temperature setting TempTime Set Sets time and temperature press to toggle between the two Plus Sign Adds time and increases temperature setting FEATURES OPERATING INSTRUCTIONS The multifunctional Air Fryer Oven requires no preheating and cooks faster than a traditional oven which means you can enjoy your favorite hot foods in mere minutes The touchscreen control panel is intuitive and customized accessories help guarantee delicious results BEFORE FIRST USE For best results follow these steps before using your Air Fryer Oven for the first time 1 Remove all packaging materials such as plastic bags and foam inserts 2 Read and remove all stickers on unit 3 Check to ensure that all parts and accessories are accounted for 4 Wipe down the interior and exterior with a damp cloth 5 Wash the fry basket stirring attachment and drip tray with warm soapy water Dry thoroughly NOTE On first use unit may emit a slight odor which is normal and will dissipate with use
  • Page 20 - English - : 11 12 HOW TO AIR FRY IN THE AIR FRYER OVEN The Air Fryer Oven works by moving hot air around to create a crisp exterior just like you get from deep frying but with little to no oil required The Air Fryer Oven offers more capacity than many conventional air fryers but thanks to its highspeed fan and two heat sources it still cooks foods quickly With the Air Fryer Oven you have two options for air frying on wire racks that allow air to circulate around the foods perfect for fried chicken or in a metal fry basket with an autostir function that gently tosses foods during cooking so all pieces turn out uniformly cooked and crisped with no need to manually shake the basket Hello French fries CAUTION Never fill the fry basket with oil Unlike deep fryers air fryers require little to no oil to produce crispy results If you choose to use oil toss foods with just a little in a separate bowl before cooking in the Air Fryer Oven 1 Prepare food for airfrying 2 If using wire racks Position drip tray in bottom slot of Air Fryer Oven just above the heating element If using fry basket with autostir option Insert stir attachment into fry basket 3 Plug in the Air Fryer Oven The control panel will illuminate If the unit was already plugged in the control panel may only show Start press Start to illuminate control panel 4 Put food on wire racks or in fry basket then insert racks or basket into the Air Fryer Oven and shut the door If using the fry basket with the stir attachment insert the basket into the lowest possible position so that its base will connect to the rotator OPERATING INSTRUCTIONS 5a If air frying with preset cooking parameters Press Air Fry then choose the icon that best represents the food youre cooking and press the icon This will set the preprogrammed time and temperature as well as the autostir function if applicable The settings will illuminate blue If you would like to turn off the autostir function press Stir until white 5b If air frying with custom cooking parameters Press Air Fry Adjust the time and temperature by pressing TimeTemp Press Stir if using the fry basket with autostir function The chosen settings will illuminate blue 6 Press Start it will illuminate red Air frying will begin immediately No need to preheat unit The fan will begin blowing the heating element on top will alight and the clock will begin to count down 7 Attend to foods as necessary To check on cooking simply open the door The until will turn off With protective mitts switch rack position or flip foods as desired When door is shut air frying timing and autostir if using will continue 8 Finish cooking and check for doneness When the timer reaches 0 the unit will beep and the word End will appear on the control panel the heater will turn off but the fan will continue to run for about 30 seconds With protective mitts remove the racks or the basket and check food for doneness Return the food to the unit for additional cooking if necessary 9 Serve and enjoy CAUTION The basket racks drip tray and contents will be HOT after cooking Place hot basket or racks on a wire rack or trivet to cool OPERATING INSTRUCTIONS
  • Page 21 - English - : 11 12 HOW TO AIR FRY IN THE AIR FRYER OVEN The Air Fryer Oven works by moving hot air around to create a crisp exterior just like you get from deep frying but with little to no oil required The Air Fryer Oven offers more capacity than many conventional air fryers but thanks to its highspeed fan and two heat sources it still cooks foods quickly With the Air Fryer Oven you have two options for air frying on wire racks that allow air to circulate around the foods perfect for fried chicken or in a metal fry basket with an autostir function that gently tosses foods during cooking so all pieces turn out uniformly cooked and crisped with no need to manually shake the basket Hello French fries CAUTION Never fill the fry basket with oil Unlike deep fryers air fryers require little to no oil to produce crispy results If you choose to use oil toss foods with just a little in a separate bowl before cooking in the Air Fryer Oven 1 Prepare food for airfrying 2 If using wire racks Position drip tray in bottom slot of Air Fryer Oven just above the heating element If using fry basket with autostir option Insert stir attachment into fry basket 3 Plug in the Air Fryer Oven The control panel will illuminate If the unit was already plugged in the control panel may only show Start press Start to illuminate control panel 4 Put food on wire racks or in fry basket then insert racks or basket into the Air Fryer Oven and shut the door If using the fry basket with the stir attachment insert the basket into the lowest possible position so that its base will connect to the rotator OPERATING INSTRUCTIONS 5a If air frying with preset cooking parameters Press Air Fry then choose the icon that best represents the food youre cooking and press the icon This will set the preprogrammed time and temperature as well as the autostir function if applicable The settings will illuminate blue If you would like to turn off the autostir function press Stir until white 5b If air frying with custom cooking parameters Press Air Fry Adjust the time and temperature by pressing TimeTemp Press Stir if using the fry basket with autostir function The chosen settings will illuminate blue 6 Press Start it will illuminate red Air frying will begin immediately No need to preheat unit The fan will begin blowing the heating element on top will alight and the clock will begin to count down 7 Attend to foods as necessary To check on cooking simply open the door The until will turn off With protective mitts switch rack position or flip foods as desired When door is shut air frying timing and autostir if using will continue 8 Finish cooking and check for doneness When the timer reaches 0 the unit will beep and the word End will appear on the control panel the heater will turn off but the fan will continue to run for about 30 seconds With protective mitts remove the racks or the basket and check food for doneness Return the food to the unit for additional cooking if necessary 9 Serve and enjoy CAUTION The basket racks drip tray and contents will be HOT after cooking Place hot basket or racks on a wire rack or trivet to cool OPERATING INSTRUCTIONS
  • Page 22 - English - : 13 14 HOW TO BAKE IN THE AIR OVEN FRYER With its larger interior capacity the Air Fryer Oven can be used just like an oven to bake and roast For most baking use the wire baking racks either on their own lined with parchment or with ovensafe bakeware For how to roast a whole chicken on the wire chicken roasting rack see p 17 1 Prepare food for baking 2 If necessary position a drip tray in the bottom slot in Air Fryer Oven so that it sits just above the heating element Use drip tray if theres a danger of fillings leaking or batter overflowing or if roasting on wire racks 3 Plug in Air Fryer Oven The control panel will illuminate If the Air Fryer Oven was already plugged in the control panel may only show Start press Start to illuminate control panel 4 Put food on wire racks or in baking dish on wire rack Put into Air Fryer Oven then shut door 5a If baking with preset cooking parameters Press Bake then choose the icon that best represents the food youre baking and press the icon This will set the preprogrammed time and temperature The autostir function will not come on The chosen settings will illuminate blue OPERATING INSTRUCTIONS 5b If baking with custom cooking parameters Press Bake Adjust the time and temperature by pressing TimeTemp The chosen settings will illuminate blue 6 Press Start it will illuminate red Baking will begin immediately No need to preheat unit The fan will begin blowing the heating element on top will alight and the clock will begin to count down 7 Attend to foods as necessary To check on cooking simply open the door The until will turn off With protective mitts switch rack positions or flip or turn foods as desired When door is shut baking and timing will continue 8 Finish cooking and check for doneness When the timer reaches 0 the unit will beep and the word End will appear on the control panel the heater will turn off but the fan will continue to run for about 30 seconds With protective mitts remove the racks and check food for doneness Return the food to the unit for additional cooking if necessary 9 Serve and enjoy CAUTION The racks drip tray and contents will be HOT after cooking Place hot rackss on a wire rack or trivet to cool OPERATING INSTRUCTIONS
  • Page 23 - English - : 13 14 HOW TO BAKE IN THE AIR OVEN FRYER With its larger interior capacity the Air Fryer Oven can be used just like an oven to bake and roast For most baking use the wire baking racks either on their own lined with parchment or with ovensafe bakeware For how to roast a whole chicken on the wire chicken roasting rack see p 17 1 Prepare food for baking 2 If necessary position a drip tray in the bottom slot in Air Fryer Oven so that it sits just above the heating element Use drip tray if theres a danger of fillings leaking or batter overflowing or if roasting on wire racks 3 Plug in Air Fryer Oven The control panel will illuminate If the Air Fryer Oven was already plugged in the control panel may only show Start press Start to illuminate control panel 4 Put food on wire racks or in baking dish on wire rack Put into Air Fryer Oven then shut door 5a If baking with preset cooking parameters Press Bake then choose the icon that best represents the food youre baking and press the icon This will set the preprogrammed time and temperature The autostir function will not come on The chosen settings will illuminate blue OPERATING INSTRUCTIONS 5b If baking with custom cooking parameters Press Bake Adjust the time and temperature by pressing TimeTemp The chosen settings will illuminate blue 6 Press Start it will illuminate red Baking will begin immediately No need to preheat unit The fan will begin blowing the heating element on top will alight and the clock will begin to count down 7 Attend to foods as necessary To check on cooking simply open the door The until will turn off With protective mitts switch rack positions or flip or turn foods as desired When door is shut baking and timing will continue 8 Finish cooking and check for doneness When the timer reaches 0 the unit will beep and the word End will appear on the control panel the heater will turn off but the fan will continue to run for about 30 seconds With protective mitts remove the racks and check food for doneness Return the food to the unit for additional cooking if necessary 9 Serve and enjoy CAUTION The racks drip tray and contents will be HOT after cooking Place hot rackss on a wire rack or trivet to cool OPERATING INSTRUCTIONS
  • Page 24 - English - : 15 16 HOW TO DEHYDRATE WITH THE AIRFRY OVEN With its fan wire racks and a lower temperature setting than found on most conventional ovens the Air Fryer Oven makes a great dehydrator perfect for drying herbs creating healthy veggie and fruit chips and making foods lighter for backpacking When dehydrating use the wire baking racks to allow air to flow around the food 1 Prepare food for dehydrating 2 Position drip tray in the bottom slot of Air Fryer Oven so that it sits above heating element 3 Plug in Air Fryer Oven The control panel will illuminate If Air Fryer Oven was already plugged in the control panel may only show Start press Start to illuminate control panel 4 Put food on wire racks Put into Air Fryer Oven then shut door 5a If dehydrating preset cooking parameters Press Dehydrate then choose the icon that best represents the food youre dehydrating This will set the preprogrammed time and temperature the autostir function will not come on The chosen settings will illuminate blue 5b If dehydrating with custom cooking parameters Press Dehydrate Adjust the time and temperature by pressing TimeTemp The chosen settings will illuminate blue OPERATING INSTRUCTIONS 6 Press Start it will illuminate red Dehydrating will begin immediately No need to preheat unit The fan will begin blowing the heating element on top will alight and the clock will begin to count down 7 Attend to foods as necessary To check on cooking simply open the door The until will turn off With protective mitts switch rack positions or flip or turn foods as desired When door is shut dehydrating and timing will continue 8 Finish cooking and check for doneness When the timer reaches 0 the unit will beep and the word End will appear on the control panel the heater will turn off but the fan will continue to run for about 30 seconds Open door With protective mitts remove the racks and check food for doneness Return the food to the unit for additional cooking if necessary 9 Serve and enjoy CAUTION The racks baking dishes or pans drip tray and contents will be HOT after cooking Place hot rackss on a wire rack or trivet to cool OPERATING INSTRUCTIONS
  • Page 25 - English - : 15 16 HOW TO DEHYDRATE WITH THE AIRFRY OVEN With its fan wire racks and a lower temperature setting than found on most conventional ovens the Air Fryer Oven makes a great dehydrator perfect for drying herbs creating healthy veggie and fruit chips and making foods lighter for backpacking When dehydrating use the wire baking racks to allow air to flow around the food 1 Prepare food for dehydrating 2 Position drip tray in the bottom slot of Air Fryer Oven so that it sits above heating element 3 Plug in Air Fryer Oven The control panel will illuminate If Air Fryer Oven was already plugged in the control panel may only show Start press Start to illuminate control panel 4 Put food on wire racks Put into Air Fryer Oven then shut door 5a If dehydrating preset cooking parameters Press Dehydrate then choose the icon that best represents the food youre dehydrating This will set the preprogrammed time and temperature the autostir function will not come on The chosen settings will illuminate blue 5b If dehydrating with custom cooking parameters Press Dehydrate Adjust the time and temperature by pressing TimeTemp The chosen settings will illuminate blue OPERATING INSTRUCTIONS 6 Press Start it will illuminate red Dehydrating will begin immediately No need to preheat unit The fan will begin blowing the heating element on top will alight and the clock will begin to count down 7 Attend to foods as necessary To check on cooking simply open the door The until will turn off With protective mitts switch rack positions or flip or turn foods as desired When door is shut dehydrating and timing will continue 8 Finish cooking and check for doneness When the timer reaches 0 the unit will beep and the word End will appear on the control panel the heater will turn off but the fan will continue to run for about 30 seconds Open door With protective mitts remove the racks and check food for doneness Return the food to the unit for additional cooking if necessary 9 Serve and enjoy CAUTION The racks baking dishes or pans drip tray and contents will be HOT after cooking Place hot rackss on a wire rack or trivet to cool OPERATING INSTRUCTIONS
  • Page 26 - English - : 17 18 HOW TO ROAST A WHOLE CHICKEN IN THE AIR OVEN FRYER With its even heating autostir function and unique wire chicken roasting rack the Air Fryer Oven can roast a chicken to crisp juicy perfection with a method thats part rotisserie part beer can and totally delicious Youll get best results with a chicken between 3½ and 4 lb and can go as high as 5 lb Any larger will be too big to spin 1 Insert stir attachment into fry basket Fit wire chicken roasting rack over stir attachment its outer ring should align with grooves on stir attachment blades 2 Prepare the chicken Remove any giblets and season chicken inside and out with salt and pepper plus whatever other seasonings you desire 3 Position chicken on rack Holding the chicken neck up lower the cavity of the chicken over the roasting rack Position legs to stabilize the chicken 4 Insert the fry basket with chicken in the Air Fryer Oven in the lowest position possible so that it connects with the rotator 5 Plug in Air Fryer Oven The control panel will illuminate If Air Fryer Oven was already plugged in the control panel may only show Start press Start to illuminate control panel 6 Press Air Fry The temperature will be set to 400F Press TimeTemp to adjust the time to 1 hour Press Stir The chosen settings will illuminate blue OPERATING INSTRUCTIONS 7 Finish cooking and check for doneness When the timer reaches 0 the unit will beep and the word End will appear on the control panel the heater will turn off but the fan will continue to run for about 30 seconds Open door With protective mitts remove the rack and check chicken for doneness 165F in thickest part of the thigh Return the chicken to the unit for additional cooking if necessary 8 Use protective mitts to transfer basket to heatproof surface and let chicken rest for 15 minutes 9 Transfer chicken to cutting board carve and serve OPERATING INSTRUCTIONS
  • Page 27 - English - : 17 18 HOW TO ROAST A WHOLE CHICKEN IN THE AIR OVEN FRYER With its even heating autostir function and unique wire chicken roasting rack the Air Fryer Oven can roast a chicken to crisp juicy perfection with a method thats part rotisserie part beer can and totally delicious Youll get best results with a chicken between 3½ and 4 lb and can go as high as 5 lb Any larger will be too big to spin 1 Insert stir attachment into fry basket Fit wire chicken roasting rack over stir attachment its outer ring should align with grooves on stir attachment blades 2 Prepare the chicken Remove any giblets and season chicken inside and out with salt and pepper plus whatever other seasonings you desire 3 Position chicken on rack Holding the chicken neck up lower the cavity of the chicken over the roasting rack Position legs to stabilize the chicken 4 Insert the fry basket with chicken in the Air Fryer Oven in the lowest position possible so that it connects with the rotator 5 Plug in Air Fryer Oven The control panel will illuminate If Air Fryer Oven was already plugged in the control panel may only show Start press Start to illuminate control panel 6 Press Air Fry The temperature will be set to 400F Press TimeTemp to adjust the time to 1 hour Press Stir The chosen settings will illuminate blue OPERATING INSTRUCTIONS 7 Finish cooking and check for doneness When the timer reaches 0 the unit will beep and the word End will appear on the control panel the heater will turn off but the fan will continue to run for about 30 seconds Open door With protective mitts remove the rack and check chicken for doneness 165F in thickest part of the thigh Return the chicken to the unit for additional cooking if necessary 8 Use protective mitts to transfer basket to heatproof surface and let chicken rest for 15 minutes 9 Transfer chicken to cutting board carve and serve OPERATING INSTRUCTIONS
  • Page 28 - English - : 19 20 Unless youre using the fry basket which fits into the bottom of the unit use the drip tray when cooking with the Air Fryer Oven to keep the heating coil and the area around it clean For easiest cleanup wrap the drip tray in foil before using For best results bake cake layers brownies and muffins positioned as far as possible from the highspeed fan which can inhibit rising Bake cake layers one at a time Smaller items such as cookies biscuits and turnovers may be baked on two racks at one time for best results alternate the position of the racks halfway through baking Any ovensafe cooking vessel than can fit in the Air Fryer Oven may be used with it When baking on two wire racks at one time switch positions halfway through baking for most even results Depending on the size of the food two racks may not fit at one time if this is the case cook in batches COOKING TIPS Though you can see foods through the units window the interior light cycles on and off with the heating element during cooking To check on foods you may need to open the door Cooking and time countdown will recommence when door is shut Do not rely on preset times for doneness as variables in food size and temperature will affect cooking times follow proper food safety guidelines for doneness especially with meat chicken and fish When removing the fry basket lift it up before pulling it out to disengage it from the rotator COOKING TIPS
  • Page 29 - English - : 19 20 Unless youre using the fry basket which fits into the bottom of the unit use the drip tray when cooking with the Air Fryer Oven to keep the heating coil and the area around it clean For easiest cleanup wrap the drip tray in foil before using For best results bake cake layers brownies and muffins positioned as far as possible from the highspeed fan which can inhibit rising Bake cake layers one at a time Smaller items such as cookies biscuits and turnovers may be baked on two racks at one time for best results alternate the position of the racks halfway through baking Any ovensafe cooking vessel than can fit in the Air Fryer Oven may be used with it When baking on two wire racks at one time switch positions halfway through baking for most even results Depending on the size of the food two racks may not fit at one time if this is the case cook in batches COOKING TIPS Though you can see foods through the units window the interior light cycles on and off with the heating element during cooking To check on foods you may need to open the door Cooking and time countdown will recommence when door is shut Do not rely on preset times for doneness as variables in food size and temperature will affect cooking times follow proper food safety guidelines for doneness especially with meat chicken and fish When removing the fry basket lift it up before pulling it out to disengage it from the rotator COOKING TIPS
  • Page 30 - English - : 21 22 Cleaning the Air Fryer Oven between uses is important to keep it running well Before cleaning ensure the Air Fryer Oven is unplugged and cool Once cool remove any accessories if necessary The fry basket stir attachment and drip tray are all toprack dishwasher safe Their nonstick surface means theyll also come clean easily with a sponge and soapy water Do not use abrasive cleaners on these accessories however or you may damage the nonstick surface The wire racks are also toprack dishwasher safe Alternatively wash racks with a sponge or a nylon brush and hot soapy water To remove stubborn stuckon foods soak racks in hot soapy water Be sure to dry promptly and thoroughly to prevent rusting The wire chicken roasting rack may be hand washed and is toprack dishwasher safe Prevent grease buildup by regularly wiping the entire interior of the Air Fryer Oven clean with a damp cloth and a mild soap solution Never use harsh cleaning products which could damage the surfaces CLEANING AND MAINTENANCE Gently wipe down exterior of the unit with a damp cloth or paper towel and dry Do not use abrasive cleaners on exterior or finish may be damaged Never immerse the Air Fryer Oven or its plug in water or any other liquid Dry all parts thoroughly before storage and store the Air Fryer Oven in a cool dry place CLEANING AND MAINTENANCE
  • Page 31 - English - : 21 22 Cleaning the Air Fryer Oven between uses is important to keep it running well Before cleaning ensure the Air Fryer Oven is unplugged and cool Once cool remove any accessories if necessary The fry basket stir attachment and drip tray are all toprack dishwasher safe Their nonstick surface means theyll also come clean easily with a sponge and soapy water Do not use abrasive cleaners on these accessories however or you may damage the nonstick surface The wire racks are also toprack dishwasher safe Alternatively wash racks with a sponge or a nylon brush and hot soapy water To remove stubborn stuckon foods soak racks in hot soapy water Be sure to dry promptly and thoroughly to prevent rusting The wire chicken roasting rack may be hand washed and is toprack dishwasher safe Prevent grease buildup by regularly wiping the entire interior of the Air Fryer Oven clean with a damp cloth and a mild soap solution Never use harsh cleaning products which could damage the surfaces CLEANING AND MAINTENANCE Gently wipe down exterior of the unit with a damp cloth or paper towel and dry Do not use abrasive cleaners on exterior or finish may be damaged Never immerse the Air Fryer Oven or its plug in water or any other liquid Dry all parts thoroughly before storage and store the Air Fryer Oven in a cool dry place CLEANING AND MAINTENANCE
  • Page 32 - English - : 23 24 Our products are backed by a limited 1year warranty To register follow the instructions on the Chefman Warranty Registration page in this User Guide We offer a limited 1year warranty from the date of purchase This warranty is void without proof of purchase within the USA Canada or Mexico Service centers and retail stores do not have the right to alter or change the Terms and Conditions of this warranty WHAT THE WARRANTY COVERS Manufacturer Defects Chefman products are warranted against defects in material and workmanship for a period of 1 year from the date of purchase when used in accordance with the Chefman User Guide Qualified Replacements If your product does not work as it should we will send you a new one If the product is no longer available we will replace it with one that is comparable THIS WARRANTY DOES NOT COVER Misuse Damage that occurs from neglectful or improper use of products damage that occurs as a result of usage with incompatible voltage See Safety Instructions for information on proper use Poor Maintenance General lack of proper care See Cleaning and Maintenance for information on proper maintenance Commercial Use Damage that occurs from commercial use Altered Products Damage that occurs from alterations or modifications by any entity other than Chefman removal of rating label Catastrophic Events Damage that occurs from fire floods or natural disasters Loss of Interest Claims of loss of interest or enjoyment TERMS AND CONDITIONS Limited Warranty TERMS AND CONDITIONS Limited Warranty
  • Page 33 - English - : 23 24 Our products are backed by a limited 1year warranty To register follow the instructions on the Chefman Warranty Registration page in this User Guide We offer a limited 1year warranty from the date of purchase This warranty is void without proof of purchase within the USA Canada or Mexico Service centers and retail stores do not have the right to alter or change the Terms and Conditions of this warranty WHAT THE WARRANTY COVERS Manufacturer Defects Chefman products are warranted against defects in material and workmanship for a period of 1 year from the date of purchase when used in accordance with the Chefman User Guide Qualified Replacements If your product does not work as it should we will send you a new one If the product is no longer available we will replace it with one that is comparable THIS WARRANTY DOES NOT COVER Misuse Damage that occurs from neglectful or improper use of products damage that occurs as a result of usage with incompatible voltage See Safety Instructions for information on proper use Poor Maintenance General lack of proper care See Cleaning and Maintenance for information on proper maintenance Commercial Use Damage that occurs from commercial use Altered Products Damage that occurs from alterations or modifications by any entity other than Chefman removal of rating label Catastrophic Events Damage that occurs from fire floods or natural disasters Loss of Interest Claims of loss of interest or enjoyment TERMS AND CONDITIONS Limited Warranty TERMS AND CONDITIONS Limited Warranty
  • Page 34 - English - : 25 26 Want more information Please visit us at Chefmancom OTHER LIMITATIONS ALL WARRANTIES OF ANY KIND WHATSOEVER EXPRESS IMPLIED AND STATUTORY ARE HEREBY DISCLAIMED ALL IMPLIED WARRANTIES OF MERCHANTABILITY AND FITNESS FOR A PARTICULAR PURPOSE ARE HEREBY DISCLAIMED PROVIDED THAT IF ANY IMPLIED WARRANTIES OF ANY KIND IS REQUIRED BY ANY JURISDICTION INCLUDING MERCHANTABILITY AND FITNESS FOR A PARTICULAR PURPOSE THE DURATION OF SUCH IMPOSED IMPLIED WARRANTY IS LIMITED TO ONE 1 YEAR THIS WARRANTY DOES NOT COVER AND CHEFMAN SHALL NOT BE LIABLE FOR INCIDENTAL INDIRECT SPECIAL OR CONSEQUENTIAL DAMAGES INCLUDING WITHOUT LIMITATION DAMAGE TO OR LOSS OF USE OF THE PRODUCT OR LOST SALES OR PROFITS OR DELAY OR FAILURE TO PREFORM THIS WARRANTY OBLIGATION THE REMEDIES PROVIDED HEREIN ARE THE EXCLUSIVE REMEDIES UNDER THIS WARRANTY WHETHER BASED ON CONTRACT TORT OR OTHERWISE This Warranty gives you specific legal rights and you may also have other rights that vary from state to state or province to province Some states or provinces do not allow the exclusions or limitations set forth in this Warranty so the above limitations or exclusions may not apply to you depending on the jurisdiction of purchase Chefman is a registered trademark of RJ BRANDS LLC Register your product to add an additional 3 months to your warranty What do I Need to Register my Product Contact Information Model Number Proof of Purchase online confirmation receipt gift receipt Date code How Do I Register my Product We offer two convenient ways to access the Chefman registration form 1 Visit chefmancomregister 2 Scan the QR code below to access site MADE IN CHINAFABRIQUE EN CHINE AC ONLY AC SEULEMENT DATE CODE ACCESS CODE ModelModele RJ25C Conveyor toaer 120v60hz 1800W CONFORMS TO UL STD 1026 CERTIFIED TO CSA STDC222 No64 CAUTION DO NOT IMMERSE IN WATER ATTENTION NE PAS PLONGER DANS LEAU WARNING TO PREVENT ELECTRIC SHOCK UNPLUG BEFORE CLEANING PRÉAVIS POUR ÉVITER LES CHOCS ÉLECTRIQUES DÉBRANCHEZ LAPPAREIL AVANT DE LUTILISER READ INSTRUCTIONS BEFORE USING LISEZ LES INSTRUCTIONS AVANT DE LUTILISER HOUSEHOLD USE ONLY POUR USAGE DOMESTIQUE SEULEMENT XXXXXXXX CHEFMAN WARRANTY REGISTRATION CHEFMAN WARRANTY REGISTRATION NOTE Label depicted here is an exmaple
  • Page 35 - English - : 25 26 Want more information Please visit us at Chefmancom OTHER LIMITATIONS ALL WARRANTIES OF ANY KIND WHATSOEVER EXPRESS IMPLIED AND STATUTORY ARE HEREBY DISCLAIMED ALL IMPLIED WARRANTIES OF MERCHANTABILITY AND FITNESS FOR A PARTICULAR PURPOSE ARE HEREBY DISCLAIMED PROVIDED THAT IF ANY IMPLIED WARRANTIES OF ANY KIND IS REQUIRED BY ANY JURISDICTION INCLUDING MERCHANTABILITY AND FITNESS FOR A PARTICULAR PURPOSE THE DURATION OF SUCH IMPOSED IMPLIED WARRANTY IS LIMITED TO ONE 1 YEAR THIS WARRANTY DOES NOT COVER AND CHEFMAN SHALL NOT BE LIABLE FOR INCIDENTAL INDIRECT SPECIAL OR CONSEQUENTIAL DAMAGES INCLUDING WITHOUT LIMITATION DAMAGE TO OR LOSS OF USE OF THE PRODUCT OR LOST SALES OR PROFITS OR DELAY OR FAILURE TO PREFORM THIS WARRANTY OBLIGATION THE REMEDIES PROVIDED HEREIN ARE THE EXCLUSIVE REMEDIES UNDER THIS WARRANTY WHETHER BASED ON CONTRACT TORT OR OTHERWISE This Warranty gives you specific legal rights and you may also have other rights that vary from state to state or province to province Some states or provinces do not allow the exclusions or limitations set forth in this Warranty so the above limitations or exclusions may not apply to you depending on the jurisdiction of purchase Chefman is a registered trademark of RJ BRANDS LLC Register your product to add an additional 3 months to your warranty What do I Need to Register my Product Contact Information Model Number Proof of Purchase online confirmation receipt gift receipt Date code How Do I Register my Product We offer two convenient ways to access the Chefman registration form 1 Visit chefmancomregister 2 Scan the QR code below to access site MADE IN CHINAFABRIQUE EN CHINE AC ONLY AC SEULEMENT DATE CODE ACCESS CODE ModelModele RJ25C Conveyor toaer 120v60hz 1800W CONFORMS TO UL STD 1026 CERTIFIED TO CSA STDC222 No64 CAUTION DO NOT IMMERSE IN WATER ATTENTION NE PAS PLONGER DANS LEAU WARNING TO PREVENT ELECTRIC SHOCK UNPLUG BEFORE CLEANING PRÉAVIS POUR ÉVITER LES CHOCS ÉLECTRIQUES DÉBRANCHEZ LAPPAREIL AVANT DE LUTILISER READ INSTRUCTIONS BEFORE USING LISEZ LES INSTRUCTIONS AVANT DE LUTILISER HOUSEHOLD USE ONLY POUR USAGE DOMESTIQUE SEULEMENT XXXXXXXX CHEFMAN WARRANTY REGISTRATION CHEFMAN WARRANTY REGISTRATION NOTE Label depicted here is an exmaple
  • Page 36: RECIPE BOOK AutoStir Air Fryer Oven
  • Page 37: RECIPE BOOK AutoStir Air Fryer Oven
  • Page 38 - English - : PREP TIME 25 min SERVINGS Spicy Sesame Chicken Wings Gochujang a red fermented chili paste from Korea adds spicy sweet and savory flavors to these irresistible wings Many supermarkets now carry this versatile condiment if you cant find it substitute your favorite red chile paste 1 In a large bowl toss the wings with the oil and salt until evenly coated 2 Insert the drip tray into the lowest position in the air oven Divide the wings between the two wire racks and slide the racks into the air oven 3 Set to air fry at 375F for 15 minutes then press Start After 7 minutes carefully switch racks to ensure even cooking 4 Meanwhile in a large bowl stir the gochujang sesame oil and garlic powder together 5 When the time expires carefully transfer the wings they will not be fully cooked at this point to the large bowl Toss the wings in the sauce until evenly coated then return them to the wire racks and the air oven 6 Set to air fry at 375F for 8 minutes switching rack positions after 4 minutes to ensure even cooking 7 Serve immediately sprinkled with the scallions and sesame seeds if using 2 lb chicken wings if using whole wings cut off wing tip 1 Tbsp vegetable oil 1 tsp salt 2 Tbsp gochujang 2 Tbsp toasted sesame oil 1 tsp garlic powder Thinly sliced scallions for serving Sesame seeds for garnish optional INGREDIENTS TOTAL TIME 35 min
  • Page 39 - English - : PREP TIME 25 min SERVINGS Spicy Sesame Chicken Wings Gochujang a red fermented chili paste from Korea adds spicy sweet and savory flavors to these irresistible wings Many supermarkets now carry this versatile condiment if you cant find it substitute your favorite red chile paste 1 In a large bowl toss the wings with the oil and salt until evenly coated 2 Insert the drip tray into the lowest position in the air oven Divide the wings between the two wire racks and slide the racks into the air oven 3 Set to air fry at 375F for 15 minutes then press Start After 7 minutes carefully switch racks to ensure even cooking 4 Meanwhile in a large bowl stir the gochujang sesame oil and garlic powder together 5 When the time expires carefully transfer the wings they will not be fully cooked at this point to the large bowl Toss the wings in the sauce until evenly coated then return them to the wire racks and the air oven 6 Set to air fry at 375F for 8 minutes switching rack positions after 4 minutes to ensure even cooking 7 Serve immediately sprinkled with the scallions and sesame seeds if using 2 lb chicken wings if using whole wings cut off wing tip 1 Tbsp vegetable oil 1 tsp salt 2 Tbsp gochujang 2 Tbsp toasted sesame oil 1 tsp garlic powder Thinly sliced scallions for serving Sesame seeds for garnish optional INGREDIENTS TOTAL TIME 35 min
  • Page 40 - English - : Spinach Onion and Gruyère Frittata Enjoy this satisfying egg dish for breakfast with buttered toast or as a light lunch or dinner paired with lightly dressed greens 1 Heat the oil in a large sauté pan over medium heat Add the onion and cook stirring occasionally until tender and golden brown 8 to 12 minutes Remove from the heat add the spinach and toss to wilt slightly 2 In a medium bowl whisk the eggs half and half salt pepper garlic and paprika Add the onionspinach mixture and the cheese and stir to combine 3 Coat an 8inch round baking pan with cooking spray then pour the egg mixture into it Place the pan on a wire rack and slide the rack into the air oven 4 Set to bake at 300F for 18 minutes then press Start 5 When the time expires remove the pan from the oven Let the frittata cool briefly then invert onto a cutting board or serving plate 6 Slice and serve immediately 1 Tbsp olive oil 1 large yellow onion thinly sliced 1 ½ oz 2 cups fresh baby spinach 6 eggs ¼ cup half and half 1½ tsp salt 1 tsp freshly ground black pepper ½ tsp garlic powder ½ tsp smoked paprika ¾ cup shredded Gruyère or other Swiss cheese Cooking spray 8inch round baking pan INGREDIENTS SPECIAL EQUIPMENT PREP TIME 20 min SERVINGS TOTAL TIME 40 min
  • Page 41 - English - : Spinach Onion and Gruyère Frittata Enjoy this satisfying egg dish for breakfast with buttered toast or as a light lunch or dinner paired with lightly dressed greens 1 Heat the oil in a large sauté pan over medium heat Add the onion and cook stirring occasionally until tender and golden brown 8 to 12 minutes Remove from the heat add the spinach and toss to wilt slightly 2 In a medium bowl whisk the eggs half and half salt pepper garlic and paprika Add the onionspinach mixture and the cheese and stir to combine 3 Coat an 8inch round baking pan with cooking spray then pour the egg mixture into it Place the pan on a wire rack and slide the rack into the air oven 4 Set to bake at 300F for 18 minutes then press Start 5 When the time expires remove the pan from the oven Let the frittata cool briefly then invert onto a cutting board or serving plate 6 Slice and serve immediately 1 Tbsp olive oil 1 large yellow onion thinly sliced 1 ½ oz 2 cups fresh baby spinach 6 eggs ¼ cup half and half 1½ tsp salt 1 tsp freshly ground black pepper ½ tsp garlic powder ½ tsp smoked paprika ¾ cup shredded Gruyère or other Swiss cheese Cooking spray 8inch round baking pan INGREDIENTS SPECIAL EQUIPMENT PREP TIME 20 min SERVINGS TOTAL TIME 40 min
  • Page 42 - English - : Marinated Garlic and Citrus Shrimp These garlicky herbflecked shrimp make a terrific appetizer and would also be delicious served over rice or in a taco 1 In a medium bowl combine the oil garlic lemon and orange juice parsley cilantro salt and pepper Add the shrimp and toss to coat Marinate for 15 minutes at room temperature or cover and refrigerate for up to 1 hour 2 Insert stir attachment into fry basket Transfer shrimp to basket Position fry basket in lowest possible position in the air oven 3 Set to air fry at 400F for 6 minutes press Stir then press Start 4 When the time expires remove the basket from the air oven and check that shrimp are cooked through they should be pink throughout If not cook for another 1 minute 5 Serve shrimp immediately 3 Tbsp olive oil 2 Tbsp finely chopped garlic 2 tsp fresh lemon juice 2 tsp fresh orange juice ¼ cup finely chopped fresh parsley ¼ cup finely chopped fresh cilantro 1 tsp salt ½ tsp freshly ground black pepper 20 large 3140 count shrimp peeled and deveined INGREDIENTS PREP TIME 20 min SERVINGS TOTAL TIME 50 min
  • Page 43 - English - : Marinated Garlic and Citrus Shrimp These garlicky herbflecked shrimp make a terrific appetizer and would also be delicious served over rice or in a taco 1 In a medium bowl combine the oil garlic lemon and orange juice parsley cilantro salt and pepper Add the shrimp and toss to coat Marinate for 15 minutes at room temperature or cover and refrigerate for up to 1 hour 2 Insert stir attachment into fry basket Transfer shrimp to basket Position fry basket in lowest possible position in the air oven 3 Set to air fry at 400F for 6 minutes press Stir then press Start 4 When the time expires remove the basket from the air oven and check that shrimp are cooked through they should be pink throughout If not cook for another 1 minute 5 Serve shrimp immediately 3 Tbsp olive oil 2 Tbsp finely chopped garlic 2 tsp fresh lemon juice 2 tsp fresh orange juice ¼ cup finely chopped fresh parsley ¼ cup finely chopped fresh cilantro 1 tsp salt ½ tsp freshly ground black pepper 20 large 3140 count shrimp peeled and deveined INGREDIENTS PREP TIME 20 min SERVINGS TOTAL TIME 50 min
  • Page 44 - English - : Homemade Corn Tortilla Chips These homemade tortillas chips are so easy and so delicious you may never go back to bagged Enjoy on their own or serve them with your favorite salsa queso and guacamole 1 Brush tortillas on both sides with oil and sprinkle with salt 2 Stack tortillas and with large chefs knife cut each tortilla into 8 wedges Arrange wedges in a single layer on the wire racks 3 Set to air fry at 350F for 8 minutes the press Start After 4 minutes carefully switch racks to ensure even cooking 4 When the time expires check that the chips are golden brown If not air fry for another 1 minute The chips will crisp more as they cool 5 Serve chips warm or let cool completely and store in an airtight container for up to 2 days 5 6inch corn tortillas 1 Tbsp olive oil 1 tsp salt INGREDIENTS PREP TIME 20 min SERVINGS TOTAL TIME 50 min Pastry brush SPECIAL EQUIPMENT
  • Page 45 - English - : Homemade Corn Tortilla Chips These homemade tortillas chips are so easy and so delicious you may never go back to bagged Enjoy on their own or serve them with your favorite salsa queso and guacamole 1 Brush tortillas on both sides with oil and sprinkle with salt 2 Stack tortillas and with large chefs knife cut each tortilla into 8 wedges Arrange wedges in a single layer on the wire racks 3 Set to air fry at 350F for 8 minutes the press Start After 4 minutes carefully switch racks to ensure even cooking 4 When the time expires check that the chips are golden brown If not air fry for another 1 minute The chips will crisp more as they cool 5 Serve chips warm or let cool completely and store in an airtight container for up to 2 days 5 6inch corn tortillas 1 Tbsp olive oil 1 tsp salt INGREDIENTS PREP TIME 20 min SERVINGS TOTAL TIME 50 min Pastry brush SPECIAL EQUIPMENT
  • Page 46 - English - : Patatas Bravas These perfectly crisp bites of potato paired with a spicycreamy tomato sauce are one of Spains most popular tapas Theyre also super tasty served alongside roast chicken 1 In a large bowl toss the potatoes with the vegetable oil salt pepper garlic powder and ½ tablespoon of the paprika until evenly coated 2 Insert the stir attachment into the fry basket then transfer the potatoes to the basket Position the basket in the air oven in the lowest position possible 3 Set to air fry at 350F for 22 minutes press Stir then press Start 4 Meanwhile in a medium bowl combine the tomato sauce mayonnaise onion vinegar remaining ½ tablespoon paprika coriander dried oregano thyme and cayenne 5 When the time expires check that the potatoes are tender golden brown and crisp If not air fry for another 1 to 2 minutes 6 Transfer the potatoes to a serving plate Serve drizzled with the sauce and sprinkled with the fresh oregano if using Alternatively serve the sauce in a bowl for dipping 2 russet potatoes scrubbed dried and cut into bitesize pieces 2 Tbsp vegetable oil 1 Tbsp salt 1 tsp freshly ground black pepper ½ tsp garlic powder 1 Tbsp smoked paprika divided ½ cup tomato sauce ¼ cup mayonnaise ½ small yellow onion finely chopped 1 Tbsp red wine vinegar 1 tsp ground coriander 1 tsp dried oregano 1 tsp dried thyme ½ tsp cayenne Fresh oregano leaves for serving optional INGREDIENTS PREP TIME 20 min SERVINGS TOTAL TIME 45 min
  • Page 47 - English - : Patatas Bravas These perfectly crisp bites of potato paired with a spicycreamy tomato sauce are one of Spains most popular tapas Theyre also super tasty served alongside roast chicken 1 In a large bowl toss the potatoes with the vegetable oil salt pepper garlic powder and ½ tablespoon of the paprika until evenly coated 2 Insert the stir attachment into the fry basket then transfer the potatoes to the basket Position the basket in the air oven in the lowest position possible 3 Set to air fry at 350F for 22 minutes press Stir then press Start 4 Meanwhile in a medium bowl combine the tomato sauce mayonnaise onion vinegar remaining ½ tablespoon paprika coriander dried oregano thyme and cayenne 5 When the time expires check that the potatoes are tender golden brown and crisp If not air fry for another 1 to 2 minutes 6 Transfer the potatoes to a serving plate Serve drizzled with the sauce and sprinkled with the fresh oregano if using Alternatively serve the sauce in a bowl for dipping 2 russet potatoes scrubbed dried and cut into bitesize pieces 2 Tbsp vegetable oil 1 Tbsp salt 1 tsp freshly ground black pepper ½ tsp garlic powder 1 Tbsp smoked paprika divided ½ cup tomato sauce ¼ cup mayonnaise ½ small yellow onion finely chopped 1 Tbsp red wine vinegar 1 tsp ground coriander 1 tsp dried oregano 1 tsp dried thyme ½ tsp cayenne Fresh oregano leaves for serving optional INGREDIENTS PREP TIME 20 min SERVINGS TOTAL TIME 45 min
  • Page 48 - English - : Baked Sweet Potatoes with Brown Sugar and Maple These super sweet spuds would pair especially well with a spicy main course 1 Using the tines of a fork poke holes into the sweet potatoes in a few places this allows steam to escape as they bake 2 Insert the drip try into lowest position in air oven Put the sweet potatoes on a wire rack and slide the rack into the air oven 3 Set to bake at 400F for 50 minutes then press Start 4 When the time expires check that potatoes are tender by piercing with a metal skewer If it does not slide in easily bake for another few minutes until tender Remove from the air oven and let cool for 4 to 5 minutes 5 Cut the potatoes in half lengthwise Season each cut side with the salt and pepper then rough up each side with a fork to season the inside and better absorb the maple syrup Top each with ½ tablespoon of butter Drizzle with the maple syrup sprin kle with the sugar and serve immediately 2 medium sweet potatoes scrubbed and dried ½ tsp salt ½ tsp black pepper 2 Tbsp butter 1 Tbsp maple syrup 1 Tbsp brown sugar INGREDIENTS PREP TIME 20 min SERVINGS TOTAL TIME 45 min
  • Page 49 - English - : Baked Sweet Potatoes with Brown Sugar and Maple These super sweet spuds would pair especially well with a spicy main course 1 Using the tines of a fork poke holes into the sweet potatoes in a few places this allows steam to escape as they bake 2 Insert the drip try into lowest position in air oven Put the sweet potatoes on a wire rack and slide the rack into the air oven 3 Set to bake at 400F for 50 minutes then press Start 4 When the time expires check that potatoes are tender by piercing with a metal skewer If it does not slide in easily bake for another few minutes until tender Remove from the air oven and let cool for 4 to 5 minutes 5 Cut the potatoes in half lengthwise Season each cut side with the salt and pepper then rough up each side with a fork to season the inside and better absorb the maple syrup Top each with ½ tablespoon of butter Drizzle with the maple syrup sprin kle with the sugar and serve immediately 2 medium sweet potatoes scrubbed and dried ½ tsp salt ½ tsp black pepper 2 Tbsp butter 1 Tbsp maple syrup 1 Tbsp brown sugar INGREDIENTS PREP TIME 20 min SERVINGS TOTAL TIME 45 min
  • Page 50 - English - : Crispy Fish Tacos Air frying gives you the crispy fish tacos you crave with no added oil You can buy chipotle mayo and prepared taco seasoning mix but recipes for quick and easy homemade versions of both are easy to find online 1 In a medium bowl toss the cabbage with the mayonnaise vinegar sugar and salt Cover and refrigerate until ready to serve 2 Season fish all over with the taco seasoning 3 Dip the fish into the egg and then into the panko until completely coated 4 Insert the drip try into lowest position in air oven Place fish on the wire racks with space in between the pieces and insert the racks into the air oven 5 Set to air fry at 350F for 12 minutes then press Start After 7 minutes carefully remove wire racks from air oven and flip fish over Reinsert wire racks and continue cooking 6 When the time expires check that the fish is golden brown and fully cooked cut into a piece to check If not continue to air fry for another 1 to 2 minutes 7 Divide fish slaw jalapeño and cilantro if using among tortillas Top with sour cream and serve 1 cup thinly sliced red cabbage 1 Tbsp chipotle mayonnaise 1 tsp applecider vinegar 1 tsp sugar 1 tsp salt ½ lb cod fillet cut into 1inch strips 2 tsp taco seasoning mix 1 egg beaten 1 cup panko breadcrumbs 6 6inch corn tortillas preferably warmed 1 jalapeño thinly sliced Fresh cilantro leaves for serving optional Sour cream for serving INGREDIENTS PREP TIME 15 min SERVINGS 6 Tacos TOTAL TIME 30 min