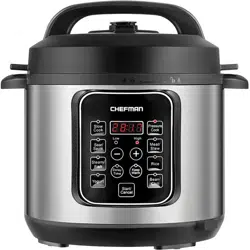
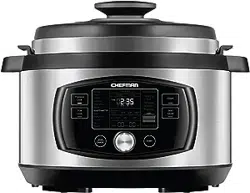
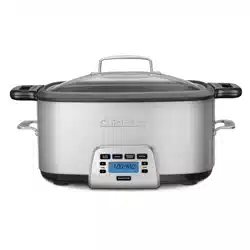
The Chefman pressure cooker can also function as a slow cooker. It can enable you to cook a fast, fresh homemade meal on the pressure setting or a programmed slow cooked meal that you have ready when you arrive home. Additionally, you can select cooking presets that meet your personal cooking preferences including: saute, steam, chili/beans and beef/ poultry. We know you will enjoy your Chefman cooking experience. This is a multi-function appliance so please take the time to look over the features of this device with its many settings. There are safety and operating instructions that are unique to this appliance so pay careful attention to these instructions this will insure that you maximize the benefits of this purchase and that it functions safely and efficiently.
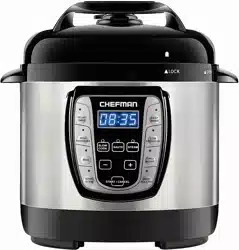
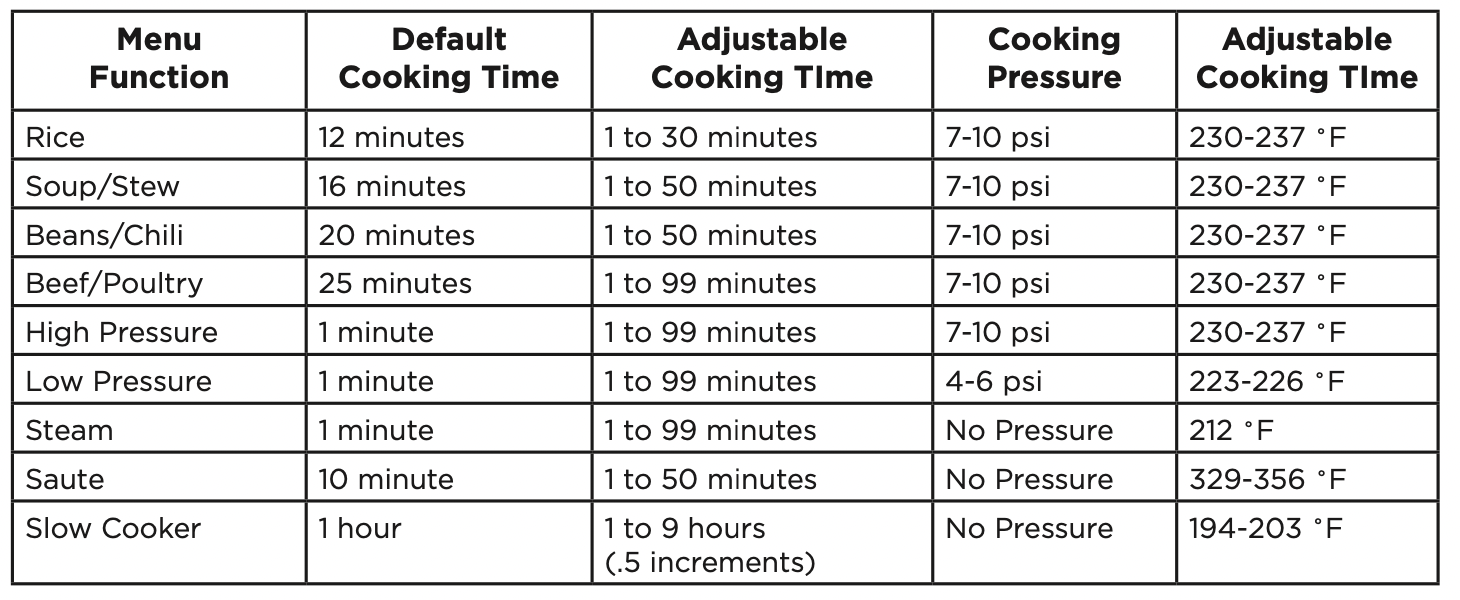
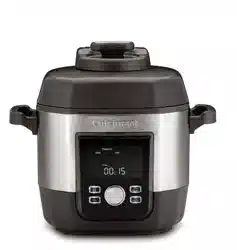
PRESSURE COOKER PANEL
When the pressure cooker has been set up and plugged into an electrical outlet the user interface will appear as pictured. An alert will sound notifying the user that it is powered on. Four blue zeros will light up on the display. All the user functions can be accessed by selecting them as pictured below.
Operating Instructions
Delay Timer: This feature allows the user to set a timed cooking experience. You can set the timer within the time frame one half-hour to twenty-four hours. The timer is set in thirty minute increases or decreases.
High Pressure: This setting can only be started while cooking within the pressure cooker mode. The high pressure setting is used for quick cooking. In the high pressure setting the amount of pressure in the pot is raised to its maximum intensity. Low Pressure: This setting can only be started while cooking with the pressure cooker mode. The low pressure setting is used for with the pots pressure set for lower intensity.
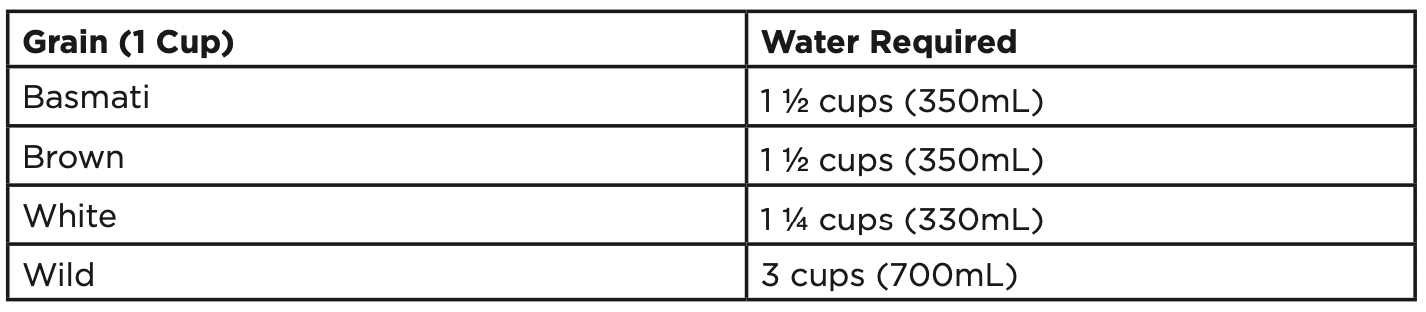
Rice: This setting adjust the time and cooking features of the pressure cooker to optimize pressure cooking rice. Rice will be cooked allowing the grains to be both separated and tender. A measuring cup is provided for measuring the rice. This setting is suitable for all types of rice such as long grain rice, jasmine, basmati and brown rice. Weigh dry rice accurately and wash well with cold water until water runs clear. Drain well and place into the removable cooking bowl. Add corresponding water amount. Water to rice ratio is based on the table provided. Keep in mind that different grains of rice require different time adjustments. Rice will foam and double in size after cooking. When you put in the dry rice use the interior bowl markings and do not fill the bowl beyond the 1/2 marking for your rice and water combination.
Soup/Stew: This setting is suitable to cook a variety of soups from light broths to hearty. It can also be used to cook a variety of vegetable, meat or poultry stews.
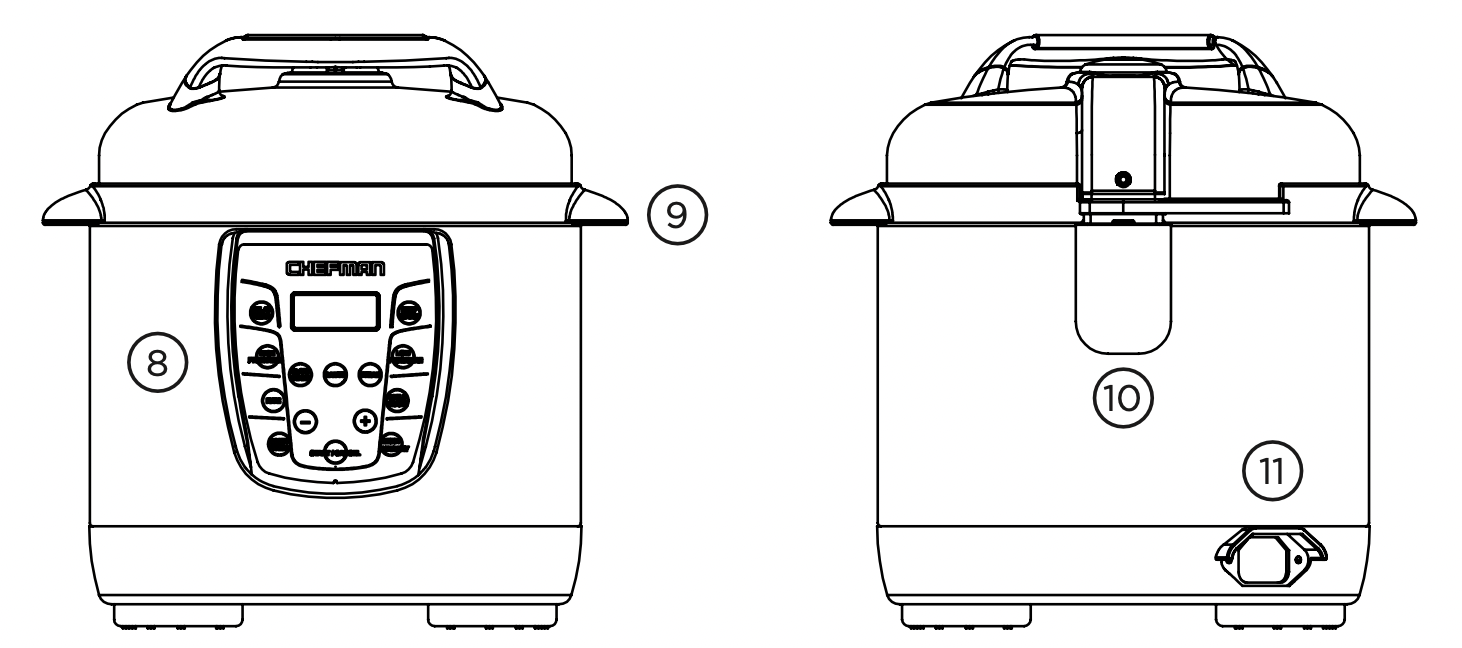
Slow Cook: This setting has adjusted for long cook times at low temperatures. It is ideal for breaking down tough cuts of meat or vegetables that would be accomplished with long and slow cooking times. It is used paired with the timer and/or delay start mode. The user determine the cooking time based on what is being prepared. A reference guide is included in the user guide. The delay timer can be used to allow the cook to set the slow cooking function to automatically for a period from a half hour to twenty- four hours.
Sauté: This setting is designed for softening and caramelizing garlic, onions and smaller pieces of food prior to pressure or slow cooking. It can also be used to pre-heat the pot so that other functions will begin more rapidly.
Steam: This setting is ideal for steaming vegetables, fish fillets, dumplings and reheating.
Increase (+): This setting allows the user to increase the time for the functions of this appliance. Slow increases are completed by tapping the button gently. Faster increases are completed by holding down the button.
Decrease (-): This setting allows the user to decrease the time for the functions of this appliance. Slow decreases are completed by tapping the button gently. Faster decreases are completed by holding down the button.
Start/Cancel: This setting starts or cancels each appliance function. When a function is started the initial display will show a moving LED image to show that the pot has started the warming function this may take several minutes. The cancel function will stop a process. If you then decide to start again you will have to restart all of the functions you require.
LED Display: This display allows the user to see if the appliance is turned on, whether a function is in progress or whether the function has completed. When the unit is first plugged in an alert will sound and the display will show four blue zeros.
Keep Warm: This setting is engaged when one of the menu functions such as pressure cooking, slow cooking or steaming comes to an end. It can also be turned on its own to keep food warm for up to six hours.
Low Pressure: This setting can only be started while cooking within the pressure cooker mode. When set to low pressure the cooking time is increased because the level of pressure in the pot is raised to its minimum intensity.
Chili/Beans: This setting is used for chili recipes that often will have beans as a key ingredient. The setting assumes that you are cooking dried beans. To shorten the cook time, soak beans in cold water overnight. Discard soaking water and cook with fresh cold water for half the pre-set cooking time. Make sure to use a water ratio of 1 part beans to 3 parts water. Beans swell and double in size after cooking. For best results, do not overfill the cooking bowl. The total volume of uncooked beans and water should not exceed the marking inside the removable cooking bowl.
Beef/Poultry: This setting is used for cooking meat and poultry.
Pressure Valve: This valve has two settings exhaust and airtight. Airtight: Set when the pressure cooker is in use. Exhaust: Set when the pressure cooking is complete to allow steam to escape. Also set when the pot is set to steam to allow steam to escape. Care must be taken not to put your hand, arm or face near the valve when steam is escaping. Use a utensil (a long handled item such as a spatula, tong etc.) to turn the valve distancing the user from the escaping steam. You can also use a dry or wet towel to cover the vent as the steam is escaping.
CLEAN THE APPLIANCE PARTS BEFORE USE
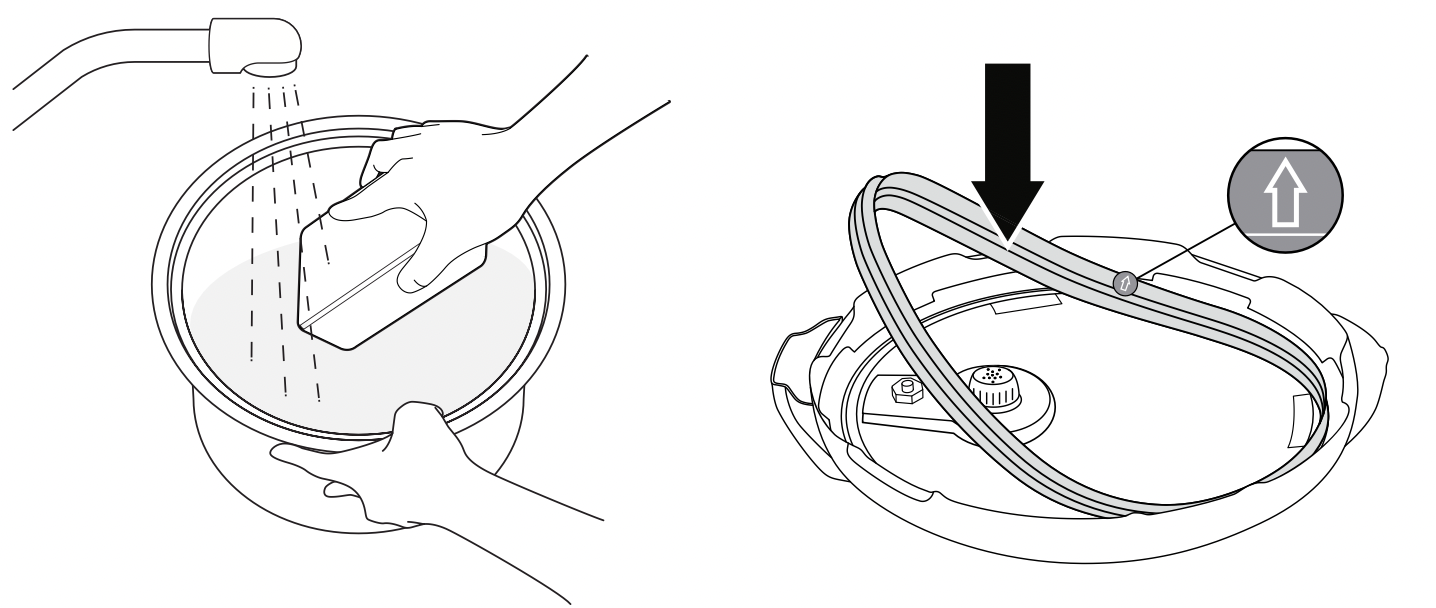
Remove the silicone gasket and the interior pot. Wash with water and a non-abrasive sponge and cleaner. Dry the items. Reinstall the gasket and pot. Make sure the gasket is in tightly installed in the interior of the lid (both behind and under the metal ring within the lid).
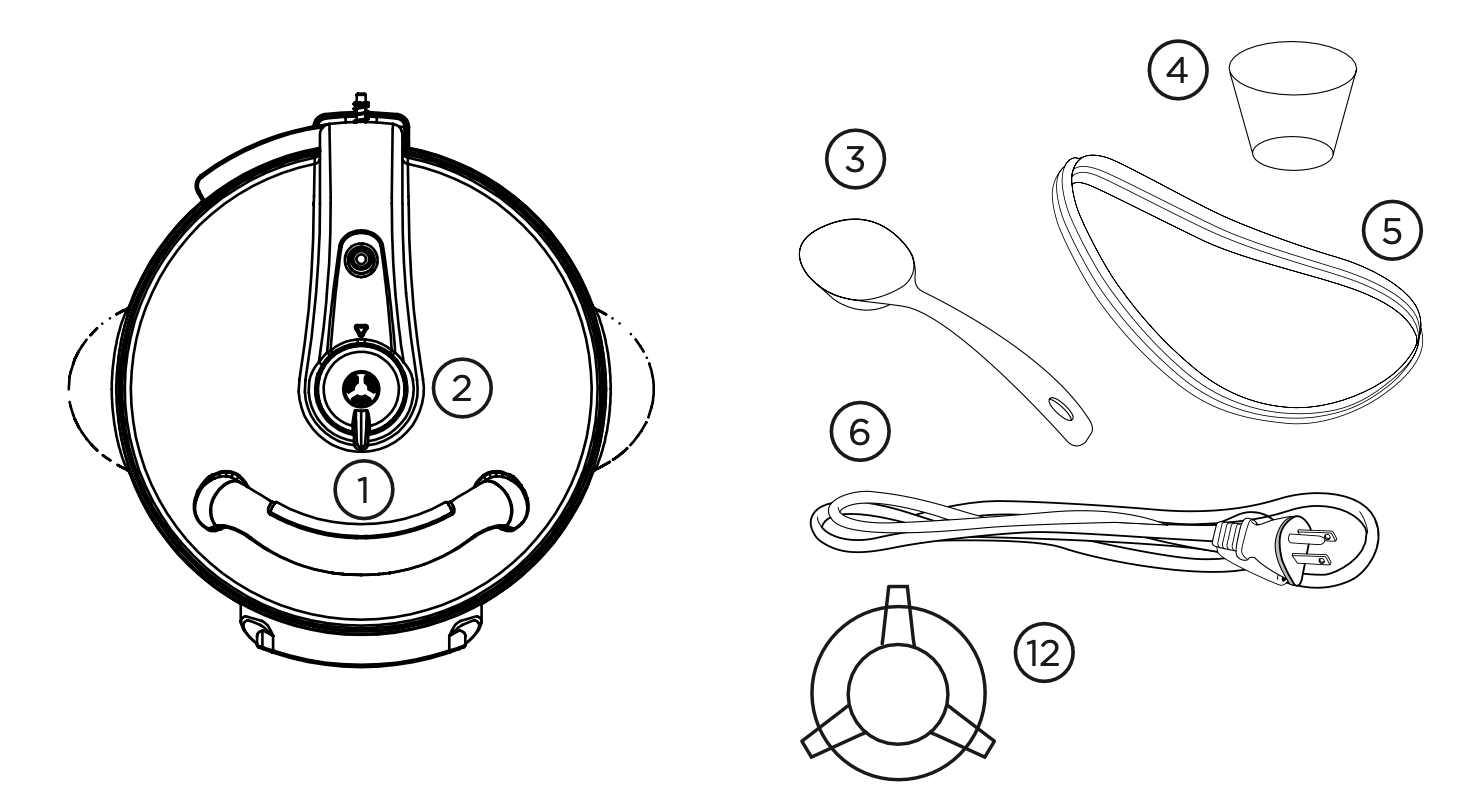
Look at the features diagram to guide you. Reattach the lid if it has been removed.
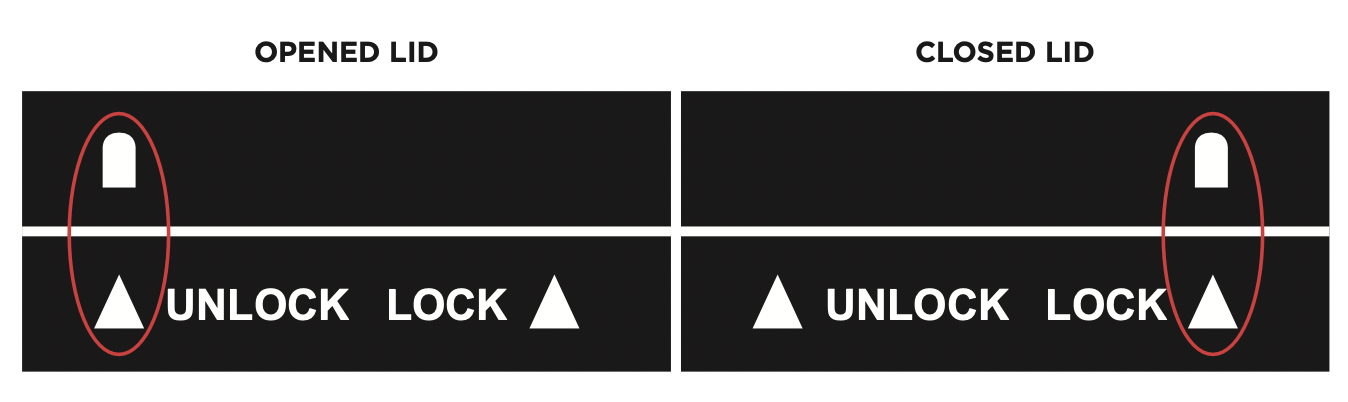
OPEN/CLOSE POSITION OF THE LID
B. You will know the lid is in the open position when the icons on the left side of the lid line up next to the word open.
To lock the lid- insert your hand under the molded plastic handle and turning it to the right. On the top right side of the lid you will see the icons line up next to the word close (diagram of the triangle and gum drop). For the lid to be in the open position the open triangle and the lid need to line up. For the lid to be in the closed position the close triangle and the lid icon have to line up. Knob counter clockwise and lifting lid up and off the appliance. Open the lid by turning the lid knob handle counter clockwise and lifting lid up and off the appliance.
INSTALLING THE SPOON HOLDER AND CONDENSATION CUP
C. Install the spoon holder on the side of the pot by installing it in the black slot which is located on the bottom right side of the pressure cooker exterior.
D. The clear condensation cup is installed in the back of the lid in the opening that corresponds with the size of the cup. This cup collects steam as it condenses along the rim of the pot.
OPERATING INSTRUCTIONS
When plugging in the unit an alert will beep letting you know that the unit is plugged in.
The display will show four blue zeros.
Open the lid by turning the unit to the left-counter-clockwise. You will hear a clicking noise. (icons will be lined up)
Make sure the silicone gasket is fully installed in the lid and lies flat behind the wire ring.
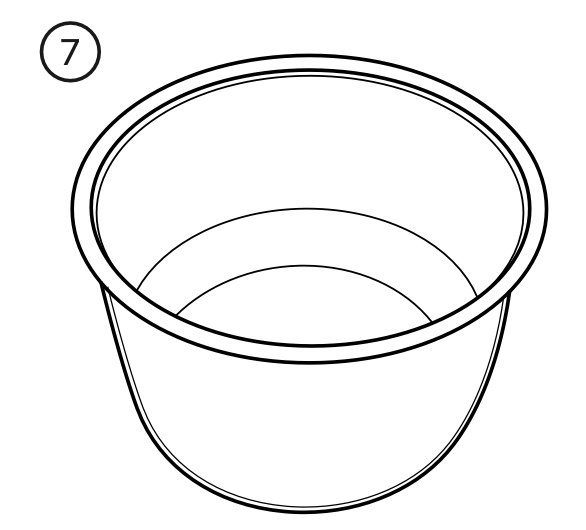
Insert the inner pot into the electric cooker base with your desired food to be cooked. Pay careful attention to the maximum fill line for different types of food.
Close the lid by turning the lid to the right clockwise. You will hear a clicking noise (icons will be lined up).
Insert the clear plastic condensation collection cup by holding it against the cooker under the lid hinge and sliding to lock it into the gap space provided that is the size of the top of this cup.
If you are using the pressure cooking setting make sure the pressure valve is in the airtight position. Pressure cooking produces steam which is let out of the cooking unit by allowing the unit to naturally cool down. This takes a long time. To cool down the pot more quickly and to open the lid faster carefully turn the pressure valve to exhaust. Follow the safety instructions to ensure that you do not burn yourself with escaping steam.
Once you have selected the cooking feature the lid will need to be locked. Once you have started the cooking cycle you will not be able to open the lid. Should you need to open the lid you must cancel the cooking setting and wait for the keep warm button to light up.
You can safely open the pot lid.
HOW TO PREPARE FOOD IN THE INNER POT
Add the food and liquid of your choice to the inner pot. Make sure not to go higher than the 2/3 marking line on the pot. If you are cooking rice or beans (food that will expand more than is typical of other foods) do not go over the ½ line. This includes both the rice/ beans and water.
Make sure to put the inner pot into the electric cooker unit.
Close the lid.
Turn the lid counterclockwise until you hear a clicking noise and see the triangle and gumdrop are lined up in the close position.
DELAY TIMER SETTING
Prepare the food in the inner pot and insert it in the cooking unit.
Close and lock the lid.
Set the delay start for a time within the default settings. The display screen will be shown as (dl) with a time value. The display will show a delay time which will blink until you select your cooking setting.
Select a cooking setting, then press start. The display will show your cook time in a blinking set of digits.
The cooking time will blink until you press start. The display will show your delay cooking time in solid not blinking digits.
PRESSURE COOK
When using the pressure cooker setting you must make sure the pressure valve is set to airtight. This will cause the cooker to build up the necessary pressure to cook more quickly. When the cooking function has ended you can decide to allow the pot to naturally depressurize (this can take a long period of time) or release the pressure by turning the valve to exhaust. Caution must be take not be near the releasing steam.
High Pressure: You can select to pressure cook at a high pressure setting. The high pressure setting will allow the pot to cook your food within a quicker time under a high pressure cooking condition. Use of this setting is determined by what the food ingredients you have decided to cook.
Low Pressure: You can select to pressure cook at a low pressure setting. The low pressure setting will allow the pot to cook your food within a less rapid cooking time than under a high pressure cooking condition. Use of this setting is determined by what the food ingredients you have decided to cook and how rapidly you want to cook them.
Steps for Using the Pressure Cook Settings
Plug in the pressure cooker
Put the pressure valve on airtight
Lock the Lid
Press any of the pressure cooking setting: High, Low, Rice, Soup/Stew, Chili/ Beans, or Beef/Poultry
The display will show a circulating start up screen indicating the pot is preheating. It may take in ten minutes or more for this to complete.
The display will now show the letters PC and a time value.
The display will count down until the cooking time is complete.
An alert will sound and the keep warm setting will blink.
You can either choose to wait for the natural cool down of the pot or use the quicker method of turning the steam valve to exhaust.
The keep warm indicator light will change to a non-blinking continuous light.
You can now open the lid safely. Please be aware the contents of the pot are hot and steam will escape from the open pot.
KEEP WARM SETTING
This setting is turned on following any of the cooking functions (High/Low Pressure, Rice, Soup/Stew, Chili/Beans and Beef/Poultry) upon completion and will stay on for up to six hours.
If you select keep warm as an initial setting the pot will keep your food warm for up to six hours.
SLOW COOK SETTING
This setting is a slow cooking option for food preparation.
Select this feature
The slow cook preset setting should be considered a low, slow, temperature cook setting. When using this setting make a time adjustment should be made to account for the temperature of this setting.
A circulating preheat display will start
When preheated you can choose a time value for how long you would like to cook your food you can set the pot to cook for a period from 1-9 hours in increments of half hours 1, 1.5, 2.0 etc.
After the preheat the display will indicate the time value.
When the cooking cycle is completed an alert will sound and the keep warm will setting will light up.
SAUTE SETTING
This setting is used to quickly saute ingredients for your cooking experience.
The pot can be left open.
The saute setting can also be used as a way to preheat the pot.
Select this feature
The saute setting can be used for a cooking time from 1-50 minutes. The default value is 10 minutes.
The preheat display of a moving blue rectangle will remain until the pot is preheated. This can take approximately ten minutes if the pot is cool.
STEAM SETTING
This setting is used for steaming vegetables and fish.
The steam setting is a non-pressure setting.
It can be set in 1 minute increments from 1-99 minutes.
Select steam enter the amount of time for which you will be steaming by pressing the + or - keys
The pressure cooker will preheat . The display will indicate the preheat screen cycling blue display. This may take up to ten minutes.
The number will be displayed and begin to cook counting down to the end. Steam may exit from the pressure valve. Opening on the top of the pot.
The pot will sound an alert when complete.
The keep warm setting will go on.
Cleaning & Maintenance
PARTS
HOW TO CLEAN
Pressure Valve
Grab the pressure valve and pull it up Wash it in warm water with a mild detergent
Allow the valve to dry put it back in place.
Main Unit
Unplug the cord from the back
Wash the display and outside pot with a soft damp sponge. Allow to dry completely before using the cooker.
Pot
Rinse with warm water and mild detergent. Use a non-abrasive mild detergent and sponge or cloth.
Measuring Cup
Spoon and Holder
Condensation Cup
Silicone Gasket
Wash with warm soapy water. Inspect after each use for any tears or other damage.
Pressure Valve (Underside of the lid)
This should be clean and free of food residue. It can be removed if necessary.
Troubleshooting
DISPLAY SHOWS THE FOLLOWING ERROR CODES
Indicator Code
Problems/Causes
E1
Open circuit of the sensor
E2
Short circuit of the sensor
E3
Overheating
E4
Signal switch malfunction
TROUBLESHOOTING GUIDE
Problem
Possible Reason
Solution
Display shows endless cycling of blue rectangle
Preheat is still not completed
Wait approximately 10 minutes.
Lid will not lock
Gasket is not aligned in wire rim in the lid
Remove gasket and re-insert correctly
Lid will not lock
Lid is not in aligned on the pot rod
Remove lid and reposition
Lid will not lock
Lid is not in the lock position
Turn the lid until the close symbols line up
Lid will not open
Cooking cycle has not ended
Wait until the keep warm indicator light is on
Lid will not open
Lid is not aligned on the pot correctly
Carefully move the lid until it can be removed and reinstalled
Water is running down from the unit
Condensation collector cup is not installed
Put in the cup in the channel on the back of the pot