OVAL
PRESSURE COOKER
QUICK LINKS
• Quick Start Guide
• User Guide
• Recipe Book
This is your one-stop guide to using your
product. From the below links, you can jump
ahead to a specific document if desired.

1
2
QUICK START GUIDE
BEFORE YOU START COOKING
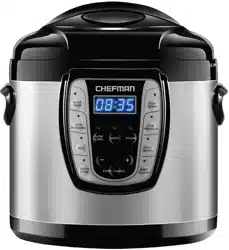
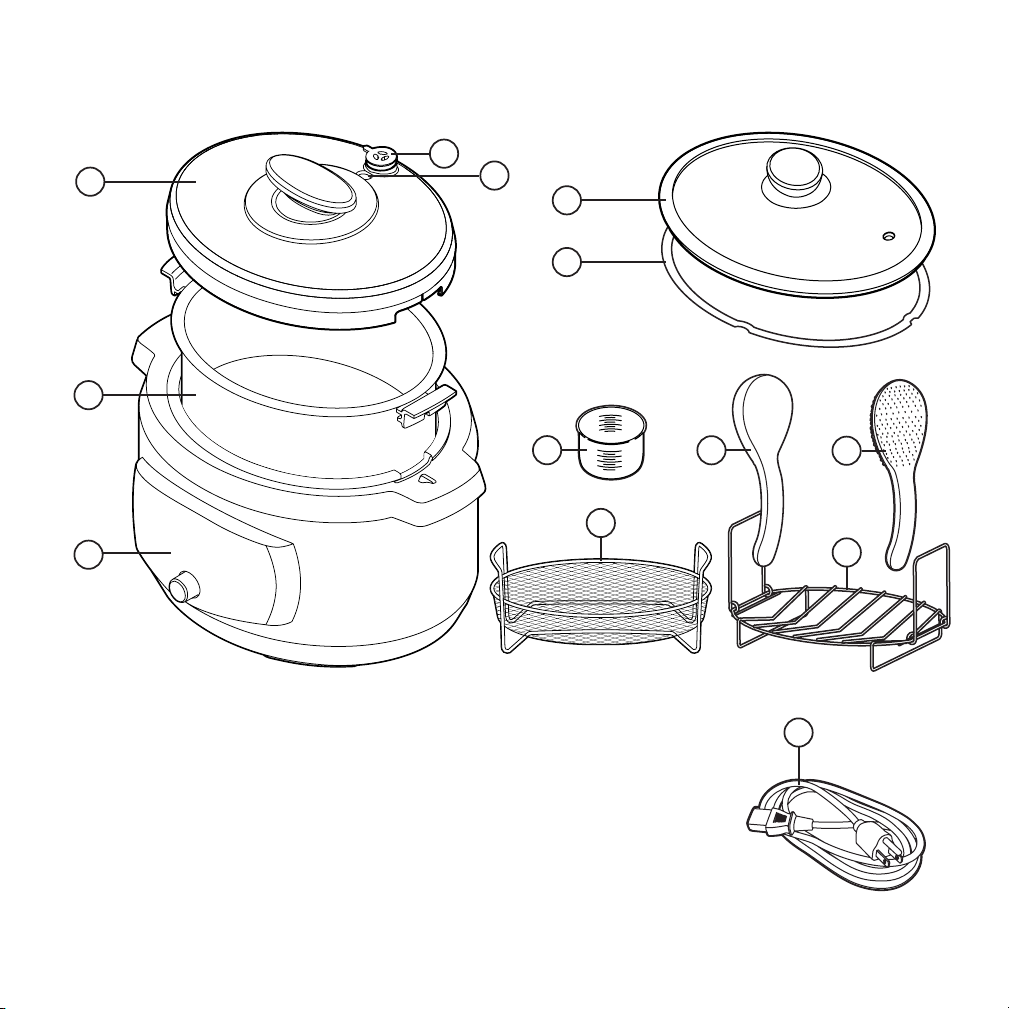
WHAT’S IN THE BOX
REMOVEABLE PRESSURE
REGULAROT KNOB
ONE HAND TWIST-OFF
OPEN AND LOCK
PRESSURE COOKER LID
REMOVABLE INNER
COOKING POT WITH
COOL-TOUCH HANDLES
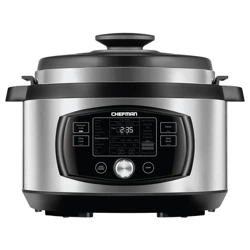
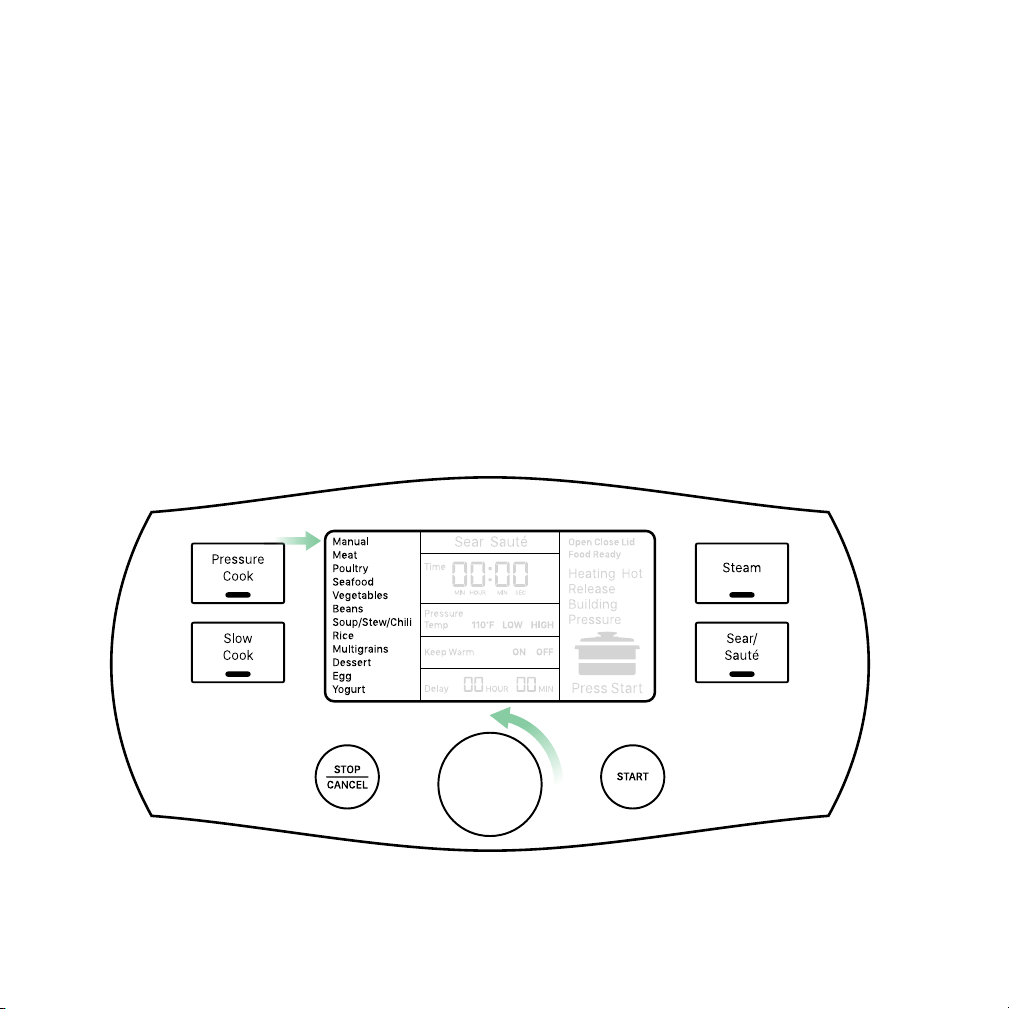
The screen is divided into 4 sections that will guide you through the cooking process:
1. Cooking Functions: Pressure Cook, Slow Cook, Steam and Sear/Sauté. Select your
preferred cooking method.
2. Food Presets: Pressure Cook, Slow Cook and Steam all have specific sets of food
presets. Each preset has time and pressure/temperature parameters for best results,
but you can customize each step or use the Manual setting to input custom parameters.
3. Temperature and Time Functions: Temperature and time can be adjusted up until you
press the Start Button. Keep Warm automatically runs for 24 hours after any cooking
function, but can be turned off. Delay Start can be set for up to 12 hours.
4. Food Status: Heating, Hot, Building Pressure, Release Pressure and Food Ready.
Once cooking begins, monitor the status of your food according to the alerts, cooking
instructions and icons. When your meal is finished, a “Food Ready” alert will display
on the screen.
PRESSURE COOKER
BASE AND CONTROL PANEL
1
Cooking
Functions
Food
Presets
Temperature and
Time Functions
Food
Status
Cooking
Functions
COOKING
FUNCTIONS
FOOD
PRESETS
TEMP AND TIME
FUNCTIONS
FOOD
STATUS
COOKING
FUNCTIONS
1
2
QUICK START GUIDE
BEFORE YOU START COOKING
WHAT’S IN THE BOX
REMOVEABLE PRESSURE
REGULAROT KNOB
ONE HAND TWIST-OFF
OPEN AND LOCK
PRESSURE COOKER LID
REMOVABLE INNER
COOKING POT WITH
COOL-TOUCH HANDLES
The screen is divided into 4 sections that will guide you through the cooking process:
1. Cooking Functions: Pressure Cook, Slow Cook, Steam and Sear/Sauté. Select your
preferred cooking method.
2. Food Presets: Pressure Cook, Slow Cook and Steam all have specific sets of food
presets. Each preset has time and pressure/temperature parameters for best results,
but you can customize each step or use the Manual setting to input custom parameters.
3. Temperature and Time Functions: Temperature and time can be adjusted up until you
press the Start Button. Keep Warm automatically runs for 24 hours after any cooking
function, but can be turned off. Delay Start can be set for up to 12 hours.
4. Food Status: Heating, Hot, Building Pressure, Release Pressure and Food Ready.
Once cooking begins, monitor the status of your food according to the alerts, cooking
instructions and icons. When your meal is finished, a “Food Ready” alert will display
on the screen.
PRESSURE COOKER
BASE AND CONTROL PANEL
1
Cooking
Functions
Food
Presets
Temperature and
Time Functions
Food
Status
Cooking
Functions
COOKING
FUNCTIONS
FOOD
PRESETS
TEMP AND TIME
FUNCTIONS
FOOD
STATUS
COOKING
FUNCTIONS
3
4
• Five convenient cooking functions: Pressure Cook, Slow Cook, Steam, Sear and Sauté
• Programmable time functions including up to 12-Hour Delay Start and 24-Hour
Keep Warm
• Cooks quicker than stovetop methods
• Glass lid included for slow cooking and steaming
This Pressure Cooker is designed with 18 food presets. Select the preset appropriate for
your meal.
AT A GLANCE
PRESETS
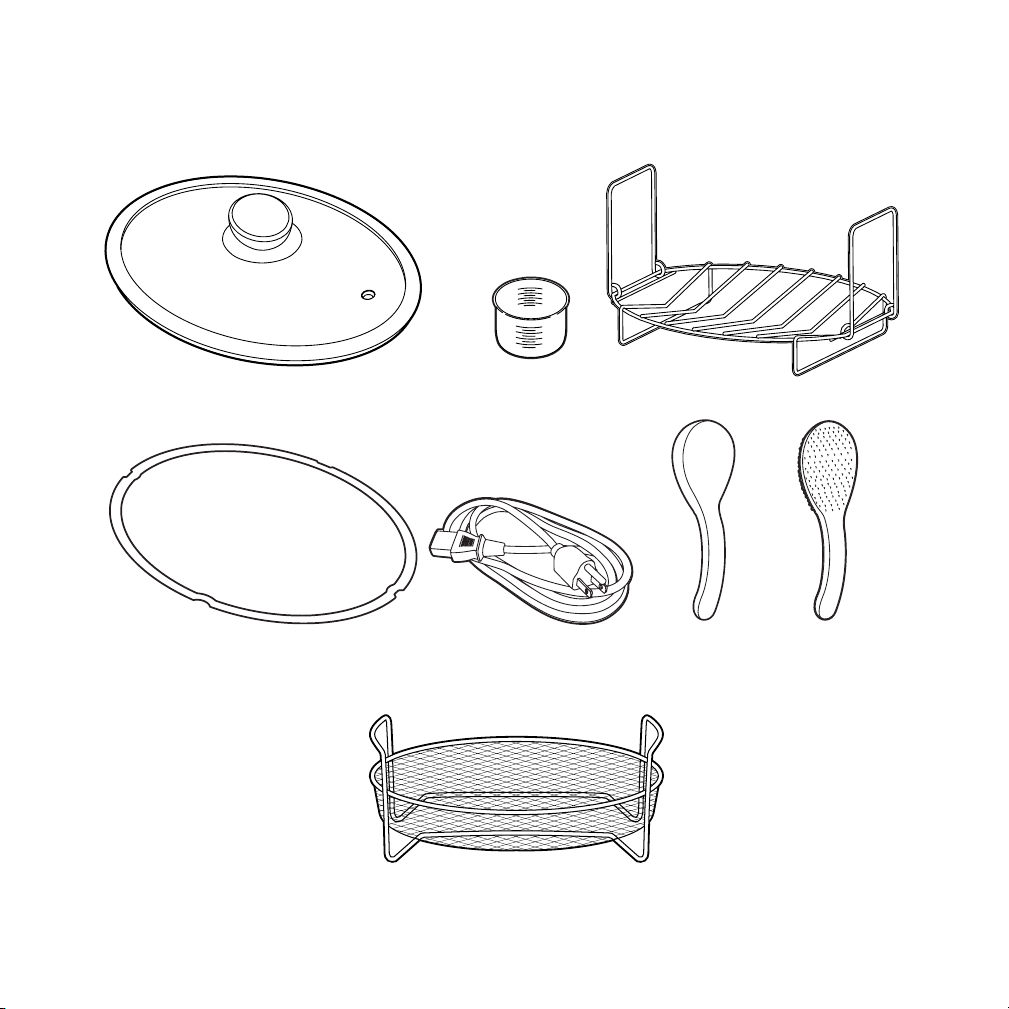
STEAM BASKET
STEAM BASKET
RUBBER GASKET
MEASURING CUP
POWER CORD
STEAM RACK
LADLE RICE SPOON
WHAT’S IN THE BOX
3
4
• Five convenient cooking functions: Pressure Cook, Slow Cook, Steam, Sear and Sauté
• Programmable time functions including up to 12-Hour Delay Start and 24-Hour
Keep Warm
• Cooks quicker than stovetop methods
• Glass lid included for slow cooking and steaming
This Pressure Cooker is designed with 18 food presets. Select the preset appropriate for
your meal.
AT A GLANCE
PRESETS
STEAM BASKET
STEAM BASKET
RUBBER GASKET
MEASURING CUP
POWER CORD
STEAM RACK
LADLE RICE SPOON
WHAT’S IN THE BOX
5
6
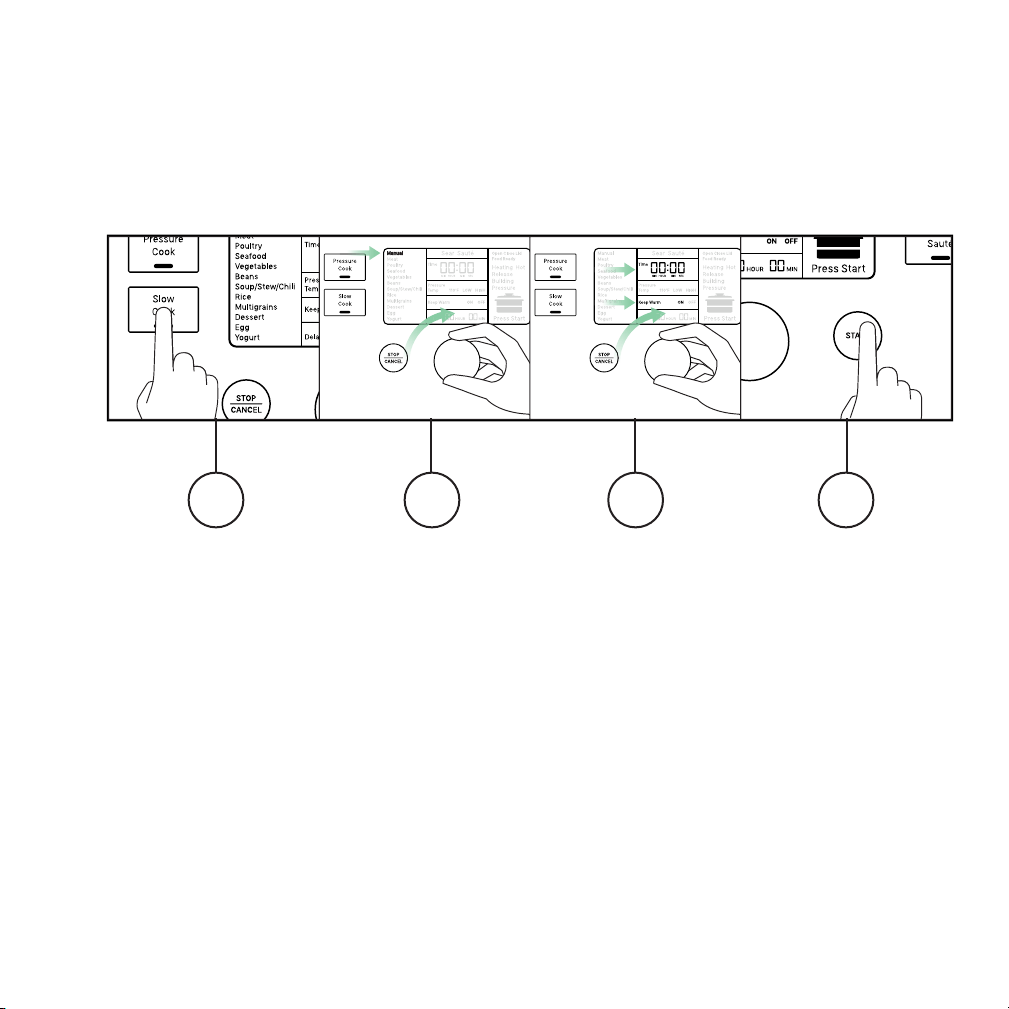
The Pressure Cooker defaults to Keep Warm after all cooking is completed.
This setting can also be turned on or off manually.
1. Press Slow Cook.
2. Use the dial and press down to select “Manual”.
3. Use the dial to set the time to 0 hours and 0 minutes. Press down to Select
“Keep Warm ON”.
4. Press the Start button and the “Keep Warm”function will begin immediately.
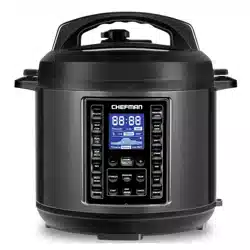
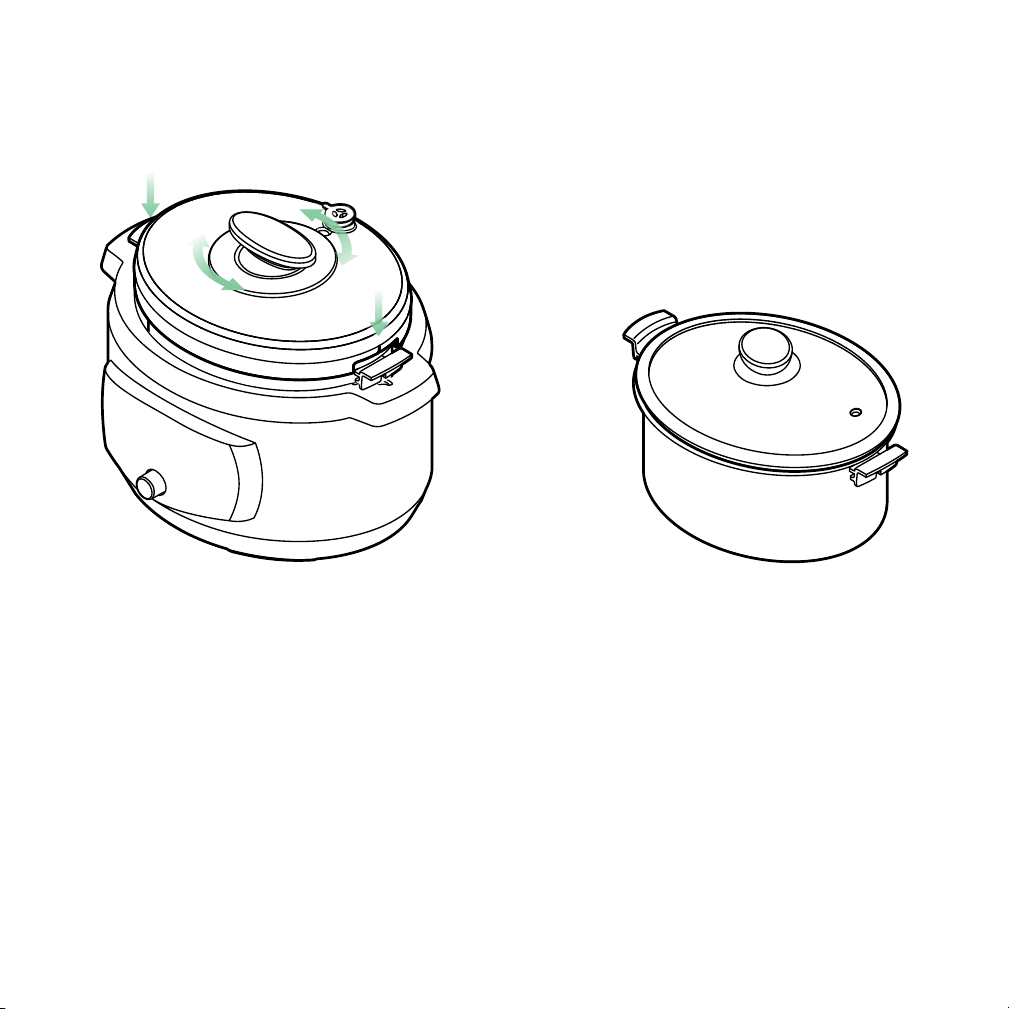
The Oval Pressure Cooker lid has an easy
one-hand open and lock twist-off handle.
The glass lid helps create an environment
for perfectly steamed or slow cooked
meals.
KEEP WARMLIDS
1 2 3 4
5
6
The Pressure Cooker defaults to Keep Warm after all cooking is completed.
This setting can also be turned on or off manually.
1. Press Slow Cook.
2. Use the dial and press down to select “Manual”.
3. Use the dial to set the time to 0 hours and 0 minutes. Press down to Select
“Keep Warm ON”.
4. Press the Start button and the “Keep Warm”function will begin immediately.
The Oval Pressure Cooker lid has an easy
one-hand open and lock twist-off handle.
The glass lid helps create an environment
for perfectly steamed or slow cooked
meals.
KEEP WARMLIDS
1 2 3 4

7
8
Q: What is pressure cooking?
A: Pressure cooking is a method of cooking in a sealed appliance that does not allow steam
to escape below a preset pressure. Because the boiling point of water increases as the
pressure increases,the pressure built up inside the Pressure Cooker allows the liquid in the
cooking pot to riseto a higher temperature before boiling, keeping moisture locked in
food.
Q: Why is the lid not closing?
A: The gasket (sealing ring) may not be properly secured to the appliance. Check that the
gasket is secured and not damaged in any way.
Q: Why is the lid not opening?
A: There may still be pressure inside the appliance. The lid cannot be opened until all
pressure has been released. Never attempt to force the lid open.
Q: Why is the red floating valve stuck in the popped-up position?
A: Sometimes food can cause the valve to stay raised. Release the pressure. Then, once
cooled, clean the inside of the Pressure Cooker lid.
Q: Why is the red floating valve stuck in the down position?
A: If there is not enough liquid or water, there will not be enough steam to build pressure.
Add more water or liquid. As a rule, use at least 1 cup of water when cooking.
FREQUENTLY ASKED QUESTIONS
1. Stop the Pressure Cooker. Unplug and let it cool before cleaning.
2. After each use, remove the pressure regulator knob and clean the opening in lid to
remove any food debris.
3. The measuring cup, rice spoon, ladle, steam rack, steam basket, glass lid and cooking pot
are all dishwasher safe.
4. Wipe the Pressure Cooker lid with a soft, damp, lint-free cloth.
5. Wipe the interior of the Pressure Cooker dry with a cloth to prevent rusting.
6. Wipe the exterior with a soft, damp cloth or sponge.
7. If washing by hand, do not use abrasive cleaning agents, scouring pads or powders when
cleaning any part of appliance.
8. Never immerse the Pressure Cooker and power cord in water or any other liquid.
9. Dry fully before storing.
• Read all instructions before using the Pressure Cooker.
• Do not touch hot surfaces.
• Never immerse the Pressure Cooker in water or any type of liquid.
• Do not use the Pressure Cooker if it has a damaged power cord.
• Use caution when moving the Pressure Cooker when it contains hot food and liquid.
• Do not operate the pressure cooker on a stovetop or in an oven.
CLEANING AND MAINTENANCE
SAFETY

10
READ ALL INSTRUCTIONS BEFORE USE
For your safety and continued enjoyment of this product, always read the instruction manual before using.
USER GUIDE
COOKING FORWARD™
Thanks for purchasing a Chefman
®
appliance.
Love to cook or rarely enter the kitchen? We’ve got you covered. Creating innovative
kitchen appliances and guides for all skill levels just so happens to be our expertise.
Saving time, reducing stress, and cooking more efficiently are just a few things to enjoy
as you create restaurant-quality meals using our products. You’ll embrace a new world of
culinary possibilities and cook with confidence. We like to call this the cooking forward
effect!
So go ahead, promote yourself from cook to head chef in your household. (You deserve it!)
From our kitchen to yours,
The Chefman
®
Team
9
Your family’s favorite foods don’t come in all the same shapes and sizes, so why
should your pressure cooker?
That’s where the Chefman
®
Multi-Function Pressure Cooker comes in.
This one-pot powerhouse holds up to 8Qt of food and is designed in a unique oval
shape to accommodate pot roasts, soups, desserts and more.
Pressure cook, slow cook, sear, sauté or steam your favorite foods to perfection and
reduce wait times by up to 70% compared to traditional stovetop cooking methods.
Become a meal prep master with the Pressure Cooker’s 12-hour delay start or a
potluck pro with its 24-hour keep warm feature.
Before you enjoy your first meal, please read this User Guide in full.
INTRODUCTION

11
12
13 Safety Instructions
15 Features
16 Operating Instructions
21 Cleaning and Maintenance
22 Troubleshooting/FAQ
24 Cooking Tips
25 Terms and Conditions
26 Chefman
®
Warranty Registration
CONTENTS
• Pressure cooking helps certain foods retain their vitamins and nutrients. A grain like
amaranth better retains its vitamin C and beta-carotene. Amaranth is the only grain out
of the entire grain family known to contain vitamin C.
• Pressure cooking reduces enzyme inhibitors and anti-nutrients, like phytic acid, which
can be found in grains and legumes. Phytic acid binds minerals and other important
nutrients in the digestive tract, preventing the body from using them. By reducing the
phytic acid content of grains and legumes, theirnutrient-availability and make them
easier to digest.
• Pressure cooking and fermenting helps reduce another anti-nutrient called lectin that’s
commonly found in certain veggies and legumes. Just make sure to soak your beans
before pressure cooking!
• When traditionally boiling veggies, water absorbs a lot of the vitamins and minerals.
Steaming veggies in the Pressure Cooker is more effective for keeping powerful
nutrients locked in.
• High altitudes affect pressure cooking. If you live in high-altitude areas, a general rule
of thumb is to increase cooking times by 5% for every 1,000 feet above a 2,000-foot
elevation.
• It’s a myth that different tastes are detected on different regions of our tongues. As you
chew, hot foods cool in your mouth increasing the taste intensity.
• The taste receptors on our tongues are most active when foods are between 86°-95°F.
• The air pressure in a basketball is equivalent to the amount of pressure in a typical
pressure cooker.
FUN FACTS

13
14
SAFETY INSTRUCTIONS SAFETY INSTRUCTIONS
IMPORTANT SAFEGUARDS IMPORTANT SAFEGUARDS
SHORT CORD INSTRUCTIONS
A short power supply cord is provided to reduce the hazards of entanglement or tripping
over a longer cord. Longer detachable power-supply cords or extension cords are available
and may be used if care is exercised in their use. If a longer detachable power-supply
extension cord is used:
1. The marked electrical rating of the extension cord should be at least as great as the
electrical rating of the appliance.
2. The cord should be arranged so that it will not drape over the countertop or tabletop
where it can be pulled on by children or tripped over unintentionally.
POWER CORD SAFETY TIPS
1. Never pull or yank on cord or the appliance.
2. To insert plug, grasp it firmly and guide it into outlet.
3. To disconnect appliance, grasp plug and remove it from outlet.
4. Before each use, inspect the power cord for cuts and/or abrasion marks. If any are found,
this indicates that the appliance should be serviced, and the power cord replaced. Please
contact Chefman Customer Support for assistance.
5. Never wrap the cord tightly around the appliance, as this could place undue stress on the
cord where it enters the appliance and cause it to fray and break.
DO NOT OPERATE APPLIANCE IF THE POWER CORD SHOWS ANY DAMAGE OR IF
APPLIANCE WORKS INTERMITTENTLY OR STOPS WORKING ENTIRELY.
When using electrical appliances, basic safety precautions should always be followed
including the following:
1. Read all instructions.
2. Do not touch hot surfaces. Protect skin by avoiding stainless-steel surfaces of appliance.
Use handles or knobs.
3. To protect against electrical shock do not immerse cord, plug, or Pressure Cooker in
water or other liquid.
4. Close supervision is necessary when Pressure Cooker is used by or near children.
5. Unplug from outlet when not in use and before cleaning. Allow to cool before putting
on or taking off parts.
6. Do not operate Pressure Cooker with a damaged cord or plug or after it malfunctions
o r h a s b e e n d a m a g e d i n a n y m a n n e r . I n s u c h c a s e s , c o n t a c t C h e f m a n C u s t o m e r S u p p o r t .
The use of accessory attachments not recommended by Chefman may cause injuries.
7. Do not use outdoors.
8. Do not let cord hang over edge of table or counter or touch hot surfaces.
9. Do not place on or near a gas or electric burner or in an oven.
10. Use extreme caution when moving this Pressure Cooker if it contains oil or other hot
liquids.
11. Always attach plug to Pressure Cooker first, then plug cord into the wall outlet. To
disconnect, turn off, then remove plug from wall outlet.
12. D o n o t u s e a p p l i a n ce f o r a ny th in g o t h e r t h a n i t s i n t e n d e d u s e.
13. Save these Instructions.
Do not place the appliance on a
stovetop or any other heatable
surface.
15
16
OPERATING INSTRUCTIONSFEATURES
BEFORE FIRST USE
1. Ensure you have all parts and accessories before discarding packaging.
2. Remove all packaging materials, such as plastic bags.
3. Read stickers and then carefully remove.
4. Wipe exterior and interior of appliance with a soft, damp, lint-free cloth.
5. Wash measuring cup, rice spoon, ladle, steam rack, steam basket, glass lid, pressure cooker lid
and cooking pot with a soapy, non-abrasive sponge. All parts and accessories except pressure
cooker lid and appliance are top-rack dishwasher safe.
6. Dry thoroughly.
7. Wipe away condensation and food debris on exterior of cooking pot before placing in
appliance.
8. Always place cooking pot in appliance before cooking.
HOW TO PRESSURE COOK
1. Plug in appliance. Appliance defaults to Pressure Cook.
2. To open pressure cooker lid, grip lock handle, turn clockwise and lift.
3. Add ingredients to cooking pot. Do not fill above 3/5 line on inside of pot.
NOTE: Wipe external surface of cooking pot clean before placing in appliance.
4. To close lid, grip handle and turn counter-clockwise.
5. Turn pressure regulator knob on lid to Sealing position.
NOTE: At this point, red floating valve is level with lid surface. Once pressure is built valve will
rise.
6. Use dial to select Manual or to scroll through food presets. Push in dial to select.
NOTE 1: To unselect, Press Stop/Cancel. NOTE 2: Food presets are specific to each cooking
function.
7. Use dial to select number of hours and minutes. Push dial to set.
8. Turn dial to select high or low pressure. Push dial to set.
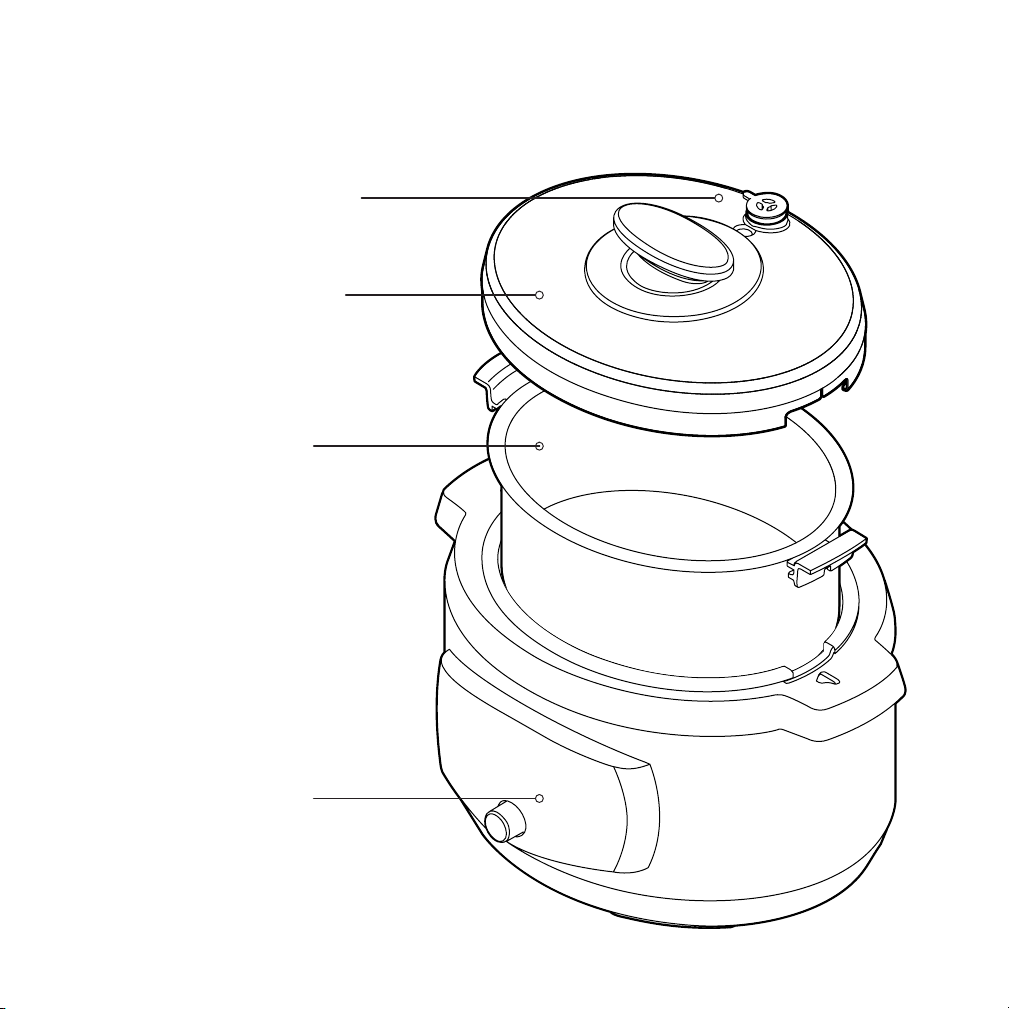
7. Rubber Gasket
8. Measuring Cup
9. Ladle
10. Rice Spoon
11. Steam Basket
12. Steam Rack
13. Power Cord
5
1
2
1. One Hand Twist-off Open and Lock
Pressure Cooker Lid
2. Removable Pressure Regulator Knob
3. Floating Valve
4. Removable Inner Cooking Pot with Handles
5. Control Panel
6. Glass Lid
6
7
3
8
4
9
10
13
11
12

15
16
OPERATING INSTRUCTIONSFEATURES
BEFORE FIRST USE
1. Ensure you have all parts and accessories before discarding packaging.
2. Remove all packaging materials, such as plastic bags.
3. Read stickers and then carefully remove.
4. Wipe exterior and interior of appliance with a soft, damp, lint-free cloth.
5. Wash measuring cup, rice spoon, ladle, steam rack, steam basket, glass lid, pressure cooker lid
and cooking pot with a soapy, non-abrasive sponge. All parts and accessories except pressure
cooker lid and appliance are top-rack dishwasher safe.
6. Dry thoroughly.
7. Wipe away condensation and food debris on exterior of cooking pot before placing in
appliance.
8. Always place cooking pot in appliance before cooking.
HOW TO PRESSURE COOK
1. Plug in appliance. Appliance defaults to Pressure Cook.
2. To open pressure cooker lid, grip lock handle, turn clockwise and lift.
3. Add ingredients to cooking pot. Do not fill above 3/5 line on inside of pot.
NOTE: Wipe external surface of cooking pot clean before placing in appliance.
4. To close lid, grip handle and turn counter-clockwise.
5. Turn pressure regulator knob on lid to Sealing position.
NOTE: At this point, red floating valve is level with lid surface. Once pressure is built valve will
rise.
6. Use dial to select Manual or to scroll through food presets. Push in dial to select.
NOTE 1: To unselect, Press Stop/Cancel. NOTE 2: Food presets are specific to each cooking
function.
7. Use dial to select number of hours and minutes. Push dial to set.
8. Turn dial to select high or low pressure. Push dial to set.
7. Rubber Gasket
8. Measuring Cup
9. Ladle
10. Rice Spoon
11. Steam Basket
12. Steam Rack
13. Power Cord
5
1
2
1. One Hand Twist-off Open and Lock
Pressure Cooker Lid
2. Removable Pressure Regulator Knob
3. Floating Valve
4. Removable Inner Cooking Pot with Handles
5. Control Panel
6. Glass Lid
6
7
3
8
4
9
10
13
11
12

17
18
9. Keep Warm automatically runs after all cooking functions but can be turned off. Use dial
to turn off, if desired. NOTE: Keep Warm can run up to 24 hours. Please use proper food
safety.
10. Select Delay Start, if desired. Use dial to select number of hours and minutes. Push dial to
set.
NOTE: Delay Start can run up to 12 hours. Please follow proper food safety.
11. Press Start.
12. Cooking pot icon displays on screen gradually filling in as pressure builds. Once appliance
is at full pressure, icon will be completely blue and red floating valve will pop up.
13. Pressure cooking begins and selected time counts down.
14. Once pressure cooking time is complete, Keep Warm timer, if selected, will begin. “Food
Ready!” will display on screen as well as “Release Pressure.”
15. Once pressure cooking time is complete, “Release Pressure” displays on screen. Release
pressure by using a quick or natural release method.
A. Quick Release: Use an oven mitt or long-handled spoon to turn pressure regulator
knob to the Venting position to let steam out until the floating valve drops down.
NOTE: Keep hands and face away from hole on top of the lid where steam escapes.
Steam is hot!
B. Natural Release: Allow appliance to cool down naturally until floating valve drops
down.
NOTE: This may take 15 minutes to an hour or more depending on the amount of food
being cooked.
16. Do not attempt to open lid until pressure is completely released. As a safety precaution,
lid is locked while pot is pressurized. Once red floating valve drops and pressure is
released, lid is safe to open.
17. Remove lid, serve and enjoy!
HOW TO SLOW COOK
*Use glass lid.
1. Press Slow Cook button.
2. Add ingredients to cooking pot. Do not fill above MAX line on inside of cooking pot.
NOTE: Wipe external surface of cooking pot clean before placing in appliance.
3. Use dial to select Manual or to scroll through food presets. Push in dial to select.
NOTE: Food presets are specific to each cooking function.
4. Use dial to select number of hours and minutes. Push dial to set.
NOTE: To unselect, press Stop/Cancel.
5. Turn dial to select high or low temperature. Push dial to set.
6. Keep Warm automatically runs after all cooking functions but can be turned off.
Use dial to turn off, if desired.
NOTE: Keep Warm can run up to 24 hours. Please use proper food safety.
7. Select Delay Start, if desired. Use dial to select number of hours and minutes. Push dial to
set.
NOTE: Delay Start can run up to 12 hours. Please follow proper food safety.
8. Press Start.
9. Slow Cook begins and selected time counts down.
10. Once slow cooking time is complete, Keep Warm, if selected, will begin. “Food Ready!”
will display on screen.
11. Remove lid, serve and enjoy!
OPERATING INSTRUCTIONSOPERATING INSTRUCTIONS

19
20
HOW TO STEAM
*Use glass lid.
1. Press Steam button.
2. Pour at least 2 cups of water into cooking pot.
3. Add ingredients to steam rack or steam basket and insert into cooking pot.
4. Cover with glass lid.
5. Use dial to select Manual or to scroll through food presets. Push in dial to select.
NOTE: Food presets are specific to each cooking function.
6. Use dial to select number of hours and minutes. Push in dial to set.
7. Keep Warm automatically runs after all cooking functions but can be turned off. Use dial to
turn off, if desired.
NOTE: Keep Warm can run up to 24 hours. Please use proper food safety.
8. Select Delay Start, if desired. Use dial to select number of hours and minutes. Push in dial
to set.
9. Press Start.
10. “Heating” displays until steam builds. Then steaming time counts down.
11. Once steaming time is complete, Keep Warm, if selected, will begin. “Food ready!” will
display on screen.
12. Remove lid, serve and enjoy!
HOW TO SEAR/SAUTÉ
*Use glass lid or leave cooker uncovered.
1. Press Sear/Sauté button.
2. Add ingredients to cooking pot. Do not fill above MAX line on inside of cooking pot.
3. Use dial to scroll between Sear and Sauté. Push in dial to select.
NOTE: Sear is a higher temerature than sauté.
4. Use dial to select number of hours and minutes. Push in dial to set.
5. Keep Warm automatically runs after all cooking functions but can be turned off.
Use dial to turn off, if desired.
NOTE: Keep Warm runs up to 24 hours. Please use proper food safety.
6. Press Start. Sear or Sauté time counts down.
7. Once sear/sauté time is complete, Keep Warm timer, if selected, will begin. “Food Ready!”
will display on screen.
8. Serve and enjoy!
HOW TO SET KEEP WARM
The Pressure Cooker defaults to a warming mode after all cooking options are completed.
This setting can also be turned on or off manually.
1. Press Slow Cook button.
2. Use dial to select Manual.
3. Use dial to set time to 0 hours and 0 minutes. Set Keep Warm on.
4. Press Start button and Keep Warm will immediately start.
OPERATING INSTRUCTIONSOPERATING INSTRUCTIONS

21
22
1. Turn off appliance, unplug, and let cool before cleaning.
2. After each use, remove pressure regulator knob and clean opening in lid to remove any
food debris.
3. The measuring cup, rice spoon, ladle, steam rack, steam basket, glass lid and cooking pot
are all top-rack dishwasher safe.
4. Wipe Pressure Cooker lid with a soft, damp, lint-free cloth.
5. Wipe interior of appliance dry with a cloth to prevent rusting.
6. Wipe exterior of appliance with a soft, damp cloth or sponge.
7. If washing by hand, do not use abrasive cleaning agents, scouring pads or powders when
cleaning any part of appliance or accessories.
8. Never immerse Pressure Cooker and power cord in water or any other liquid.
9. Dry fully before storing.
CLEANING AND MAINTENANCE TROUBLESHOOTING/FAQS
• Q: What is pressure cooking
A: It is a method of cooking in a sealed appliance that does not allow steam to escape below
a preset pressure level. Because the boiling point of water increases as the pressure increases,
the pressure built up inside the Pressure Cooker allows the liquid in the cooking pot to rise to a
higher temperature before boiling, keeping moisture locked in food.
• Q: Why does the lid not close?
A: The gasket (sealing ring) may not be properly secured to the Pressure Cooker lid. Check
that the gasket is secured and not damaged in any way.
• Q: Why is the red floating valve stuck in the popped-up position?
A: Sometimes food can cause the valve to stay raised. Release the pressure. Then, once
cooled, clean the inside of the Pressure Cooker lid.
• Q: When opening the lid, why is the cooking pot stuck to it?
A: This may be caused by a vacuum effect due to cooling. To get the pot to separate from the
lid, move the pressure regulator knob to Venting. Then, remove the lid and the cooking pot
should stay inside the Pressure Cooker.
• Q: Why is steam coming from the rim of the lid during pressure cooking?
A: Food may be stuck to the gasket or the gasket may be torn or damaged. Check that the
gasket is clean and in place or if it needs to be replaced.
• Q: Why is steam continuously coming out of the floating valve?
A: Pressure regulator knob may be in the Venting position. As pressure is building, floating
valve will omit steam until pressure is reached.
• Q: Why is the red floating valve not rising?
A: If there is not enough liquid or water, there will not be enough steam to build pressure. Add
more water or liquid. As a rule, use at least 1 cup of water when pressure cooking.
• Q: Why is the appliance’s screen blank after plugging the appliance in?
A: There may be a bad power connection, no power or the appliance’s fuse may have blown. Try
a different power outlet to determine whether it is the outlet or appliance that’s causing the pow-
er issue. If the issue is the Pressure Cooker, unplug it and contact Chefman Customer Support.

23
24
TROUBLESHOOTING/FAQS COOKING TIPS
• Always check that the cooking pot is in the Pressure Cooker before adding in food or liquid.
• When pressure cooking do not exceed the 3/5 line on the inside of the cooking pot.
• When pressure cooking foods that foam, froth or bubble, such as rice, pasta and beans, fill the
cooking pot halfway or less.
• When pressure cooking, use high pressure for meat and pasta and low pressure for delicate
foods like scallops.
• Use the Steam function to make desserts like cheesecakes and lava cakes.
• Do not fill the Pressure Cooker more than the two-thirds full of food or pack food too tightly
into the cooking pot. Doing so may prevent the Pressure Cooker from operating properly and
affect how the food cooks.
• Cut food into uniform pieces so that it cooks evenly.
• To properly use a food thermometer with meat, place the thermometer in the thickest part of
the meat, avoiding bone or fat. When the food is irregularly shaped, like a roast beef, check
the temperature in several spots.
• Using a little oil, sear poultry and meats before pressure cooking, then deglaze the pot with
liquid to intensify flavor.
• Add dairy ingredients at the very end of the cooking cycle because dairy willt curdle under
pressure.
• Q: What does it mean when the screen displays an “E03” error code?
A: Food may be burned on the bottom of the cooking pot indicating the appliance is over-
heating and malfunctioning. Turn off the Pressure Cooker and once the cooking pot has
completely cooled, clean and remove burnt food.
• Q: What does it mean when the screen displays an “E01,” “E02” or “E04” error code?
A: The Pressure Cooker is malfunctioning. Turn off the Pressure Cooker and unplug it.
Contact Chefman Customer Support.
• Q: Why are there clicking and crackling sounds coming from the appliance while it is
cooking?
A: There may be condensation or bits of food that were splattered on the cooking pot
before it was placed in the appliance. Wipe the external surface of the cooking pot before
inserting it into the Pressure Cooker.

25
26
Our products are backed by a limited 1-year warranty. To register, follow the instructions on the Chefman
®
Warranty Registration page in this User Guide.
We offer a limited 1-year warranty from the date of purchase. This warranty is void without proof of purchase
within the USA, Canada or Mexico. Service centers and retail stores do not have the right to alter or change
the Terms & Conditions of this warranty.
WHAT THE WARRANTY COVERS
• Manufacturer Defects
Chefman
®
products are warranted against defects in material and workmanship for a period of 1 year from
the date of purchase, when used in accordance with the Chefman
®
User Guide.
• Qualified Replacements
If your product does not work as it should, we will send you a new one. If the product is no longer available,
we will replace it with an identical product or one that is comparable.
THIS WARRANTY DOES NOT COVER
• Misuse - Damage that occurs from neglectful or improper use of products; damage that occurs as a result of
usage with incompatible voltage. See Safety Instructions for information on proper use.
• Poor Maintenance - General lack of proper care. See Cleaning & Maintenance Instructions for information on
proper maintenance.
• Commercial Use - Damage that occurs from commercial use.
• Altered Products - Damage that occurs from alterations or modifications by any entity other than
Chefman
®
; removal of rating label.
• Catastrophic Events - Damage that occurs from fire, floods or natural disasters.
• Loss of Interest - Claims of loss of interest or enjoyment.
Register your product to extend your warranty for 3 months.
What do I need to register my product?
•Contact Information
•Model Number
•Proof of Purchase
(i.e. online confirmation, receipt, gift receipt)
•Date code
How do I register my product?
We offer 2 convenient ways to access the Chefman
®
registration form:
1. Visit chefman.com/register.
2. Scan the QR code below to access the form:
Have a question?
Please reach out to us at Chefman.com/contact.
Need more help?
We’re here for you! Contact us at customersupport@chefman.com or 888.315.6553 Monday-Friday.
OTHER LIMITATIONS: ALL WARRANTIES OF ANY KIND WHATSOEVER, EXPRESS, IMPLIED AND STATUTORY, ARE HEREBY DISCLAIMED. ALL IMPLIED
WARRANTIES OF MERCHANTABILITY AND FITNESS FOR A PARTICULAR PURPOSE ARE HEREBY DISCLAIMED, PROVIDED THAT IF ANY IMPLIED
WARRANTIES OF ANY KIND IS REQUIRED BY ANY JURISDICTION, INCLUDING MERCHANTABILITY AND FITNESS FOR A PARTICULAR PURPOSE, THE
DURATION OF SUCH IMPOSED IMPLIED WARRANTY IS LIMITED TO ONE (1) YEAR. THIS WARRANTY DOES NOT COVER, AND CHEFMAN® SHALL NOT BE
LIABLE, FOR INCIDENTAL, INDIRECT, SPECIAL OR CONSEQUENTIAL DAMAGES, INCLUDING WITHOUT LIMITATION, DAMAGE TO, OR LOSS OF USE OF THE
PRODUCT, OR LOST SALES OR PROFITS OR DELAY OR FAILURE TO PREFORM THIS WARRANTY OBLIGATION. THE REMEDIES PROVIDED HEREIN ARE THE
EXCLUSIVE REMEDIES UNDER THIS WARRANTY, WHETHER BASED ON CONTRACT, TORT OR OTHERWISE.
This Warranty gives you specific legal rights, and you may also have other rights that vary from state to state or Province to Province. Some states or Provinces do not
allow the exclusions or limitations set forth in this Warranty, so the above limitations or exclusions may not apply to you depending on the jurisdiction of purchase.
Chefman® is a registered trademark of RJ BRANDS, LLC. ETL
CM
is a registered certification mark of Intertek Testing Services NA, Inc.
TERMS & CONDITIONS
Limited Warranty
CHEFMAN
®
WARRANTY REGISTRATION
MADE IN CHINA/FABRIQUE EN CHINE
AC ONLY/ AC SEULEMENT
DATE CODE:
ACCESS CODE:
Model/Modele: RJ25-C
Conveyor toaer
120v~60hz 1800W
CONFORMS TO UL STD. 1026
CERTIFIED TO CSA STD.C22.2 No.64
CAUTION: DO NOT IMMERSE IN WATER
ATTENTION: NE PAS PLONGER DANS L’EAU
WARNING: TO PREVENT ELECTRIC SHOCK,
UNPLUG BEFORE CLEANING
PRÉAVIS: POUR ÉVITER LES CHOCS ÉLECTRIQUES,
DÉBRANCHEZ L’APPAREIL AVANT DE L’UTILISER
READ INSTRUCTIONS BEFORE USING
LISEZ LES INSTRUCTIONS AVANT DE L’UTILISER
HOUSEHOLD USE ONLY
POUR USAGE DOMESTIQUE SEULEMENT
0000000
0000
XXXXXXXX
27
EXTRA LARGE OVAL
MULTI-FUNCTION PRESSURE COOKER
RECIPE BOOK

27
EXTRA LARGE OVAL
MULTI-FUNCTION PRESSURE COOKER
RECIPE BOOK
28
29
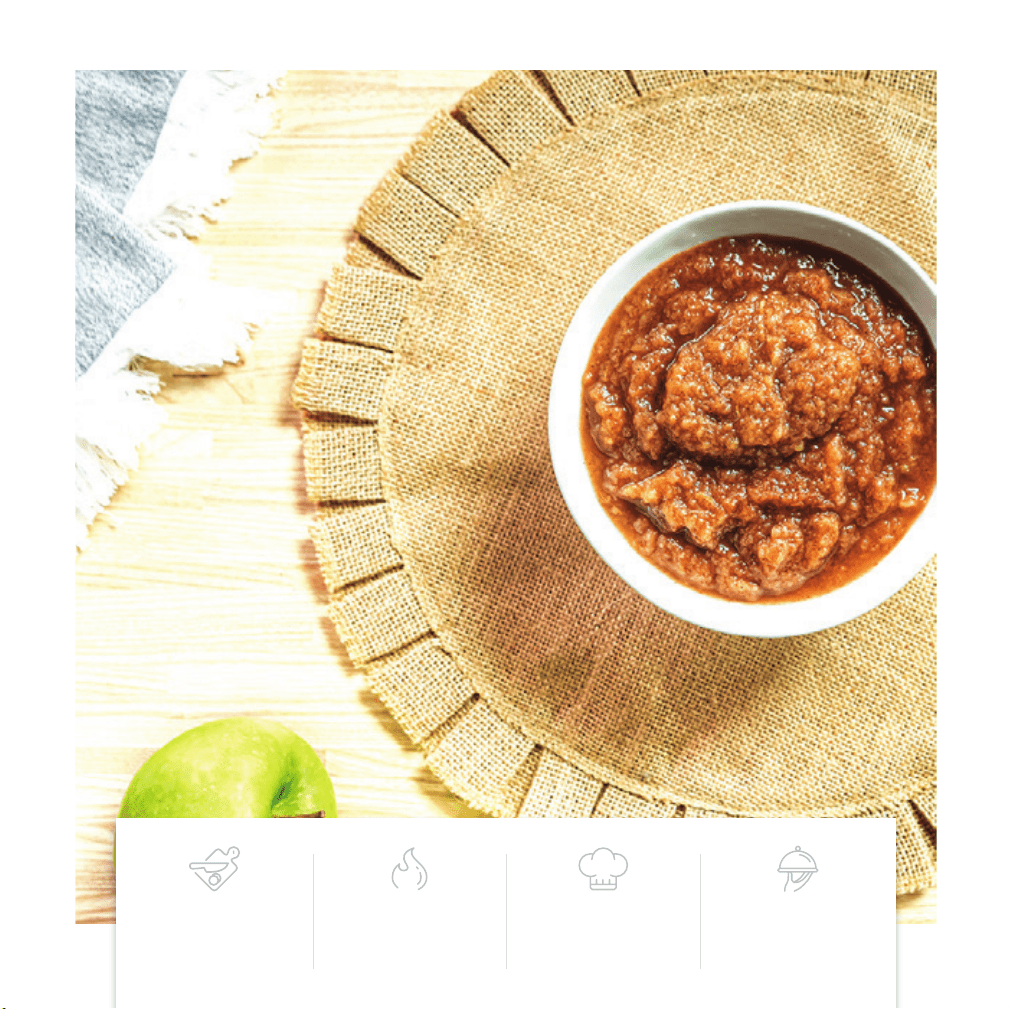
APPLE SAUCE
1. Add the apples, lemon juice, sugar, cinnamon and water
in the cooking pot. Stir to combine.
2. Close and lock the lid. Set to pressure cook on high for
10 minutes.
3. When the time expires, release the pressure and remove
the lid.
4. Stir until the texture is smooth and all ingredients are
combined.
5. Refrigerate to cool or serve immediately.
• 8 Granny Smith apples,
peeled, cored, chopped
• 2 lemons, juiced (about 6
tbsp)
• ¼ cup sugar
• 3 tbsp cinnamon
• ¼ cup water
INGREDIENTS
PREP TIME COOK TIME SKILL LEVEL SERVINGS
15 min 10 min EASY 8-12

28
29
APPLE SAUCE
1. Add the apples, lemon juice, sugar, cinnamon and water
in the cooking pot. Stir to combine.
2. Close and lock the lid. Set to pressure cook on high for
10 minutes.
3. When the time expires, release the pressure and remove
the lid.
4. Stir until the texture is smooth and all ingredients are
combined.
5. Refrigerate to cool or serve immediately.
• 8 Granny Smith apples,
peeled, cored, chopped
• 2 lemons, juiced (about 6
tbsp)
• ¼ cup sugar
• 3 tbsp cinnamon
• ¼ cup water
INGREDIENTS
PREP TIME COOK TIME SKILL LEVEL SERVINGS
15 min 10 min EASY 8-12
30
31
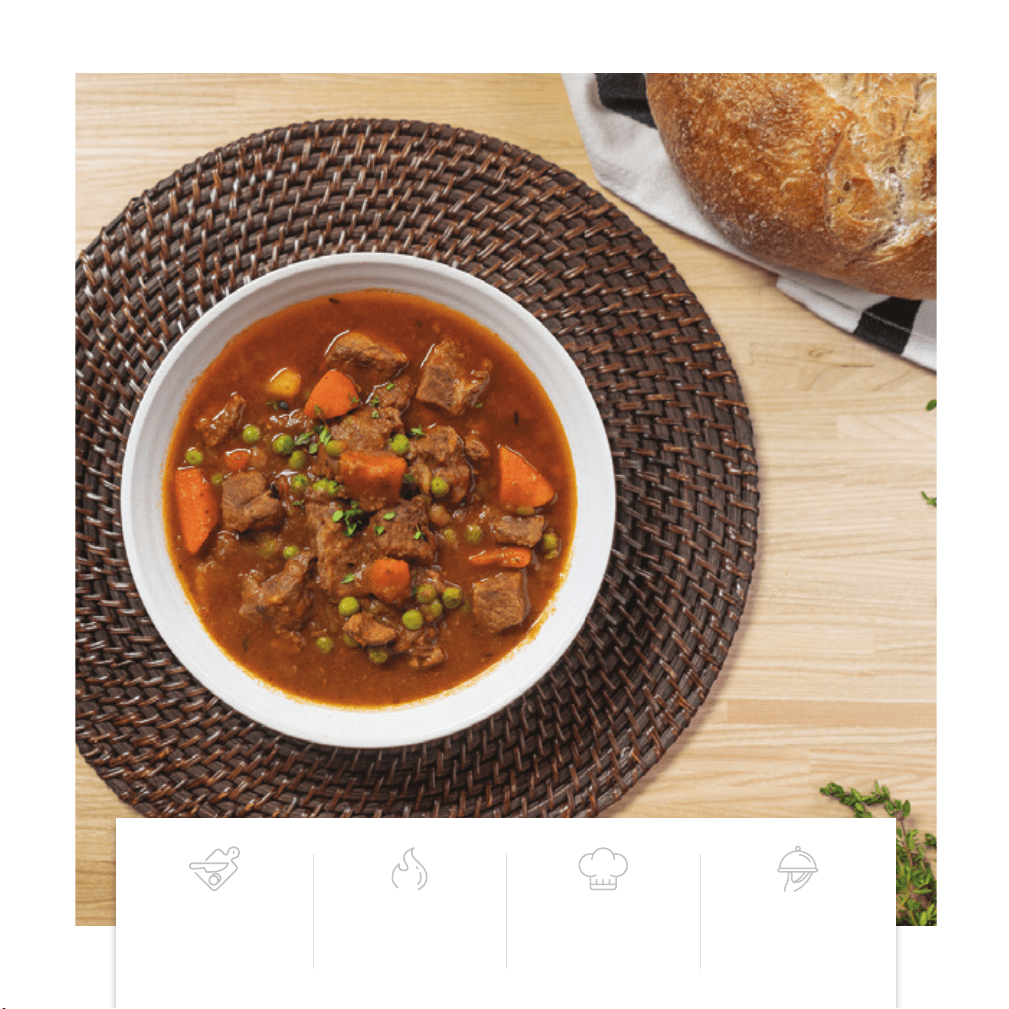
BEEF STEW
1. Put the olive oil into the cooking pot. Set to sauté for
20 minutes.
2. When the oil is hot and shiny add in the cut chuck roast
and season with salt and black pepper. Stir to combine.
3. Let the meat brown for 5 minutes.
4. Add in the carrots and the russet potatoes.Cook the
chuck roast, carrots and potatoes until slightly tender,
about 5 minutes.
5. Add the onion and garlic to the cooking pot and cook
until the onions begin to sweat, about 3 minutes.’
6. Add in the tomato paste. Cook the vegetables and
chuck roast with the tomato paste while stirring and
scraping the bottom of the pot for about 5 minutes.
7. Add in the Worcestershire sauce, thyme and bay leaves.
Stir to combine.
8. Add in the beef broth and stir to combine.
9. Let sauté time expire if it has not done so already.
10. Close and lock the lid. Set to pressure cook on high for
35 minutes.
11. After the time has expired and the pressure has
been released, open lid. Stir in the frozen peas. Serve
immediately.
• 4 tbsp olive oil
• 4 lb boneless chuck roast,
cut into ½-inch cubes
(can be purchased as
“stew meat”)
• 2 tbsp salt
• 1 tbsp black pepper
• 6 large carrots, peeled,
chopped
• 2 large russet potatoes,
peeled, chopped
• 2 large yellow onions,
chopped
• 4 cloves garlic, thinly sliced
• ⅓ cup tomato paste
• 2 tbsp Worcestershire
sauce
• 2 tsp fresh thyme, minced
• 2 bay leaves
• 6 cups beef broth
• 3 cups of frozen peas
INGREDIENTS
PREP TIME COOK TIME SKILL LEVEL SERVINGS
35 min 35 min MEDIUM 12

30
31
BEEF STEW
1. Put the olive oil into the cooking pot. Set to sauté for
20 minutes.
2. When the oil is hot and shiny add in the cut chuck roast
and season with salt and black pepper. Stir to combine.
3. Let the meat brown for 5 minutes.
4. Add in the carrots and the russet potatoes.Cook the
chuck roast, carrots and potatoes until slightly tender,
about 5 minutes.
5. Add the onion and garlic to the cooking pot and cook
until the onions begin to sweat, about 3 minutes.’
6. Add in the tomato paste. Cook the vegetables and
chuck roast with the tomato paste while stirring and
scraping the bottom of the pot for about 5 minutes.
7. Add in the Worcestershire sauce, thyme and bay leaves.
Stir to combine.
8. Add in the beef broth and stir to combine.
9. Let sauté time expire if it has not done so already.
10. Close and lock the lid. Set to pressure cook on high for
35 minutes.
11. After the time has expired and the pressure has
been released, open lid. Stir in the frozen peas. Serve
immediately.
• 4 tbsp olive oil
• 4 lb boneless chuck roast,
cut into ½-inch cubes
(can be purchased as
“stew meat”)
• 2 tbsp salt
• 1 tbsp black pepper
• 6 large carrots, peeled,
chopped
• 2 large russet potatoes,
peeled, chopped
• 2 large yellow onions,
chopped
• 4 cloves garlic, thinly sliced
• ⅓ cup tomato paste
• 2 tbsp Worcestershire
sauce
• 2 tsp fresh thyme, minced
• 2 bay leaves
• 6 cups beef broth
• 3 cups of frozen peas
INGREDIENTS
PREP TIME COOK TIME SKILL LEVEL SERVINGS
35 min 35 min MEDIUM 12
32
33
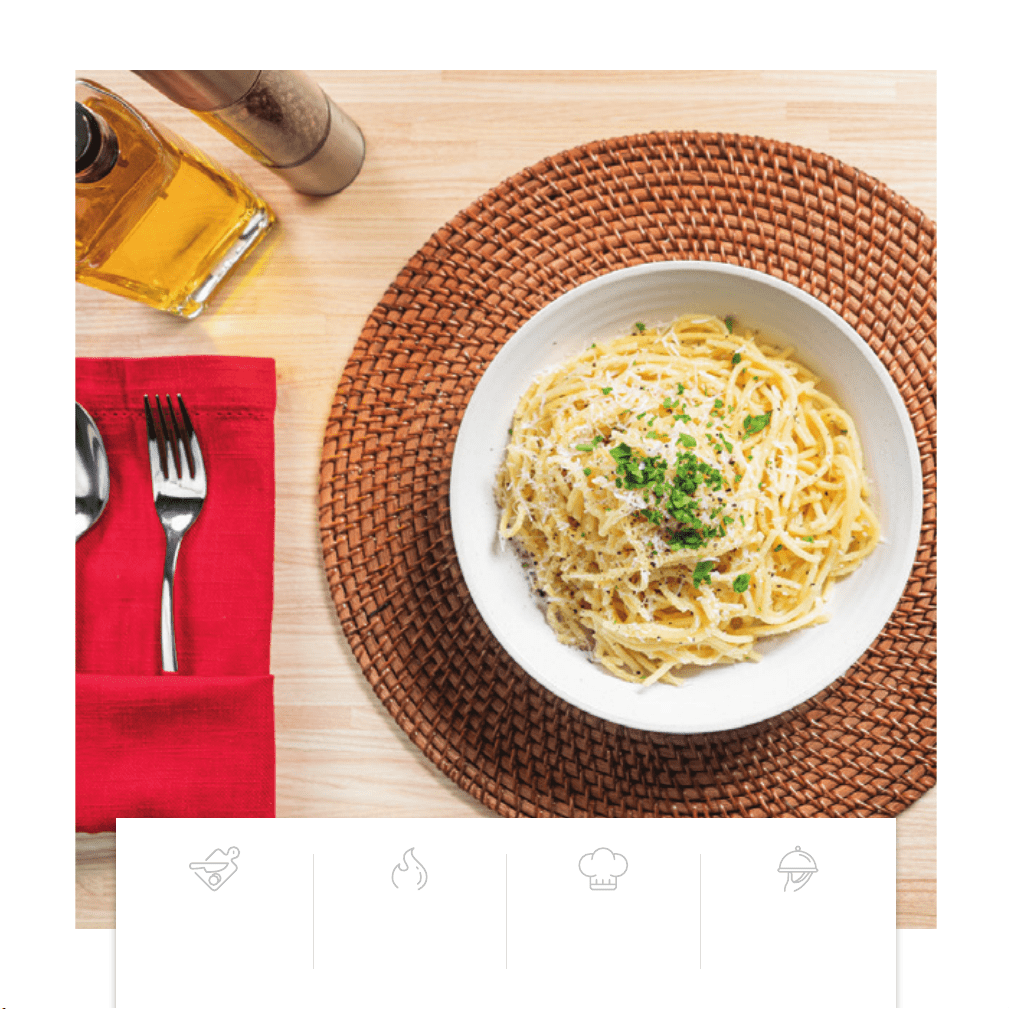
CACIO E PEPE
1. Combine spaghetti, water and extra virgin olive oil in the
cooking pot.
2. Close and lock lid. Set to pressure cook on high for 5
minutes.
3. When time has expired, release pressure and remove lid.
4. Stir in Pecorino cheese and ground black pepper. Keep
stirring until all excess water has evaporated.
5. Serve immediately.
• 2 lbs spaghetti
• 8 cups water
•
½
cup extra virgin olive oil
• 4 cups grated Pecorino
Romano cheese
• 1 tbsp freshly ground
black pepper
INGREDIENTS
PREP TIME COOK TIME SKILL LEVEL SERVINGS
2 min 5 min EASY 8-12

32
33
CACIO E PEPE
1. Combine spaghetti, water and extra virgin olive oil in the
cooking pot.
2. Close and lock lid. Set to pressure cook on high for 5
minutes.
3. When time has expired, release pressure and remove lid.
4. Stir in Pecorino cheese and ground black pepper. Keep
stirring until all excess water has evaporated.
5. Serve immediately.
• 2 lbs spaghetti
• 8 cups water
•
½
cup extra virgin olive oil
• 4 cups grated Pecorino
Romano cheese
• 1 tbsp freshly ground
black pepper
INGREDIENTS
PREP TIME COOK TIME SKILL LEVEL SERVINGS
2 min 5 min EASY 8-12
34
35
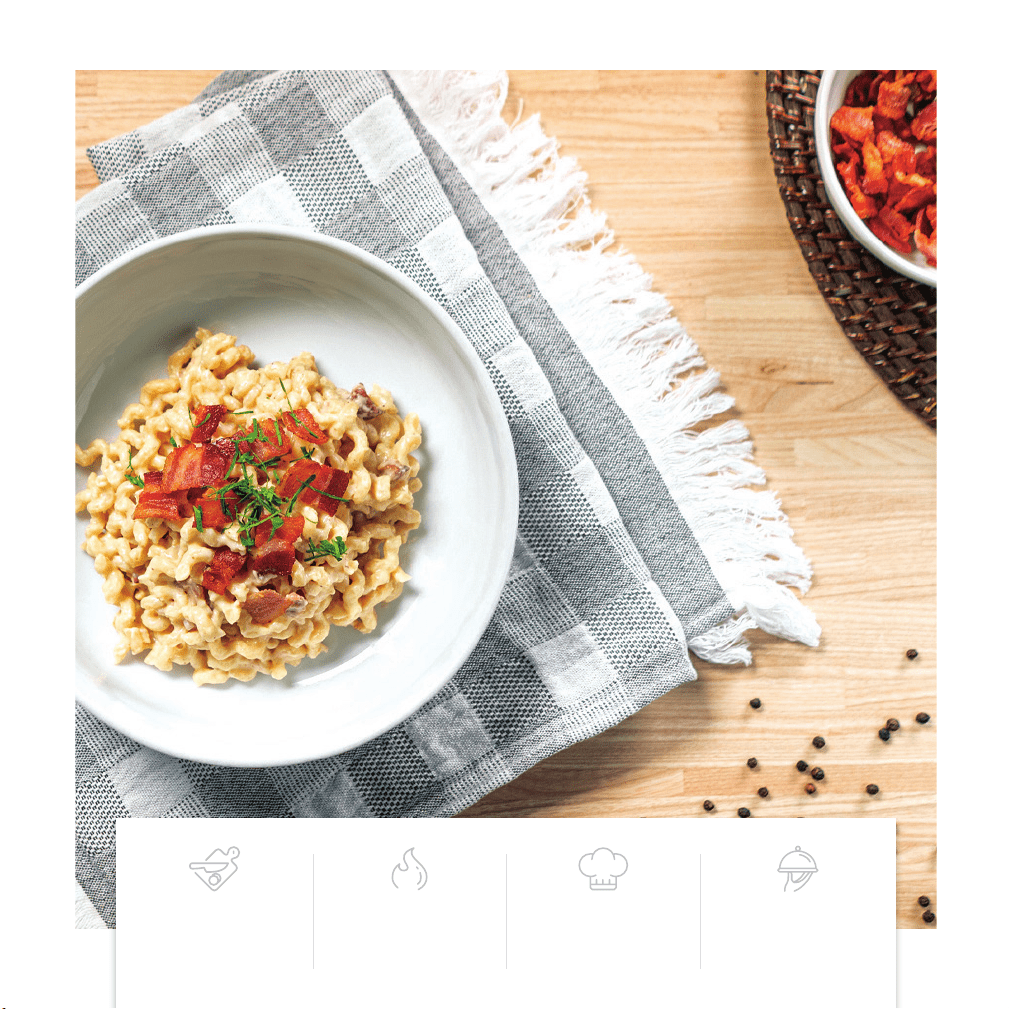
CARBONARA PASTA
1. Add the bacon in the cooking pot. Set to sauté for
25 minutes.
2. Cook the bacon until crispy, about 15 minutes. Using a
slotted spoon, remove the bacon and transfer to a paper
towel-lined plate to catch excess grease.
3. Discard about 2/3 of the bacon grease.
4. Add the chopped onion and finely chopped garlic into the
cooking pot. Stir occasionally until timer expires.
5. Add the long fusilli and water. Stir to coat.
6. Close and lock lid, then set to pressure cook on high for 5
minutes.
7. While the pasta is cooking, in a medium bowl, whisk
together egg yolks, half and half or whole milk, Pecorino
Romano cheese and ground black pepper.
8. When the timer expires, release the pressure, open the lid
and turn off.
9. Pour the egg mixture and cooked bacon into the pasta
and stir until it is fully incorporated.
10. Garnish with extra Pecorino Romano cheese and parsley.
11. Serve immediately.
• 2 lbs bacon, chopped
• 2 large yellow onions,
chopped
• 8 cloves garlic, finely
chopped
• 2 lbs long fusilli
• 8 cups water
• 12 egg yolks
• 1 cup half and half or whole
milk
• 3 cups Pecorino
Romano cheese, plus
more for garnish
• 1 tsp freshly ground black
pepper
• 1 bunch parsley, chopped,
for garnish
INGREDIENTS
PREP TIME COOK TIME SKILL LEVEL SERVINGS
30 min 5 min EASY 8-12

34
35
CARBONARA PASTA
1. Add the bacon in the cooking pot. Set to sauté for
25 minutes.
2. Cook the bacon until crispy, about 15 minutes. Using a
slotted spoon, remove the bacon and transfer to a paper
towel-lined plate to catch excess grease.
3. Discard about 2/3 of the bacon grease.
4. Add the chopped onion and finely chopped garlic into the
cooking pot. Stir occasionally until timer expires.
5. Add the long fusilli and water. Stir to coat.
6. Close and lock lid, then set to pressure cook on high for 5
minutes.
7. While the pasta is cooking, in a medium bowl, whisk
together egg yolks, half and half or whole milk, Pecorino
Romano cheese and ground black pepper.
8. When the timer expires, release the pressure, open the lid
and turn off.
9. Pour the egg mixture and cooked bacon into the pasta
and stir until it is fully incorporated.
10. Garnish with extra Pecorino Romano cheese and parsley.
11. Serve immediately.
• 2 lbs bacon, chopped
• 2 large yellow onions,
chopped
• 8 cloves garlic, finely
chopped
• 2 lbs long fusilli
• 8 cups water
• 12 egg yolks
• 1 cup half and half or whole
milk
• 3 cups Pecorino
Romano cheese, plus
more for garnish
• 1 tsp freshly ground black
pepper
• 1 bunch parsley, chopped,
for garnish
INGREDIENTS
PREP TIME COOK TIME SKILL LEVEL SERVINGS
30 min 5 min EASY 8-12
36
37
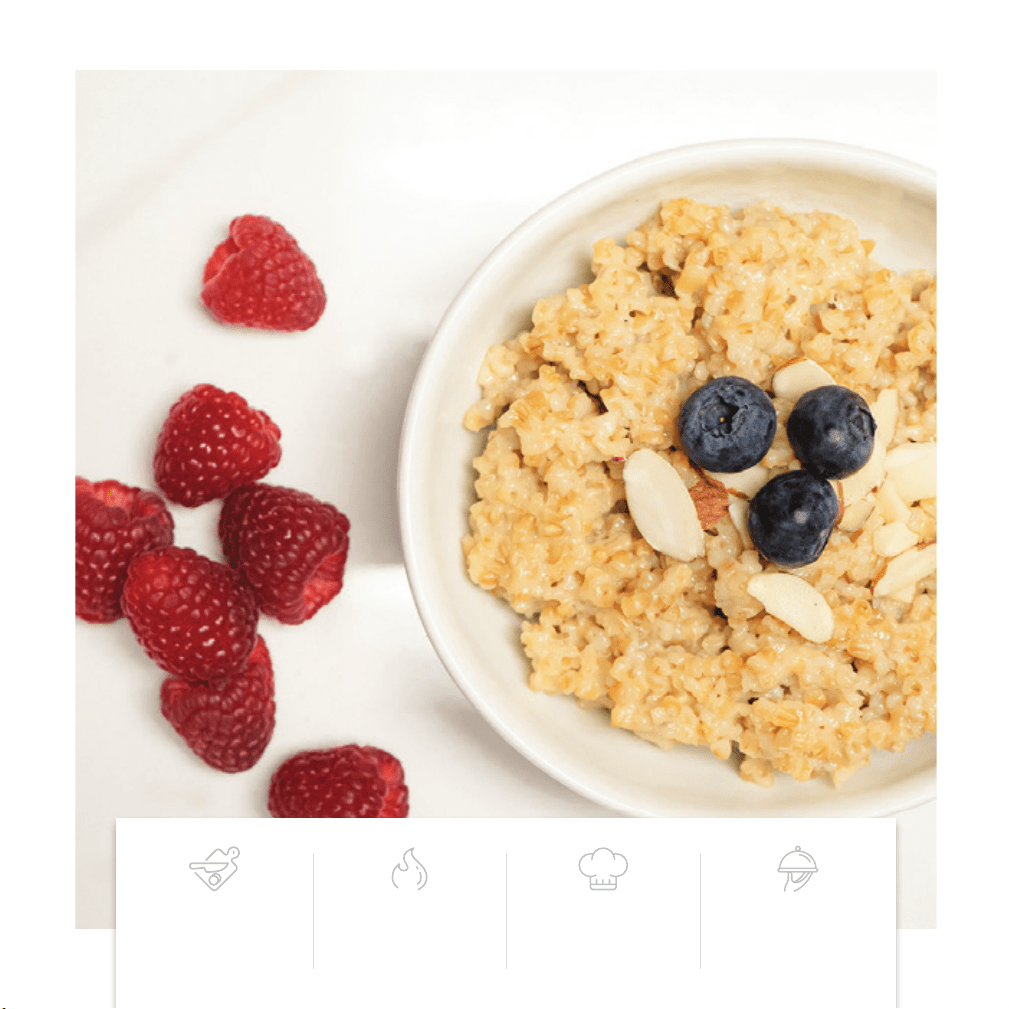
CINNAMON STEEL-CUT OATMEAL
1. Combine steel-cut oats, milk, brown sugar and cinnamon
in cooking pot and stir to combine ingredients.
2. Close and lock the lid. Set to pressure cook on high for
10 minutes.
3. When the time has expired, release the pressure and
remove the lid.
4. Stir to combine and serve immediately with desired
toppings.
• 4 cups steel-cut oats
• 12 cups 2% milk or almond
milk
• ½
cup brown sugar
• 4 whole cinnamon sticks,
or 2 tbsp ground cinnamon
• Mixed berries, for garnish,
optional
• Maple syrup, for garnish,
optional
• Toasted pecans, for
garnish, optional
INGREDIENTS
PREP TIME COOK TIME SKILL LEVEL SERVINGS
2 min 10 min EASY 12

36
37
CINNAMON STEEL-CUT OATMEAL
1. Combine steel-cut oats, milk, brown sugar and cinnamon
in cooking pot and stir to combine ingredients.
2. Close and lock the lid. Set to pressure cook on high for
10 minutes.
3. When the time has expired, release the pressure and
remove the lid.
4. Stir to combine and serve immediately with desired
toppings.
• 4 cups steel-cut oats
• 12 cups 2% milk or almond
milk
• ½
cup brown sugar
• 4 whole cinnamon sticks,
or 2 tbsp ground cinnamon
• Mixed berries, for garnish,
optional
• Maple syrup, for garnish,
optional
• Toasted pecans, for
garnish, optional
INGREDIENTS
PREP TIME COOK TIME SKILL LEVEL SERVINGS
2 min 10 min EASY 12
38
39
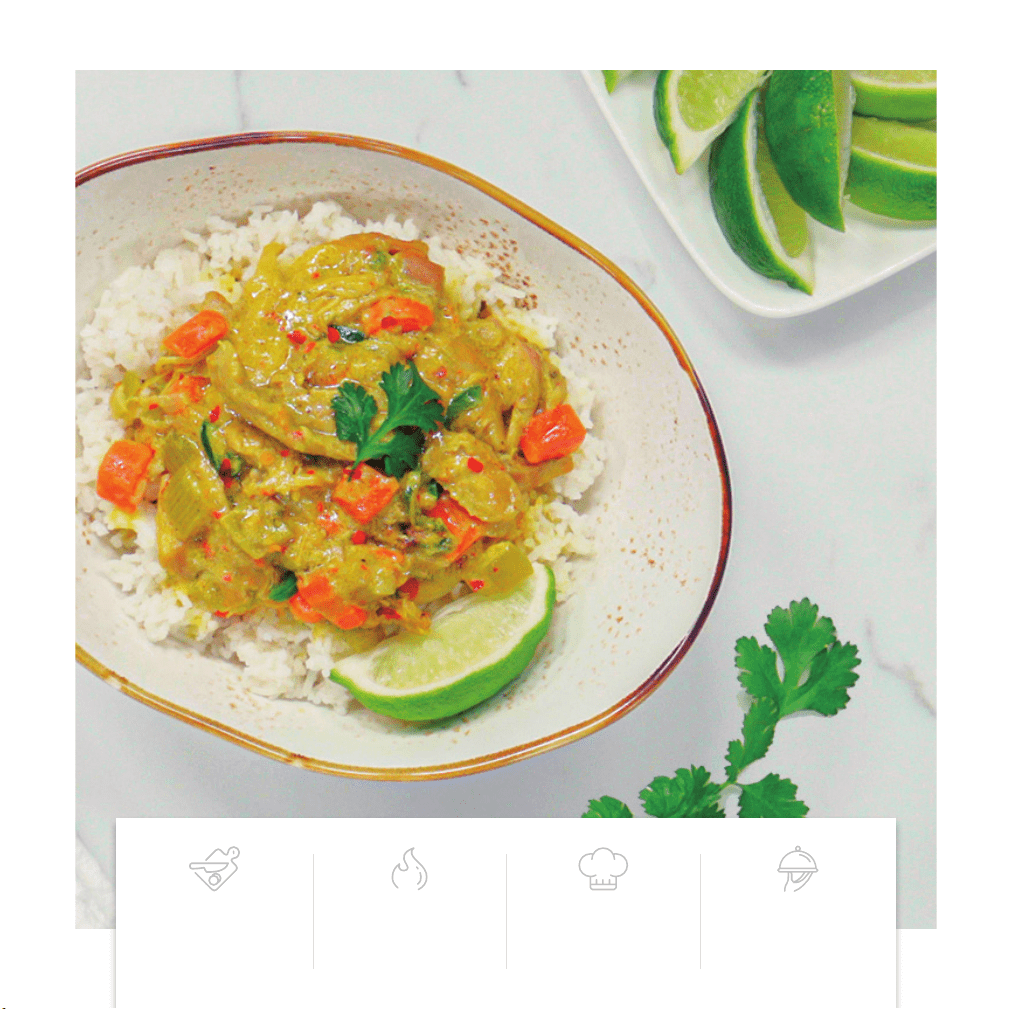
COCONUT CURRY CHICKEN
1. Put coconut oil in cooking pot and set to sauté for
25 minutes.
2. When coconut oil is hot and shiny, about 2 minutes, add
seasoned chicken thighs to the pot and brown each
side, about 4 minutes per side. Note: It is ok if chicken
sticks when being turned, the chicken will eventually
have a shredded texture.
3. Add in carrots, celery, onion, garlic and jalapeno. Sweat
together until the timer expires, stirring occasionally.
4. Add curry powder, garlic powder, ginger powder,
crushed red pepper, coconut milk, and half and half. Stir
all ingredients to combine.
5. Close and lock the lid. Set to pressure cook on high for
10 minutes.
6. When time has expired, release the pressure and remove
the lid.
7. Squeeze lime juice on top, if using, and stir to combine.
Place sprigs of cilantro on top and serve with rice.
• 4 tbsp coconut oil
• 12 boneless, skinless chicken
thighs, about 2 packages,
seasoned with salt and pepper
• 8 large carrots, peeled,
chopped
• 8 stalks of celery, chopped
• 2 large onions, sliced
• 6 cloves garlic, thinly sliced
• 2 jalapenos, seeds
removed, thinly sliced
• 2 tbsp curry powder
• 2 tsp garlic powder
• 2 tbsp ginger powder
• 2 tsp crushed red pepper
• 2 (13.5-oz) cans coconut milk
• ½ cup half and half
• Lime juice, for garnish,
optional
• Cilantro, for garnish, optional
• Rice, for serving
INGREDIENTS
PREP TIME COOK TIME SKILL LEVEL SERVINGS
2 min 10 min EASY 12

38
39
COCONUT CURRY CHICKEN
1. Put coconut oil in cooking pot and set to sauté for
25 minutes.
2. When coconut oil is hot and shiny, about 2 minutes, add
seasoned chicken thighs to the pot and brown each
side, about 4 minutes per side. Note: It is ok if chicken
sticks when being turned, the chicken will eventually
have a shredded texture.
3. Add in carrots, celery, onion, garlic and jalapeno. Sweat
together until the timer expires, stirring occasionally.
4. Add curry powder, garlic powder, ginger powder,
crushed red pepper, coconut milk, and half and half. Stir
all ingredients to combine.
5. Close and lock the lid. Set to pressure cook on high for
10 minutes.
6. When time has expired, release the pressure and remove
the lid.
7. Squeeze lime juice on top, if using, and stir to combine.
Place sprigs of cilantro on top and serve with rice.
• 4 tbsp coconut oil
• 12 boneless, skinless chicken
thighs, about 2 packages,
seasoned with salt and pepper
• 8 large carrots, peeled,
chopped
• 8 stalks of celery, chopped
• 2 large onions, sliced
• 6 cloves garlic, thinly sliced
• 2 jalapenos, seeds
removed, thinly sliced
• 2 tbsp curry powder
• 2 tsp garlic powder
• 2 tbsp ginger powder
• 2 tsp crushed red pepper
• 2 (13.5-oz) cans coconut milk
• ½ cup half and half
• Lime juice, for garnish,
optional
• Cilantro, for garnish, optional
• Rice, for serving
INGREDIENTS
PREP TIME COOK TIME SKILL LEVEL SERVINGS
2 min 10 min EASY 12
40
41
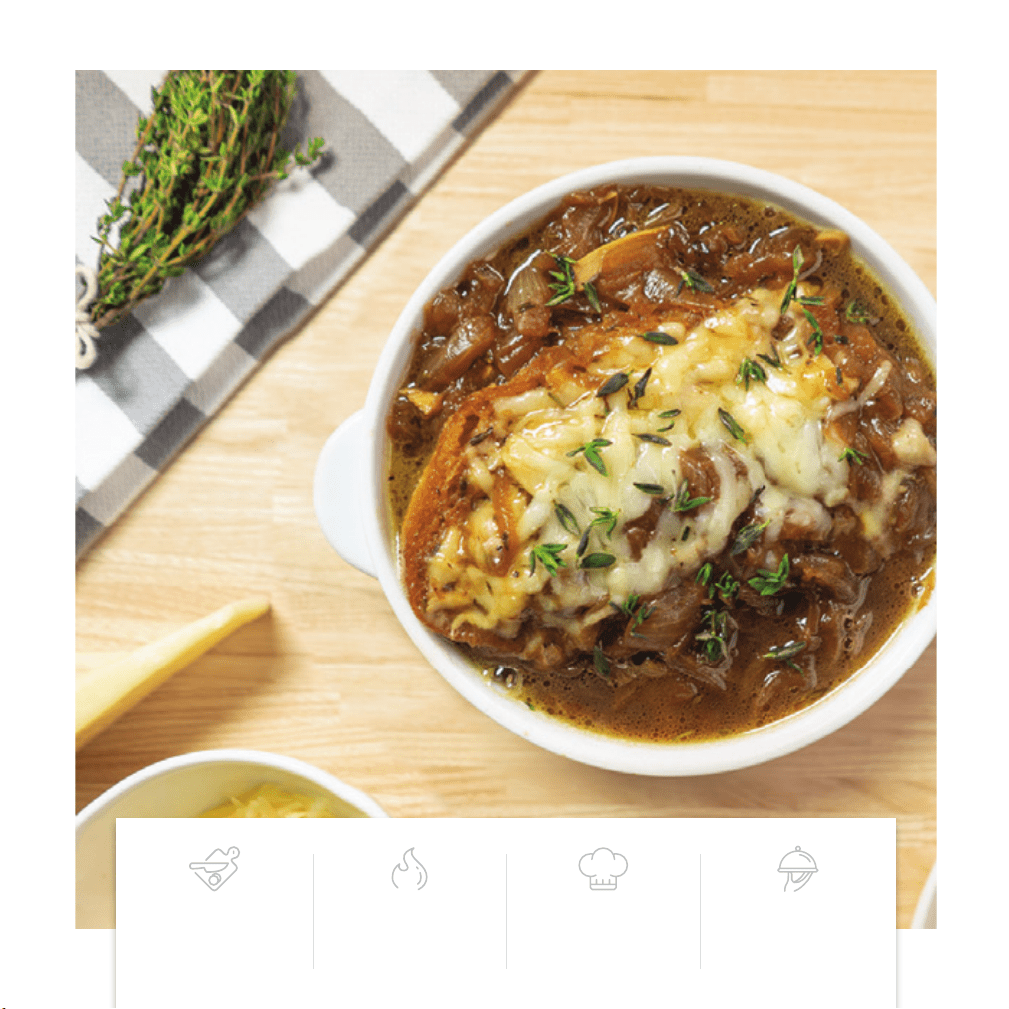
FRENCH ONIon soup
1. Place 4 tbsp butter into the cooking pot and set to sauté for 15
minutes.
2. When butter is hot and bubbly, add in 6 pieces of the 12 slices
of French bread, toast on each side until golden brown, about
2 minutes per side.
3. Repeat with 4 tbsp butter, 6 slices of French bread.
4. Remove slices of bread from cooking pot and evenly disperse
half of the cheese amongst the 12 slices of bread and set aside.
5. End sauté function if it isn’t already. Add the remaining
4 tbsp of butter to the cooking pot and set to sauté for
20 minutes.
6. When butter is hot and bubbly, add the onions, salt, and
ground black pepper to the cooking pot and stir to coat the
onions with the butter.
7. Occasionally stir the onions until they develop caramel color,
about 10 minutes. Then add garlic.
8. When the time has expired, add the beef broth. Scrape the
bottom of the pot to loosen stuck on bits. Add in the thyme.
9. Close and lock the lid. Set to pressure cook on high for
5 minutes.
10. When time has expired, release pressure and remove the lid.
Stir soup to combine all flavors.
11. Place the 12 cheesy slices of toasted French bread in 12 different
bowls. Serve soup over the bread. The cheese will melt.
12. Evenly sprinkle the remaining cheese between the
12 bowls of soup and serve immediately.
• 12 tbsp butter, divided
• 12 slices French bread
• 3 cups Gruyère or Swiss
cheese, divided in half
• 8 large yellow onions,
thinly sliced
• 2 tbsp salt
• 1 tbsp ground black pepper
• 3 cloves garlic, thinly sliced
• 6 cups beef broth
• 1 tbsp thyme, minced
INGREDIENTS
PREP TIME COOK TIME SKILL LEVEL SERVINGS
10 min 30 min MEDIUM 12

40
41
FRENCH ONIon soup
1. Place 4 tbsp butter into the cooking pot and set to sauté for 15
minutes.
2. When butter is hot and bubbly, add in 6 pieces of the 12 slices
of French bread, toast on each side until golden brown, about
2 minutes per side.
3. Repeat with 4 tbsp butter, 6 slices of French bread.
4. Remove slices of bread from cooking pot and evenly disperse
half of the cheese amongst the 12 slices of bread and set aside.
5. End sauté function if it isn’t already. Add the remaining
4 tbsp of butter to the cooking pot and set to sauté for
20 minutes.
6. When butter is hot and bubbly, add the onions, salt, and
ground black pepper to the cooking pot and stir to coat the
onions with the butter.
7. Occasionally stir the onions until they develop caramel color,
about 10 minutes. Then add garlic.
8. When the time has expired, add the beef broth. Scrape the
bottom of the pot to loosen stuck on bits. Add in the thyme.
9. Close and lock the lid. Set to pressure cook on high for
5 minutes.
10. When time has expired, release pressure and remove the lid.
Stir soup to combine all flavors.
11. Place the 12 cheesy slices of toasted French bread in 12 different
bowls. Serve soup over the bread. The cheese will melt.
12. Evenly sprinkle the remaining cheese between the
12 bowls of soup and serve immediately.
• 12 tbsp butter, divided
• 12 slices French bread
• 3 cups Gruyère or Swiss
cheese, divided in half
• 8 large yellow onions,
thinly sliced
• 2 tbsp salt
• 1 tbsp ground black pepper
• 3 cloves garlic, thinly sliced
• 6 cups beef broth
• 1 tbsp thyme, minced
INGREDIENTS
PREP TIME COOK TIME SKILL LEVEL SERVINGS
10 min 30 min MEDIUM 12
42
43
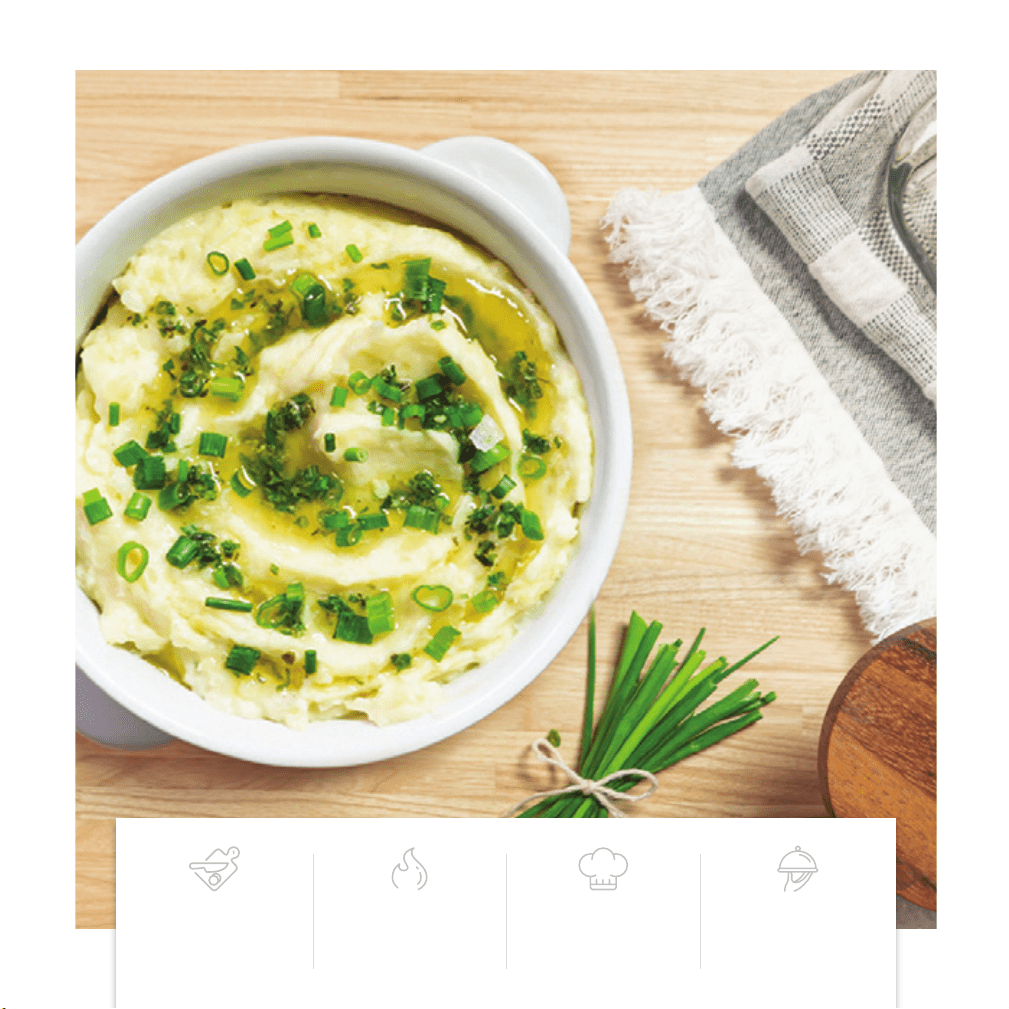
GARLIC MASHED POTATOES
1. Place the potatoes, butter, water, and whole milk into
the cooking pot.
2. Close and lock the lid. Set to pressure cook on high for
12 minutes. Set Keep Warm to On.
3. When the time has expired, release the pressure and
remove the lid.
4. Add in the sour cream and garlic salt.
5. Mash the potatoes and all ingredients in the pot to
combine. Once mashed to the preferred consistency,
season with salt and pepper to taste.
6. Top the mashed potatoes with chives, if using. Serve
immediately.
• 12 medium Yukon Gold
potatoes (about 4 lbs),
peeled, ¼-inch slices
• 8 tbsp butter (1 stick), cut
into 4 pieces
• ¼ cup water
• ½ cup whole milk
• 2 cups sour cream, room
temperature
• 2 tbsp garlic salt
• Salt and pepper, to taste
• 4 tbsp fresh chives,
chopped, optional
Supplies Needed:
• Potato masher
INGREDIENTS
PREP TIME COOK TIME SKILL LEVEL SERVINGS
15 min 12 min EASY 8

42
43
GARLIC MASHED POTATOES
1. Place the potatoes, butter, water, and whole milk into
the cooking pot.
2. Close and lock the lid. Set to pressure cook on high for
12 minutes. Set Keep Warm to On.
3. When the time has expired, release the pressure and
remove the lid.
4. Add in the sour cream and garlic salt.
5. Mash the potatoes and all ingredients in the pot to
combine. Once mashed to the preferred consistency,
season with salt and pepper to taste.
6. Top the mashed potatoes with chives, if using. Serve
immediately.
• 12 medium Yukon Gold
potatoes (about 4 lbs),
peeled, ¼-inch slices
• 8 tbsp butter (1 stick), cut
into 4 pieces
• ¼ cup water
• ½ cup whole milk
• 2 cups sour cream, room
temperature
• 2 tbsp garlic salt
• Salt and pepper, to taste
• 4 tbsp fresh chives,
chopped, optional
Supplies Needed:
• Potato masher
INGREDIENTS
PREP TIME COOK TIME SKILL LEVEL SERVINGS
15 min 12 min EASY 8
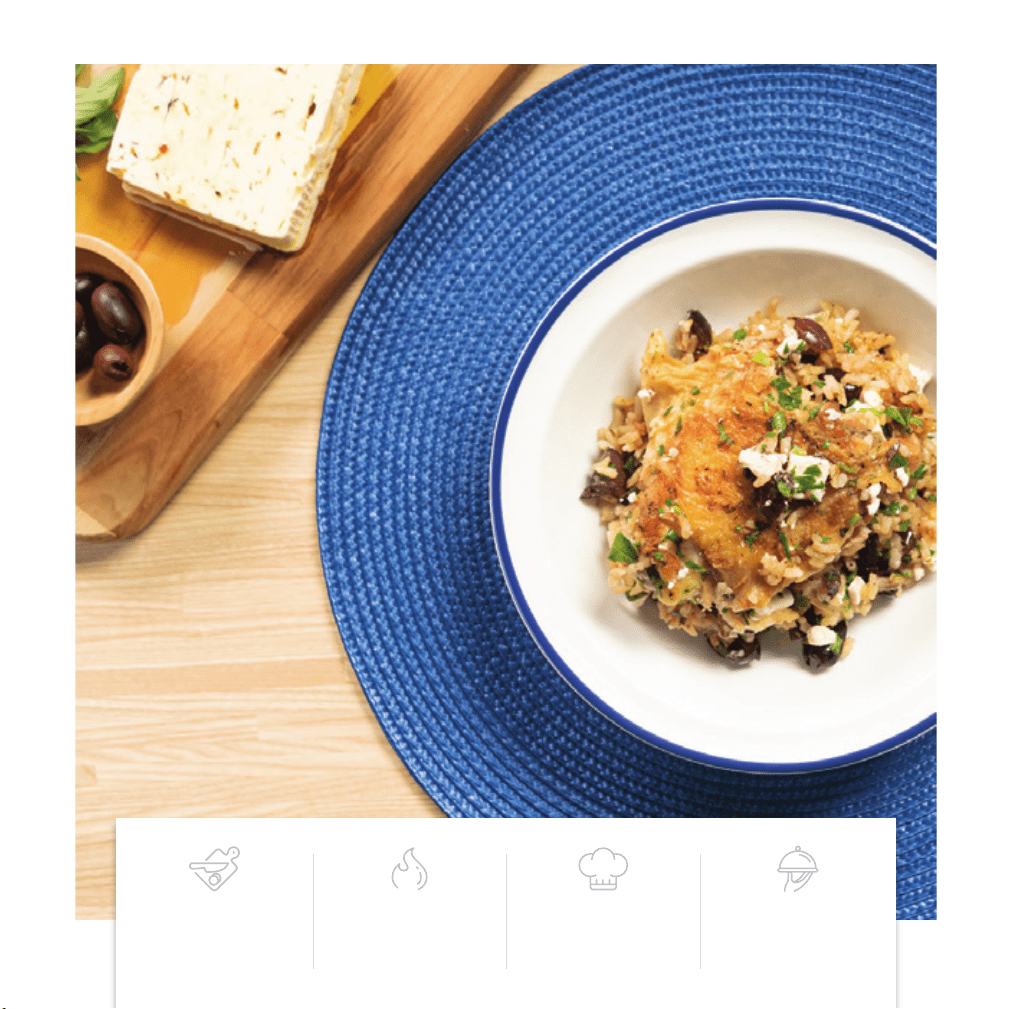
44
45
GREEK CHICKEN AND RICE
1. In a large bowl, toss the chicken thighs with the onion
powder, garlic powder, salt, and ground black pepper.
Stir to make sure all the thighs are evenly coated in the
spice mixture.
2. Put the olive oil in the cooking pot. Set to sauté for
20 minutes.
3. When the oil is hot and shiny, add in the chicken thighs,
skin side down. Cook for
8 minutes.
4. Turn the chicken thighs and sear on the other side.
Cook for another 8 minutes or until time expires.
5. Turn off and add the rice and chicken broth to the pot.
With tongs, wiggle the thighs in the pot so the rice is
covered by the broth.
6. Close the lid and set to pressure cook on high for
15 minutes.
7. When the time expires, release the pressure and open
the lid, then stir.
8. Top the chicken and rice with the chopped oregano,
parsley, olives and feta. Stir to combine. Serve
immediately.
• 8 bone-in, skin-on chicken
thighs (about 2 packages)
• 1 ½ tbsp onion powder
• 1 ½ tbsp garlic powder
• 2 tsp salt
• 1 tsp ground black pepper
• 3 tbsp olive oil
• 3 cups long-grain white
rice
• 4 cups chicken broth
• 6 stems fresh oregano,
leaves picked and roughly
chopped
• 12 stems parsley, leaves
picked and roughly
chopped
• 1 ½ cups pitted kalamata
olives, roughly chopped
• 2 cups feta cheese
INGREDIENTS
PREP TIME COOK TIME SKILL LEVEL SERVINGS
25 min 15 min MEDIUM 8
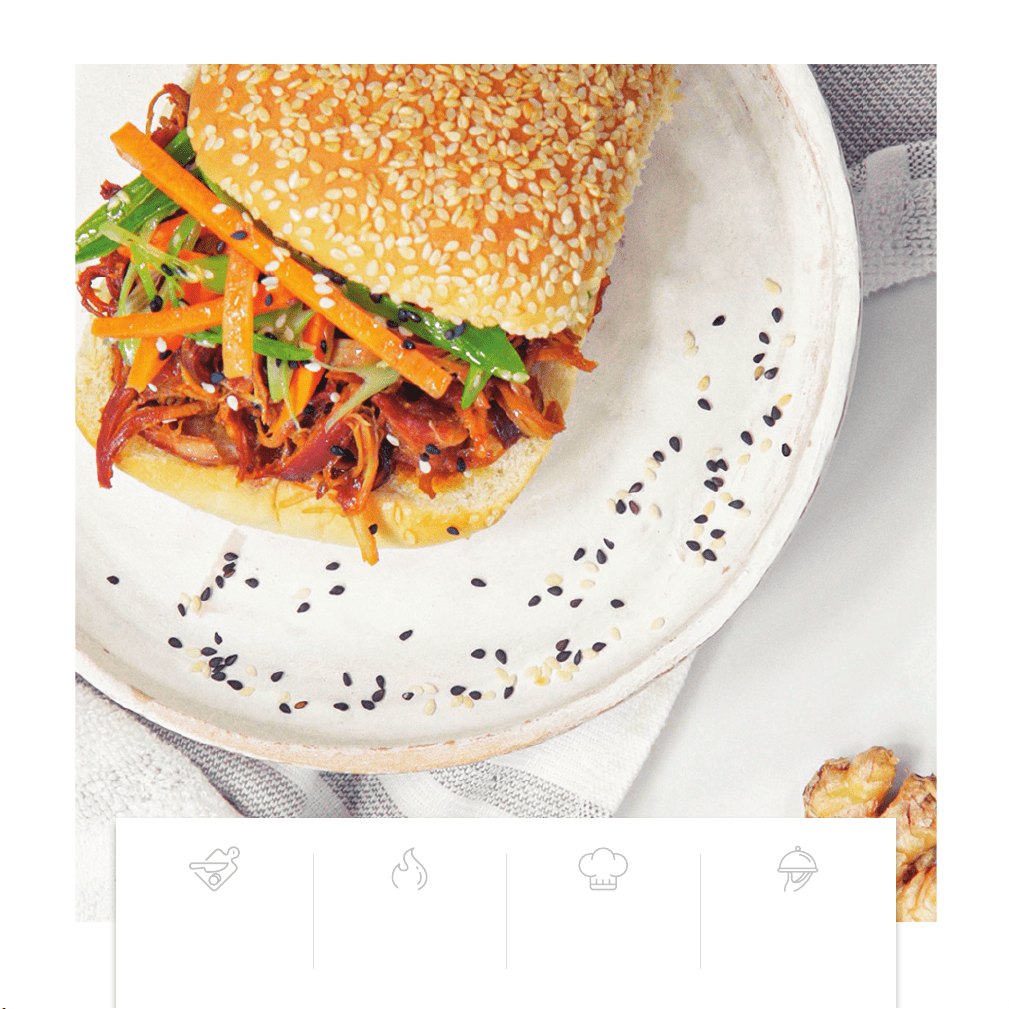
46
47
HONEY GINGER PULLED CHICKEN
1. Add olive oil in cooking pot and set to sauté for
15 minutes.
2. When the oil is hot and shiny, after about 2 minutes,
cook chicken thighs on each side until golden brown,
on both sides. Let timer expire.
3. Add garlic, scallions, soy sauce, honey, rice wine vinegar
and grated ginger to cooking pot with chicken. Stir to
combine.
4. Close and lock the lid. Set to pressure cook on high for
10 minutes.
5. When timer has expired, release pressure and remove
the lid.
6. Using two forks, shred chicken to desired texture.
7. In a small bowl, toss together sliced scallions and
carrots, toasted sesame oil, rice wine vinegar and
black and white sesame seeds for the slaw.
8. Evenly distribute chicken on each bun and top with
the slaw. Serve immediately.
Pulled Chicken:
• 3 tbsp olive oil
• 16 boneless, skinless chick-
en thighs
• 12 cloves of garlic, thinly
sliced
• 8 scallions, thinly sliced
• 1 ½ cups soy sauce
• 2 cups honey
• 4 tbsp rice wine vinegar
• 1 tbsp grated ginger
Slaw Garnish:
• 2 cups sliced scallions
• 2 cups peeled,
sliced carrots
• 2 tbsp toasted sesame oil
• 2 tsp rice wine vinegar
• Black and white sesame
seeds
• 12 buns, optional
INGREDIENTS
PREP TIME COOK TIME SKILL LEVEL SERVINGS
20 min 10 min MEDIUM 12

48
49
ITALIAN WEDDING SOUP
1. In a large mixing bowl, stir together ground beef,
egg, half and half, parsley, oregano, garlic powder,
1 tablespoon of the salt, ½ tablespoon of the black pepper
and Italian breadcrumbs. Combine all ingredients together
to form a ball.
2. Form the mixture into 1-inch balls, about 45 meatballs total.
Set aside.
3. Put olive oil in the pot. Set to sauté for 20 minutes.
4. When oil is wet and shiny, place the formed meatballs in
cooking pot and brown on both sides, about 4 minutes per
side.
5. After meatballs have browned, add in onion, carrots, celery
and garlic. Cook together until vegetables are almost
cooked, about 6 minutes.
6. After vegetables are almost cooked, add in parsley,
oregano, remaining 2 tablespoons of salt, ½ tablespoon of
black pepper, chicken broth and kale. Stir to combine. Let
sauté time expire.
7. Put on lid and set to pressure cook on high for 15 minutes.
8. When time has expired, release pressure and remove the lid.
9. Stir in pastina. Let sit for about 3 minutes.
10. Serve immediatley with parmesan.
• 1 ½ lb lean ground beef
• 2 eggs
• ½ cup half and half
• 1 tbsp dried parsley
• 1 tbsp dried oregano
• 1 tbsp garlic powder
• 2 ½ tbsp salt, divided
• 1 tbsp black pepper, divided
• 1 ½ cups Italian breadcrumbs
• 3 tbsp olive oil
• 2 large onions, chopped
• 6 large carrots, peeled and
chopped
• 6 stalks of celery, chopped
• 6 cloves of garlic, thinly sliced
• 1 ½ cups of parsley, chopped
• 1 cup of oregano, chopped
• 12 cups of chicken broth
• 3 cups kale, destemmed and
rough chopped
• 1 ½ cups of pastina
• Grated parmesan for serving
INGREDIENTS
PREP TIME COOK TIME SKILL LEVEL SERVINGS
30 min 15 min MEDIUM 12
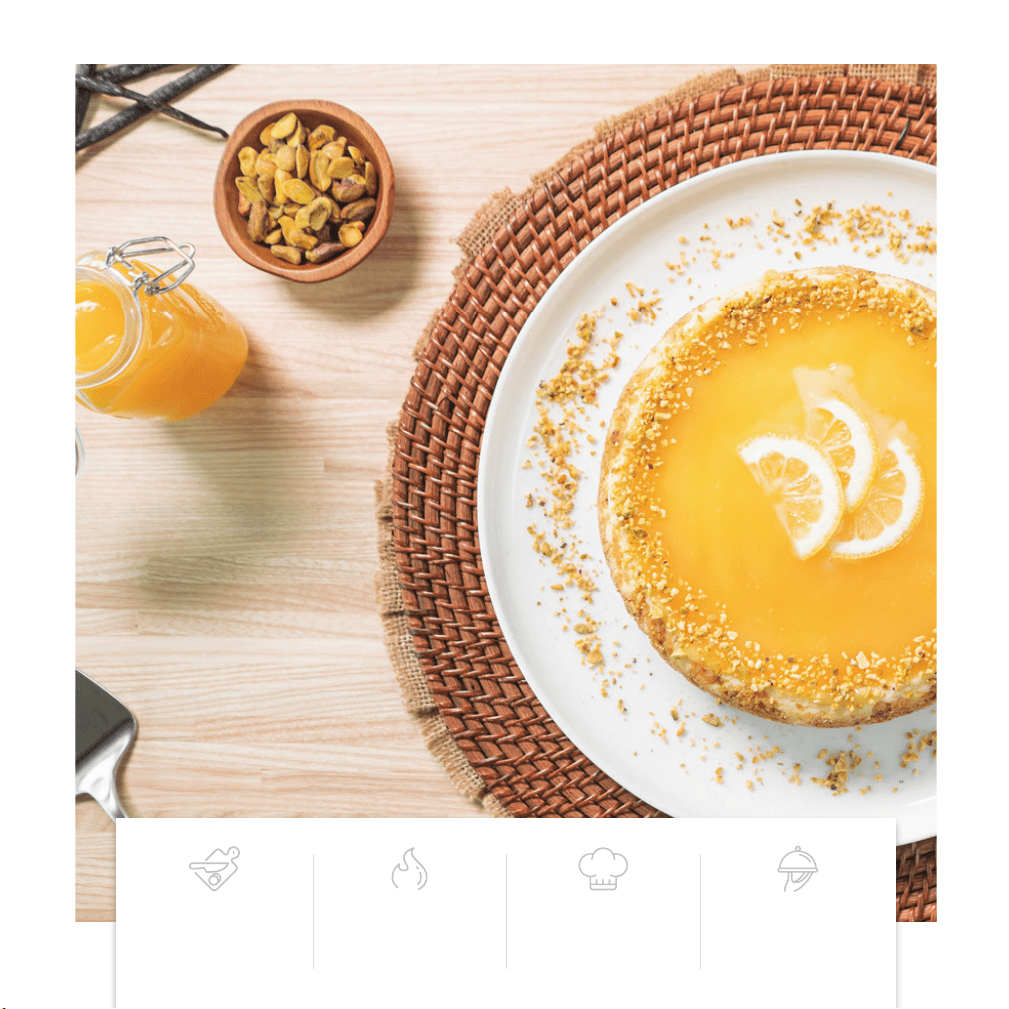
50
51
Lemon Cheesecake
1. Using the ½ tbsp of butter, grease the bottom and sides of the 7-inch
springform pan.
2. For the crust: In a medium bowl combine graham cracker crumbs,
toasted chopped pistachios and melted butter. Mix with a fork until
well combined.
3. Pour the mixture into the 7-inch springform pan and use fingers to
press into the bottom and halfway up the sides of the pan. Set aside.
4. For the filling: In a large bowl use a hand or stand mixer to combine
the cream cheese and sugar. Mix on medium speed until light and
fluffy.
5. One at a time, add in the eggs and mix until well combined.
6. Add in the lemon juice, lemon zest, vanilla extract and mix until well
incorporated.
7. Add in the flour. Mix just until incorporated.
8. Pour the mixture into the crust.
9. Pour the water into the bottom of the cooking pot. Place the Steam
Basket in the pot, then place the springform pan on top of the basket.
10. Gently place aluminum foil square over the cheesecake as a tent
to prevent condensation from forming during steaming, not tightly
covering it.
11. Set to pressure cook on high for 25 minutes. Close and lock the lid.
12. When the time expires and the pressure is released, open the lid and
gently remove the aluminum foil square so the condensation does not
form on top of the cheesecake. Gently remove the cheesecake using
the handles on the rack.
13. Let cool for 15 minutes and then transfer the cheesecake to the
refrigerator for at least 4 hours or until cold.
14. Remove the ring of the springform pan.
15. Top with lemon curd and serve.
• ½ tbsp unsalted butter, for
greasing
• 1 cup graham cracker crumbs
• ½ cup toasted pistachios,
finely chopped
• 4 tbsp unsalted butter, melted
and cooled
• 16 oz cream cheese, room
temperature
• ½ cup sugar
• 2 large eggs, room
temperature
• 2 tbsp lemon juice
• 1 tbsp lemon zest
• 1 tbsp vanilla extract
• 1 tbsp all-purpose flour
• 2 cups water, for steaming
• Lemon curd, to taste
Supplies Needed:
• 7-inch Springform Pan
• Hand or Stand Mixer
• 10-inch folded aluminum
square (for tenting)
• Steam Basket accessory
INGREDIENTS
PREP TIME COOK TIME SKILL LEVEL SERVINGS
25 min 10 min MEDIUM 4

52
53
Chocolate Lava Cakes
1. Butter and lightly flour ramekins. Set aside.
2. Add butter and chocolate to a microwave safe bowl.
3. Melt butter and chocolate together in
30 second increments, stirring occasionally
until smooth. Set aside.
4. In a medium bowl, whisk together sugar, flour, eggs, egg
yolks, vanilla and salt until thickened and pale.
5. Gently pour chocolate mixture into egg mixture while stirring
quickly.
6. Fill ramekins 2/3 of the way with batter.
7. Put steam rack and water in bottom of cooking pot. Place
filled ramekins on
steam rack.
8. Close and lock the lid. Set to pressure cook on high for 6 min.
9. When the time has expired, release pressure and remove the
lid.
10. Remove ramekins and while still hot, flip the cakes out in one
quick motion.
11. Serve immediately.
• 1 stick (4 oz) unsalted
butter, plus more for
greasing
• 6 oz bittersweet chocolate
• ¼ cup sugar
• 2 tbsp all-purpose flour,
plus more for greasing
• 2 eggs
• 2 egg yolks
• 1 tsp vanilla
• ¼ tsp salt
• 2 cups water
Supplies Needed:
• 4 (4-oz) Ramekins
• Steam Rack accessory
INGREDIENTS
PREP TIME COOK TIME SKILL LEVEL SERVINGS
20 min 6 min MEDIUM 4

54
55
Mixed Berry Jam
1. Add strawberries, blackberries, blueberries, raspberries,
sugar, and lemon juice to the cooking pot.
2. Close and lock the lid. Set to pressure cook on high for
6 minutes.
3. Let the pressure release naturally, It will take about
30 minutes. Once pressure is released, remove lid.
(Warning: If pressure is released manually it will agitate
the jam and cause it to come out of the pressure release
valve and splatter.)
4. Set to sauté for 8 minutes. Whisk in pectin, if using, for a
thicker consistency.
5. Let cool completely. Store in an airtight container in the
refrigerator until set.
• 4 cups strawberries,
quartered
• 4 cups blackberries
• 4 cups blueberries
• 4 cups raspberries
• 4 cups sugar
• ½ cup lemon juice,
about 4 lemons
• 2 tsp pectin, optional
INGREDIENTS
PREP TIME COOK TIME SKILL LEVEL SERVINGS
10 min 8 min EASY 8 cups
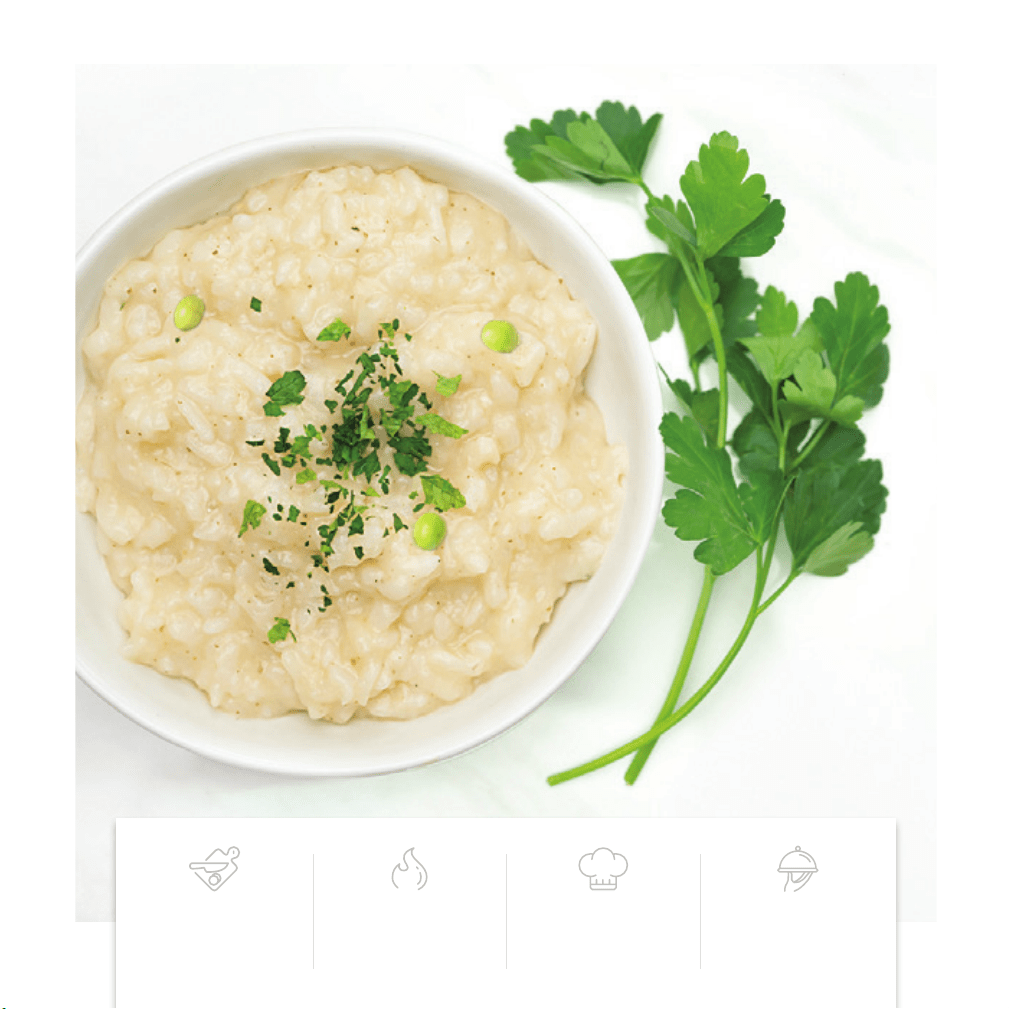
56
57
Parmesan Risotto with Peas
1. Add the butter into the cooking pot. Set to sauté for 1
5 minutes.
2. When the butter is hot and bubbling, about 2 minutes,
add the onion, salt, and black pepper and cook until
translucent, about 5 minutes.
3. Add Arborio rice and white wine. Stir to combine.
4. Cook until wine reduces by about half. Add stock and
stir to combine. Let cook until the time expires.
5. Close and lock lid and set to pressure cook on high for
6 minutes.
6. When the time expires, release pressure and open
the lid.
7. Add in Parmesan and frozen peas. Stir for about
4 minutes or until excess liquid evaporates and
ingredients are fully incorporated.
8. Finish with extra Parmesan and lemon zest. Serve
immediately.
• 4 tbsp butter (1/2 stick)
• 2 large yellow onions,
chopped
• 1 ½ tbsp salt
• 2 tsp black pepper
• 4 cups Arborio rice
• 2 cups white wine
• 10 cups chicken stock
• 3 cups Parmesan cheese,
grated
• 2 cups frozen peas
• 2 lemons, zested, for
garnish, optional
INGREDIENTS
PREP TIME COOK TIME SKILL LEVEL SERVINGS
10 min 6 min Medium 12
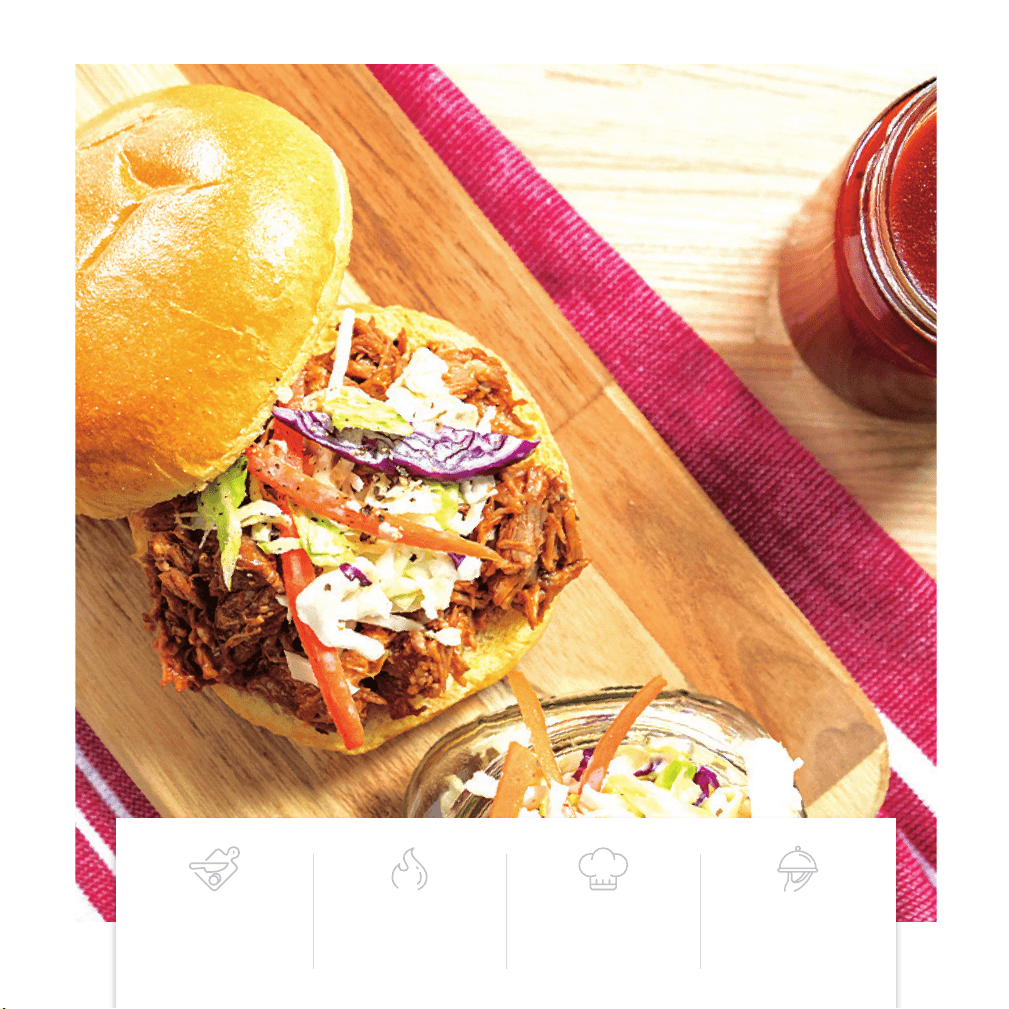
58
59
Pulled Pork
1. In a medium bowl, combine the garlic powder, onion
powder, salt and black pepper with the boneless pork
butt.
2. Add the canola or vegetable oil to the cooking pot. Set
to sear for 15 minutes.
3. When the oil is hot, add the pieces of pork, rotating to
make sure all pieces get color.
4. When all pieces have caramelization, stop sauté
function. Add the barbecue sauce and stir to combine
with pork.
5. Close lid. Set to pressure cook high for 35 minutes.
6. When the time expires, release the
pressure and remove the lid. Set to sauté
for 10 minutes.
7. When the liquid is almost completely evaporated and
the pork is saucy, turn off, and shred with two forks.
8. Serve immediately.
• 2 tsp garlic powder
• 2 tsp onion powder
• 1 tbsp salt
• 2 tsp black pepper
• 4 lb boneless pork butt,
cut into 2-inch pieces
• 2 tbsp canola or
vegetable oil
• 2 cups barbecue sauce
• 8 buns, optional
• Cole slaw, optional
INGREDIENTS
PREP TIME COOK TIME SKILL LEVEL SERVINGS
35 min 35 min EASY 8
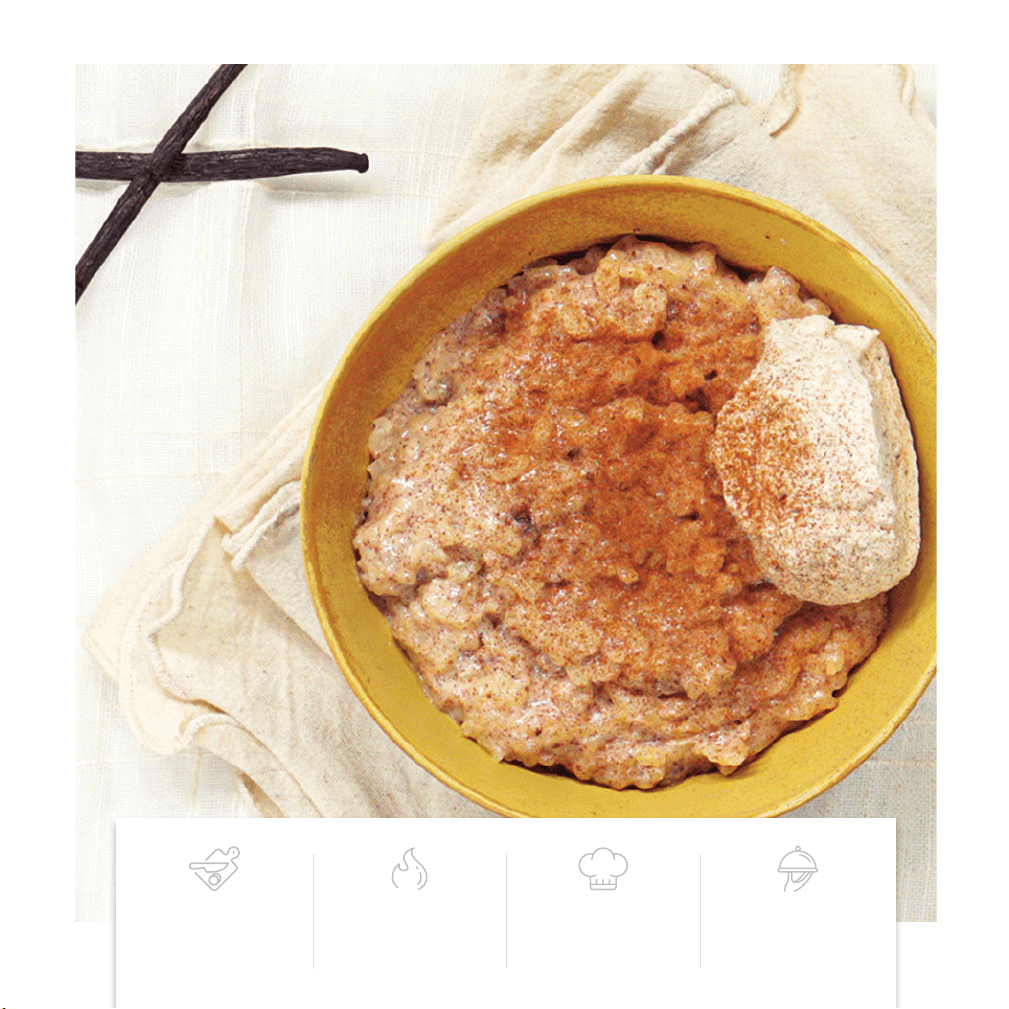
60
61
Rice Pudding
1. Add rice, whole milk, water, salt, cinnamon, nutmeg
and vanilla to cooking pot. Stir to combine.
2. Close and lock lid. Set to pressure cook on low for
20 minutes.
3. When the time expires, release pressure and remove lid.
4. Add sweetened condensed milk. Stir to combine.
5. Serve immediately with whipped cream and candied
pecans, if using.
• 2 cups Arborio rice, rinsed
and drained
• 4 cups whole milk
• 1 cup water
• 2 tsp salt
• 1 tbsp cinnamon
• 1 tsp nutmeg
• Beans of 2 scraped
vanilla beans or 2 tsp
vanilla extract
• 2 (14-oz) cans sweetened
condensed milk
• Whipped cream, for
garnish
• Candied pecans, for
garnish
INGREDIENTS
PREP TIME COOK TIME SKILL LEVEL SERVINGS
10 min 20 min EASY 12
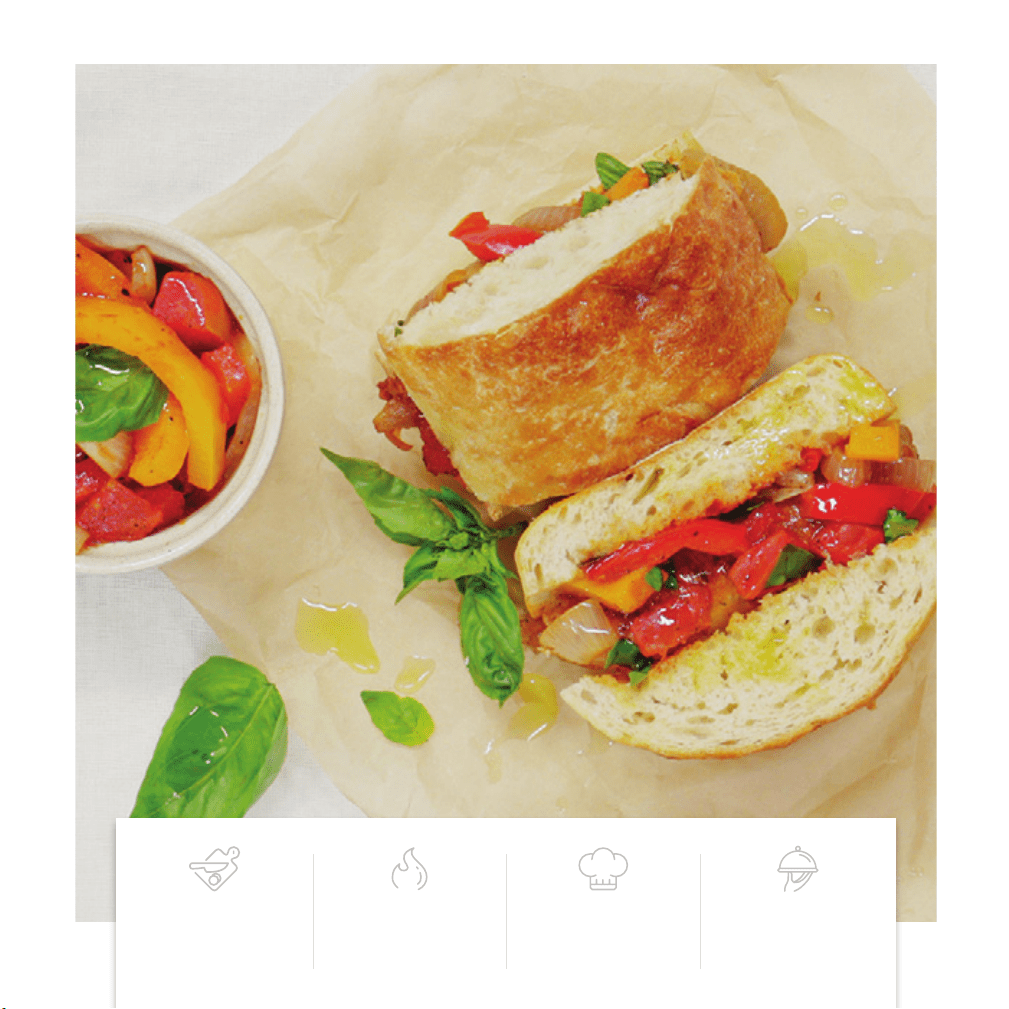
62
63
Sausage and Peppers
1. Pour olive oil into cooking pot. Set to sauté for
40 minutes.
2. When oil is hot and shiny, place links of Italian chicken
or pork sausage into cooking pot. Cook on each side
for about 7 minutes, or until golden brown.
3. Add peppers, onions, and garlic to cooking pot. Sauté
until golden, about 5 minutes.
4. Stir in diced tomatoes, basil, salt and pepper until
combined. Let all ingredients simmer together for
remaining time, about 10 minutes, or until sausage is
cooked and sauce comes together and thickens.
5. Serve immediately.
• 4 tbsp olive oil
• 2 lb spicy Italian chicken or
pork sausage
• 4 bell peppers, sliced
• 2 large onions, sliced
• 4 cloves of garlic, thinly
sliced
• 2 (14.5-oz) cans diced
tomatoes
• 12 leaves of basil, torn
• 2 tbsp salt
• 2 tsp pepper
• 8 rolls or buns, optional
INGREDIENTS
PREP TIME COOK TIME SKILL LEVEL SERVINGS
10 min 20 min EASY 12
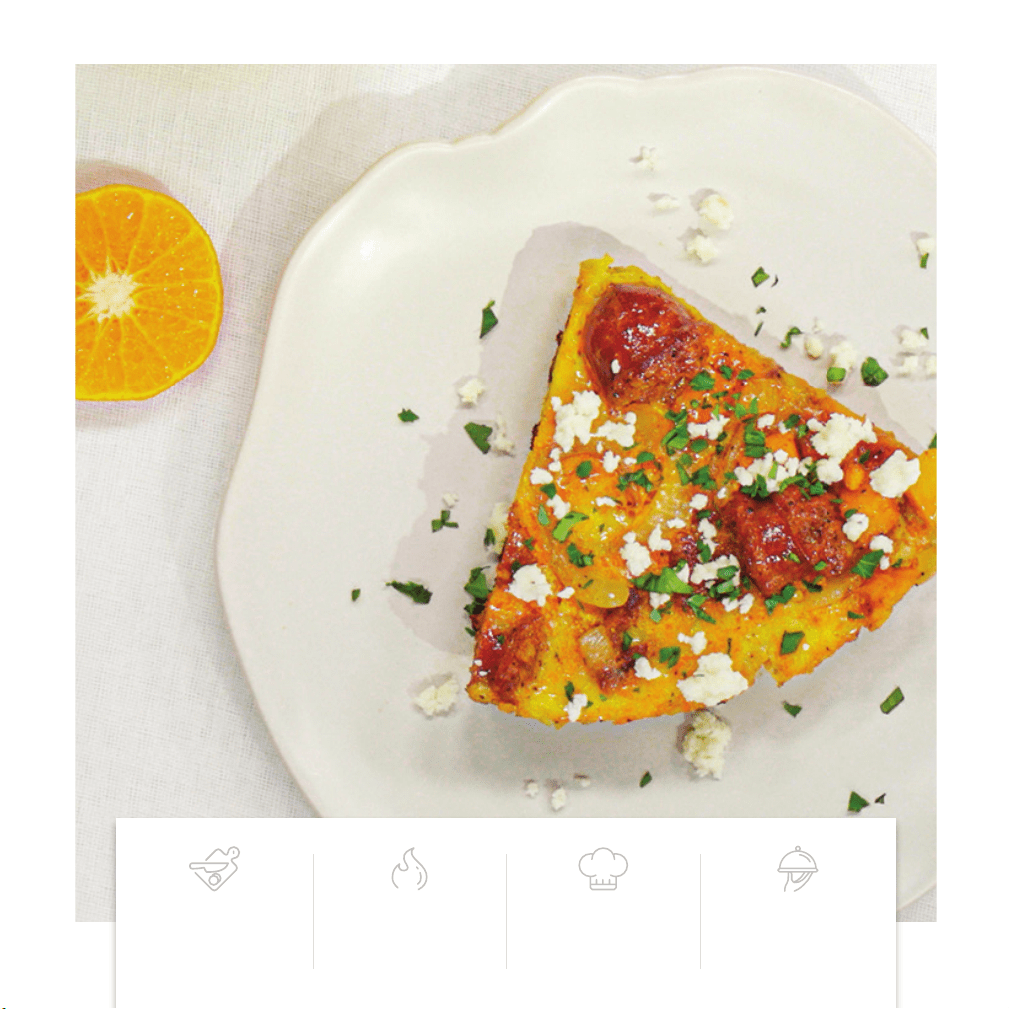
64
65
SWEET POTATO & Chorizo Fritatta
1. Add chorizo to cooking pot. Set to sauté for 12 minutes.
2. Brown the chorizo on all sides for about
5 minutes. Remove grease if desired.
3. Add in sweet potato, onions, garlic, salt and pepper.
Sauté for the remaining time, about 7 minutes, or until
the sweet potato is almost cooked.
4. Pour whisked eggs on top of chorizo-vegetable mixture.
Stir slightly to incorporate vegetables into eggs.
5. Put glass lid on pot, set to steam for 8 minutes.
6. When the time has expired, remove the lid.
7. Cut into 12 pieces and top with queso fresco and
cilantro, if using.
8. Serve immediately.
• 2 lb chorizo, sliced
• 2 sweet potatoes, diced
• 2 large onions, sliced
• 6 cloves of garlic, thinly
sliced
• 2 tbsp salt
• 1 tbsp black pepper
• 12 eggs, beaten
• Queso fresco, crumbled,
optional
• Cilantro leaves, optional
INGREDIENTS
PREP TIME COOK TIME SKILL LEVEL SERVINGS
10 min 8 min MEDIUM 12
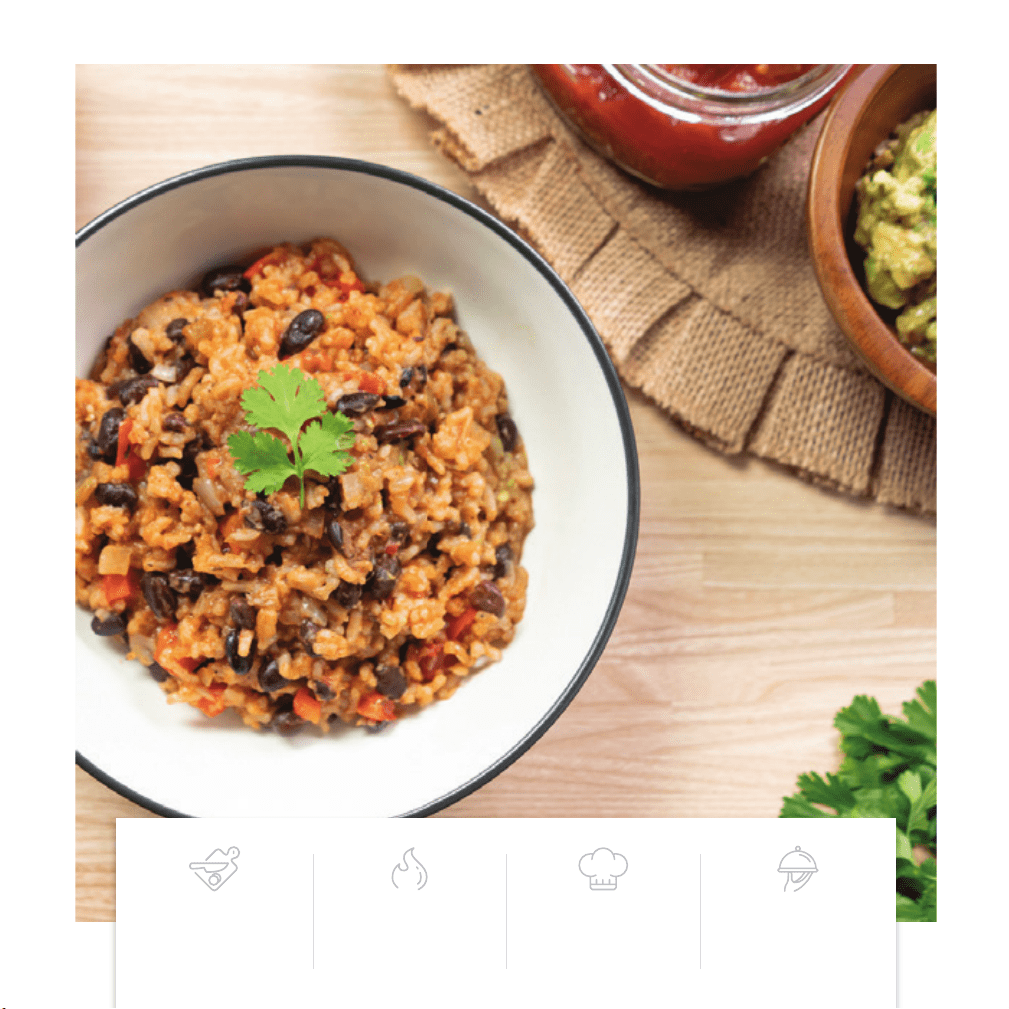
66
67
TEX-MEX Rice and beans
1. Add olive oil to the cooking pot. Set to sauté for
8 minutes.
2. When the oil is hot and shiny, about 2 minutes, add the
diced onion, diced bell pepper and salt to the cooking
pot. Stir occasionally until the onion begins to soften,
about 3 minutes.
3. Add the garlic and stir to incorporate. Cook until sauté
time expires.
4. Add the salsa, white rice, black beans, and taco
seasoning. Stir to combine.
5. Add the chicken broth, and stir, close and lock lid.
6. Set to pressure cook low for 12 minutes.
7. When the time expires, release the pressure, remove
the lid and stir.
8. Serve immediately.
• 2 tbsp olive oil
• 2 large onions, rough dice
• 2 red bell peppers,
rough dice
• 4 tsp salt
• 4 cloves garlic, minced
• 2 cups salsa, fresh or
from a jar
• 2 cups white rice
• 2 (15.5-oz) cans black
beans, drained
• 4 tbsp taco seasoning
• 32 oz chicken broth
INGREDIENTS
PREP TIME COOK TIME SKILL LEVEL SERVINGS
20 min 12 min EASY 8
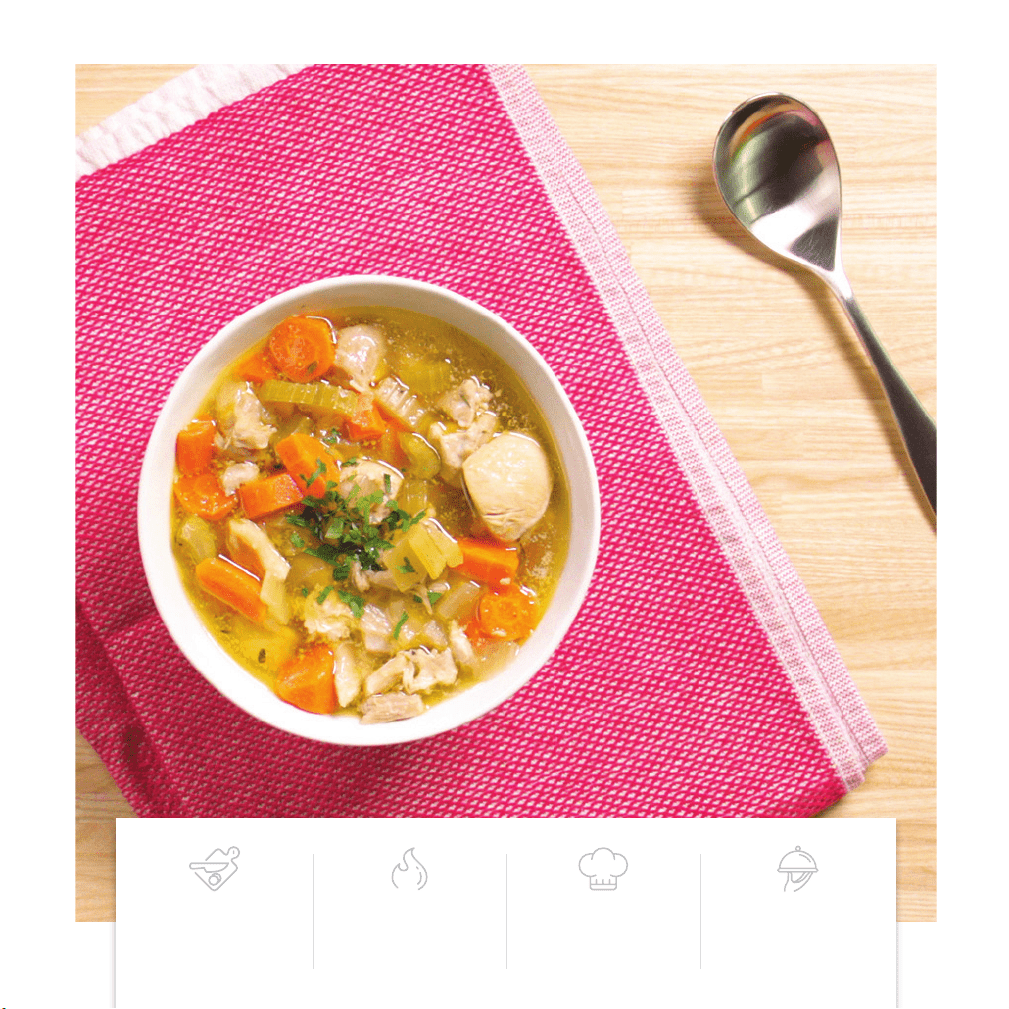
68
69
Traditional Chicken Soup
1. Add olive oil to the cooking pot. Set to sauté for
15 minutes.
2. When the oil is hot and shiny, about 2 minutes, add
the chicken. Add the salt and black pepper and stir to
combine. Cook chicken for about 3 minutes.
3. Add the carrots and cook until slightly softened, about
2 minutes.
4. Add the onion and celery to the pot and stir to combine.
Cook for about 2 minutes.
5. Add the garlic and the thyme to the cooking pot. Stir all
ingredients to combine and let the sauté time expire.
6. Add the chicken broth and bay leaves. Stir
to combine all ingredients. Close and lock the lid.
7. Set to pressure cook on low for 25 minutes.
8. When the time has expired, release the pressure,
remove lid and stir.
9. Garnish with parsley and serve immediately.
• 2 tbsp olive oil
• 4 lb boneless skinless
chicken thighs, cut into
½-inch pieces
• 1 tbsp salt
• 2 tsp black pepper
• 2 large carrots, peeled,
chopped
• 2 large onions, chopped
• 10 celery stalks, chopped
• 4 cloves garlic, thinly sliced
• 2 sprigs thyme, minced
• 12 cups chicken broth
• 4 bay leaves
• 1 bunch parsley, chopped
INGREDIENTS
PREP TIME COOK TIME SKILL LEVEL SERVINGS
15 min 25 min MEDIUM 12
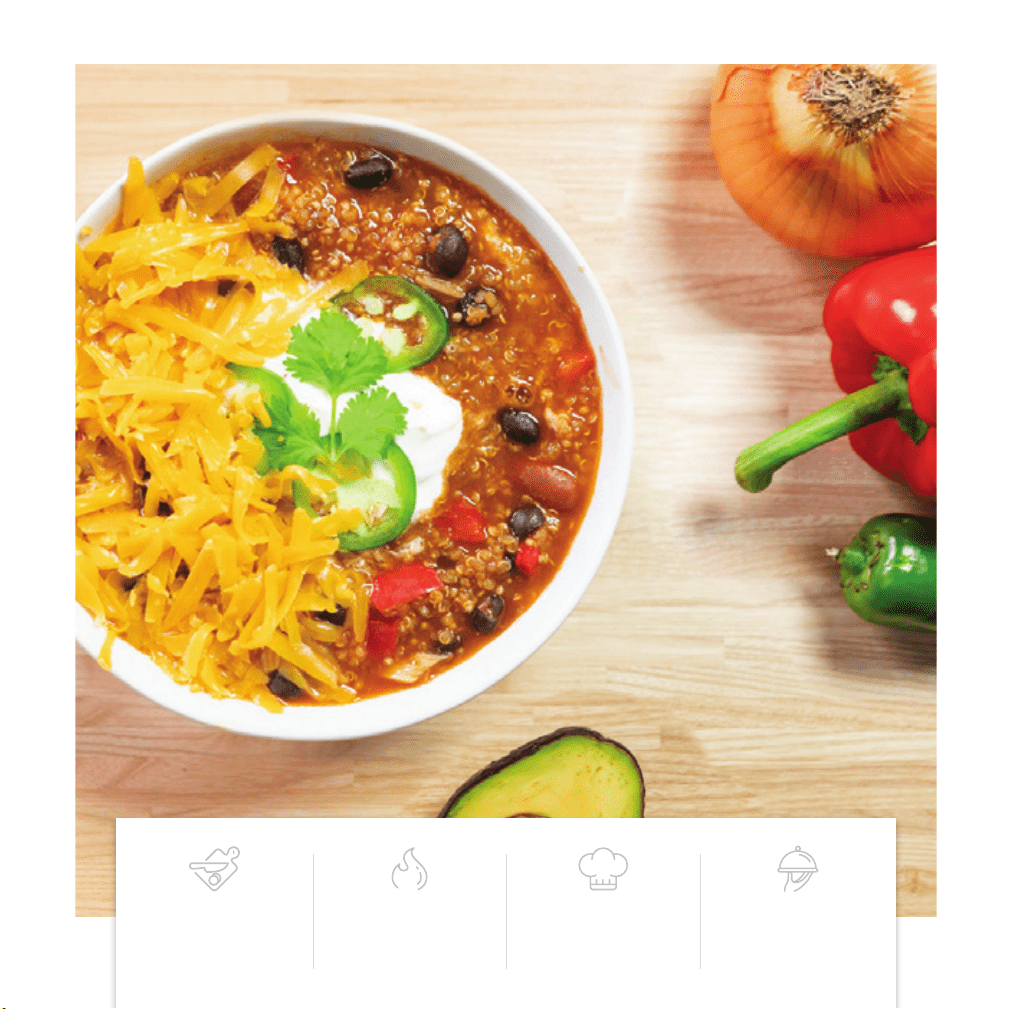
70
71
VEGETARIAN CHILI
1. Put the olive oil into the cooking pot. Set to sauté for
12 minutes.
2. After about 2 minutes, when the oil is hot and shiny,
add in onions, bell peppers, garlic, chili powder, salt,
cumin and cayenne pepper. Stir all ingredients to
combine.
3. Sauté all ingredients together until slightly tender,
about 5 minutes.
4. Once the vegetables are slightly tender add in the
black beans and kidney beans. Stir to combine and
cook for about 3 minutes or until the ingredients start
to come together.
5. Add the vegetable broth, tomato sauce and uncooked
quinoa. Stir all ingredients to combine and let sauté
timer expire.
6. Close and lock the lid. Set to pressure cook on high for
8 minutes.
7. While the chili is cooking, assemble desired toppings
for serving.
8. When the time has expired, release the pressure and
open the lid.
9. Serve immediately and finish with desired toppings.
• 2 tbsp olive oil
• 2 large yellow onions, chopped
• 4 red bell peppers, chopped
• 8 cloves of garlic, thinly sliced
• 2 tbsp chili powder
• 3 tbsp salt
• 1 tsp ground cumin
• ½ tsp ground cayenne pepper
• 2 (15.5-oz) cans black beans,
drained
• 2 (15.5-oz) cans kidney beans,
drained
• 6 cups vegetable broth
• 2 cups tomato sauce
• 3 cups uncooked quinoa
• 2 (15.5-oz) cans black beans,
drained
• 2 (15.5-oz) cans kidney beans,
drained
• 2 jalapenos, for garnish
• Fresh cilantro, for garnish
• Avocado, for garnish
• Shredded cheese, for garnish
• Sour cream, for garnish
INGREDIENTS
PREP TIME COOK TIME SKILL LEVEL SERVINGS
30 min 8 min MEDIUM 12

72
73
WHOLE CHICKEN WITH GRAVY
1. Add olive oil to the cooking pot. Set to sauté for
20 minutes.
2. When the olive oil is hot and shiny, about 2 minutes, add
the chicken to the pot, breast-side down. Let cook for
8 minutes.
3. Gently turn the chicken over in the pot, cook for another
8 minutes.
4. Add the lemon juice and white wine or chicken broth to
the pot. Let the liquid cook until sauté timer expires.
5. Add the bunch of rosemary to the pot. Close and lock
the lid.
6. Set to pressure cook high for 30 minutes.
7. When the time expires, release the pressure, open the
lid and carefully remove the rosemary. Discard the
rosemary and place the chicken on a separate plate or
platter.
8. Set to sauté for 10 minutes. Whisking constantly, slowly
add the corn starch and water mixture to the drippings.
9. Let the gravy simmer until sauté timer expires, whisking
frequently. Season to taste with salt and pepper.
10. Serve immediately.
• 2 tbsp olive oil
• Whole chicken,
between 5 lbs and 6 lbs,
giblets removed,
skin seasoned with salt
and pepper
• 2 lemons, juiced
(about 6 tbsp)
• 1 ⅓ cups white wine or
chicken stock
• 1 bunch fresh rosemary,
tied with twine in
the middle
• ½ cup corn starch,
dissolved in 1 cup of water
• Salt and ground black
pepper, to taste
INGREDIENTS
PREP TIME COOK TIME SKILL LEVEL SERVINGS
35 min 30 min MEDIUM 6

74
®
CHEFMAN.COM | @MYCHEFMAN
©CHEFMAN 2019