Loading ...
Loading ...
Loading ...
27
•
It is common to see smoke and/or an occasional ame-up during the Self-
Cleaning cycle, depending on the content and amount of soil remaining in the
oven. If a ame persists, turn o the oven and allow it to cool before opening the
door to wipe up the excessive food soil.
•
The door latch is automatically activated after selecting the Self-Cleaning cycle.
The “SYMBOL” writings will appear in the display. This ensures that the door
cannot be opened while the oven interior is at clean temperatures.
•
The oven light does not operate during this mode.
•
During Self-Cleaning, the kitchen should be well ventilated to help eliminate
odors associated with Self- Cleaning. Odors will lessen with use.
•
1h:30 is the preset length of cleaning.
•
The mode automatically stops at the end of the clean hours.
•
When the oven heat drops to a safe temperature, the automatic door lock will
release and the door can be opened.
PREPARING THE OVEN FOR SELF-CLEANING
1. Remove all utensils and bake ware.
2. Remove non-porcelain oven racks.
IMPORTANT: If chromed racks are left in the oven during the Self-Cleaning cycle,
they will permanently lose the shiny nish and change to a dull, dark nish. See
Cleaning Chart for proper care.
3. Wipe up any soft soil spills and grease with paper towels. Excess grease will
cause ames and smoke inside the oven during Self-Cleaning.
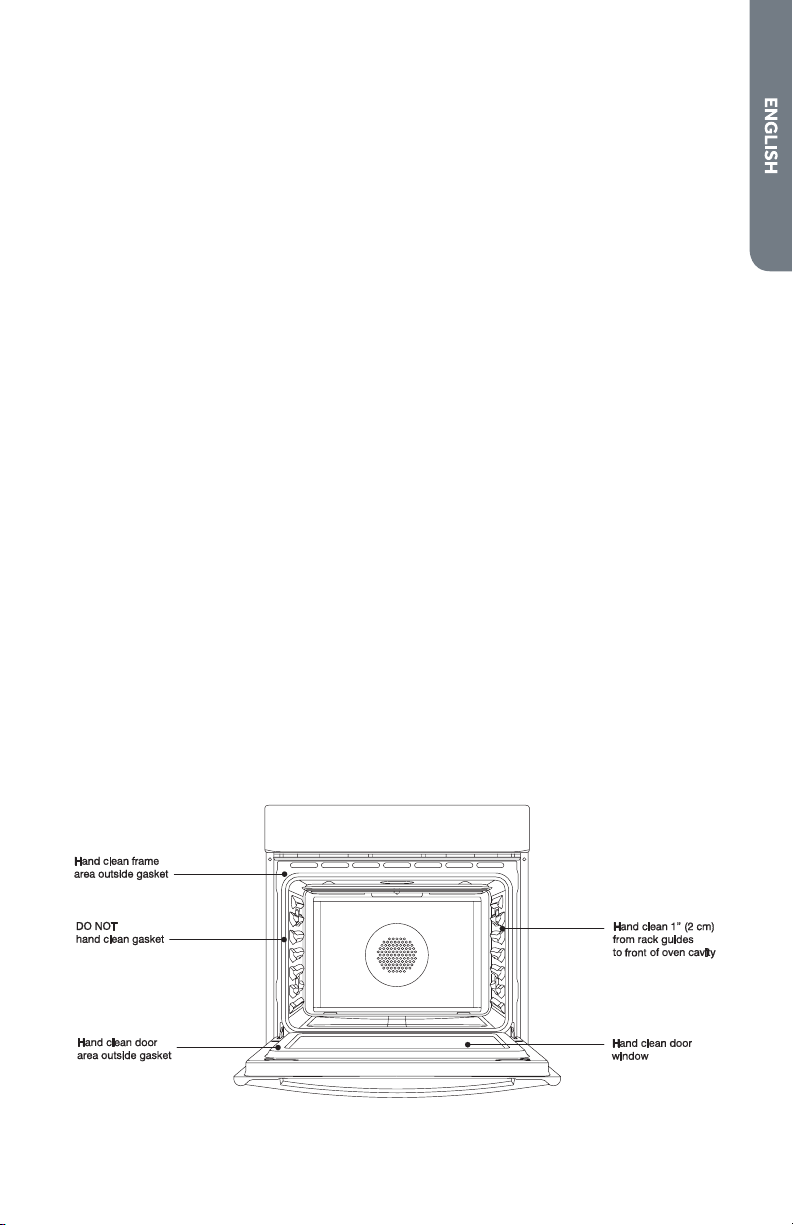
4. Review illustration below. Some areas of the oven must be cleaned by hand
before the cycle begins. They do not get hot enough during the cleaning cycle
for soil to burn away. Use a soapy sponge, plastic scrubber, or a detergent-lled
S.O.S. pad. Hand-clean the oven door edge, oven front frame and up to 1½“
(2 - 3 cm) inside the frame with detergent and hot water. Do not rub the oven
gasket. Clean the oven door window by hand. Rinse all areas thoroughly then dry.
5. Be sure oven interior lights are turned o and the light bulbs and lens covers are
in place.
Loading ...
Loading ...
Loading ...