Loading ...
Loading ...
Loading ...
53
Other Useful
Information
Taking Pictures
Playing Back/
Erasing Images
Recording & Viewing
Video Clips
Connecting to
the Computer
Getting Ready
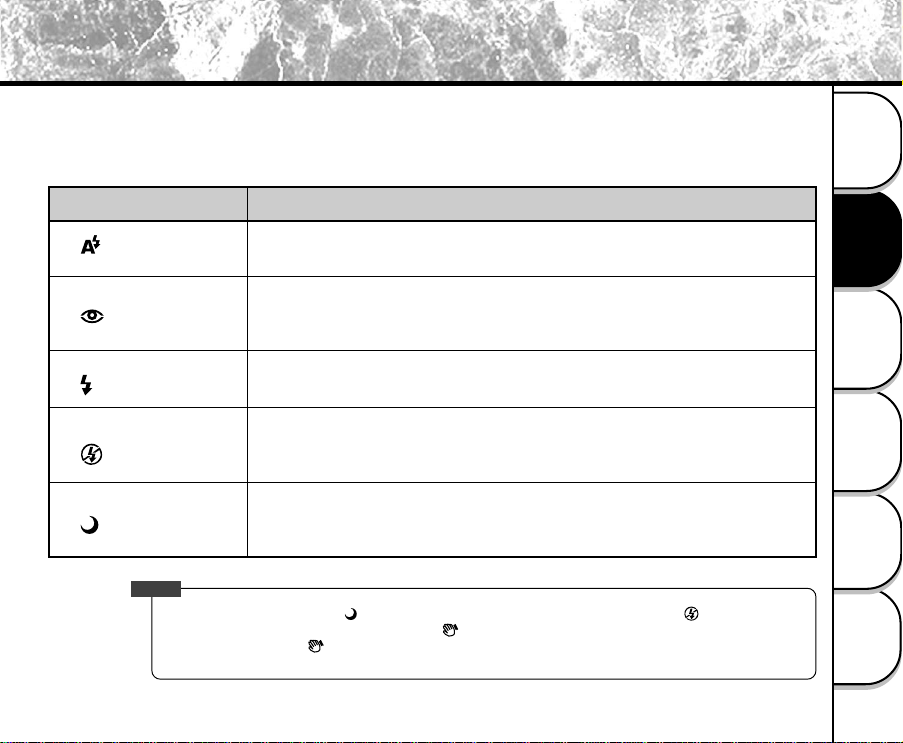
The camera provides 5 flash modes: Auto (default), Red-eye reduction, Forced flash, Off, Night Shot, which can be
changed cyclically by pressing the flash button on the top of the camera. The table below tells you how to choose the
appropriate flash mode while shooting.
Flash Mode Description
The flash fires automatically according to the ambient conditions. Select this mode for
general photography.
The flash emits a pre-flash before the main flash flashes, which causes the pupil in the
human eye to close and eliminates red-eye phenomenon. Select this mode when
taking pictures of people and animals in low-light conditions.
The flash always fires regardless of the surrounding brightness. Select this mode for
recording images in artificial light (backlighting, fluorescent lighting, etc.).
The flash does not fire. Select this mode when taking pictures at a place where the
flash photography is prohibited or under the situation that the distance to the subject is
too far away for the flash to have any effect.
The flash fires and the shutter speed becomes slow in this mode so that the subject
and background will be exposed correctly while taking a picture with dark background
at night.
[ ]Auto
[ ]Red-eye Reduction
[ ]Forced Flash
[ ]Off
[ ]Night Shot
Using the Flash (continued)
NOTE
• If you take a picture in the [ ] mode at a place with a dark background or in the [ ] mode at a dark
place, the shutter speed slows down, and [
] is displayed. (When the shutter is pressed halfway,
the LED1 lights and [ ] is displayed on the LCD monitor.) We recommend that you use a tripod to
prevent blurred image caused by shaking.
Loading ...
Loading ...
Loading ...