
Loading ...
Loading ...
Loading ...
Upper Threading 57
2
——
—————————————————————————————————————————————————————————————
—
—————————————————————
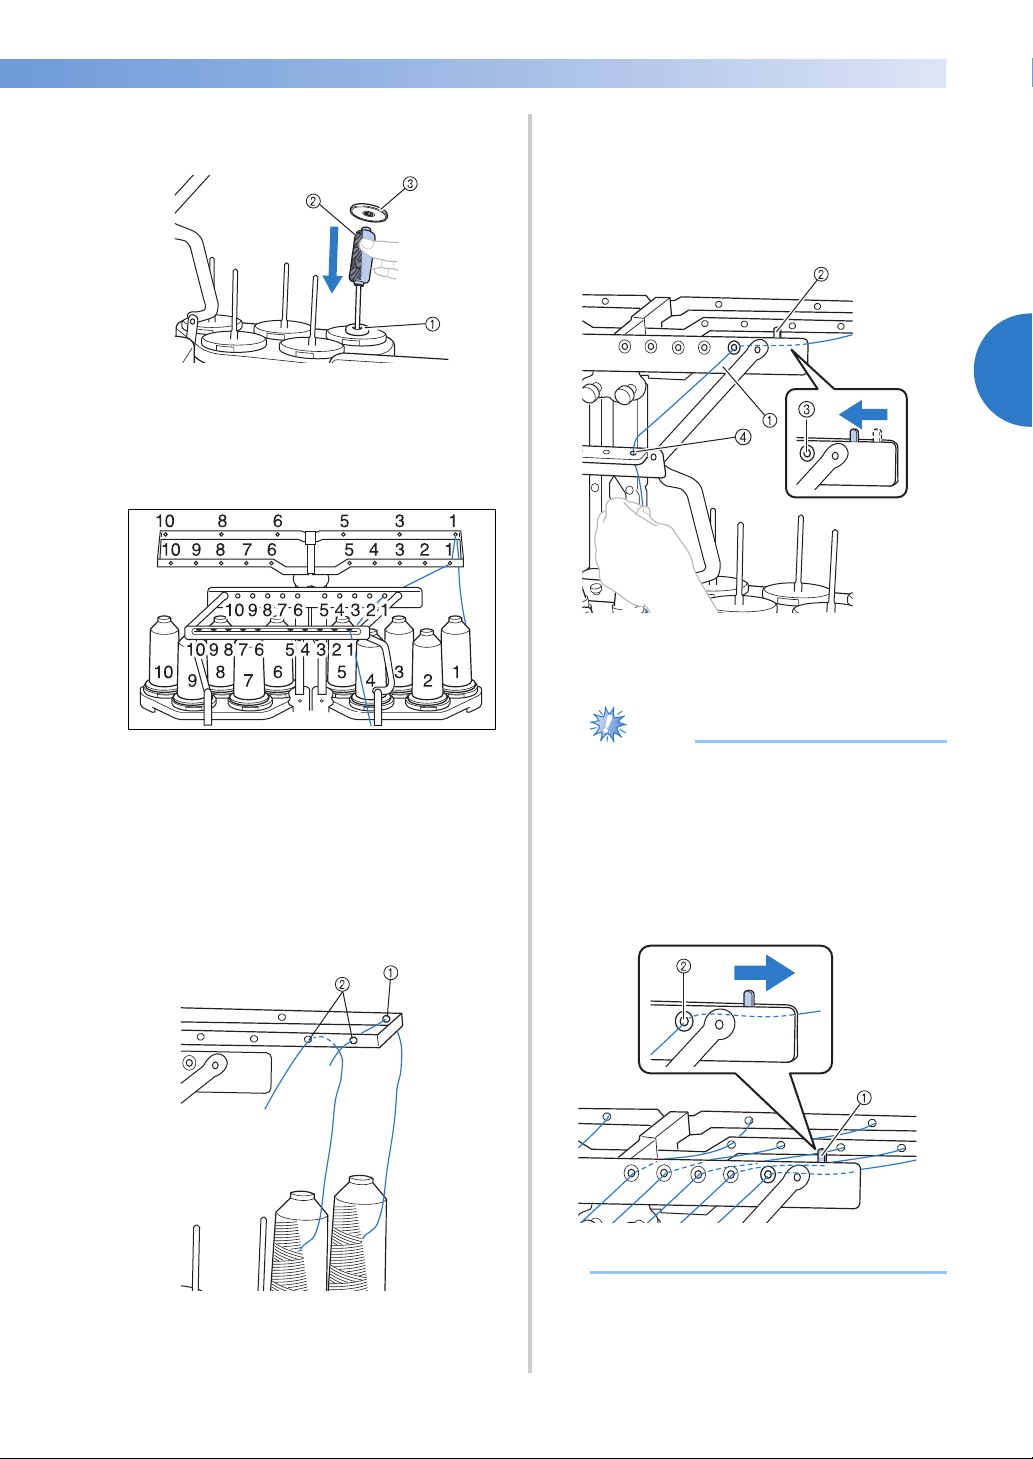
• Use spool cap on all spools of thread
shorter than the height of the spool pin.
1 Spool mat
2 Small spool
3 Spool cap
The numbers indicate the thread path for each of
the numbered needle bars. Be very careful to
correctly thread the needle bars.
2
Pass the thread of a specified color through
the holes on the thread guide, making sure
that you have the thread color matched to
the coordinating needle bar.
Pass the thread from spool pins 1, 3, 5, 6, 8
and 10 through the holes in both thread
guides A and B.
Pass the thread from spool pins 2, 4, 7 and 9
through the hole in thread guide B only.
1 Thread guide A (There are 6 holes in this thread
guide)
2 Thread guide B (There are 10 holes in this
thread guide)
3
Pass the thread through the hole (with the
corresponding needle bar number) in thread
guide C, then through the corresponding
hole in thread guide D.
As an example, the threading for spool pin 1
is shown.
1 Thread guide C
2 Thread tension lever
3 Holes in thread guide C
4 Thread guide D
Note
● Before threading, make sure to slide the
thread tension lever to the left so that the
holes in thread guide C are fully open.
● After all upper threading is finished, be
sure to slide the thread tension lever back
to the right. Embroidering with the holes in
thread guide C fully open may cause the
thread to become tangled or break.
1 Thread tension lever
2 Holes in thread guide C
Loading ...
Loading ...
Loading ...