Loading ...
Loading ...
Loading ...
Using the Optional Cap Frame 275
7
——
——————————————————————————————————————————————————
—
————————————————————————————————
6
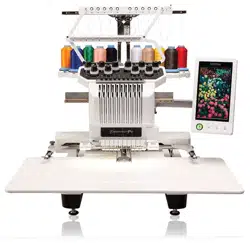
Align the holes on the embroidery frame holder
with the pins in the frame-mounting plate of the
carriage.
1 Pins in the frame-mounting plate
2 Holes on the embroidery frame holder
7
Secure the embroidery frame holder with the
two thumb screws.
1 Use the thumb screws included with the
machine (thumb screws removed in step
1 on
page 261).
CAUTION
Additional digitizing
information
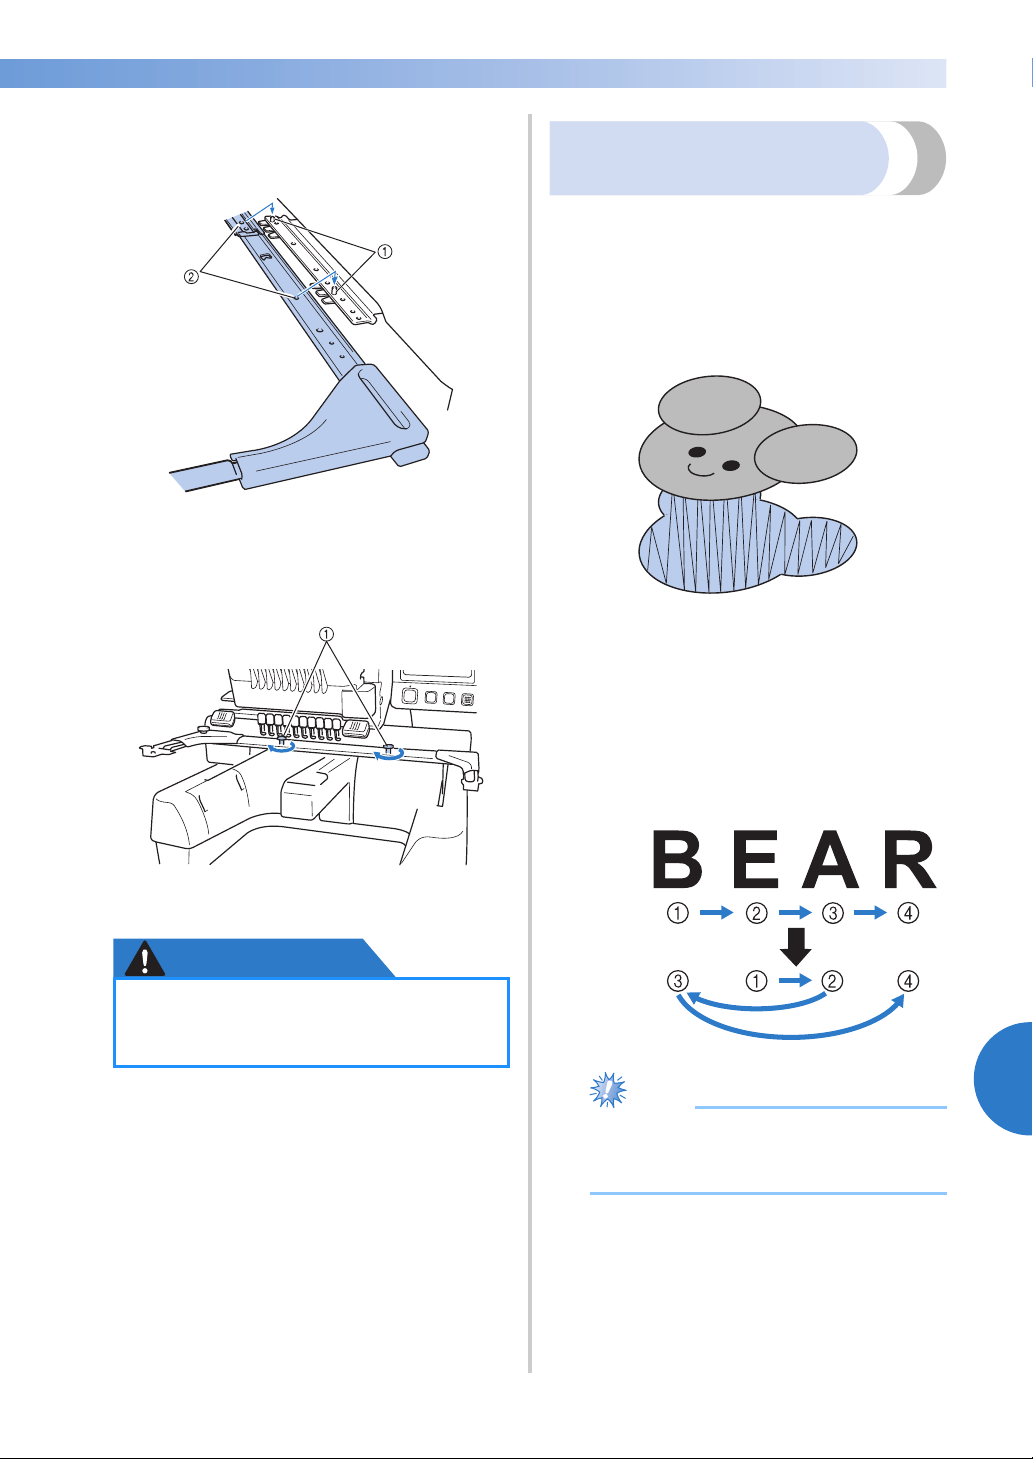
When creating a pattern for embroidering with a
cap frame, pay attention to following points in
order to avoid registration problems (misalignment
of gaps in the pattern).
1
Sew underlay stitches.
2
Start the embroidery pattern from the
center, and sew toward the ends.
With the machine, the order in which
patterns are selected when they are
combined is the order in which they will be
sewn. For the following example, select the
patterns in the order “E”
→“A”→“B”→“R”
to make the combined pattern “BEAR”.
Note
● Do NOT sew from one end to the other,
otherwise wrinkling or shrinking may
occur.
● Using the disc-shaped screwdriver
included, firmly tighten the thumb
screws.
Incorrect
sewing
order
Correct
sewing
order
Loading ...
Loading ...
Loading ...