Loading ...
Loading ...
Loading ...
Using the Optional Cap Frame 261
7
——
——————————————————————————————————————————————————
—
————————————————————————————————
1
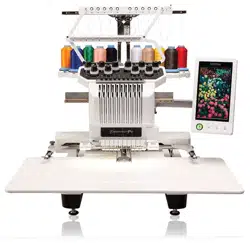
Loosen and then remove the two thumb
screws and the embroidery frame holder.
1 Thumb screws
• The removed thumb screws remain
attached to the embroidery frame holder.
1 Put the two thumb screws back in the
embroidery frame holder.
2
Remove the two upper thumb screws of the
cap frame driver and set aside. Loosen the
two lower thumb screws (4 turns).
1 Upper thumb screws
2 Lower thumb screws
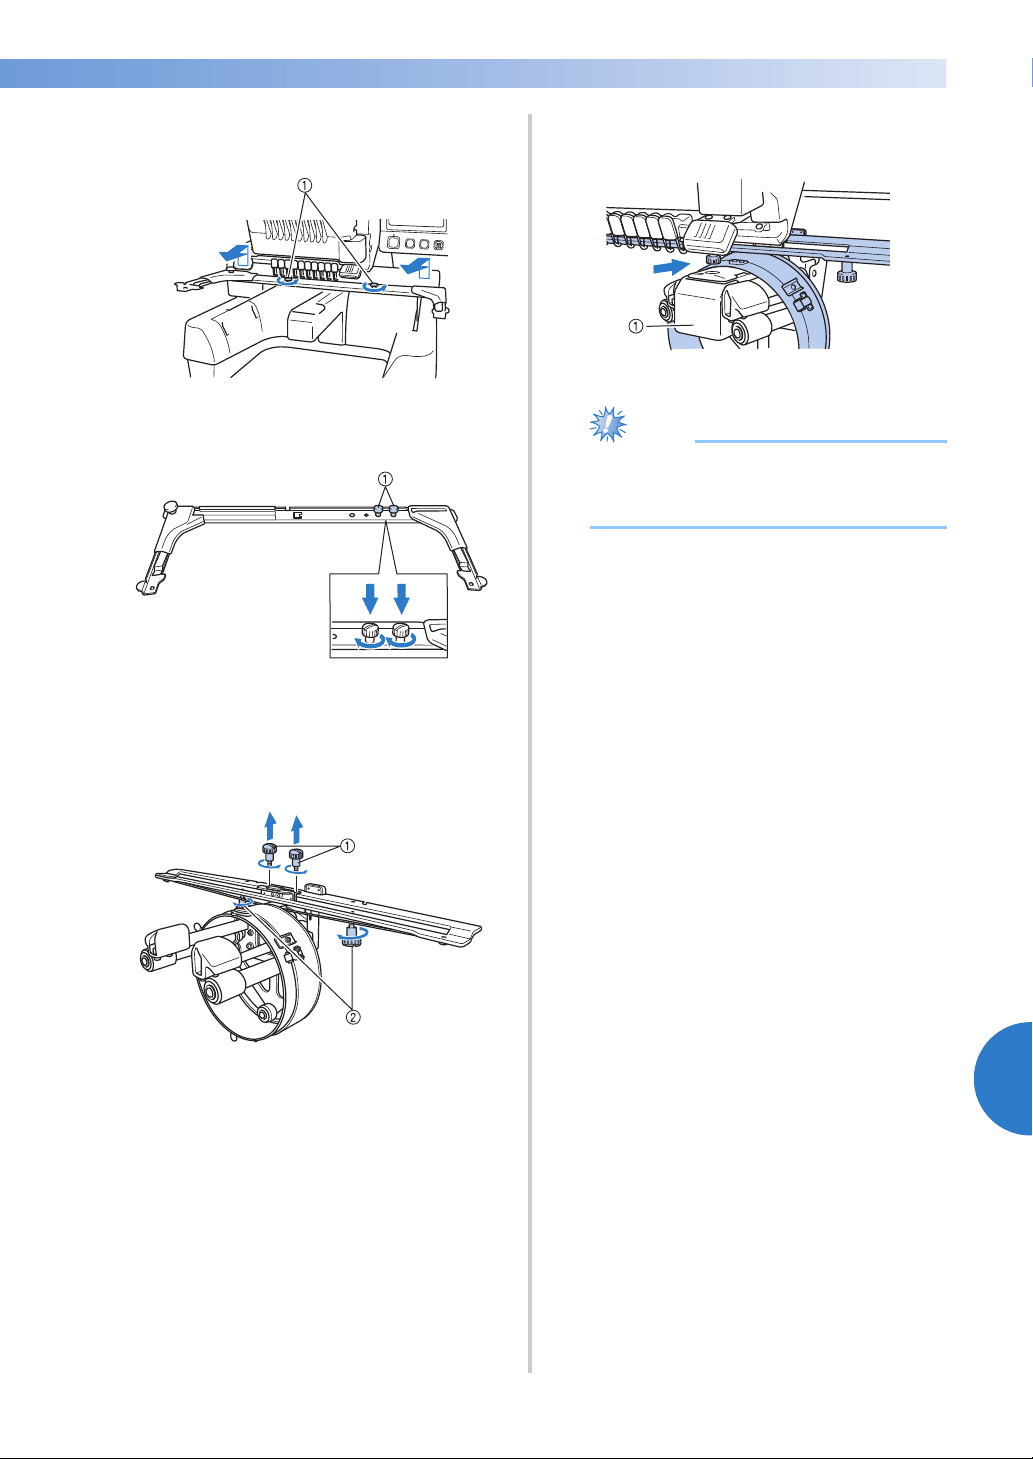
3
Pass the machine bed through the ring of the
cap frame driver.
1 Machine bed
Note
● Be careful that the cap frame driver does
not hit any nearby parts, such as the
presser foot.
Attach the cap frame driver to the carriage as
described below in steps
4 through 7.
Loading ...
Loading ...
Loading ...