
Loading ...
Loading ...
Loading ...
GETTING READY ——————————————————————————————————————————————————————————————————————
——
30
3
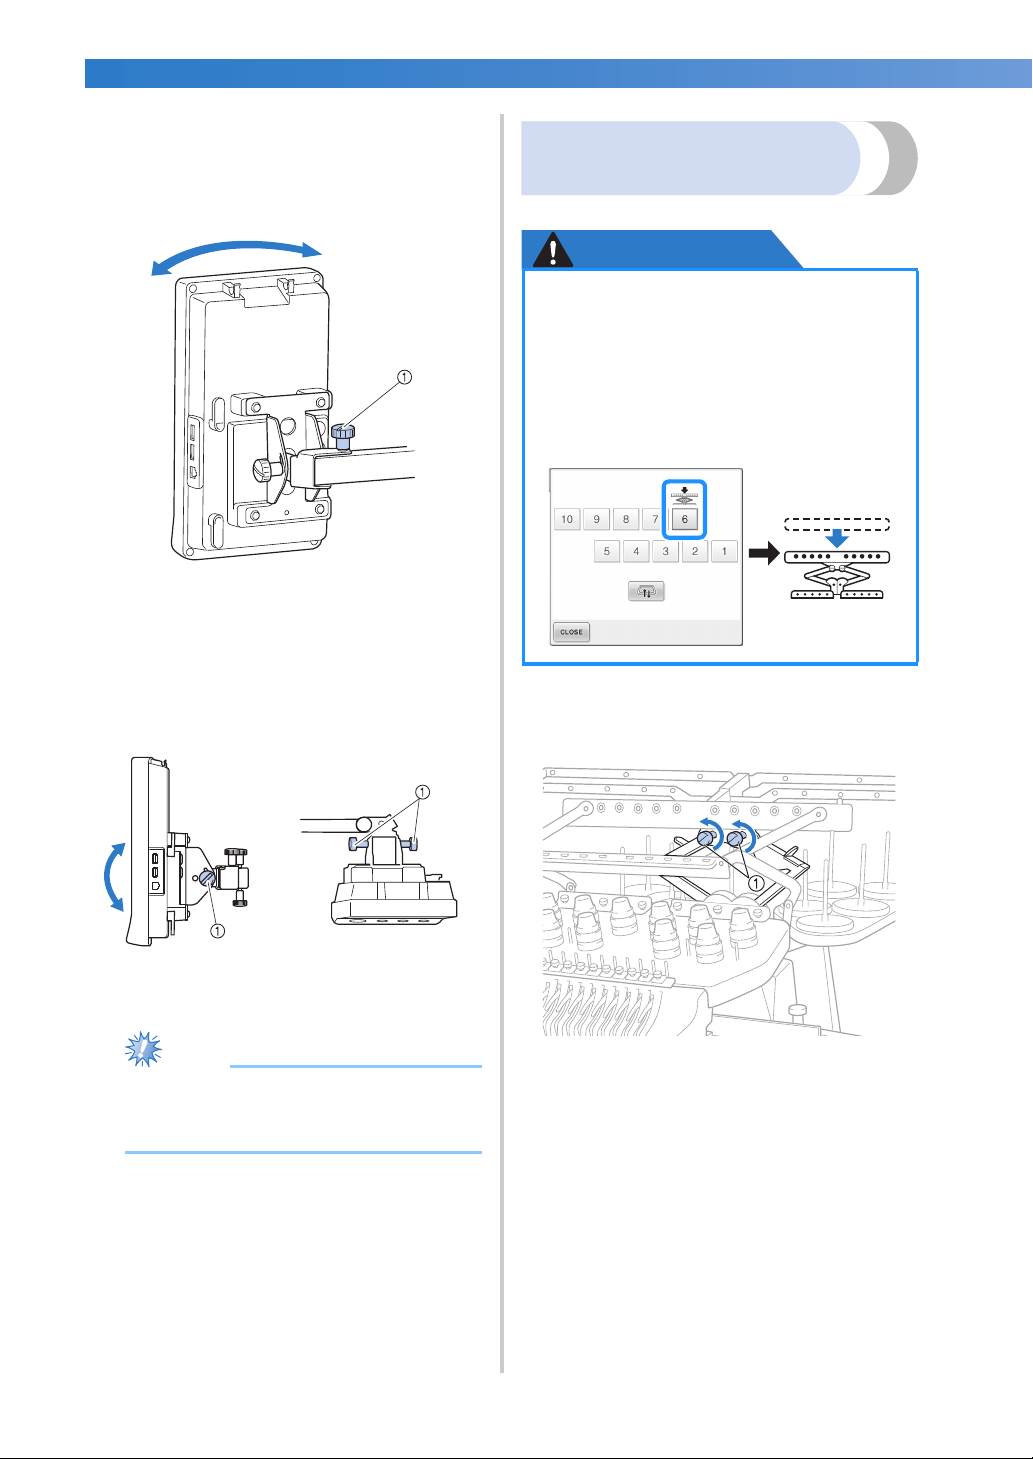
Adjust the orientation of the operation
panel.
Loosen the thumb screw, adjust the operation
panel to an easy-to-view orientation, and
then tighten the thumb screw.
1 Thumb screw
4
Adjust the angle of the operation panel.
Loosen the 2 thumb screws behind the
operation panel, adjust the operation panel to
an easy-to-view angle, and then tighten the
thumb screws.
1 Thumb screws
Note
● Using the disc-shaped screwdriver
included, loosen and firmly tighten the
five thumb screws.
Preparing the thread guide
assembly
Raise the thread guide assembly.
CAUTION
1
Loosen the two thumb screws on top of the
thread guide assembly support.
1 Turn the screw counterclockwise three or four
times to loosen it.
(Side view) (Top view)
● When setting up the thread guide
assembly, set it up with the needle bar
6 position selected, otherwise the
machine may malfunction. (Refer to
“Moving and threading a selected
needle bar” on page 62 for moving the
needle bar.)
Loading ...
Loading ...
Loading ...