
Loading ...
Loading ...
Loading ...
APPENDIX ——————————————————————————————————————————————————————————————————————————
——
264
6
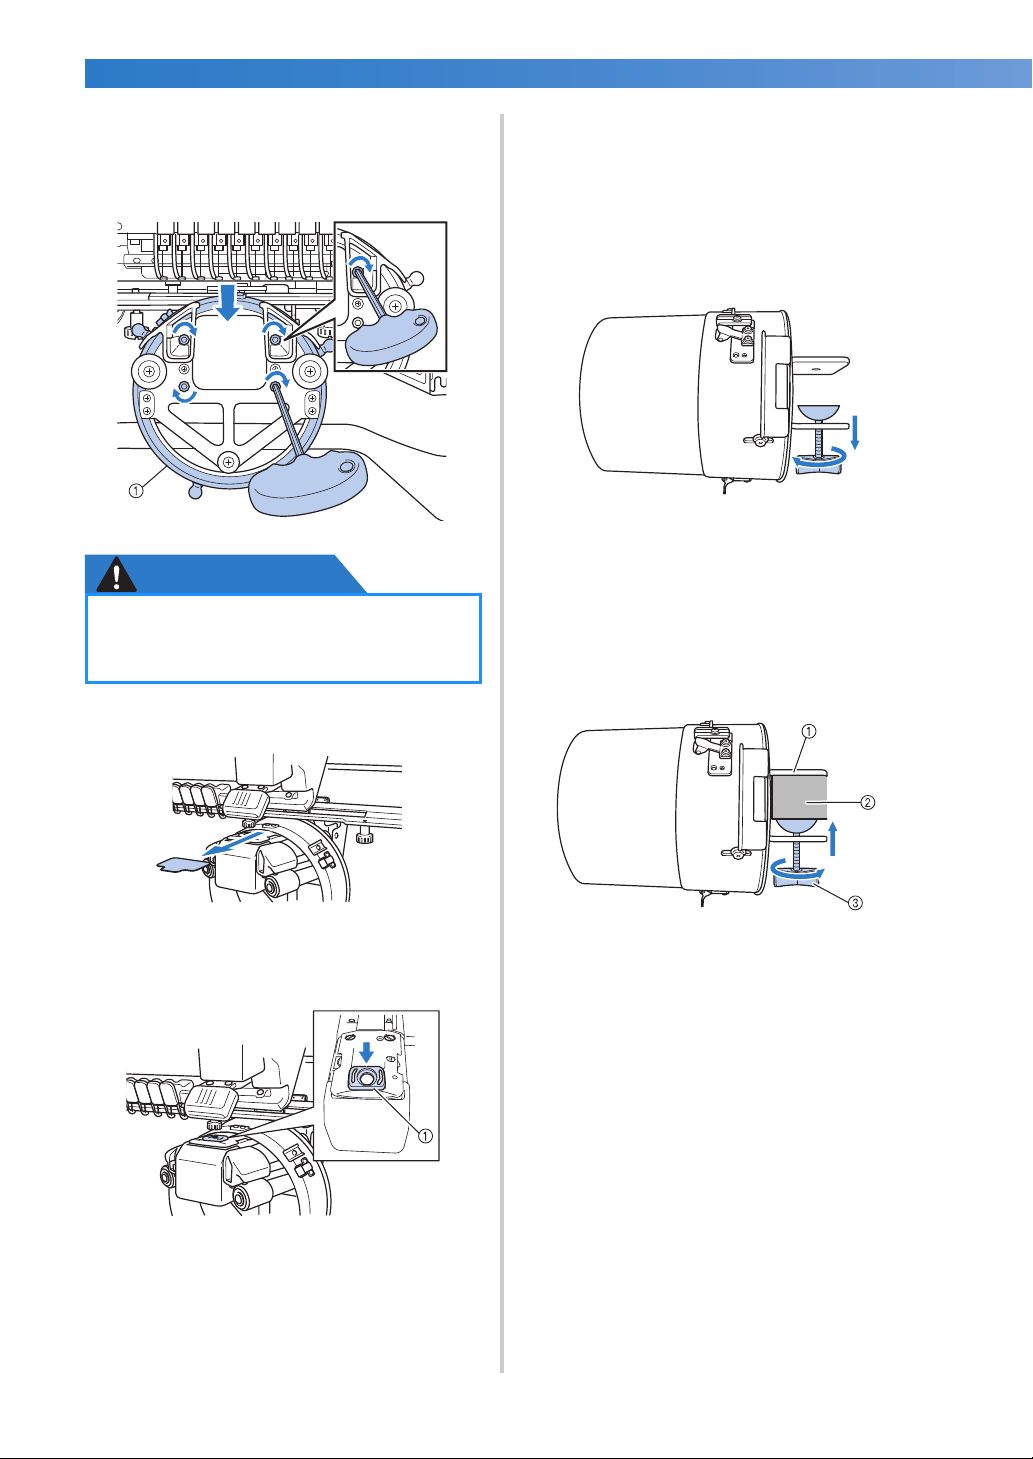
Lightly press down the ring, and then use the
Allen screwdriver (large) to tighten the four
hexagonal screws on the inside of the ring.
Firmly tighten the screws.
1 Ring
CAUTION
7
Remove the pad inserted in step 5.
■ Installing the needle plate spacer
Attach the needle plate spacer to the needle
plate.
1 Needle plate spacer
■ Preparing the mounting jig
Attach the mounting jig to a stable surface, such
as a desk.
1
Loosen the thumb screw for the mounting jig
to open the mounting bracket so that it is
wider than the thickness of the mounting
surface.
• The mounting bracket can be mounted
onto a mounting surface with a thickness
from 9 mm (3/8 inch) to 38 mm (1-1/2
inches).
2
Securely clamp the mounting bracket onto
the mounting surface by tightening the
thumb screw.
1 Mounting bracket
2 Mounting surface
3 Tighten thumb screw
● Make sure that each hexagonal screw is
firmly tightened. If any screw remains
loosen, injuries may result.
Loading ...
Loading ...
Loading ...