Loading ...
Loading ...
Loading ...
GETTING READY ——————————————————————————————————————————————————————————————————————
——
32
Attaching the embroidery
frame holder
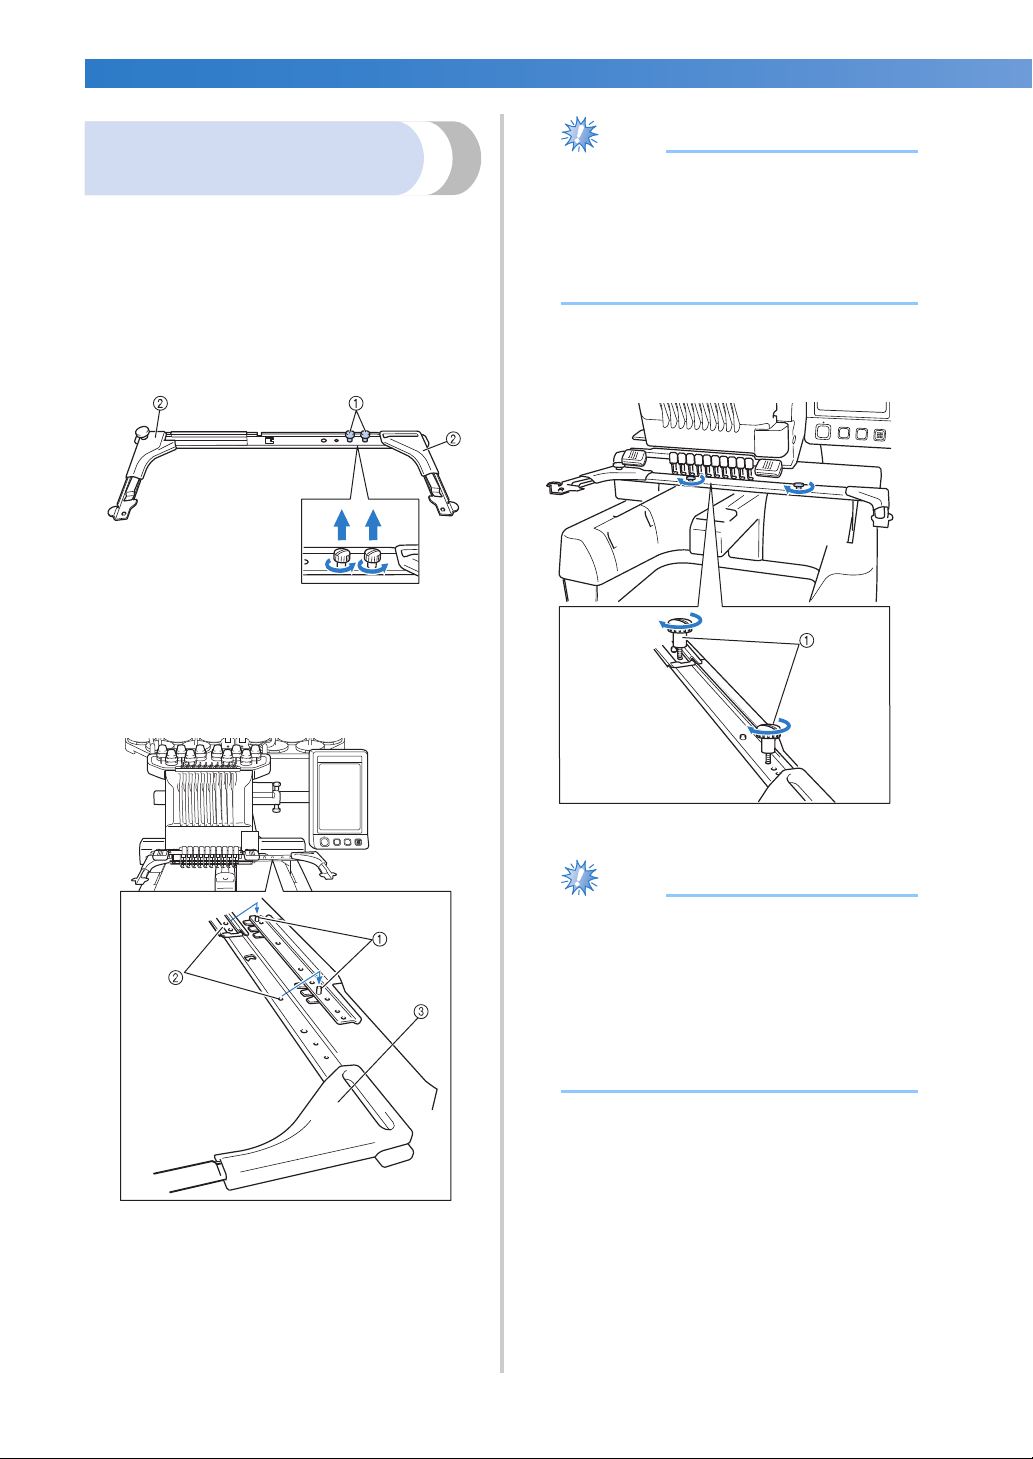
Attach the embroidery frame holder to the carriage.
1
Use the embroidery frame holder
appropriate for the embroidery frame that
you are using. (Refer to page 90 to 92.)
2
Remove the two thumb screws of the
embroidery frame holder.
1 Thumb screws
2 Corner covers
3
Align the holes in the embroidery frame
holder with the pins on the frame-mounting
plate of the carriage.
1 Pins on the frame-mounting plate
2 Holes in the embroidery frame holder
3 Corner covers
Note
● Each embroidery frame holder has
different color of corner cover.
Holder A: White corner covers
Holder B: Light gray corner covers
Holder C: Dark gray corner covers
(Optional)
4
Secure the embroidery frame holder with
the two thumb screws removed in step
2.
1 Thumb screws
Note
● Using the disc-shaped screwdriver
included, firmly tighten the thumb screws.
● Two types of embroidery frame holders
are included with this machine.
Embroidery frame holder A is used with
the four included embroidery frames.
(Refer to “Correctly Using the Embroidery
Frames” on page 90 for the details.)
This completes the preparation of the machine.
Loading ...
Loading ...
Loading ...