
Loading ...
Loading ...
Loading ...
Using the Optional Cap Frame 265
7
——
——————————————————————————————————————————————————
—
————————————————————————————————
Memo
● If there is a gap between the clamp of the
thumb screw and the mounting surface,
insert the included pad as shown below.
1 Mounting bracket
2 Mounting surface (worktable, desk, etc.)
3 Pad
4 Thumb screw
3
Check that there is no looseness.
If there is looseness, mount the mounting jig
onto the mounting surface again.
Note
● Be sure that the mounting bracket is
securely clamped onto the mounting
surface and that the thumb screw is firmly
tightened.
● Do not attach the mounting jig to an
unstable surface (flexible, bent or warped).
● Be careful that the mounting jig does not
fall when it is removed.
4
Adjust the size of the mounting jig according
to the type (size) of cap being embroidered.
1 Low Profile (shorter caps)
2 Standard type (taller caps)
■ For the standard type
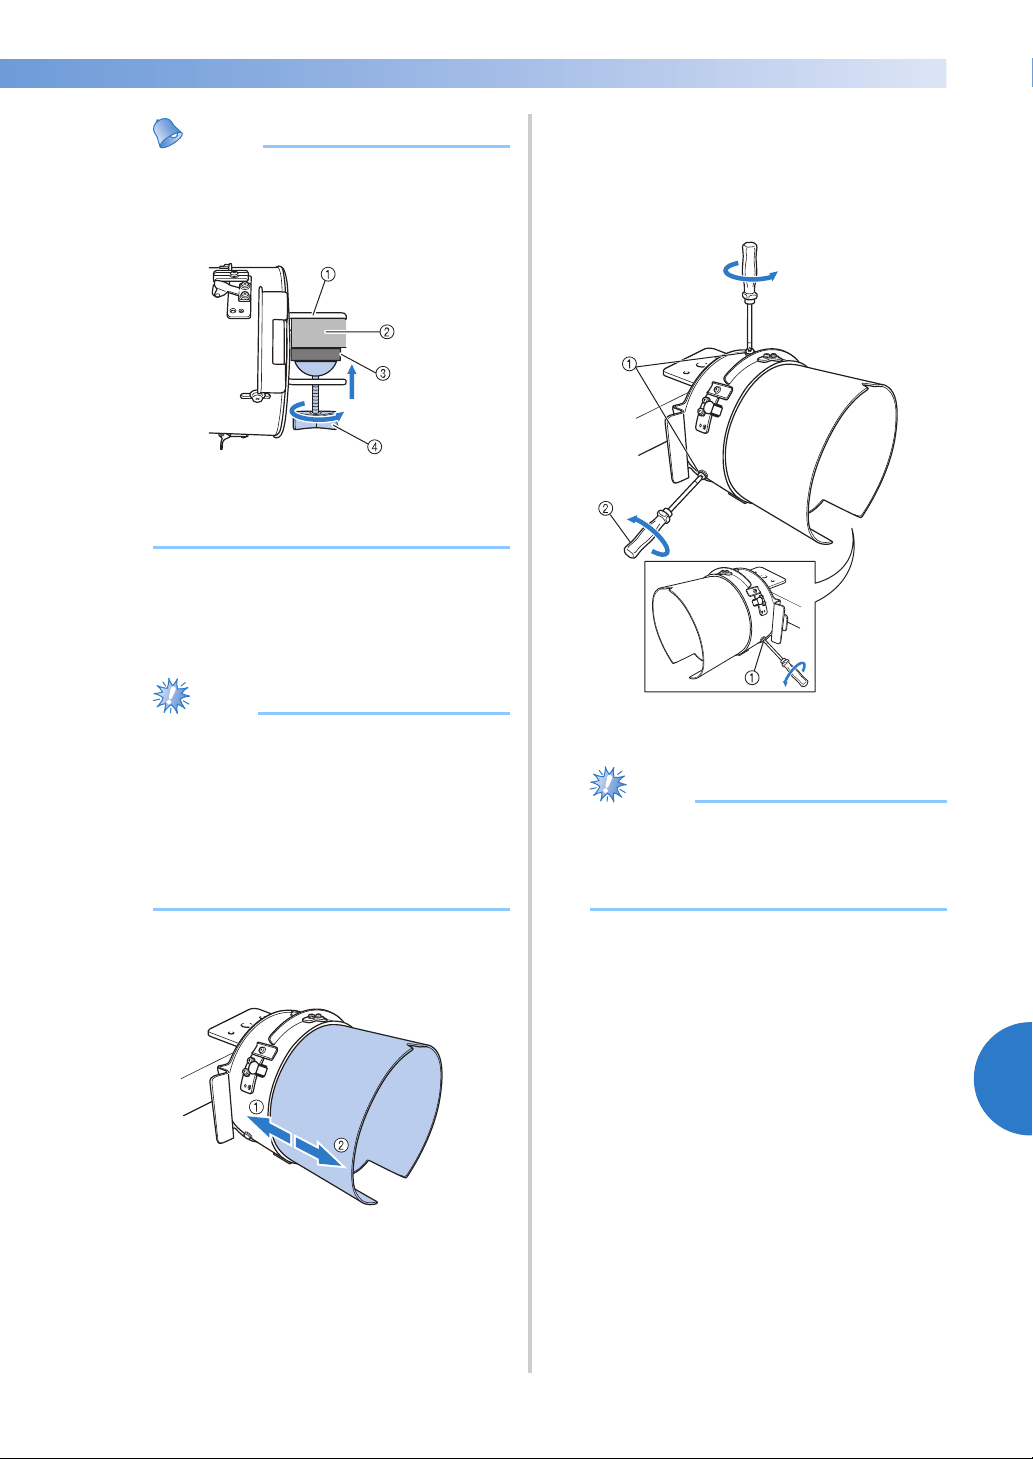
Using a Phillips screwdriver, loosen the three
screws (one each at the top and on the left and
right sides) on the outside of the mounting jig
two or three turns.
1 Screws
2 Phillips screwdriver
Note
● Do not remove the three screws (one each
at the top, left and right), otherwise they
may be lost. Only turn the screws to
slightly loosen them.
Loading ...
Loading ...
Loading ...