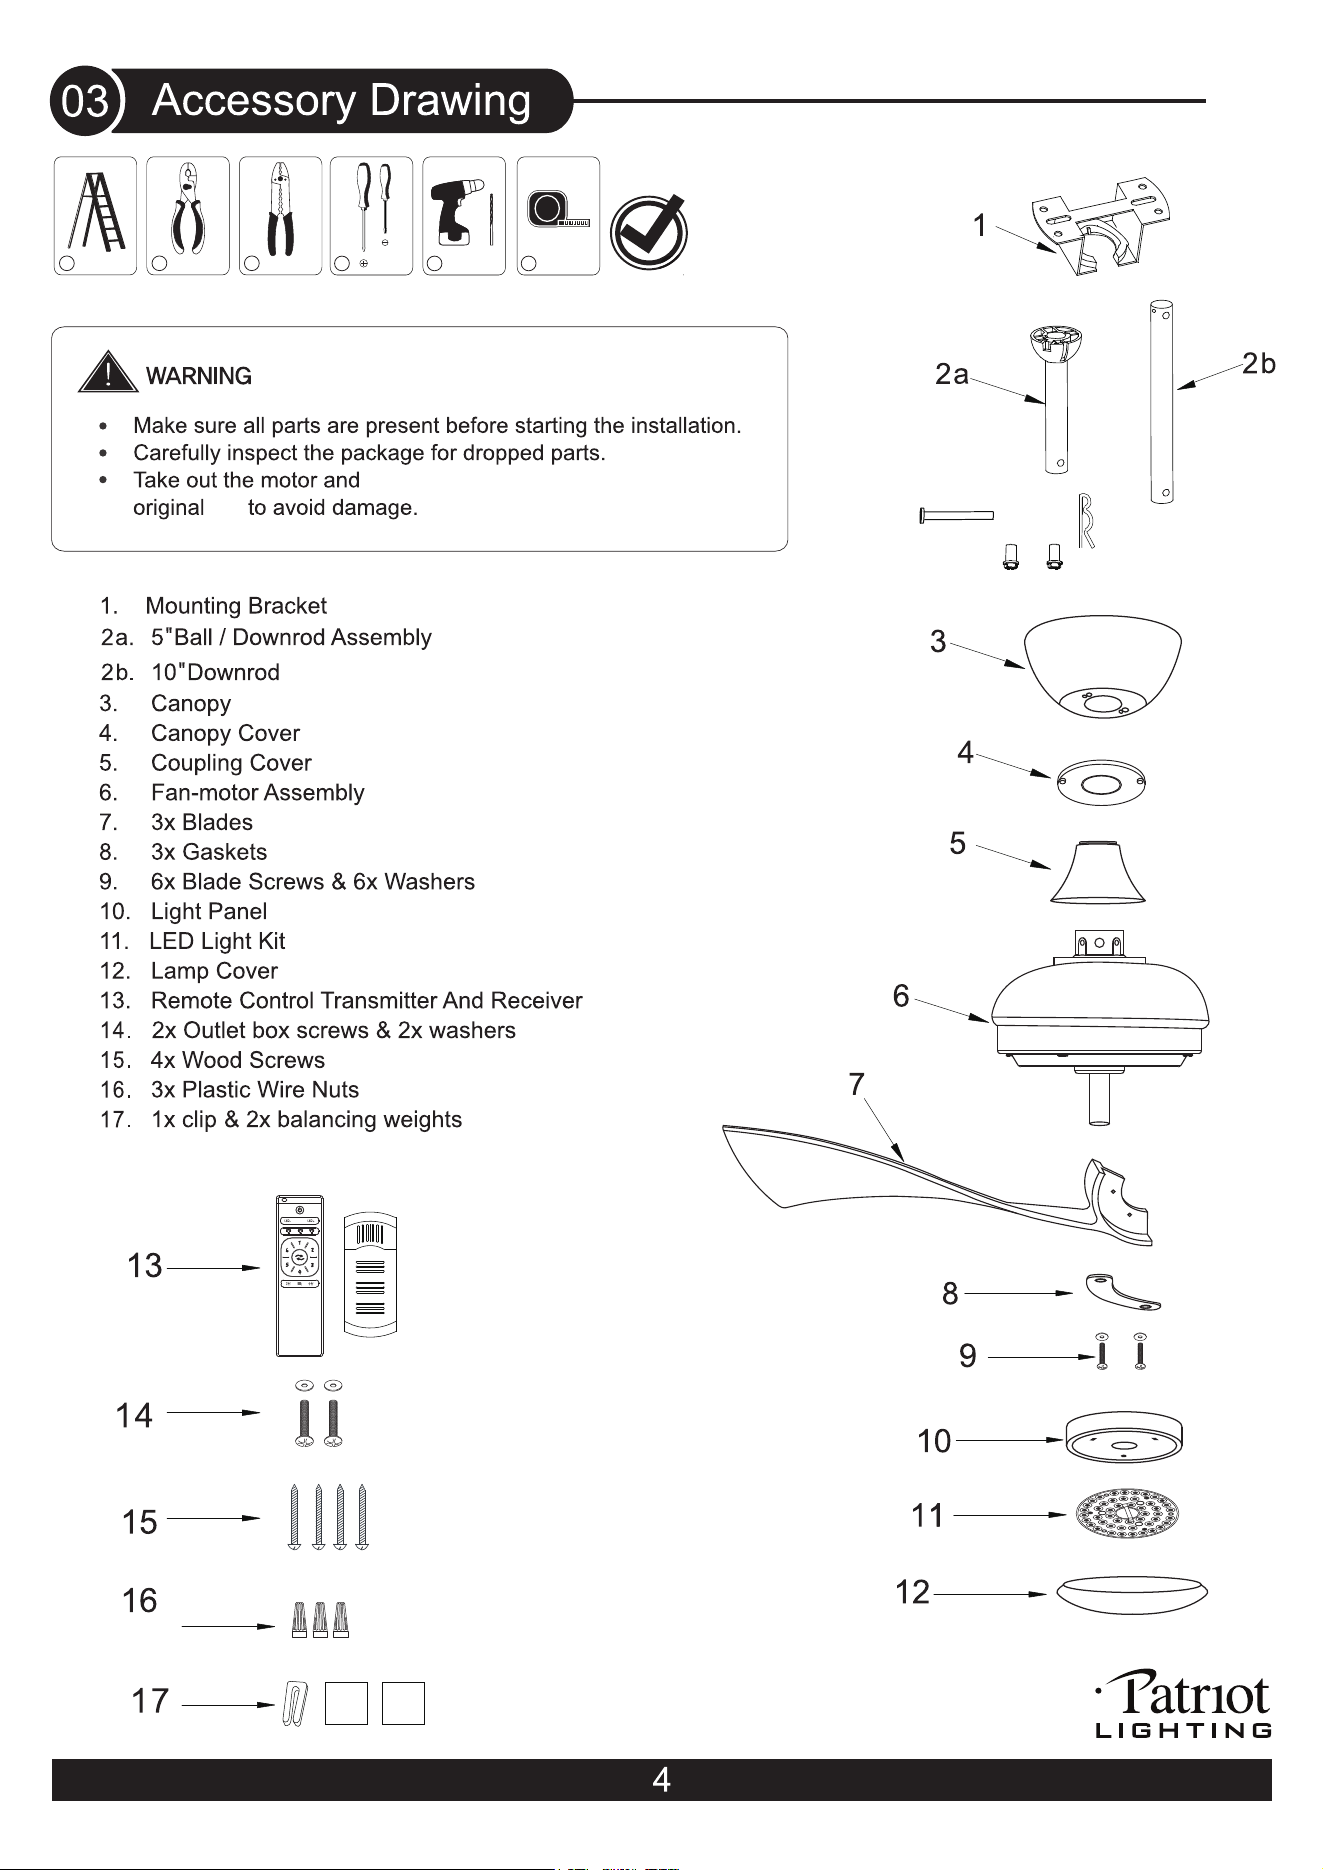
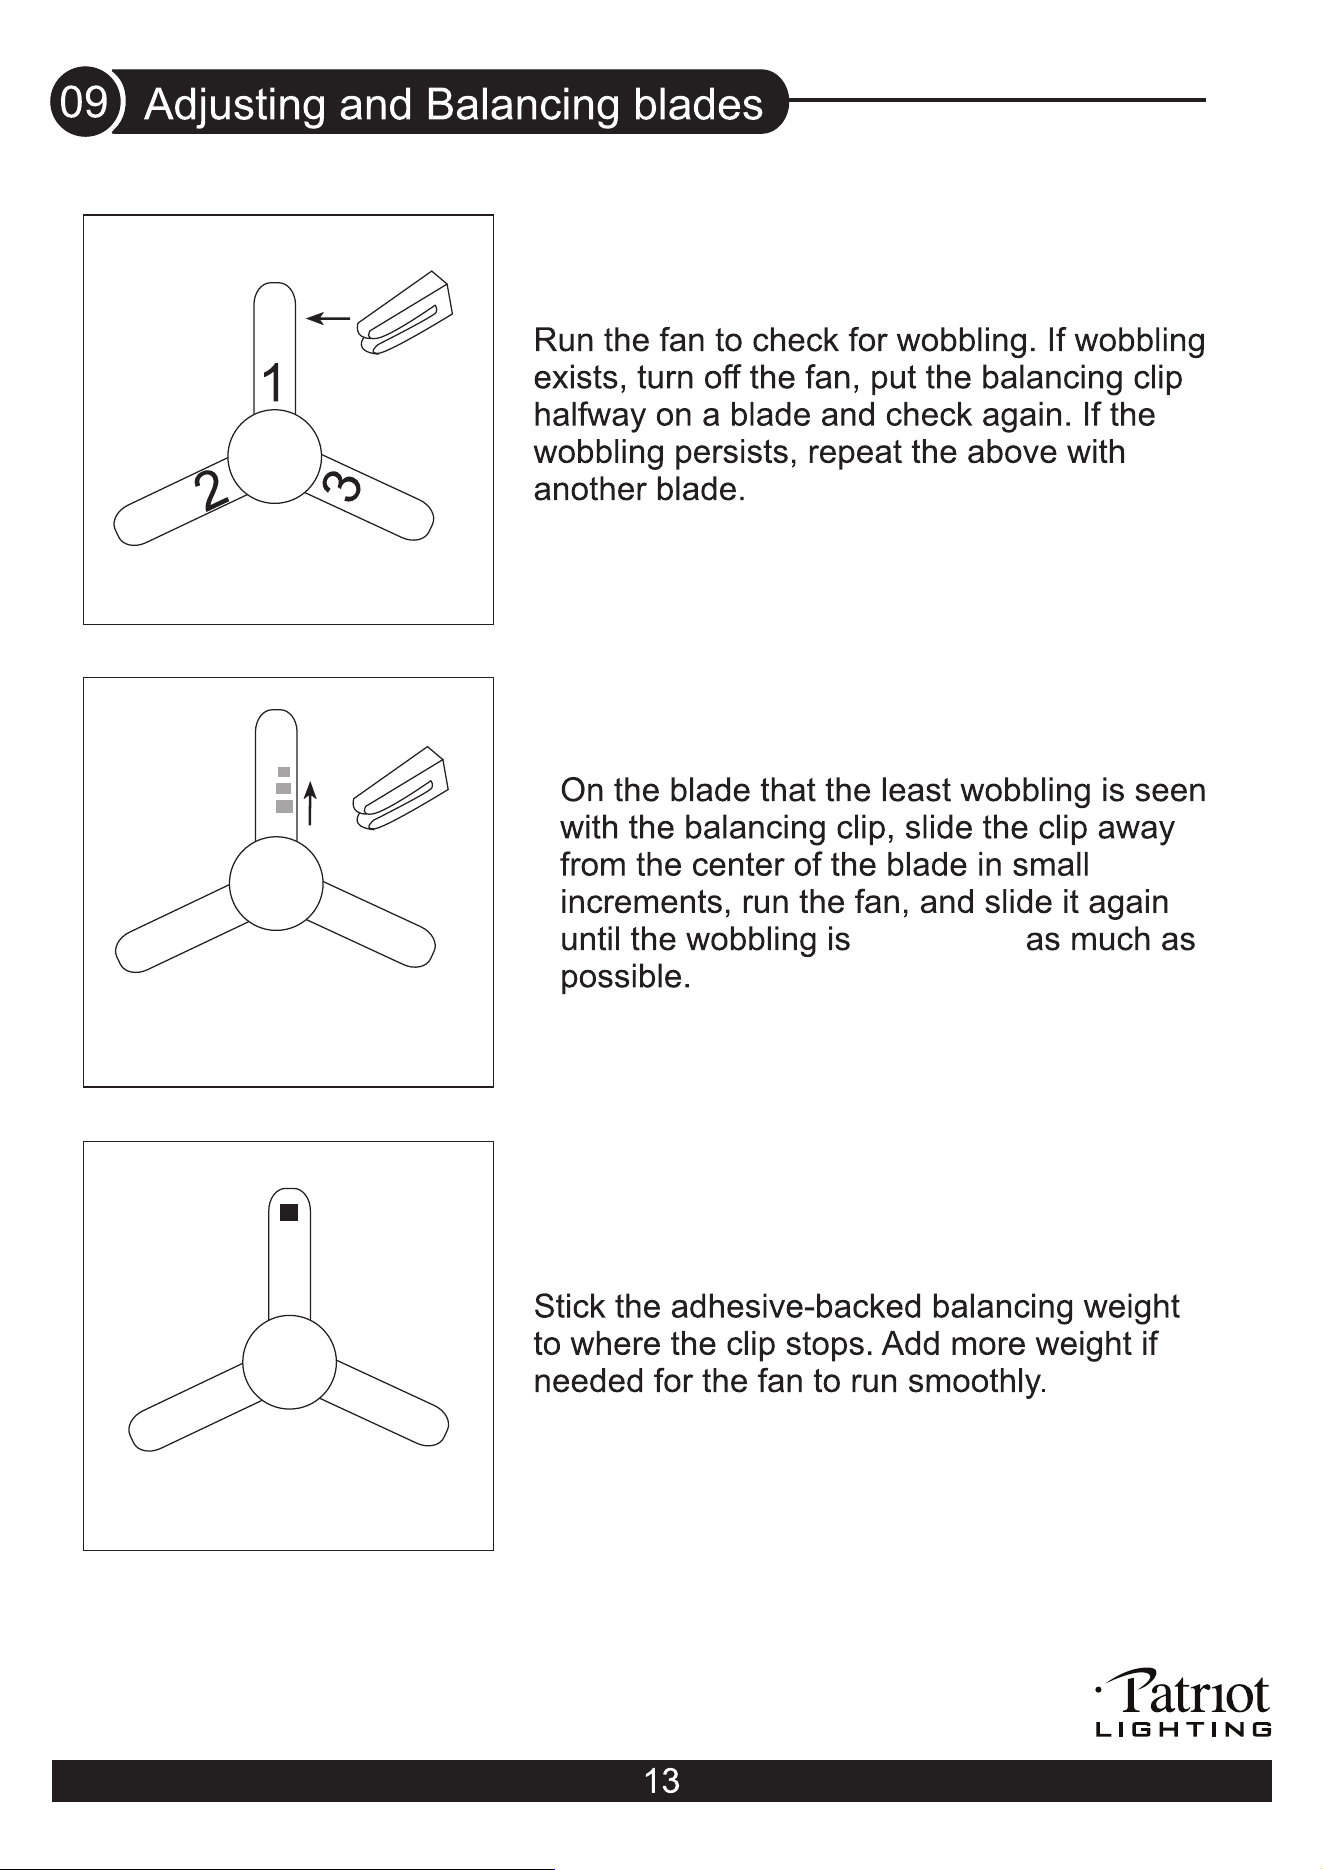
box
place it on a soft surface or on the
. parts.
Save the parts.
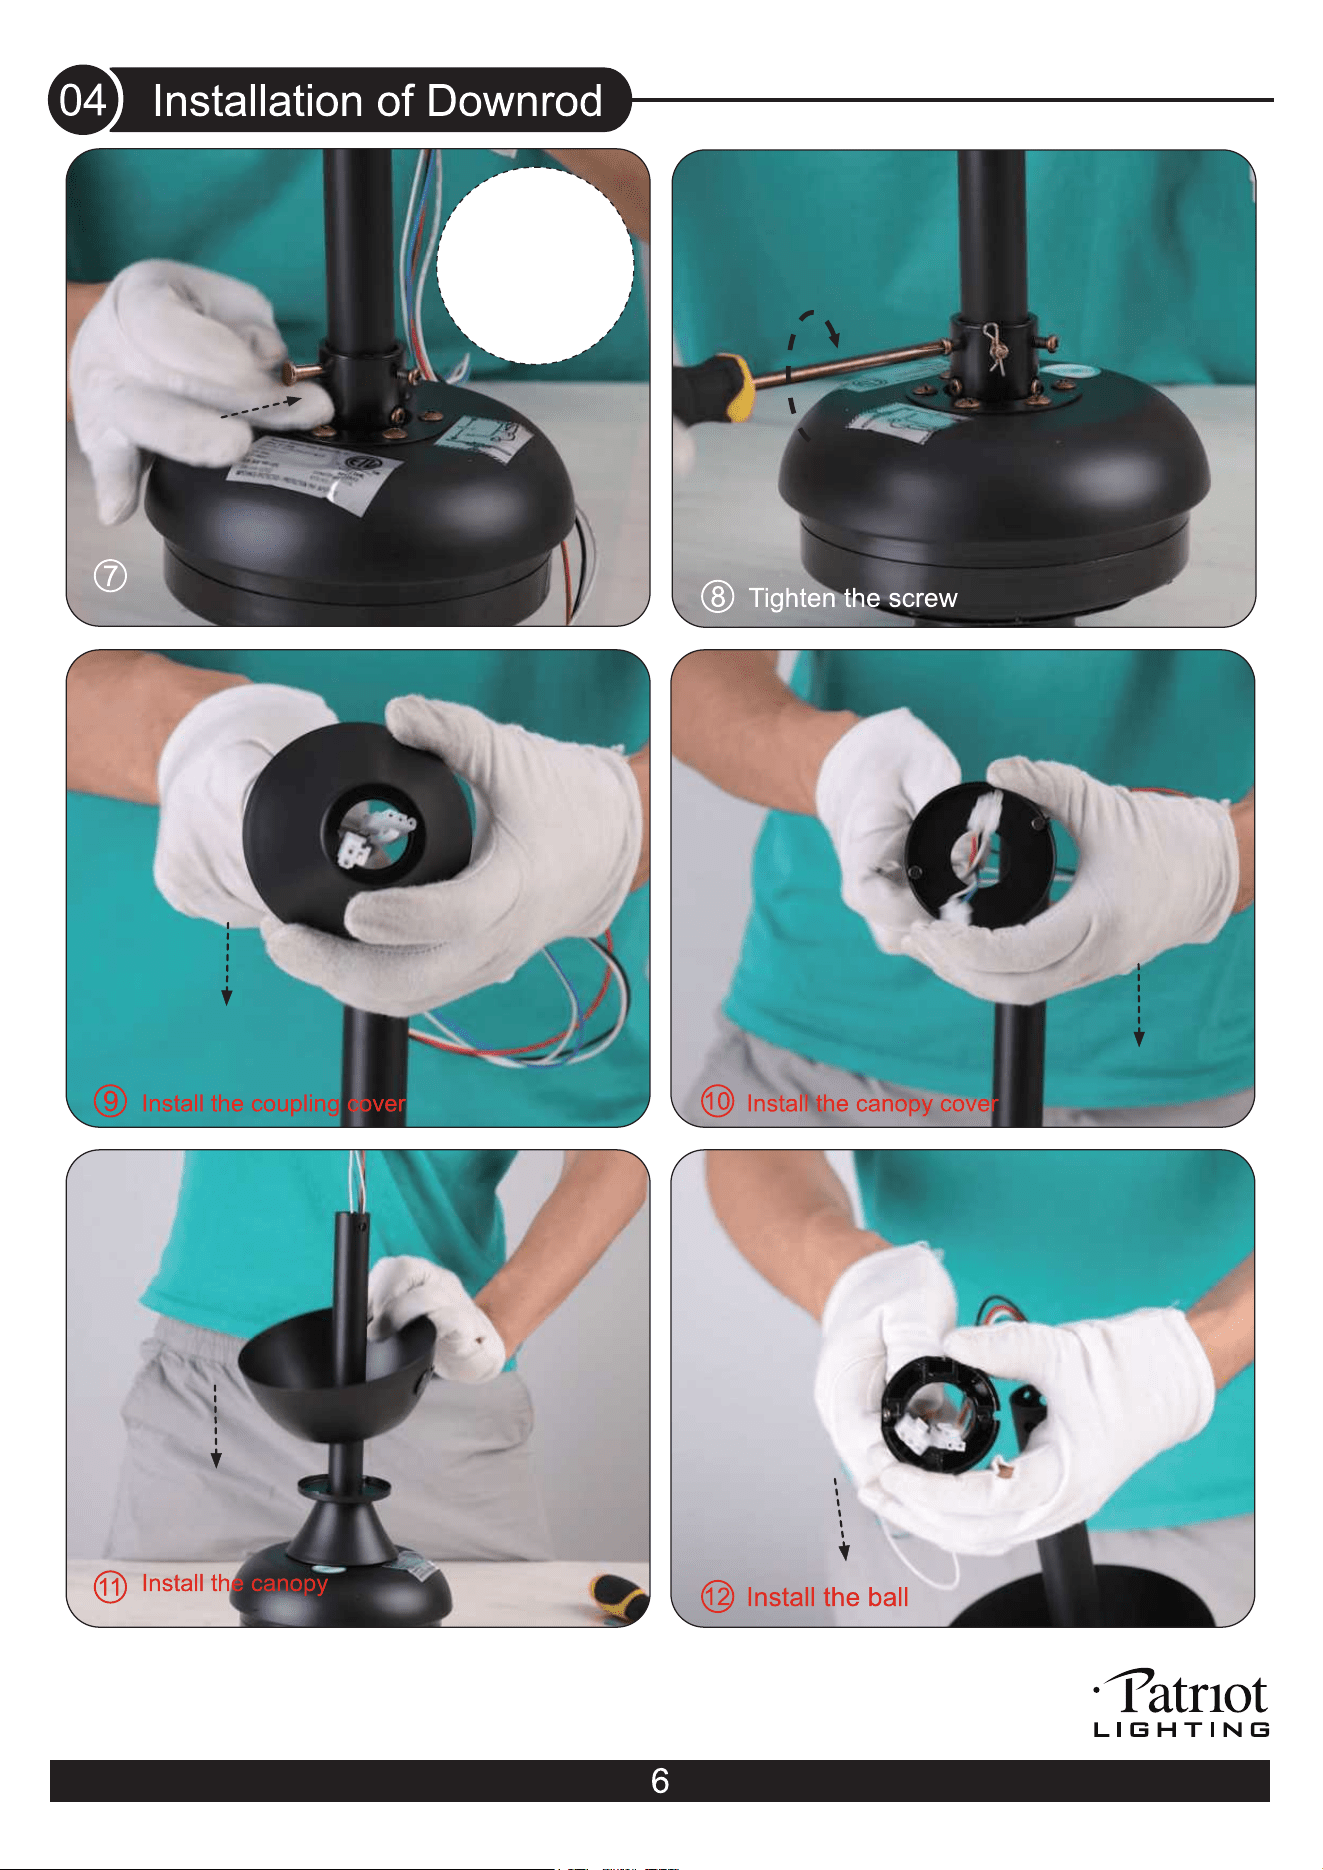
Loosen the screws.
es
(5'' and 10'' to be option).
Loosen both of screws and remove
the ball from the downrod.
s.
on the downrod. on the downrod.
and canopy cover
on the downrod.
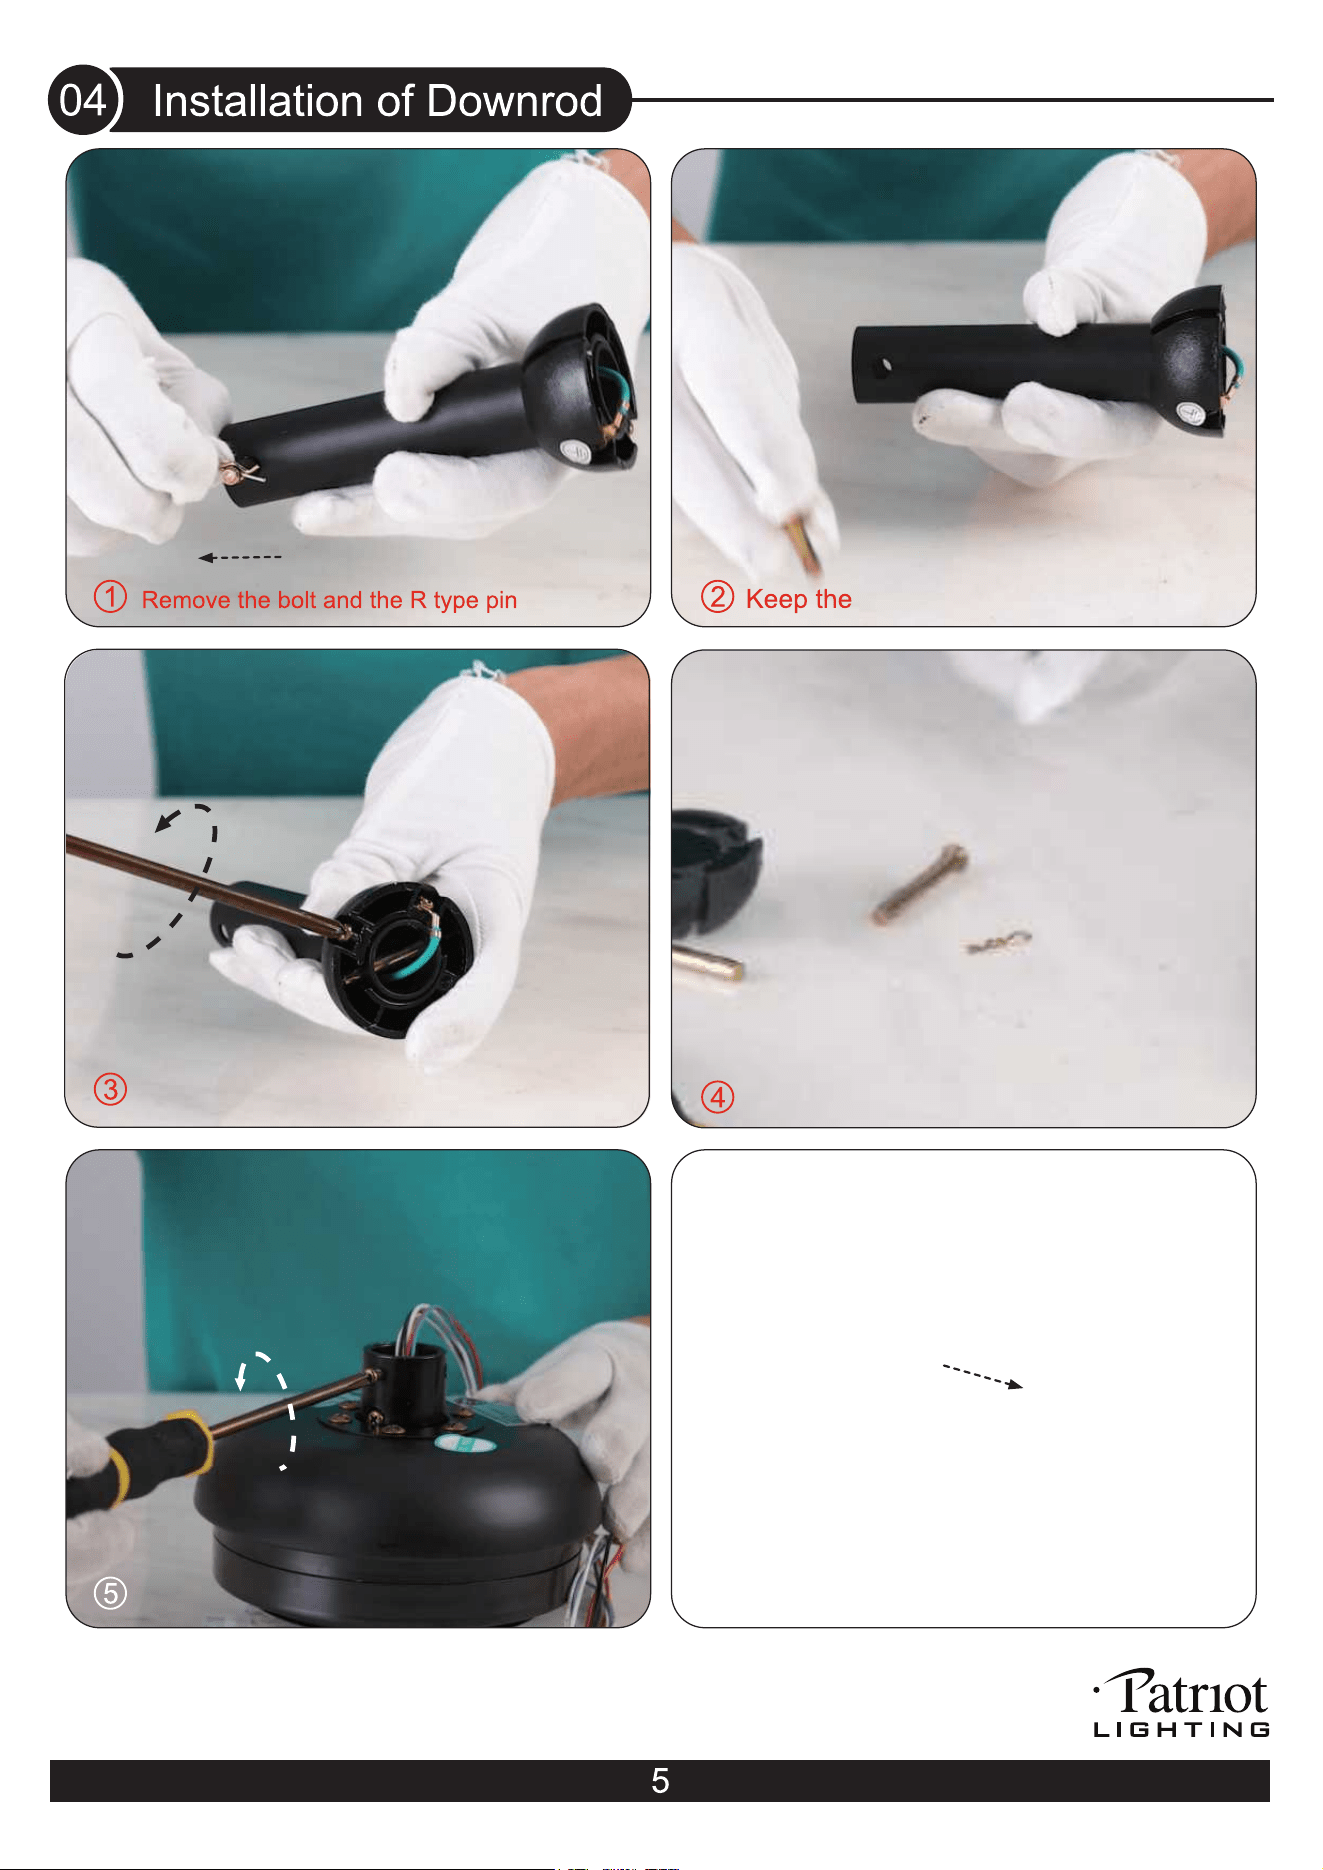
Insert the downrod into the fan, then
install the bolt and the R type pin.
on the downrod.
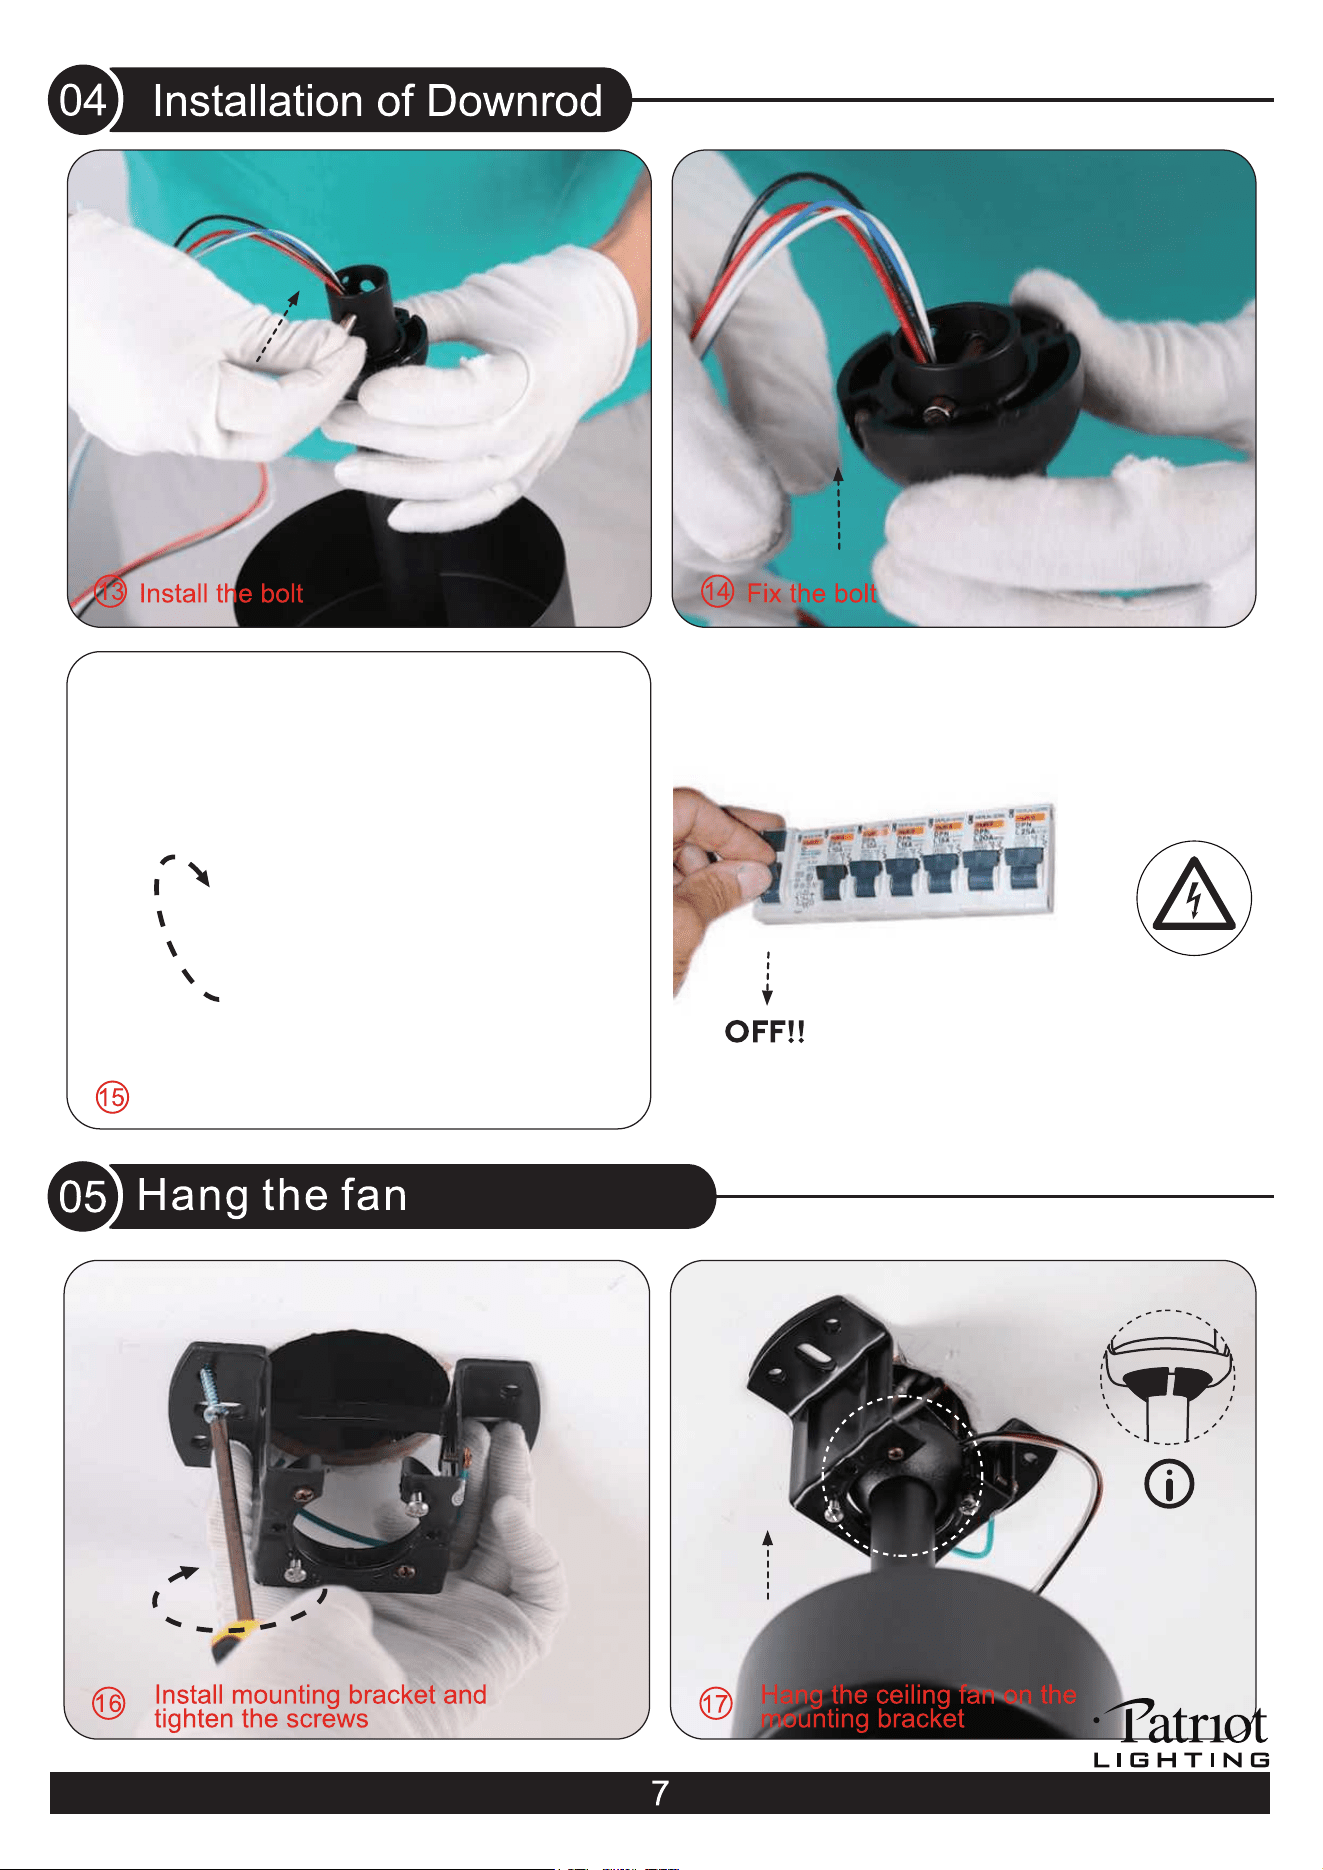
through the downrod. inside the ball.
.
..
Tighten both of screws.

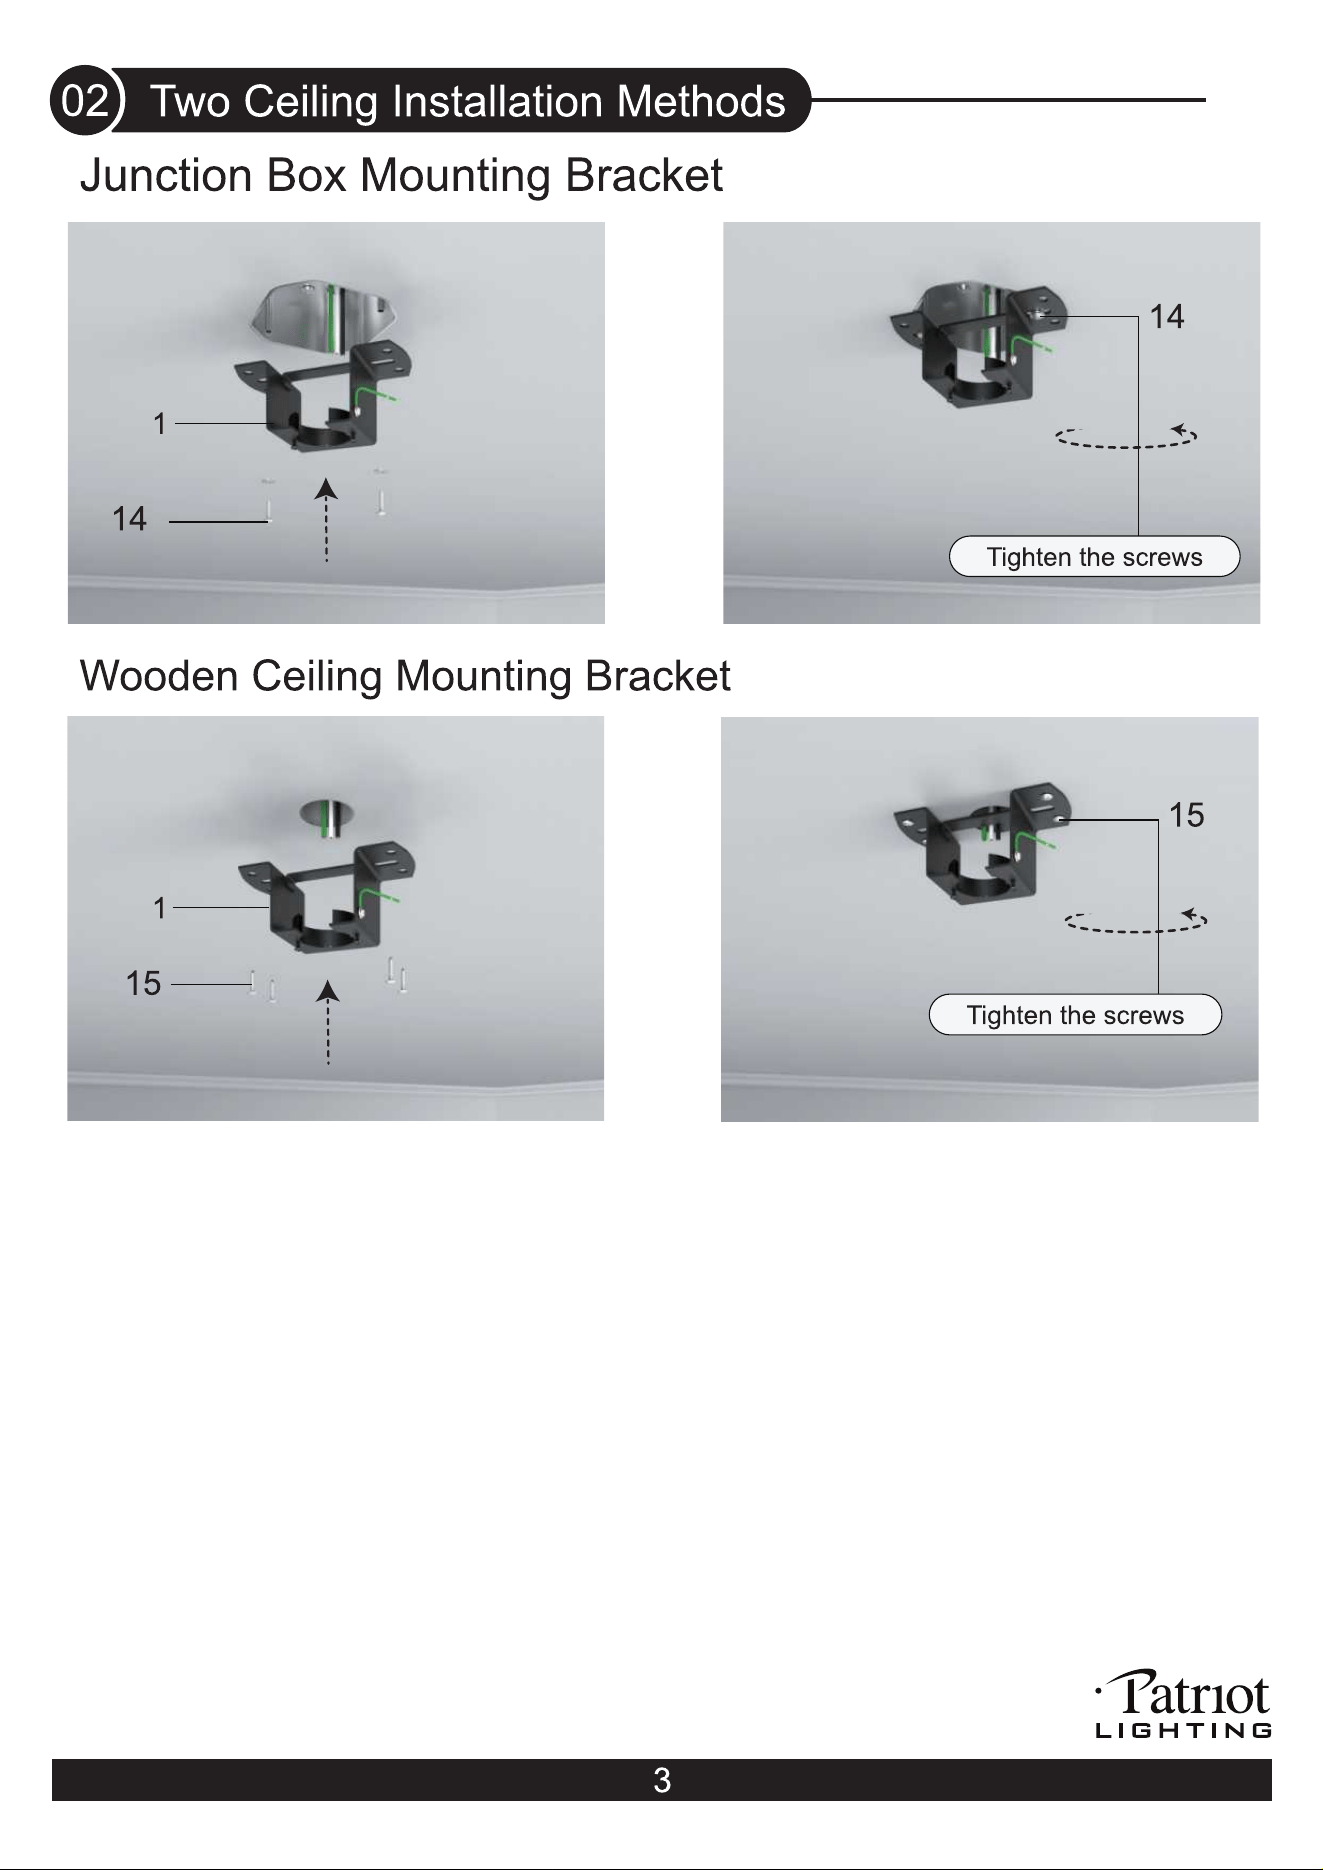
3. Installing receiver in ceiling fan
GREEN/YELLOW
before making wire connection.
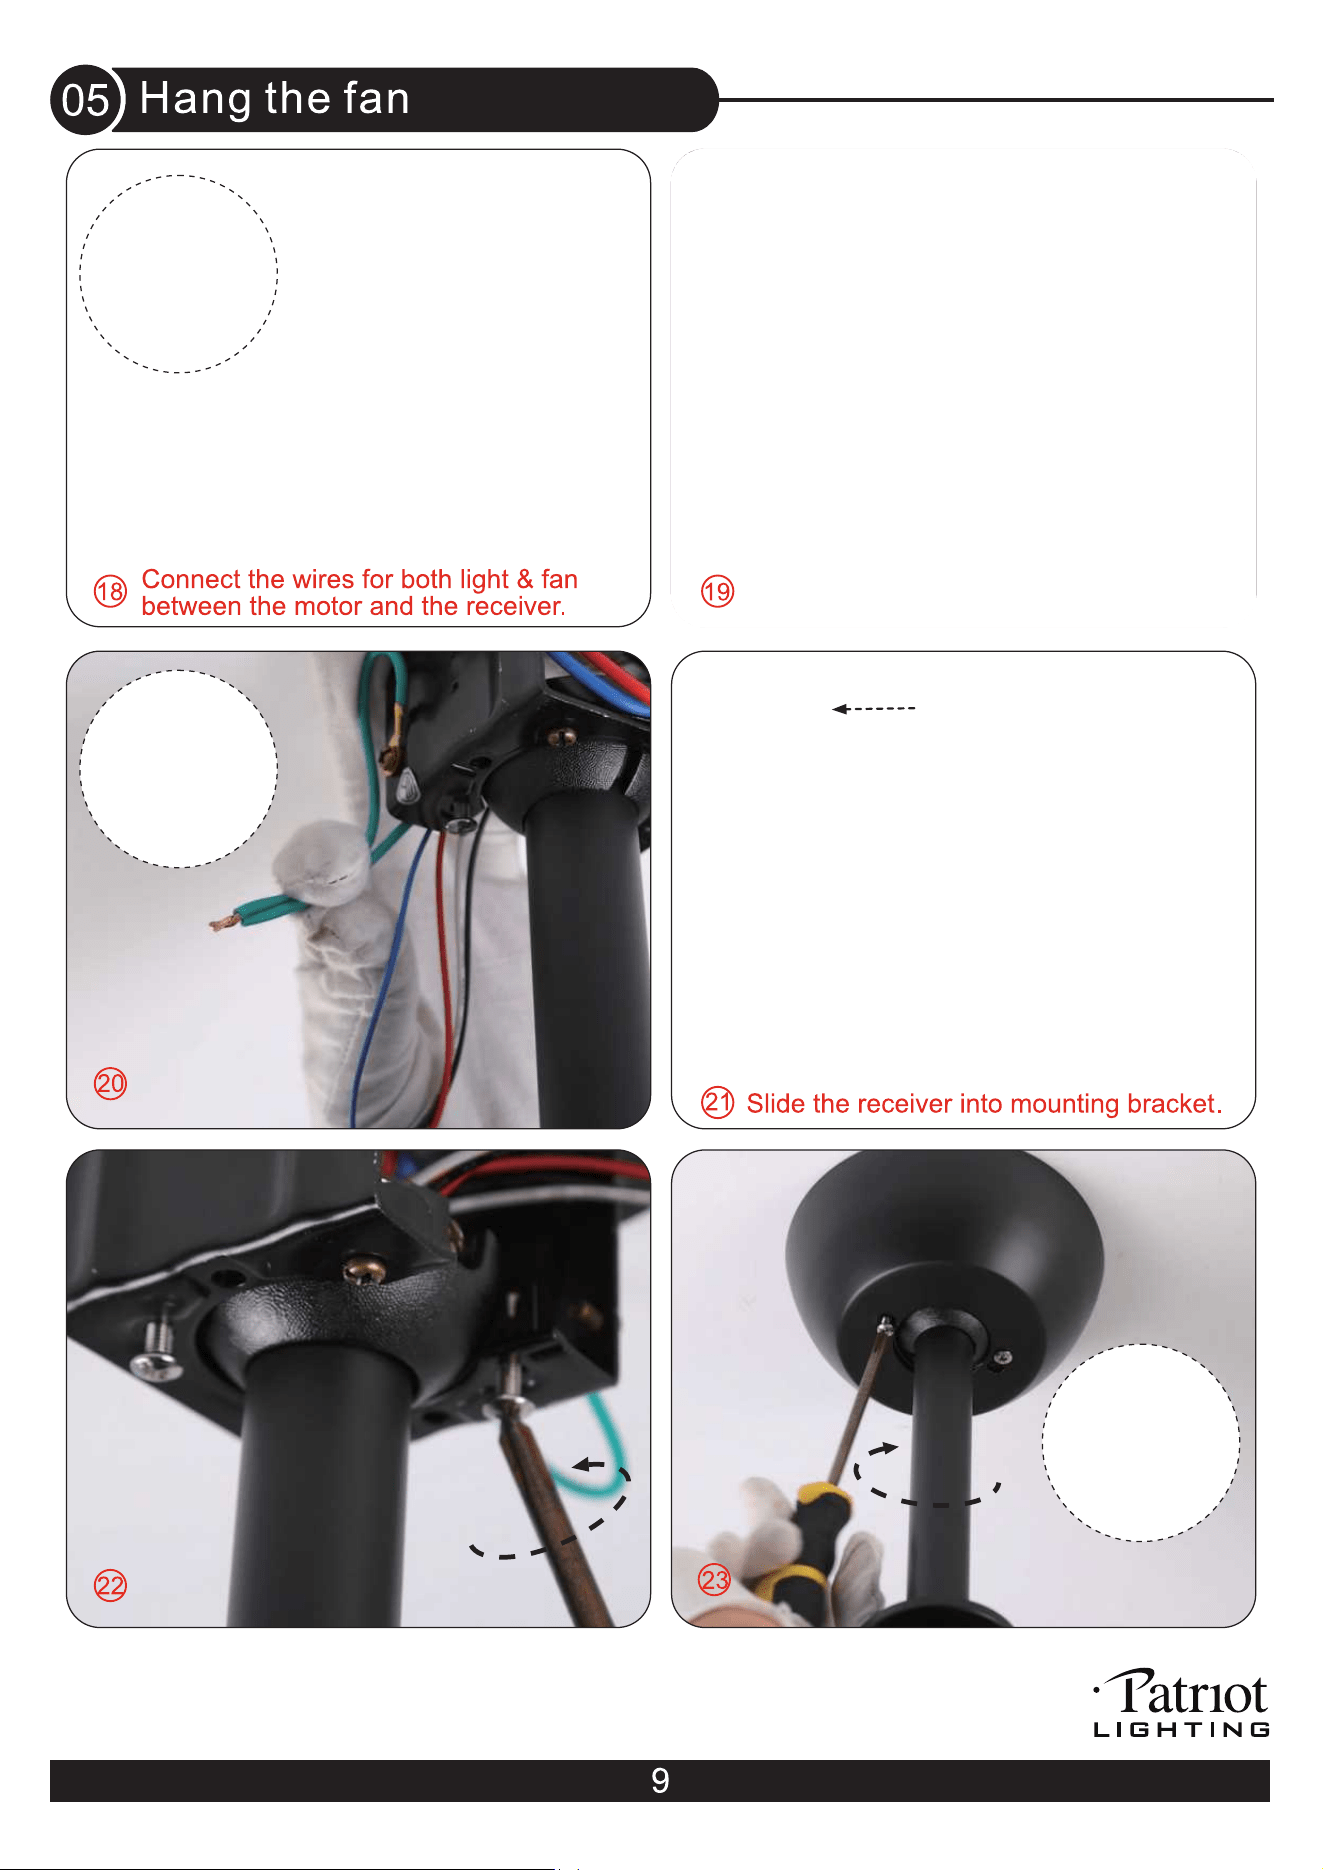
Connect ground wire from outlet box to green
wires from mounting bracket, ball and receiver.
Install the screws halfway into the
mounting bracket.
Install the canopy over the mounting bracket and
tighten the screws.
Connect the black and white wires from the
receiver and house.
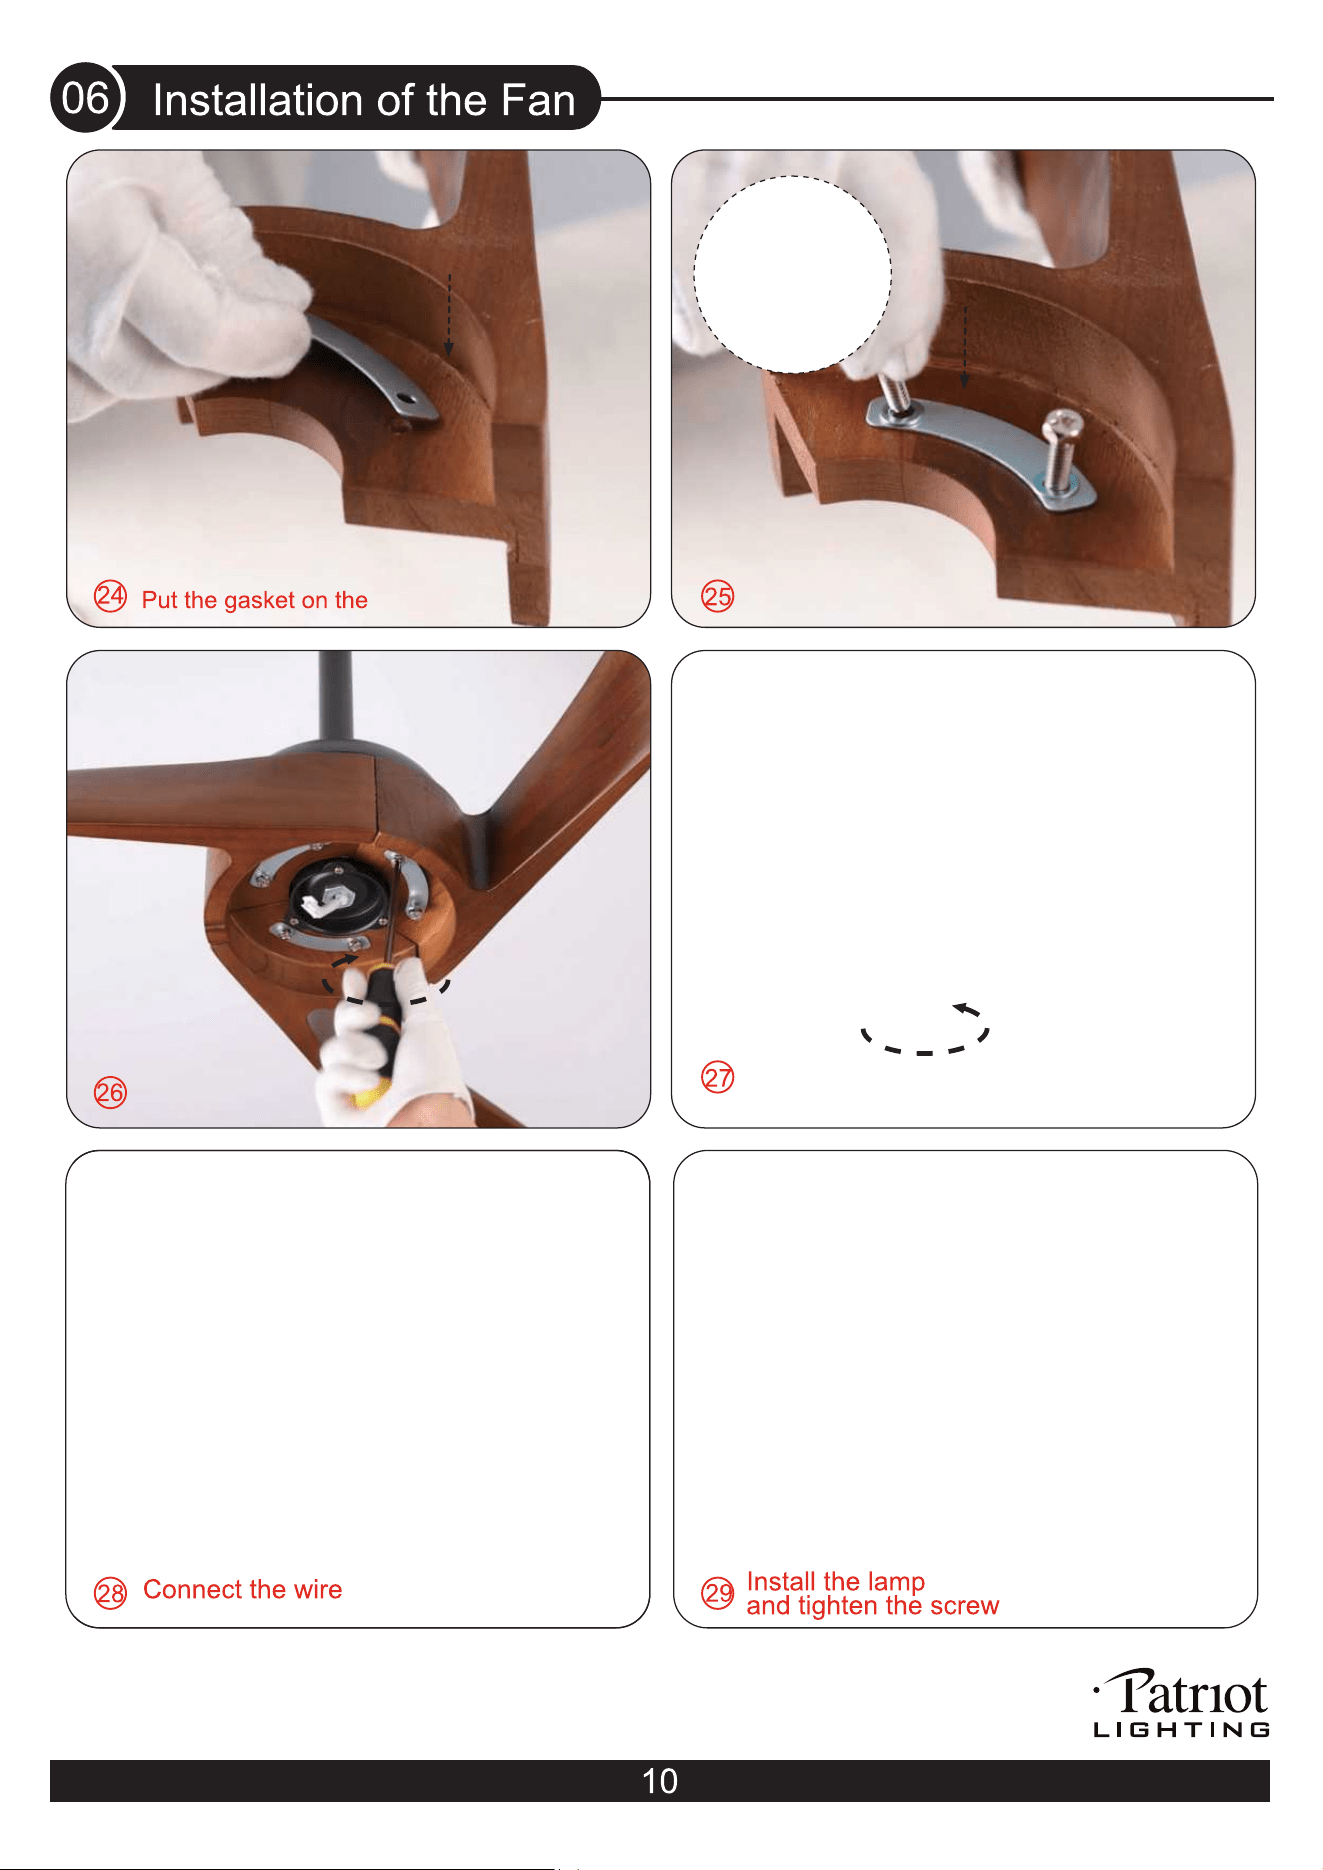
holes of the blade.
Put a washer on each hole of the gasket.
Insert screws in gasket holes and tighten.
Lossen the screws of the bowl hood and
remove one of them.
from fan to LED light kit.
.
panel on the bowl hood

Install 2*1.5 volt AAA batteries(not included).
(To prevent damage to transmitter, remove the batteries if not used for a long time.
Transmitter
Soft white light / Bright white light / Daylight
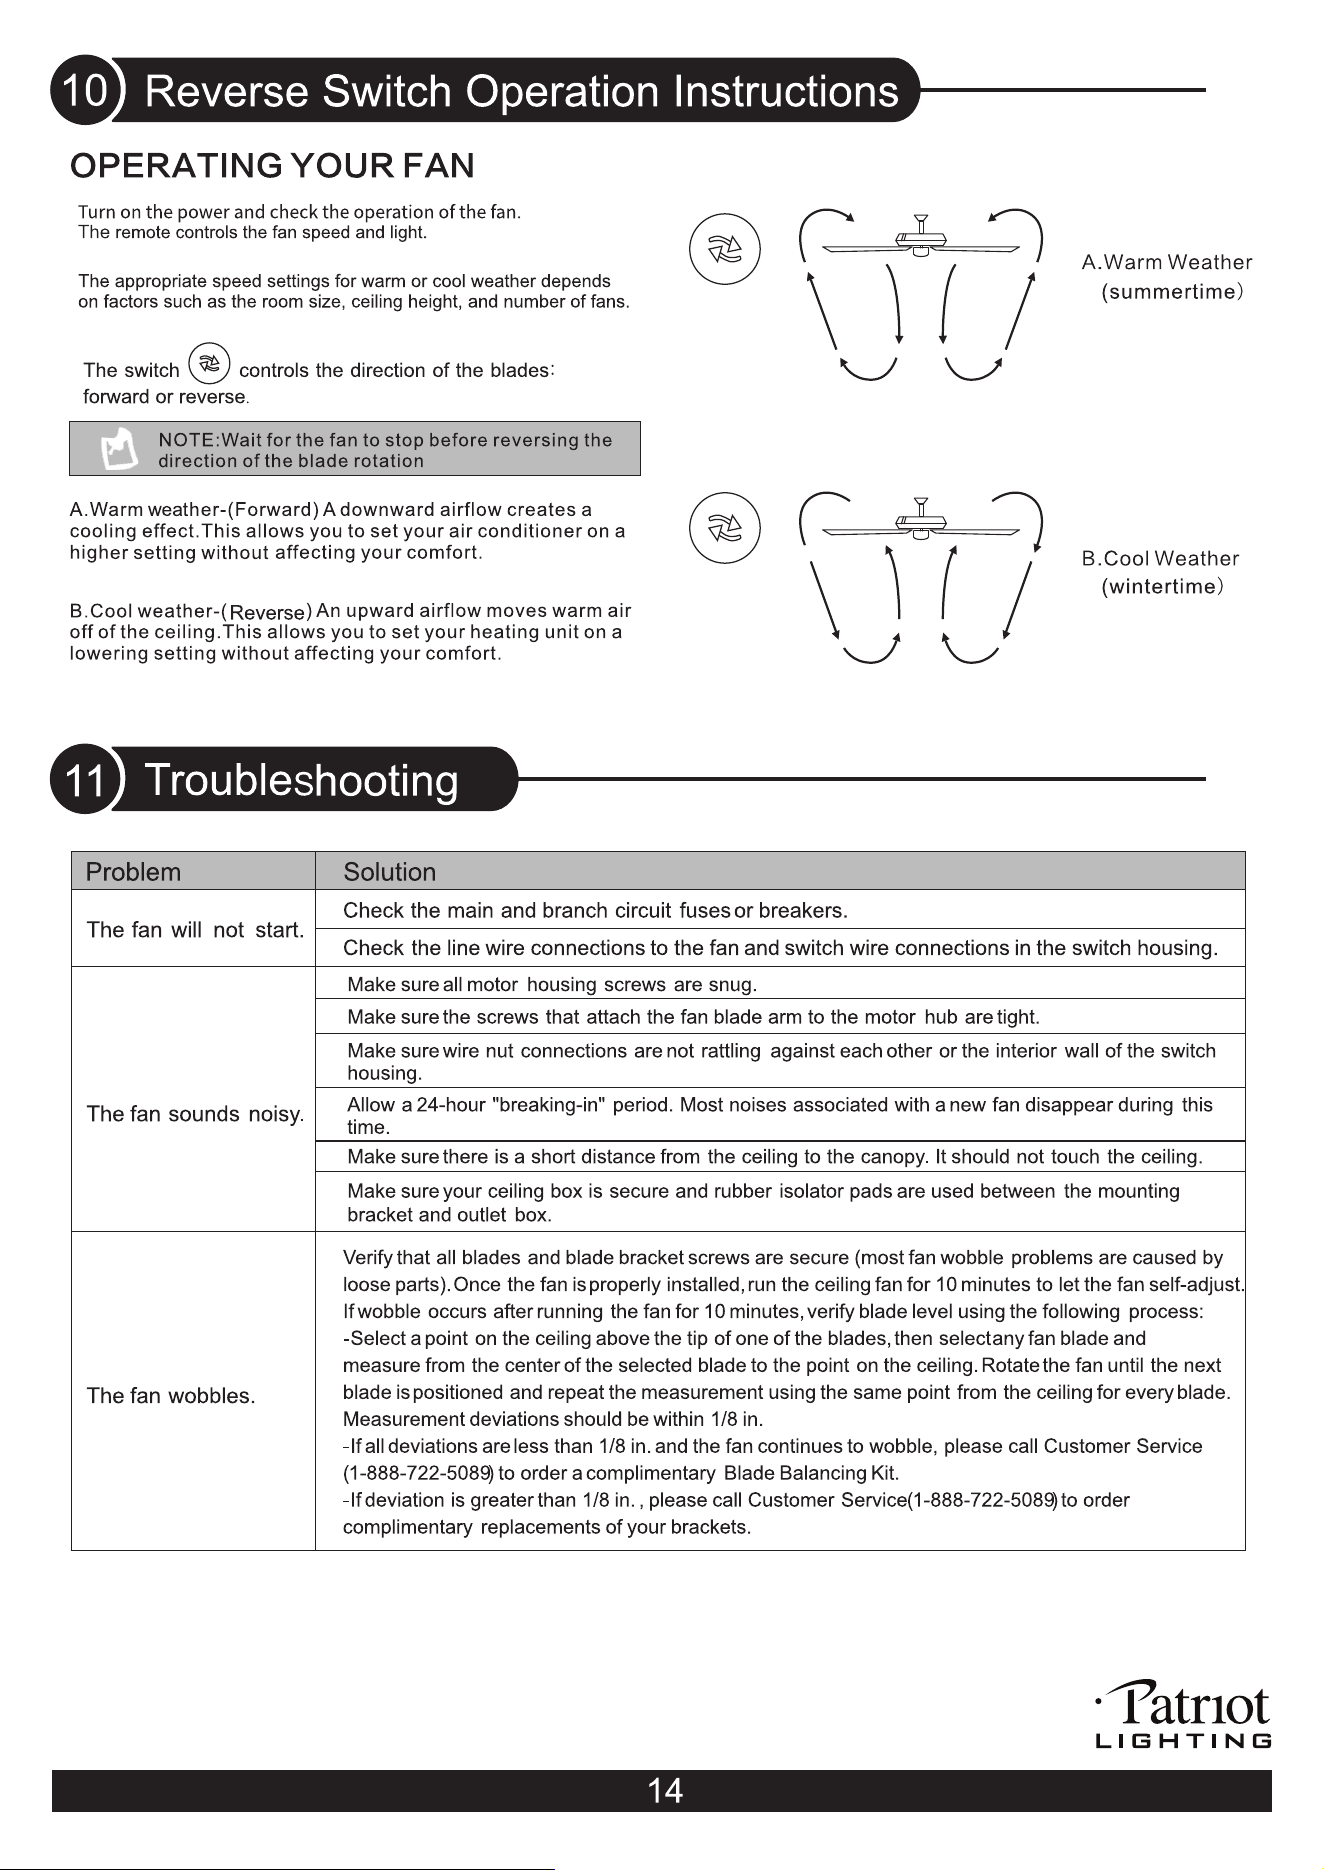
forward/reverse
Store the transmitter away from excessive heat or humidity.
on the lamp pan.
o
o
ff
and the
ff
and the
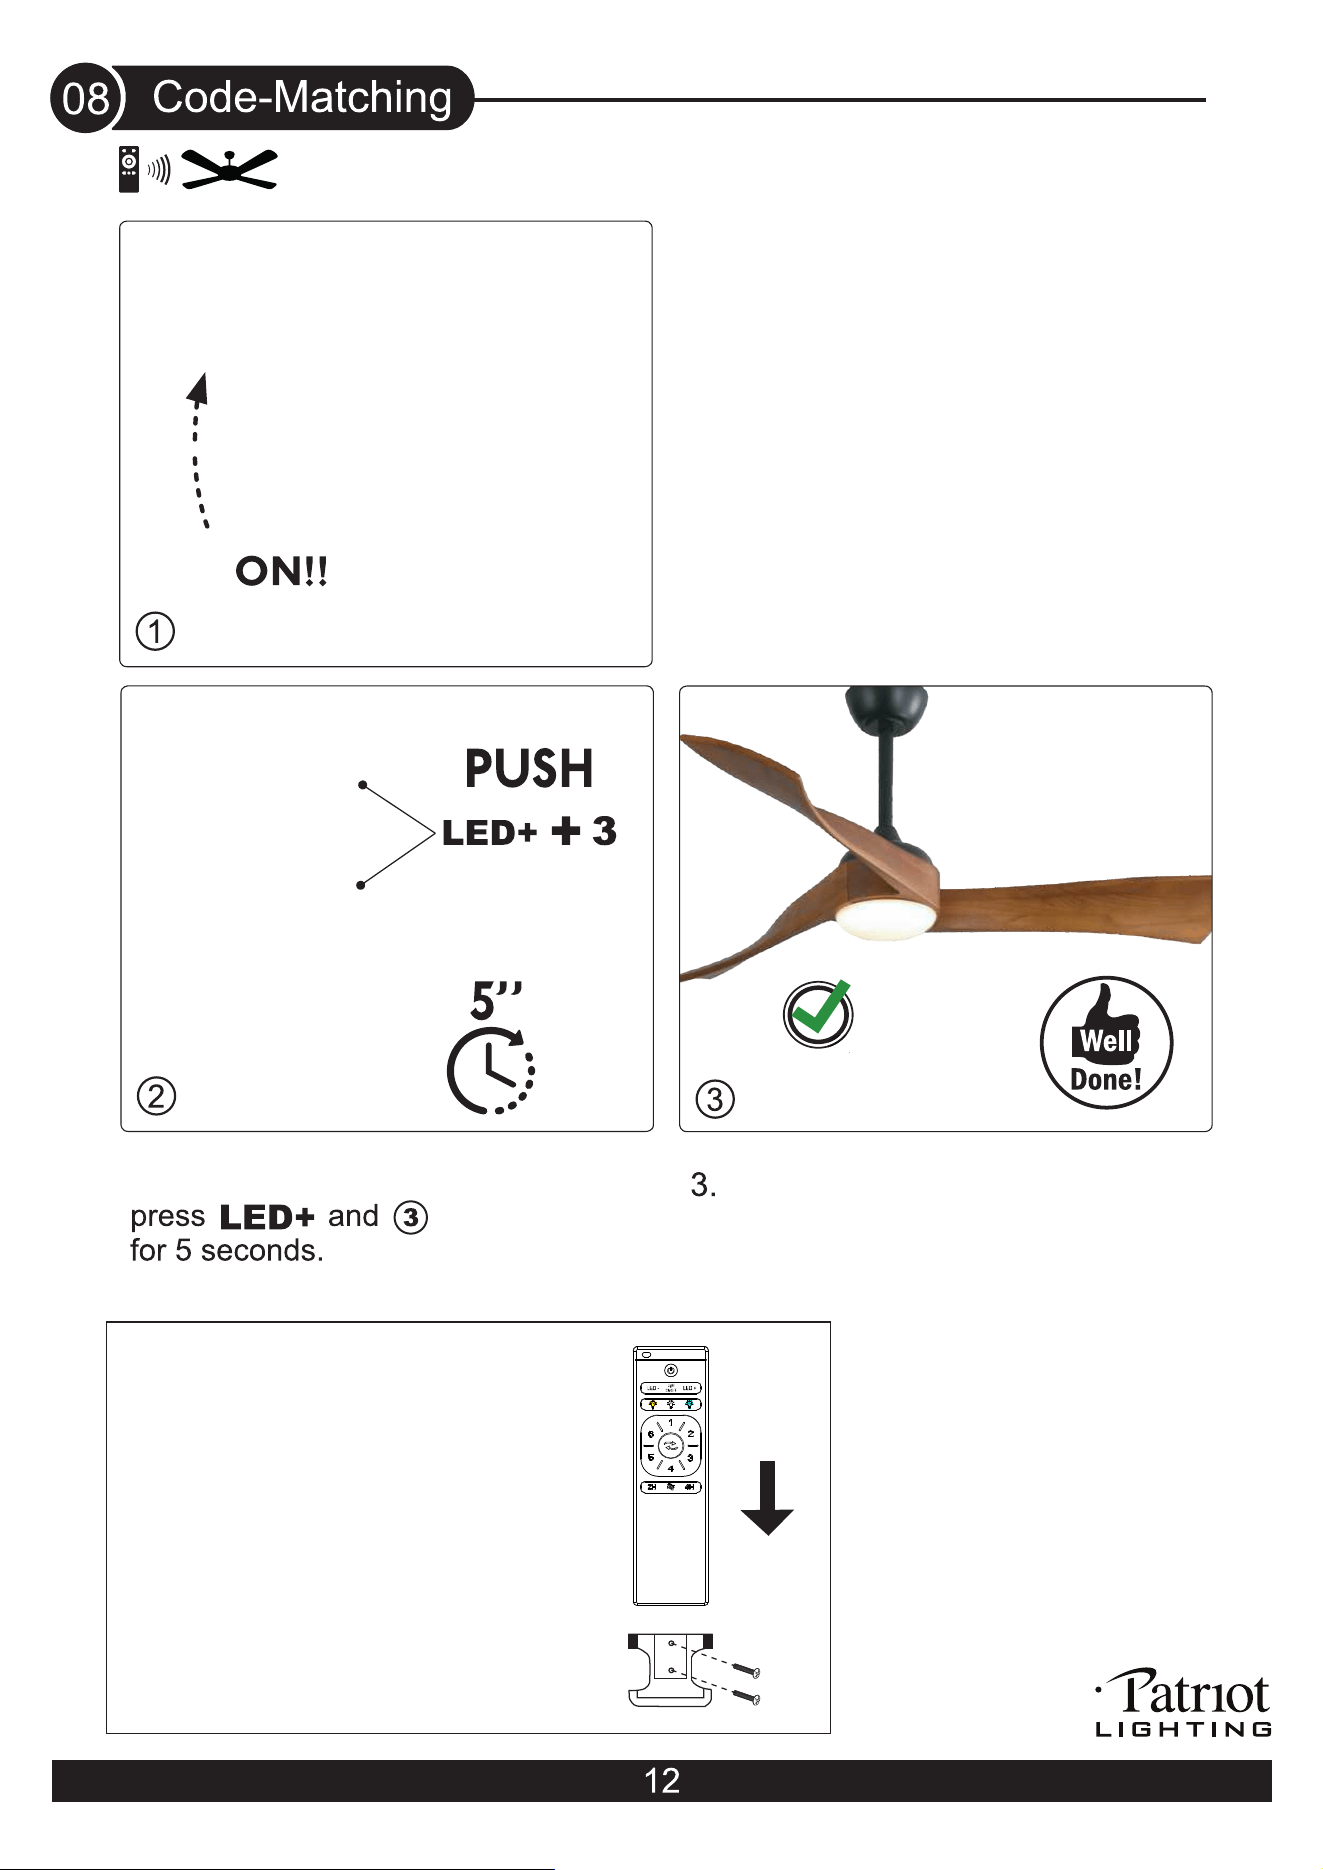
If the remote does not work:
1. Turn on the power switch.
2. After turning on the power switch,
speed setting
When the light is turned
fan is turned on, the code-matching
is successful.
Install the handle to the wall by
using the two screws provided.
Put the transmitter into the hold
while it is not in use.
The light is turned
the fan is turned on.
eliminated