
box
This is a dual mount ceiling fan, and can be mounted on sloped
ceiling (below 15°) with a longer downrod (sold separately).
(Pre-installed on the motor)
installation
into thes
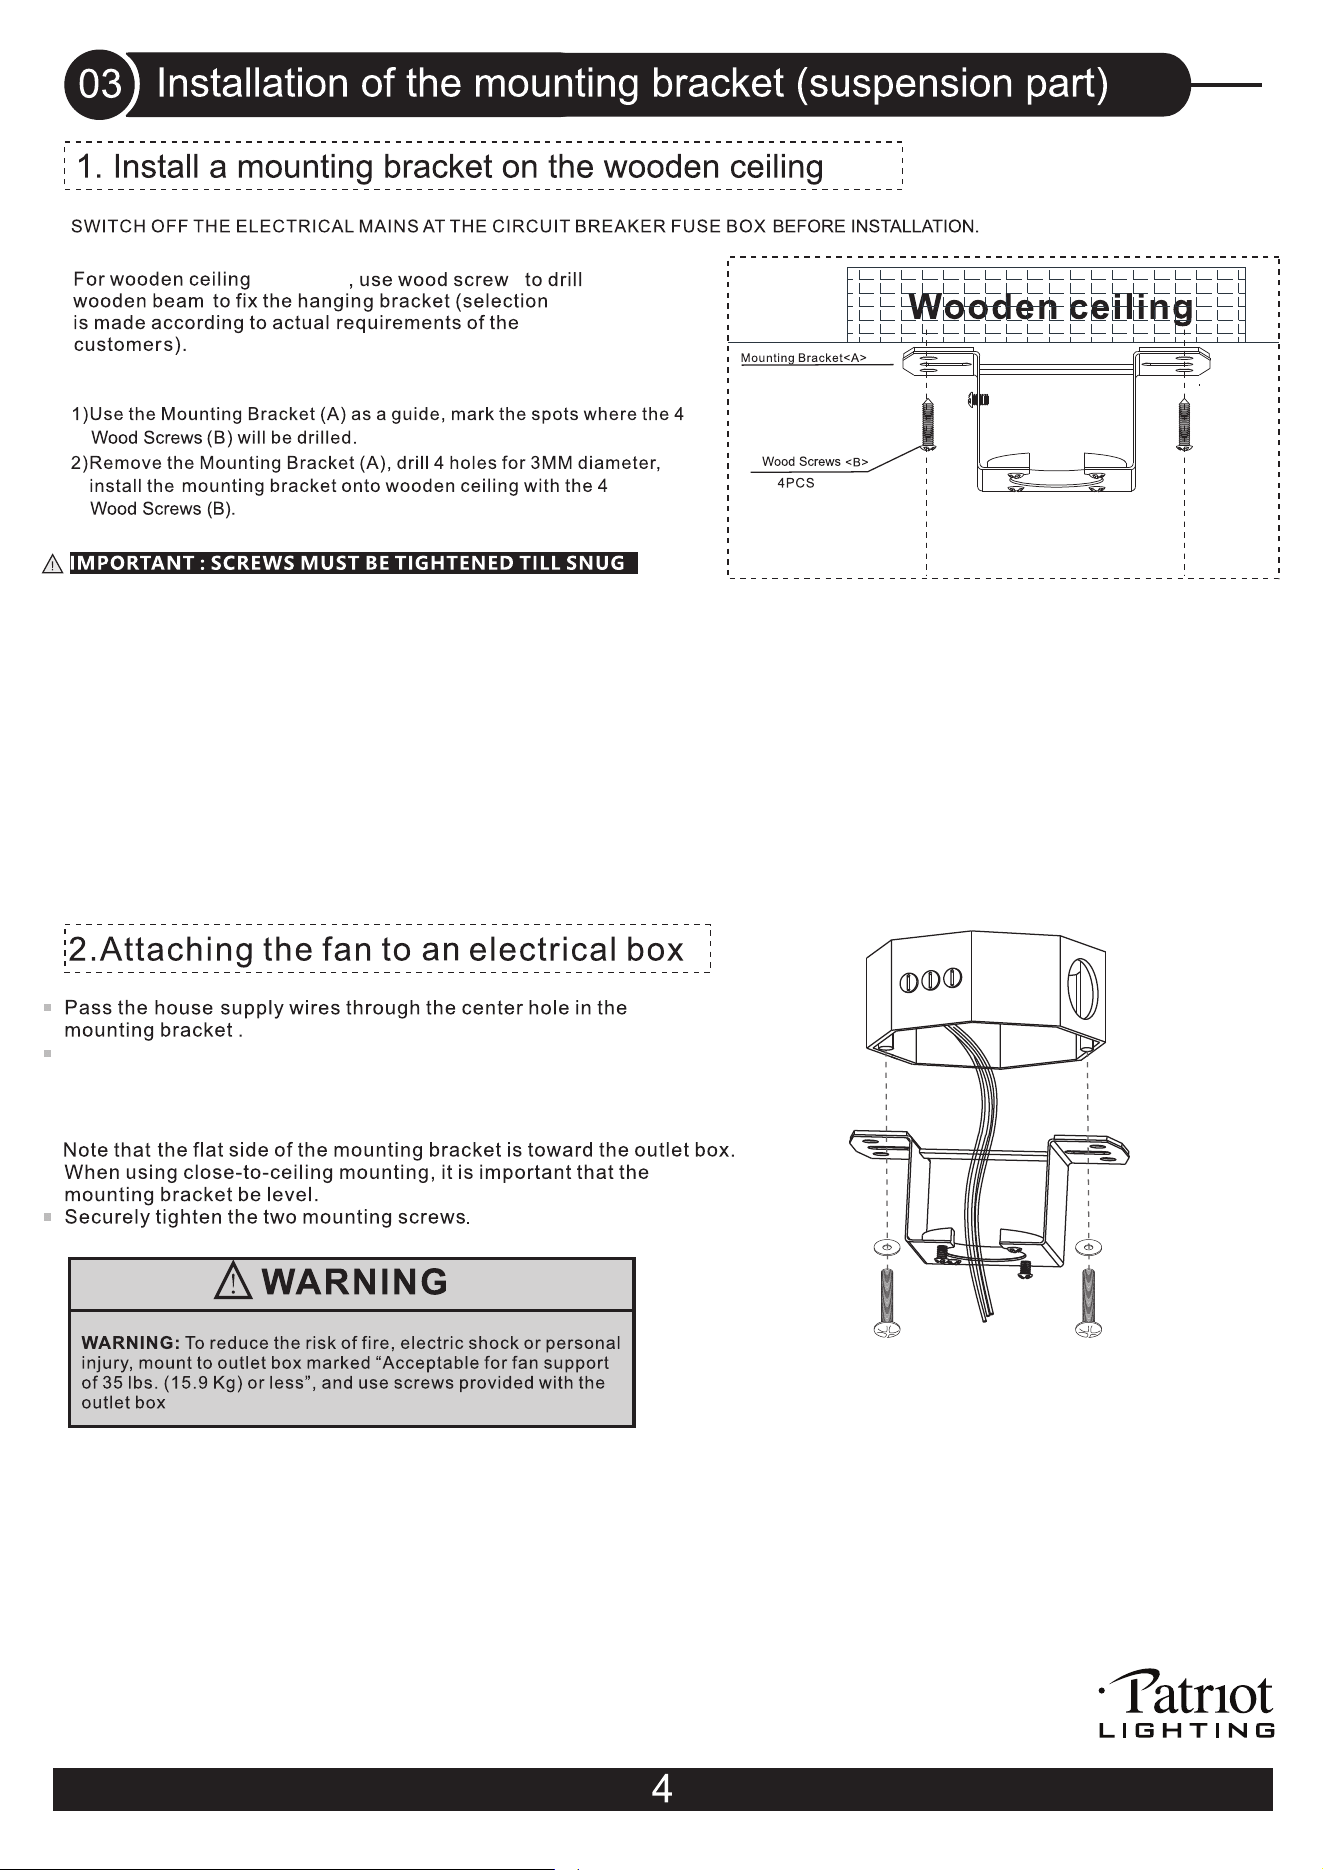
Install the ceiling mounting bracket (#1) on the outlet box by holding the
mounting bracket use the two screws provided with outlet box.
If no screws provided on outlet box, use the screws and washers (#13)
provided with the fan for instead.
on
in the
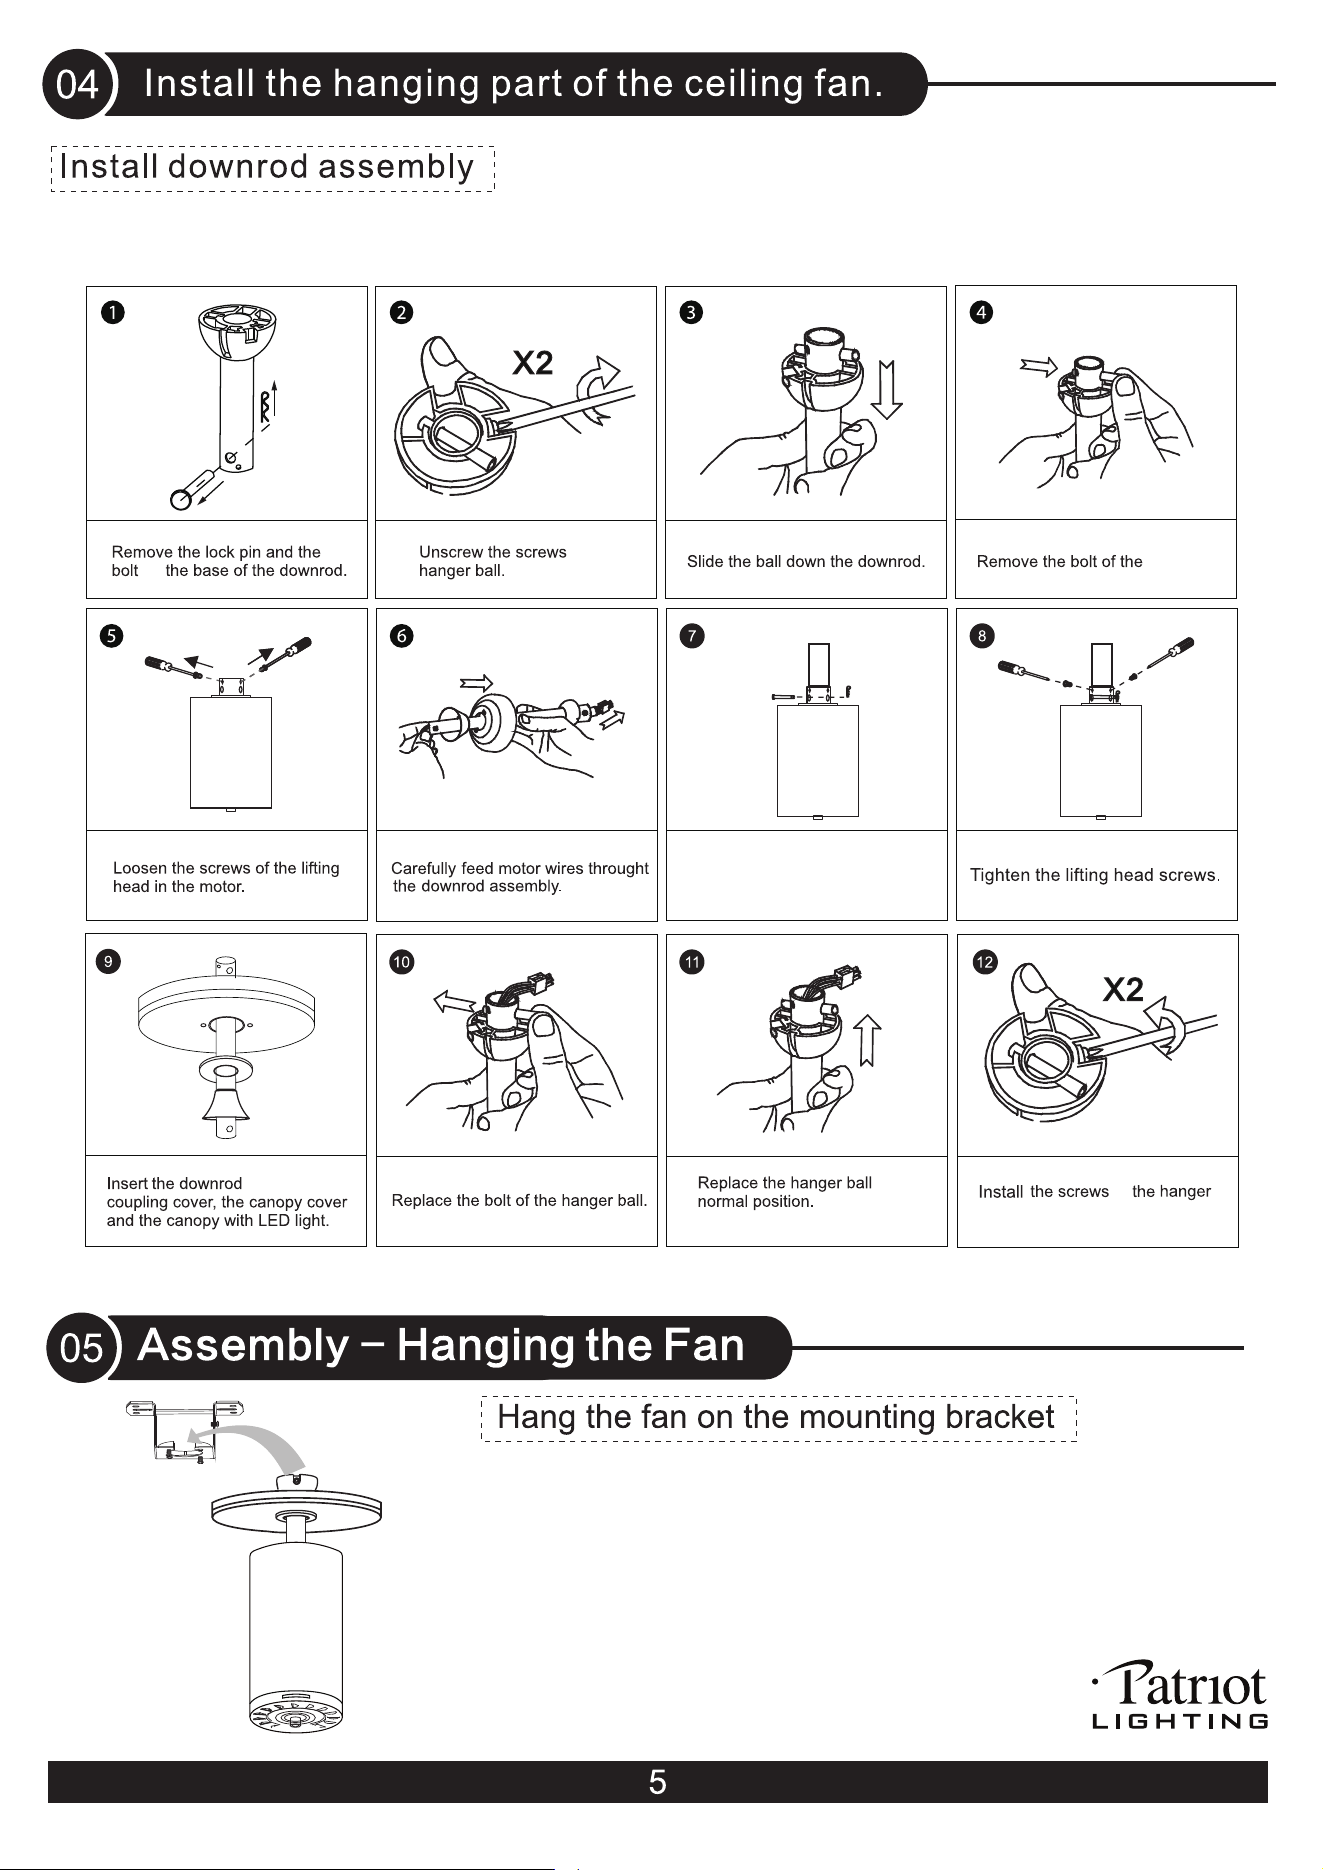
hanger ball.
Insert the downrod assembly into
the lifting head in the motor.
Reinstall the bolt and the lock pin
through the hole on the downrod.
to its
through the
ball, and tighten the screws.
in
Note: make sure tab on mounting bracket
is aligned with slot in the hanger ball.
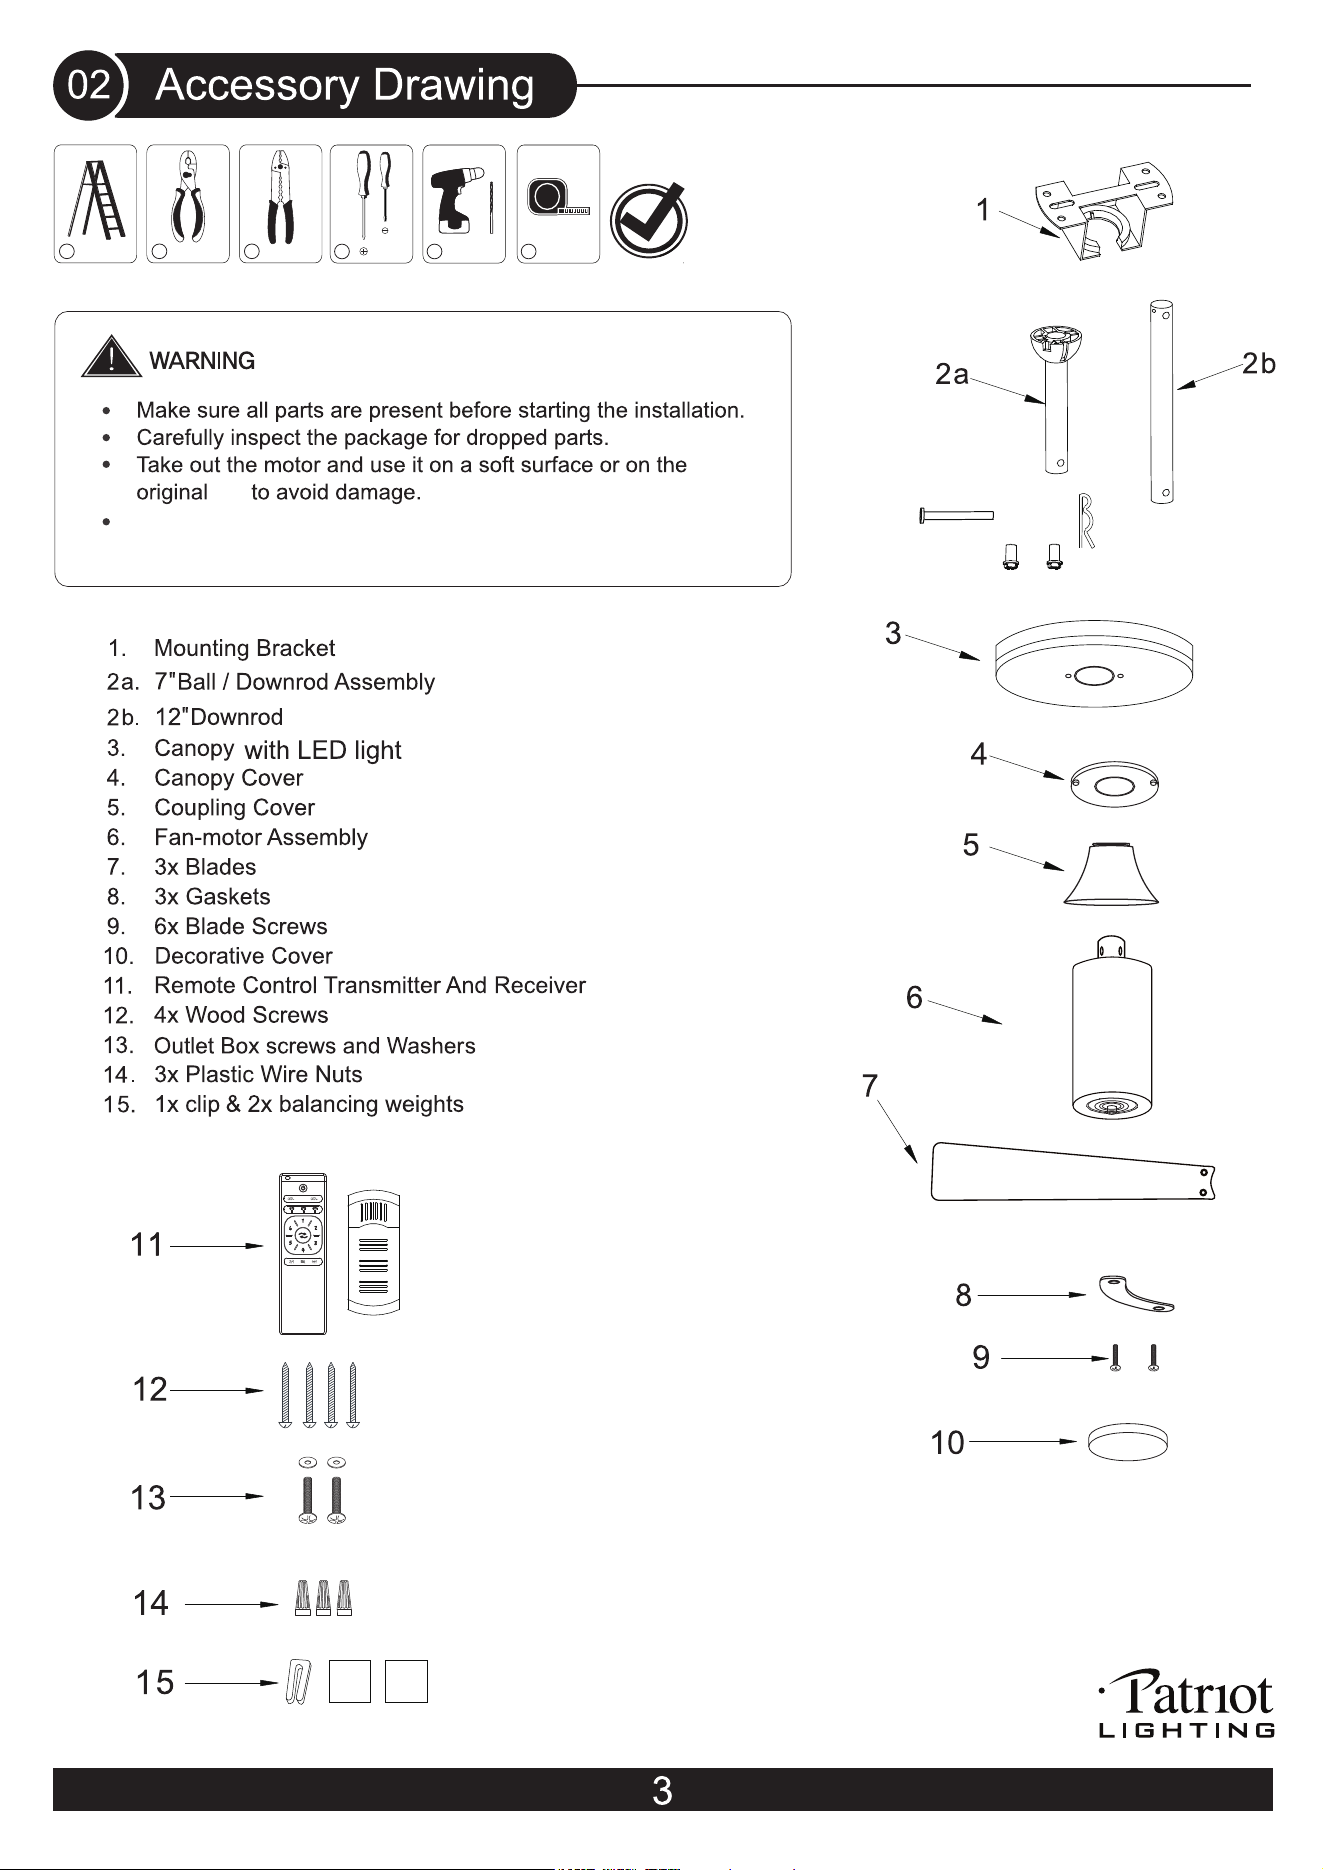
There are two downrods included, sizes of 7'' and 12''. Please choice necessory downrod according to the ceiling
height.
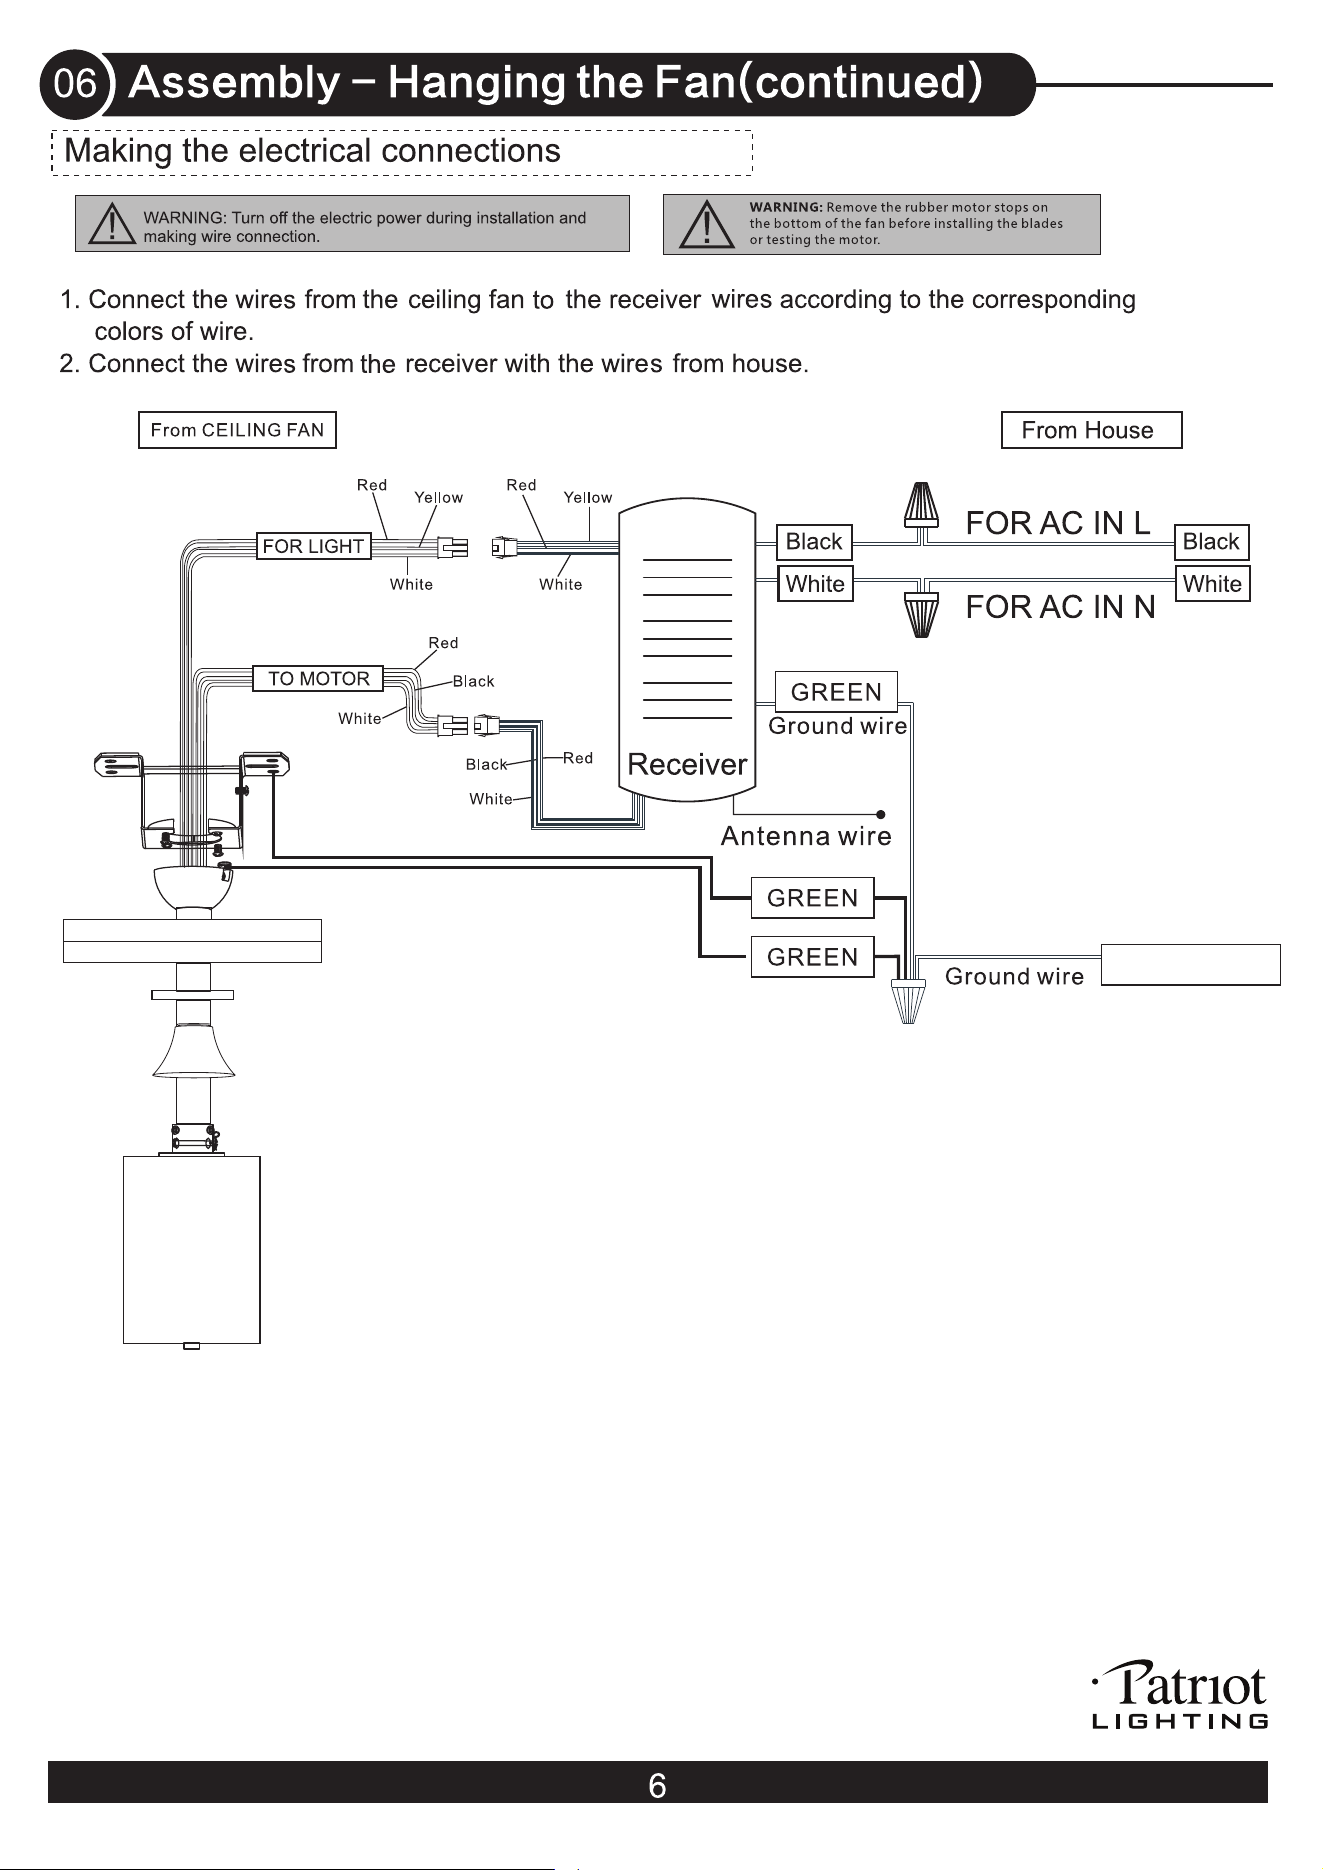
GREEN/YELLOW
.
ing
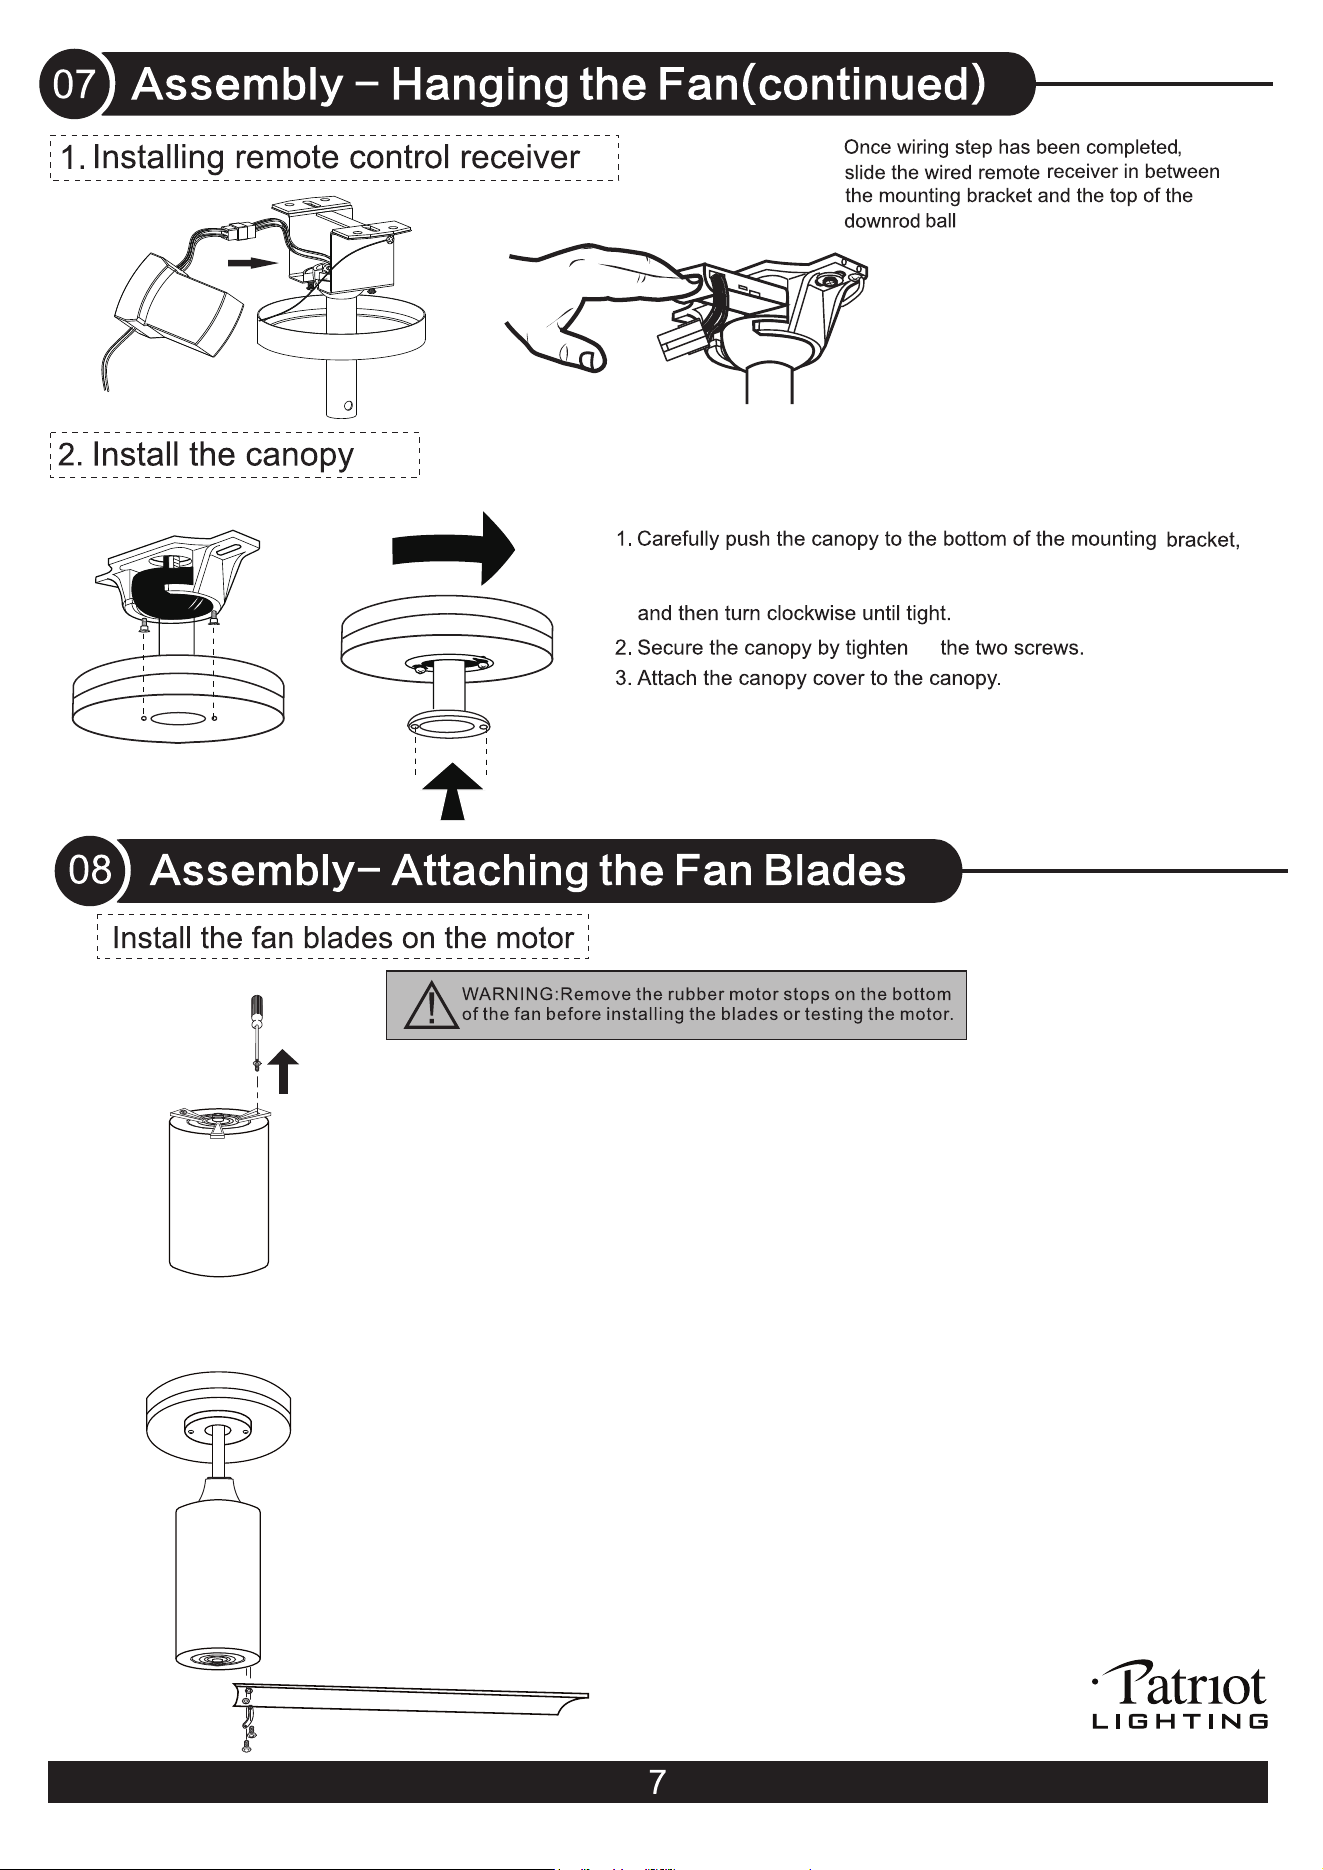
make sure the two keyhole slots in the canopy with LED light are
aligned with the two prominent screws on the mounting bracket,
Remove the screws from the bottom of the fan motor assembly and keep them.
Use the gasket (#8) as a guide to find the matching holes on the bottom of
the fan-motor assembly (#6).
Attached the blades (#7) to fan-motor assembly in correct positions (see
“this end up" maked on the blade, or refer to the image at left), and
secure the blades with the gaskets and blade screws (#9).
Make sure all screws are tightened.
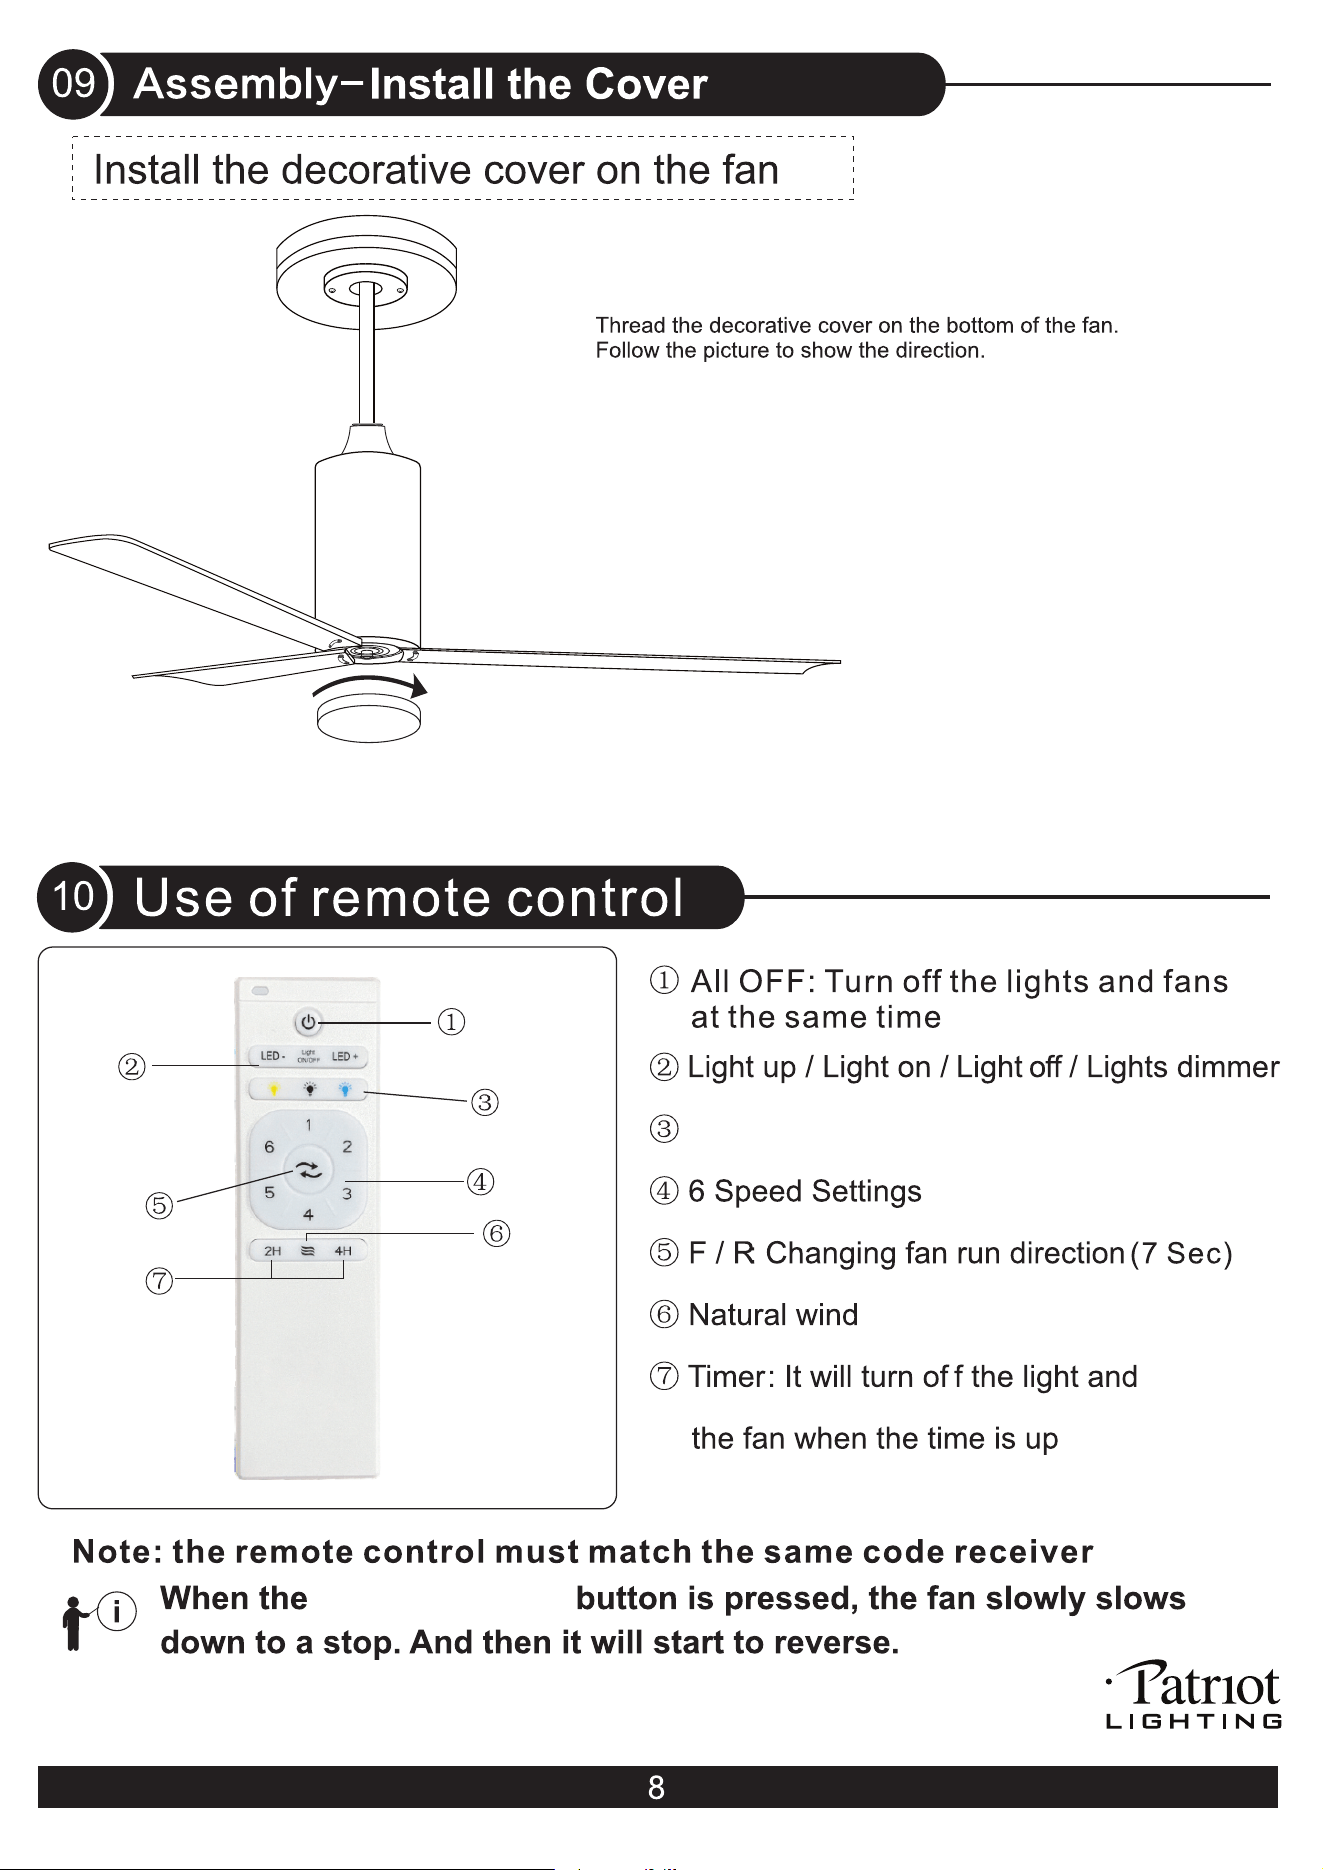
Soft-white light / Bright-white light / Day light
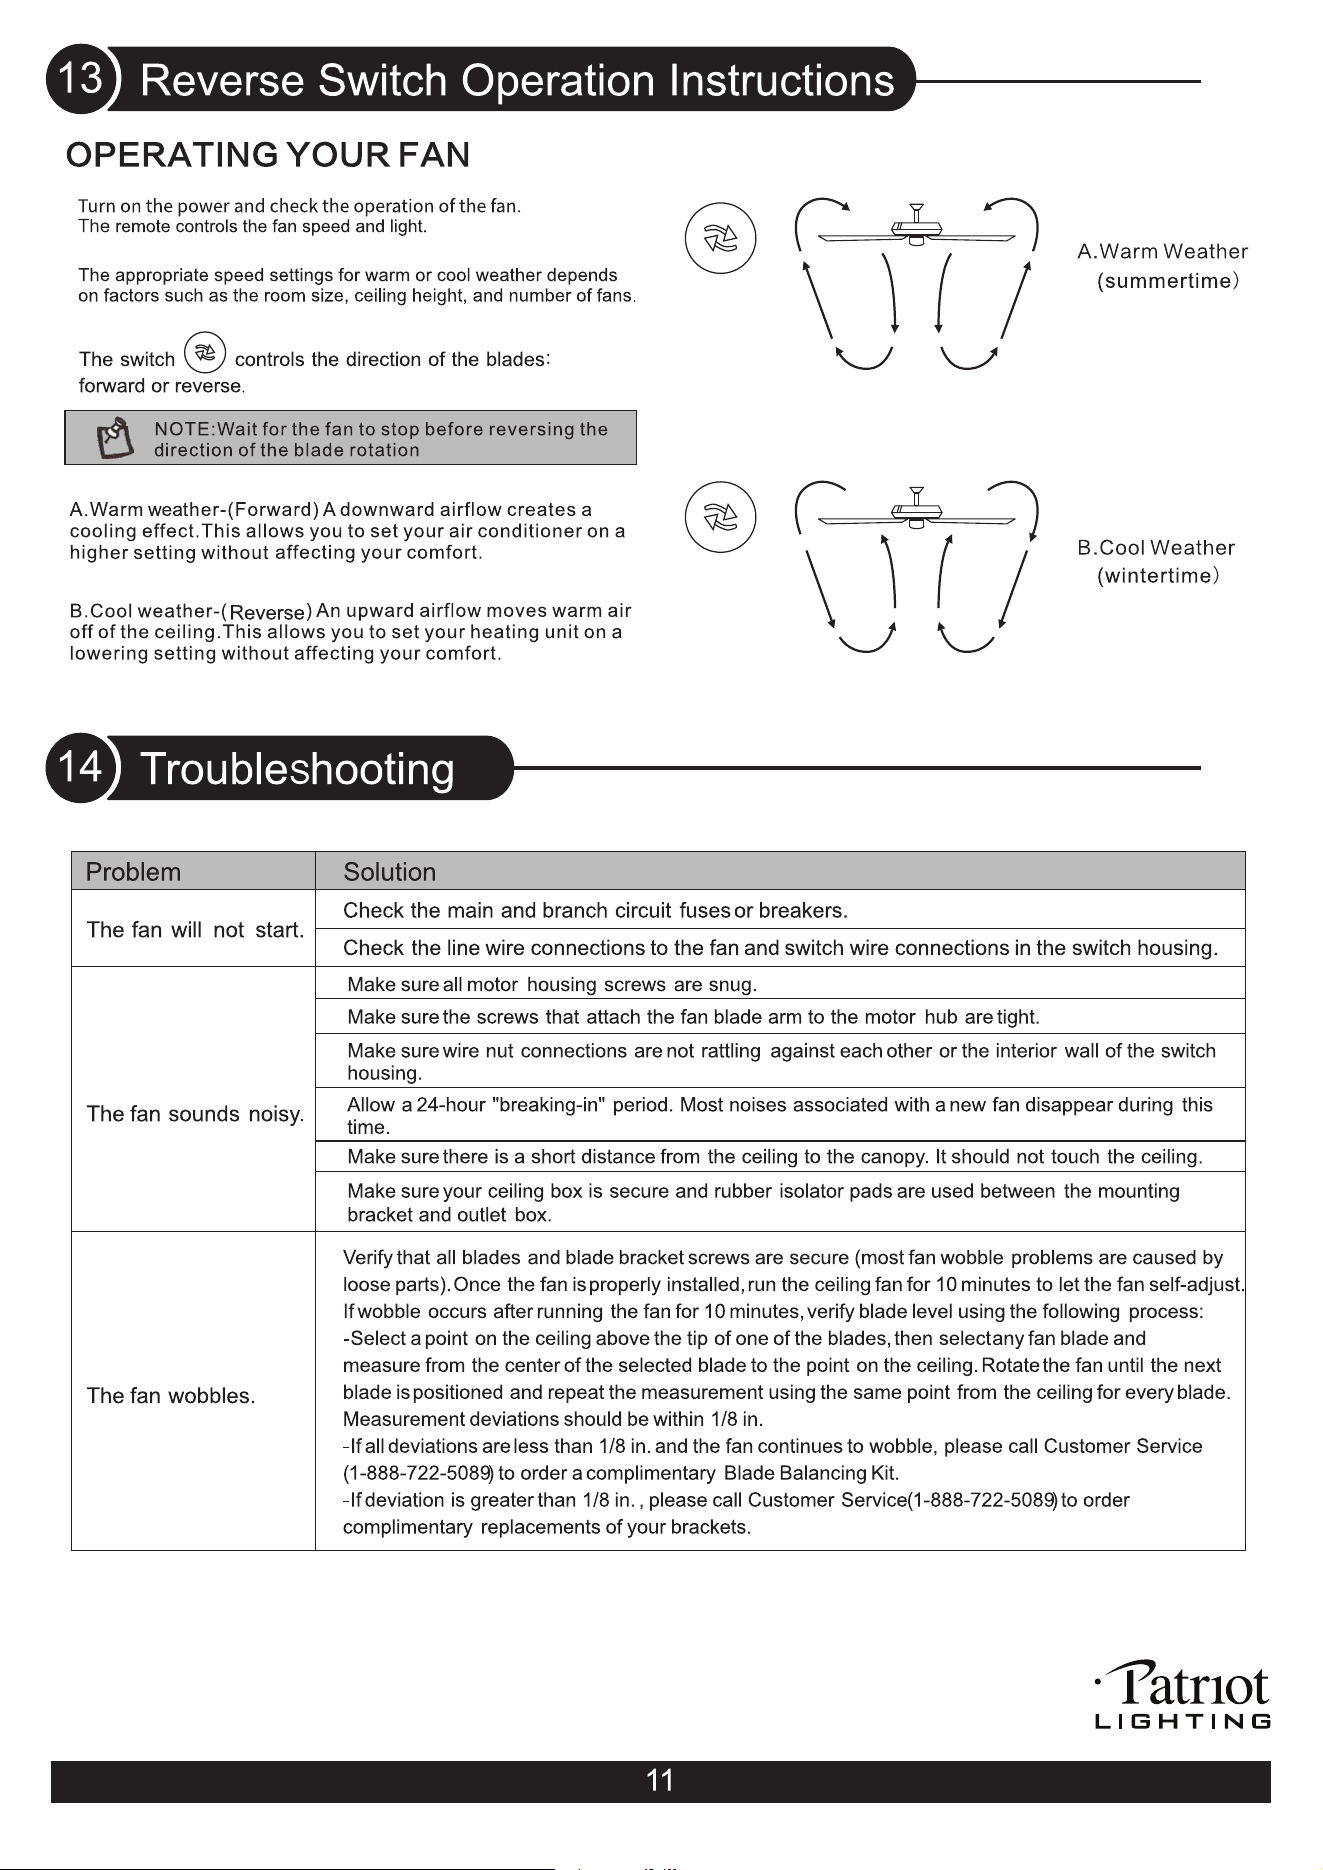
forward/reverse
speed setting
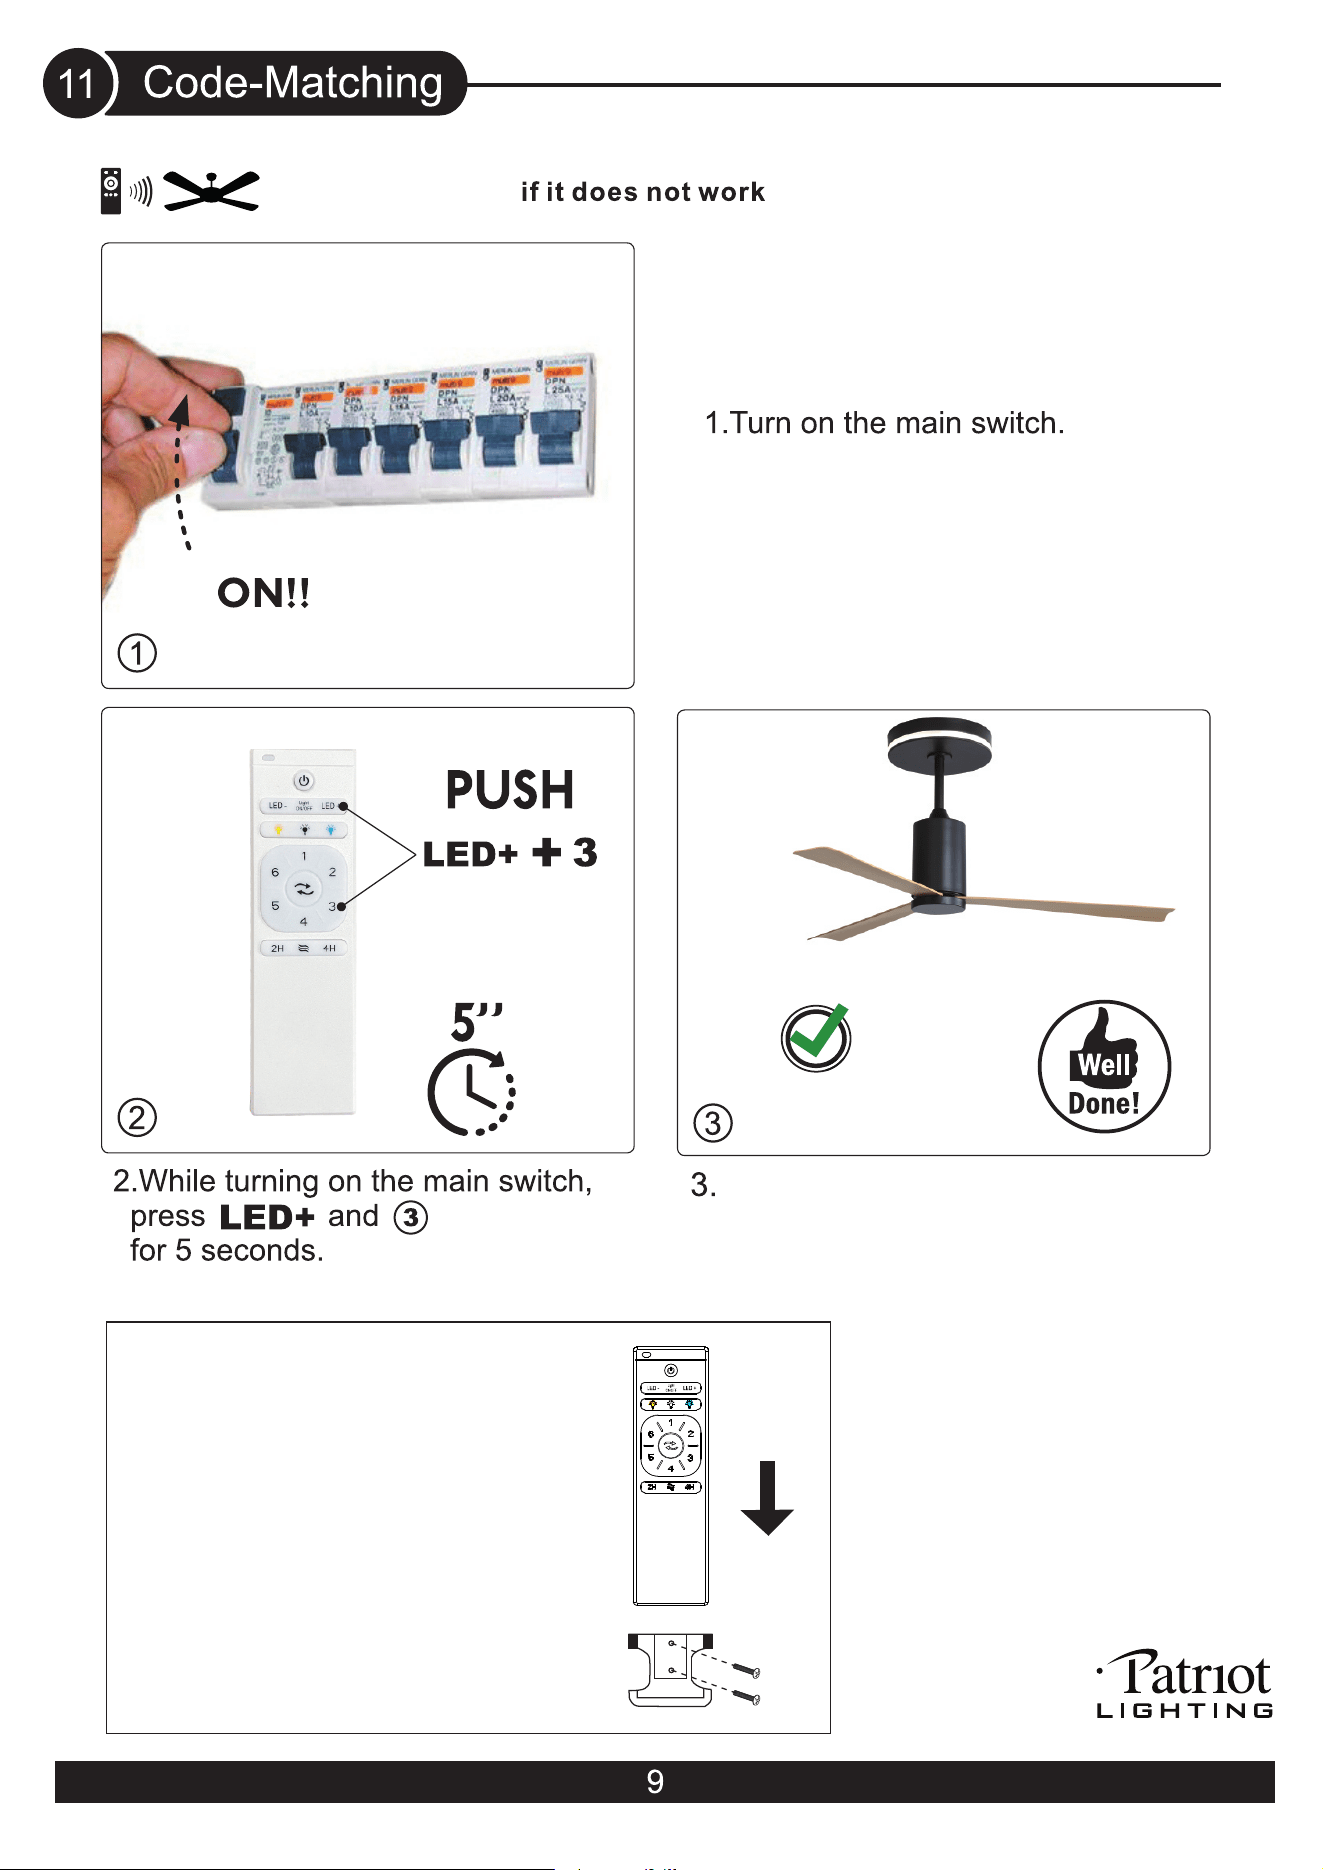
The light is turn o ffand
When the light is turn o ffand the
the fan is turn on.
fan is turn on,the code-matching is
successful.
Install the handle to the wall by
using the two screws provided.
Put the transmitter into the hold
while it is not in use.
eliminated
soft white light.
bright white light.
day light.
15
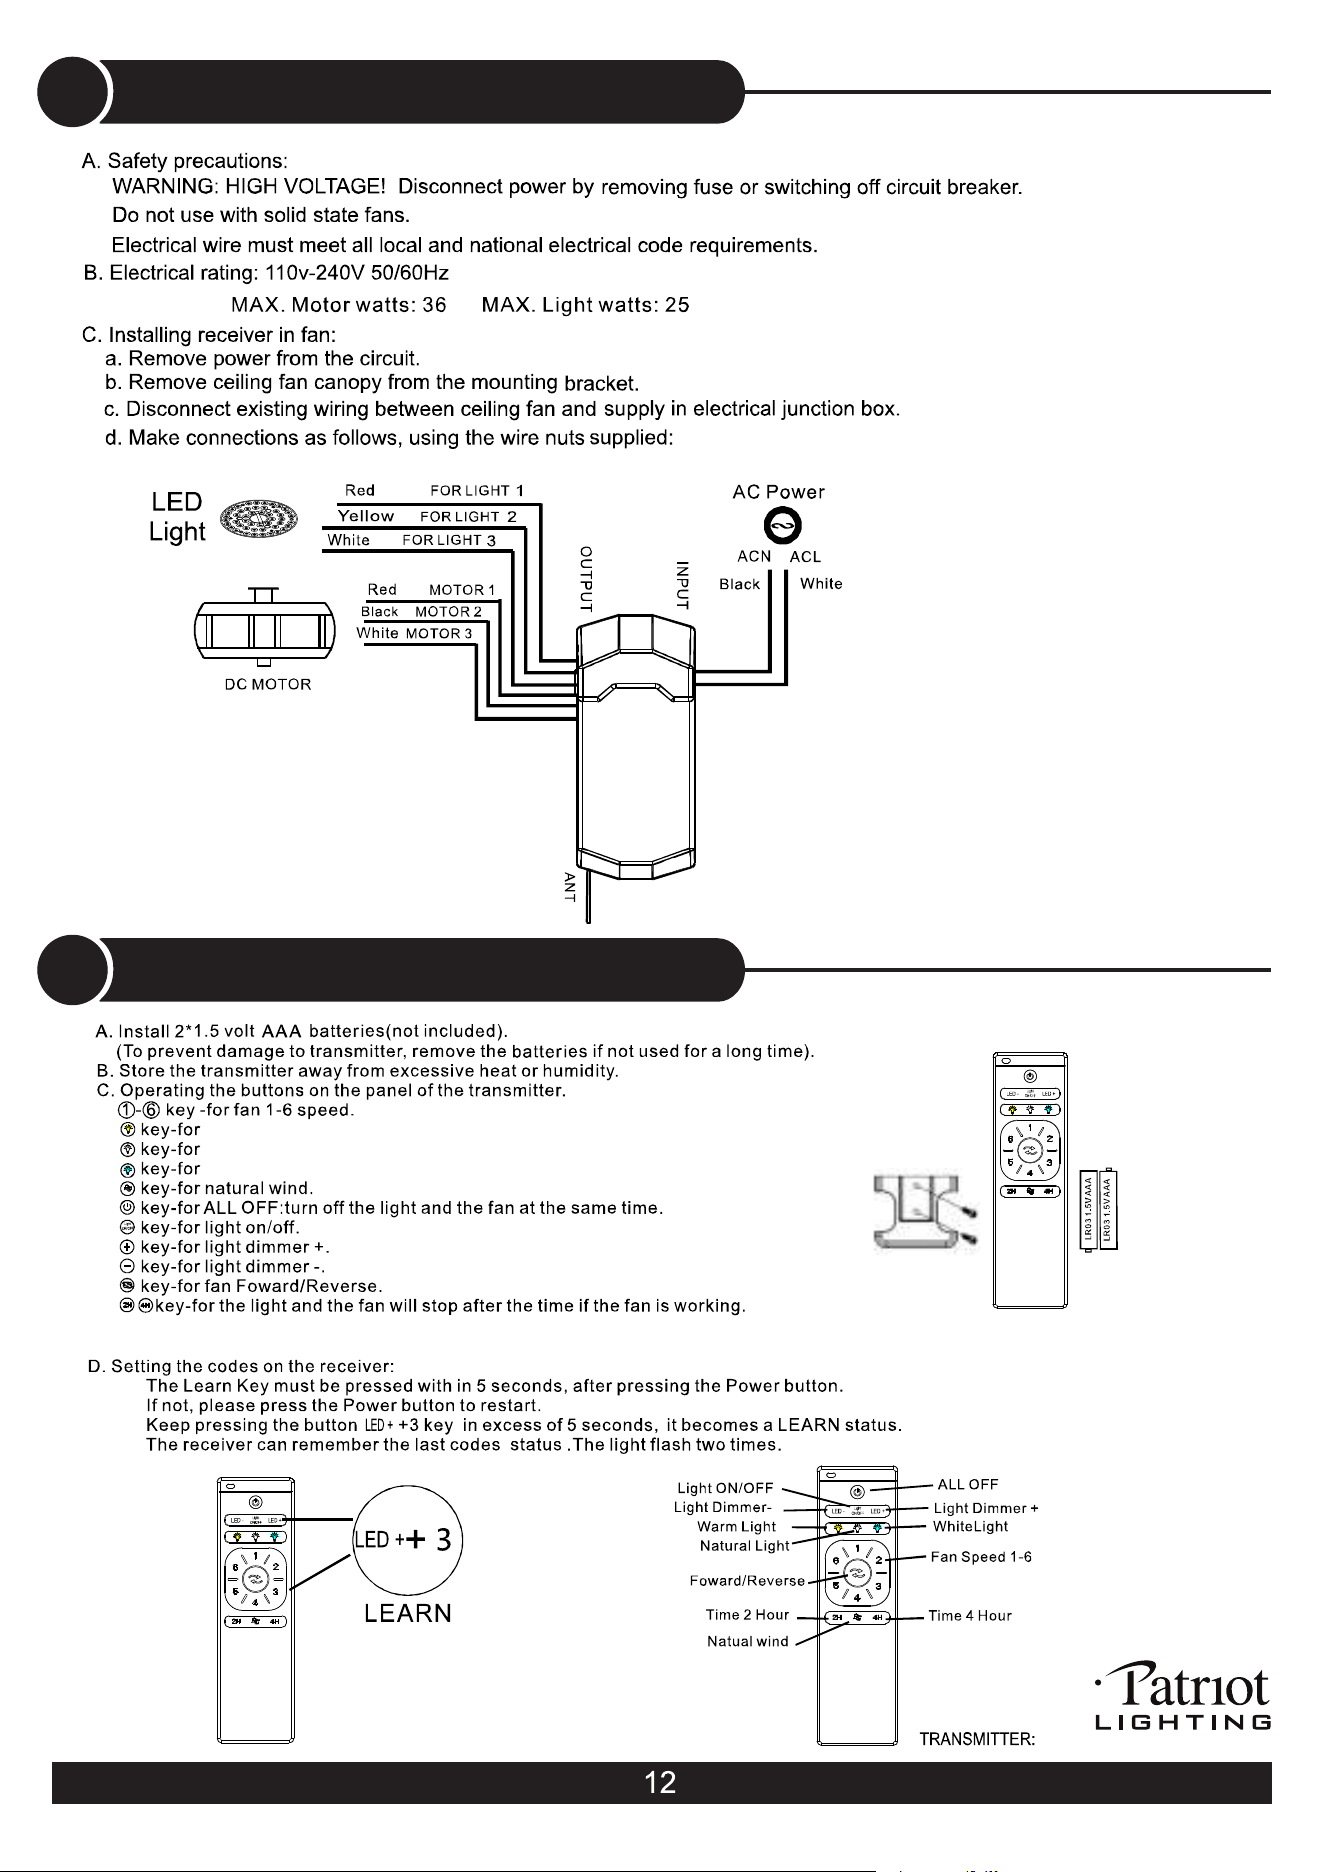
Installing receiver in ceiling fan
16
Operating transmitter

13
