Loading ...
Loading ...
Loading ...

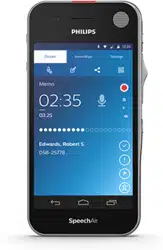
33Philips Voice Recorder App
Send a dictation
Send an individual dictation or multiple dictations
simultaneously, and choose between various forwarding
options. Before you send your dictations, set up the
relevant sending options in Settings > Sending options.
For more information, see Dictation app settings.
Send an individual dictation
1
Make sure that you are connected to a Wi-Fi network.
2
Tap on the recording screen.
3
Select your desired sending option from the
displayed list.
X The dictation is marked as sent in the
recordings list.
Send multiple dictations simultaneously
1
Make sure that you are connected to a Wi-Fi network.
2
Open your recordings list from the Recordings tab.
3
Mark the checkboxes next to the dictations you want
to send.
4
Tap the options icon in the bottom right corner, and
then tap Send.
5
Select your desired sending option from the
displayed list.
X The dictation is marked as sent in the
recordings list.
Send a dictation via email
Before you send a dictation via email:
• Set up an email account rst. Alternatively, set up an
email account when you send the recording via email
for the rst time. If you haven’t set up an account yet,
you will be prompted to create an account when you
send the dictation. For more information about how to
set up an email account, see Using email app.
• Make sure that the email option is enabled in Settings
> Sending options > Other sending options (e.g.
Email) > Use other sending options.
To send a dictation via email:
1
Make sure that you are connected to a Wi-Fi network.
2
Tap on the recording screen.
3
Select email as your desired sending option.
X The Compose email window opens.
4
Enter the recipient’s email address, and then tap
to send the dictation.
X The dictation is marked as sent in the
recordings list.
If you haven’t set up an email account yet:
1
Make sure that you are connected to a Wi-Fi network.
2
Tap on the recording screen.
3
Select email as your desired sending option.
X The Account setup window opens. Follow the
instructions on the screen. For more information
about how to set up an email account, see Using
email app.
X The Compose email window opens when your
account is set up.
4
Enter the recipient’s email address, and then tap
to send the dictation.
X The dictation is marked as sent in the
recordings list.
Tip
• You can create an email template and thus have
all elds automatically prelled when sending a
dictation. Go to Settings > Sending options > Other
sending options (e.g. Email) > Email template.
Send a dictation to Philips SpeechLive
Philips SpeechLive is a cloud dictation solution that
allows you to store, access and share dictation les
from anywhere in the world and around the clock while
guaranteeing maximum le security.
For more information about how to use SpeechLive
and SpeechLive services, see the SpeechLive Quick
start guide for authors or the Quick start guide for
administrators. Download the quicks starts guides at
www.speechlive.com/support.
Before you send a dictation to SpeechLive:
• You need to have a valid SpeechLive account. If
you are not using SpeechLive yet, create a new user
account in Settings > Sending options > SpeechLive
or at www.speechlive.com.
• Set up an existing SpeechLive user account in the
dictation app.
• Make sure that you have enabled SpeechLive in
Settings > Sending options > SpeechLive.
Loading ...
Loading ...
Loading ...