Loading ...
Loading ...
Loading ...

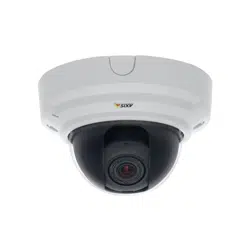
AXIS P3364–V
Video and Audio
Image Appeara nce
Increasing the Color level increases the color saturation. The value 100 gives maximum c olor saturation. The value 0 gives a
black and white image.
The image Brightness can be adjusted in the range 0–100, where a higher value prod uces a brighter image.
Increasing the Sharpness can increase bandwidth usage. A sharper im age m ight increase image noise especially in low light
conditions. A lower setting reduces image noise, but the whole image will appear less sharp.
The Contrast changes the re lati ve difference between lig ht and dark. It can be adjusted using the slidebar.
White Balance
White balance is used to m ake colors in the image appear the same regardless of the color tem per ature of the light source. The Ax is
product can be set to automatically identify the light source and compensate for its color. A lternatively, select the type of light
source from the drop -dow n list. For a de scription of each available setting, see the online help
.
The white balance window is enabled for the Automatic and Autom atic outdoor options that appear in the White balance drop-down
list. Select one of the options fro m the drop-down list to set the white balance w indo w properties. Select Automatic to use the
default settings for the Automatic and Autom atic outdoor options (in the W hite balance drop-down list). Select Custom to manually
set a reference window for white balance in the view area.
Wide Dynamic Range
Wide dynamic range (Dynamic Contrast) can impro ve the exposure when there is a considerable contrast between light and dark
areas in the image. En ab le WD R in intense backlight conditions. Disable WDR in low light conditions f o r optimal exposure .
Note
This setting is only possible when usi ng automatic exposure control.
Exposure Settings
Configure the exposure settings to suit the image quality requirements in relation to l
ighting, frame rate and bandwidth
considerations.
Exposure value - Click in the bar to fine-tune the expo sure.
Exposure control - These settings is used to adapt to the amount of light used. Automatic is the default settings can be used in most
situations. The shutter speed is automati cally set to produce optimum image quality. Flicker-free 50 or 60 Hz is used to remove
flicker which can b e caused by fluorescent a nd oth
er light sources. The Hold current option locks the current exposure settings.
Enable B acklight com p ensation - Ena b le t
his option if a bright spo t of light, for example a light bulb, causes other areas in
the image to appear too dark.
Exposure zones - This settings determines which part of the image is used to calculate the exposure. For m ost situations, the Auto
setting can be used. For particular requirement, select a predefi ned area.
Shutter & Gain
The shutter and gain settings affect the amount of motion blur and noise in the image. To ad apt to different lighting, available
storage space and bandwidth, it is often necessary to prioritize either low motion blur or low noise. The Axis product allows
using differ
ent pri oritiza tion in normal light and in l ow light.
Shutter
speed is related to the amount of time the shutter is opened and is measured in seconds (s). A slow shutter speed allows
more light to reach the sensor and can help produce a brighter image in low light situations. On the other hand, a slow shutter
speedcancausemovingobjects to appear blurry.
Set Shutter to
• Auto to set the shutter speed automatically. If required, use Max shutter to limit the shutter speed to prevent the frame
rate from being reduced. For example, to get 30 fps, set Max shutter to 1/30.
18
Loading ...
Loading ...
Loading ...
