Loading ...
Loading ...
Loading ...
PREPARING THE FABRIC
56
Hooping the Fabric in the Embroidery Frame
■ Types of Embroidery Frames
Optional embroidery frames can be used. When choosing
frames that do not appear on the screen, be sure to check
the design size of the embroidery field of the optional
frame. Check with your authorized Brother dealer for
frame compatibility.
Select a frame that matches the pattern size. Available
frame options are displayed on the LCD.
1 Highlighted: Can be used
2 Shaded: Cannot be used
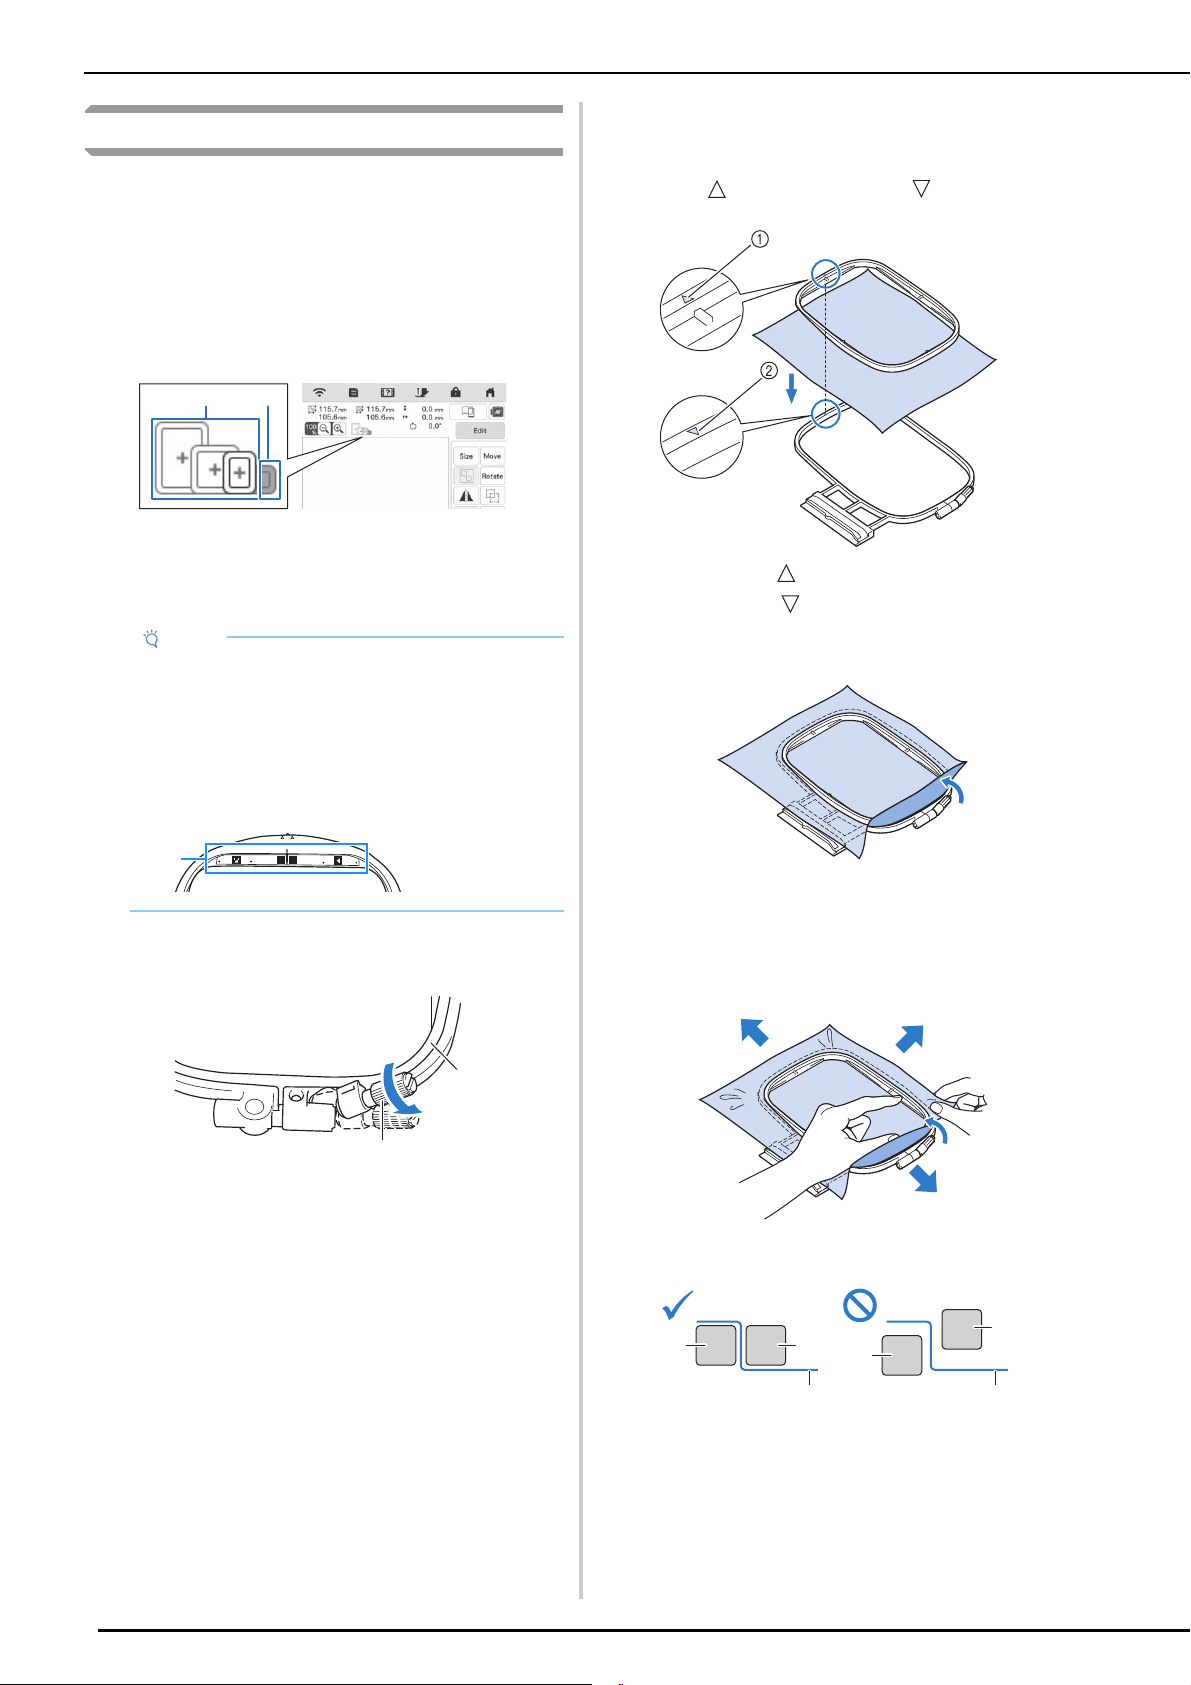
■ Inserting the Fabric
a
Lift-up and loosen the frame adjustment screw and
remove the inner frame.
1 Frame adjustment screw
2 Inner frame
b
Lay the fabric right side up on top of the outer frame.
c
Insert the inner frame making sure to align the inner
frame’s with the outer frame’s .
1 Inner frame’s
2 Outer frame’s
d
Slightly tighten the frame adjustment screw.
e
Gently smooth out the fabric. Make sure fabric is flat
and without wrinkles.
* After stretching the fabric, make sure the fabric is
taut.
* Make sure the inside and outside frames are even
before you start embroidering.
1 Outer frame
2 Inner frame
3 Fabric
Note
• If the fabric is not securely held in the embroidery
frame, the pattern will embroider out poorly. Insert
the fabric on a level surface, and gently stretch the
fabric taut in the frame.
• Embroidery frames with factory-coded stickers can
be used with the application (My Design Snap).
a
b
1 Factory-
coded
stickers
1
a
b
a
b
c
a
b
c
Loading ...
Loading ...
Loading ...