Loading ...
Loading ...
Loading ...
ADJUSTING THE SCREEN
108
c
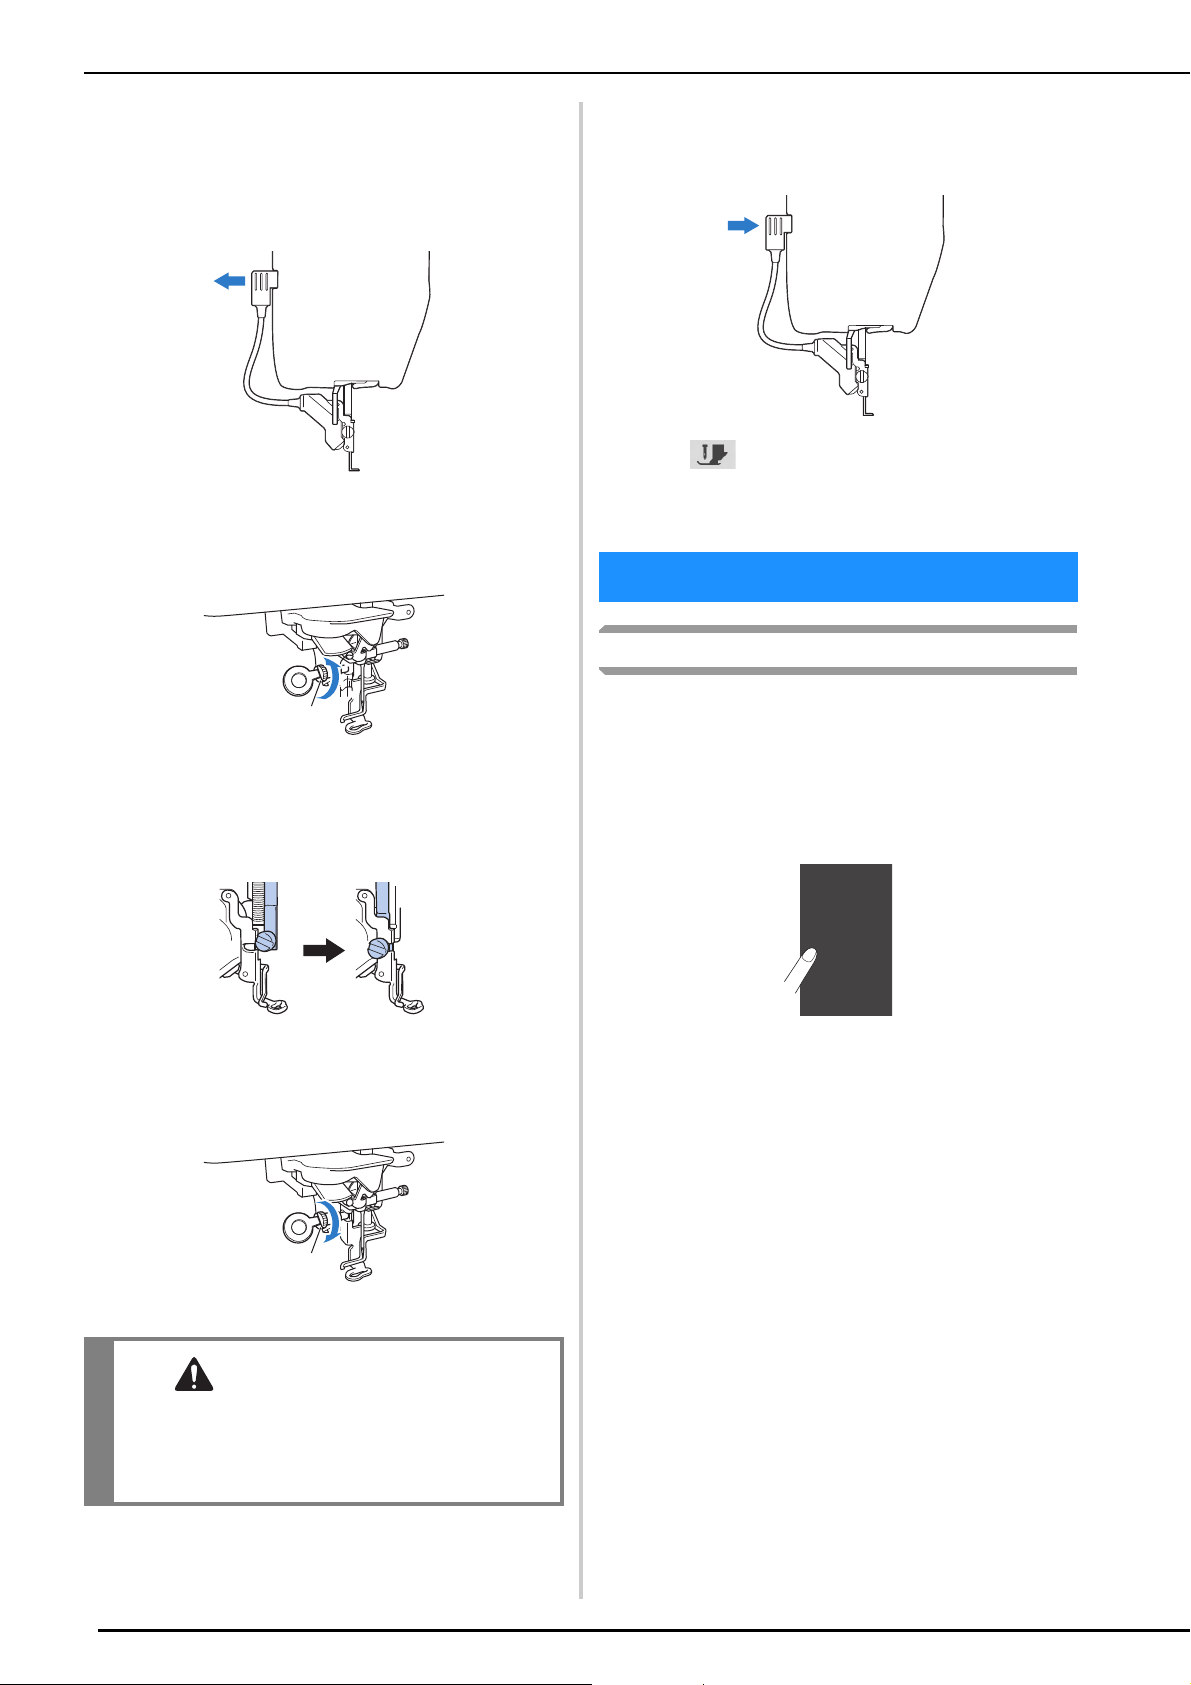
Raise the presser foot lever.
d
Remove the connector of the embroidery foot “W+”
with LED pointer from the connector on the back of
the machine.
e
Use the included disc-shaped screwdriver to loosen the
screw for the embroidery foot, and then remove the
embroidery foot “W+” with LED pointer.
f
Position the embroidery foot “W+” with LED pointer
on the presser foot bar by aligning the notch of the
presser foot to the large screw.
Side view
g
Hold the embroidery foot in place with your right
hand, and then use the disc-shaped screwdriver to
securely tighten the screw for the embroidery foot.
1 Screw for embroidery foot
h
Plug the connector of the embroidery foot “W+” with
LED pointer into the jack on the back left side of your
machine.
i
Press to unlock all keys and buttons.
All keys and operation buttons are unlocked, and the
previous screen is displayed.
Touch Panel is Malfunctioning
If the screen does not respond correctly when you
touch a key (the machine does not perform the
operation or performs a different operation), follow the
steps below to make the proper adjustments.
a
Holding your finger on the screen, turn the main
power switch to OFF and back to ON.
The touch panel adjustment screen appears.
CAUTION
• Use the disc-shaped screwdriver to firmly
tighten the screw for the embroidery foot. If
the screw is loose, the needle may strike the
embroidery foot and possibly cause injury.
a
a
ADJUSTING THE SCREEN
Loading ...
Loading ...
Loading ...