Loading ...
Loading ...
Loading ...
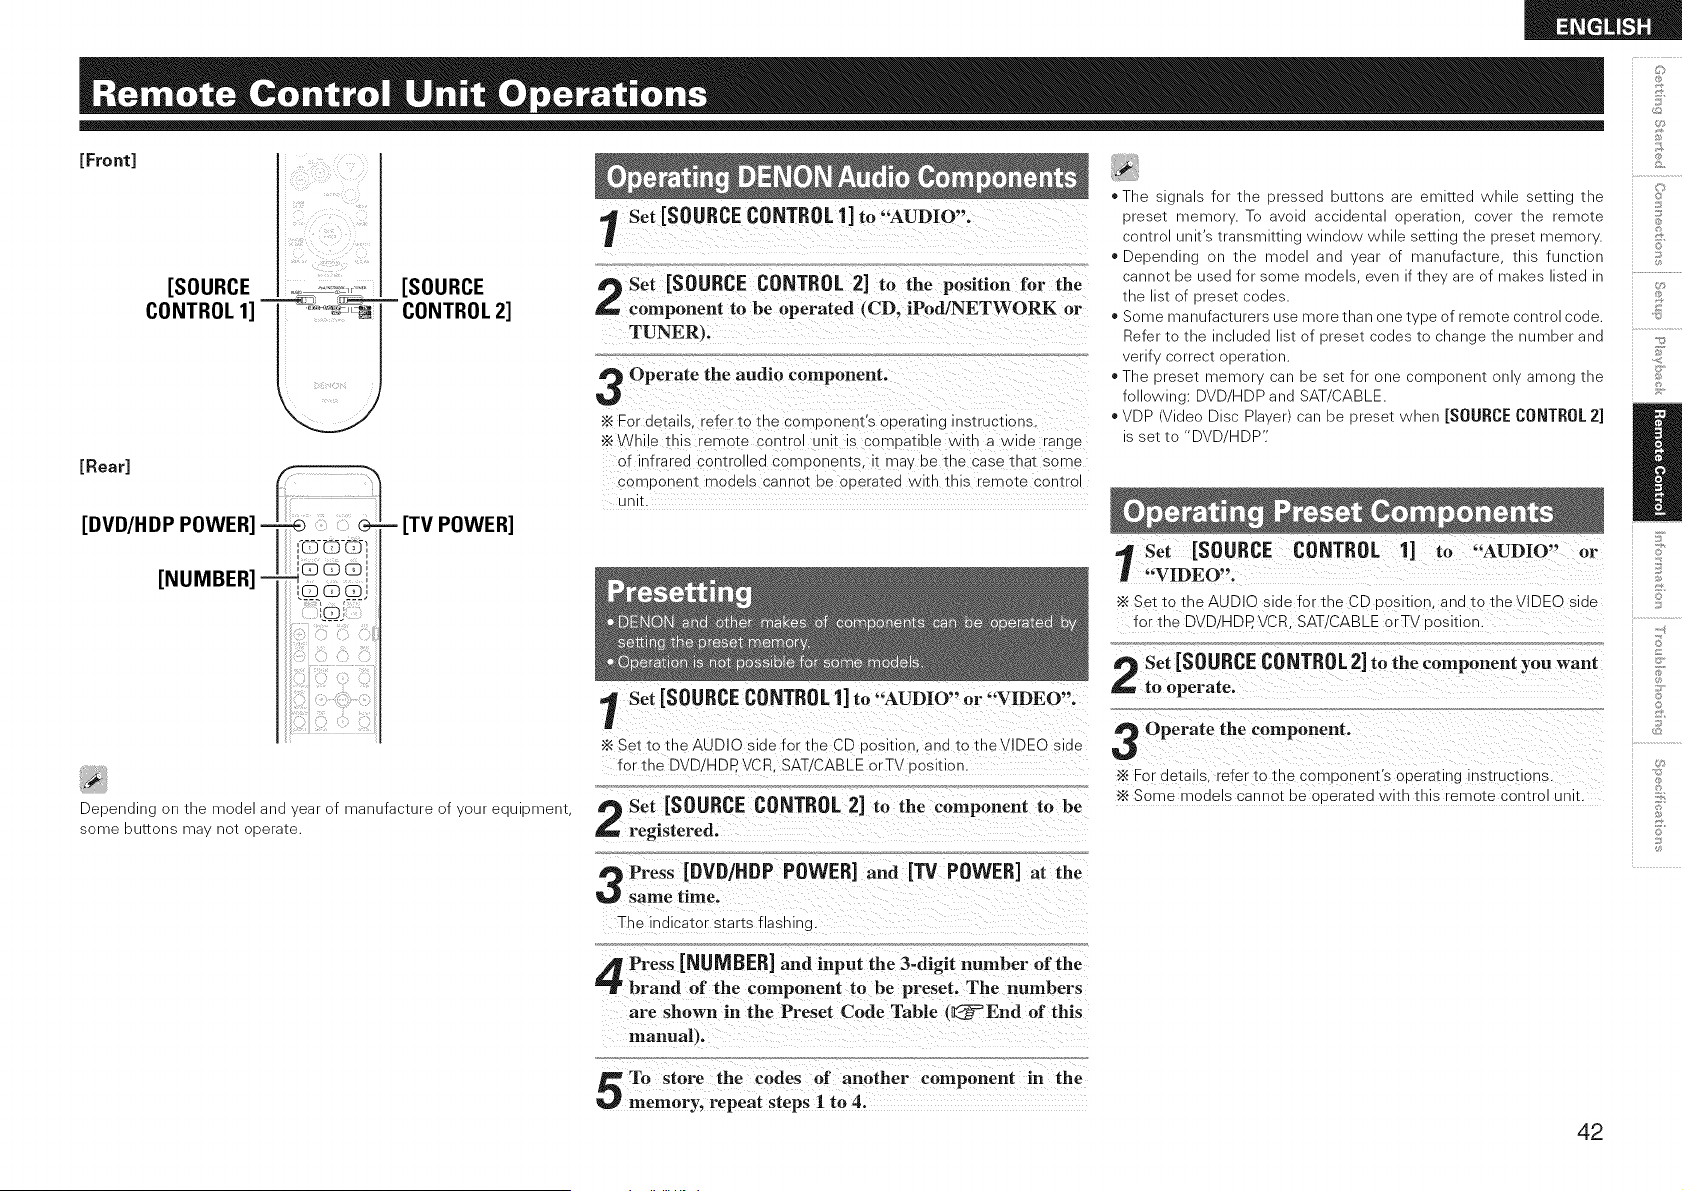
[Front]
[Rear]
i !__il _ ;_ ;_'_'_ii
[SOURCE ._,, _.._r, [SOURCE
CONTROL 1] '''=__ _ CONTROL 2]
- [TV POWER]
Depending on the model and year of manufacture of your equipment,
some buttons may net operate.
Set [SOURCE CONTROL 1] to "AUDIO".
Set [SOURCE CONTROL 2] to the position for the
component to be operated (CD, iPod/NETWORK or
TUNER},
Operate the audio component.
•_ For details. "efer to the comDonent's operating ns_ruct_ons
•_ W k; e this remote control unit is compatible with a wide range
of infrared controlled comDonems [ may De tne case tnat some
comDonem models cannot oe oueratea with this remote centre
unit.
l Set [SOURCE CONTROL1] to "AUDIO" or "VIDEO".
•_ Set to the AUDIO side for the CD position, and to tNeVIDEO side
for the DVD/HDP. VCR. SAT/CABLE orTV oosldon.
Set [SOURCE CONTROL 2] to the component to be
registered.
Press [DVD/HDP POWER] and [13/ POWER] at the
same time.
The indicator starts flashino.
* The s gnal_ for tne oressea outtons are eml_ea Wnlle setting me
oreset memor . To aVOid 9cciqenta 3Deratlon cover me _emote
centre Jnlt s transmitting WlndOV_ While setting tne oreset memor.
Depending on tne "node and ear of manufacture tnls functior
cannot De used for some models ever _tne are _f maKes listed "
tne liSt of preset codes.
Some manufacturers use more [nan one type of remote control code.
Refer to tne nClUded st of t)rese] COdeStc cnange tne number and
verif v correct operation.
* The 3reser memor can 3e set for one :omDonenr only among [ne
following: DVD.HDP and SAT CABLE.
* VDP video Disc Pl_ver/can ge greset wnen [SOURCE CONTROL 2]
3 set to "DVE HDP':
't Set [SOURCE CONTROL 1] to "AUDIO" or
"VIDEO".
"_ Set tc the AUDIO side for the CD _osmon. and to the VIDEO side
for the DVD/HDP. VCR. SAT!CABLE orTV dosidon.
Set [SOURCE CONTROL2] to the component you want
to operate.
Operate the component.
•_ For details refer to the corr oonent's operating instructions.
•_ Some models cannot be ooeratea with this "emote control unit.
©
o
S
o
Press [NUMBER] and input the 3-digit number of the
brand of the component to be preset, The numbers
are shown in the Preset Code Table t_=End of this
manual).
To store the codes of another component in the
memory, repeat steps I to 4.
42
Loading ...
Loading ...
Loading ...