
Loading ...
Loading ...
Loading ...
Flooring
1. e boiler is approved for installation on combustible ooring,
but must never be installed on carpeting.
Do not install boiler on carpeting even if founda-
tion is used. Fire can result, causing severe personal
injury, death or substantial property damage.
Foundation
1. Provide a solid foundation pad, at least 2 inches above the
oor, if any of the following is true:
y oor can become ooded.
y the oor is dirt, sand, gravel or other loose material.
y the boiler mounting area is severely uneven or sloped.
2. e minimum foundation size is:
y Evergreen
®
: 24 inches wide x 24 inches deep
3. Foundation may be of wood, brick or concrete (minimum 2
inches thick) construction.
If ooding is possible, elevate boiler suciently to prevent water
from reaching boiler.
Theboilerisheavy. Use caution not to drop the
boiler or cause bodily injury while liing and han-
dling. Verify that the boiler is securely attached to
prevent possibility of boiler falling aer installation.
Cold weather handling — If boiler has been stored in
a very cold location (below 0°F) before installation,
handle with care until the plastic components come
to room temperature.
1. e Evergreen
®
boiler is generally easier to handle and ma-
neuver aer removing the shipping container.
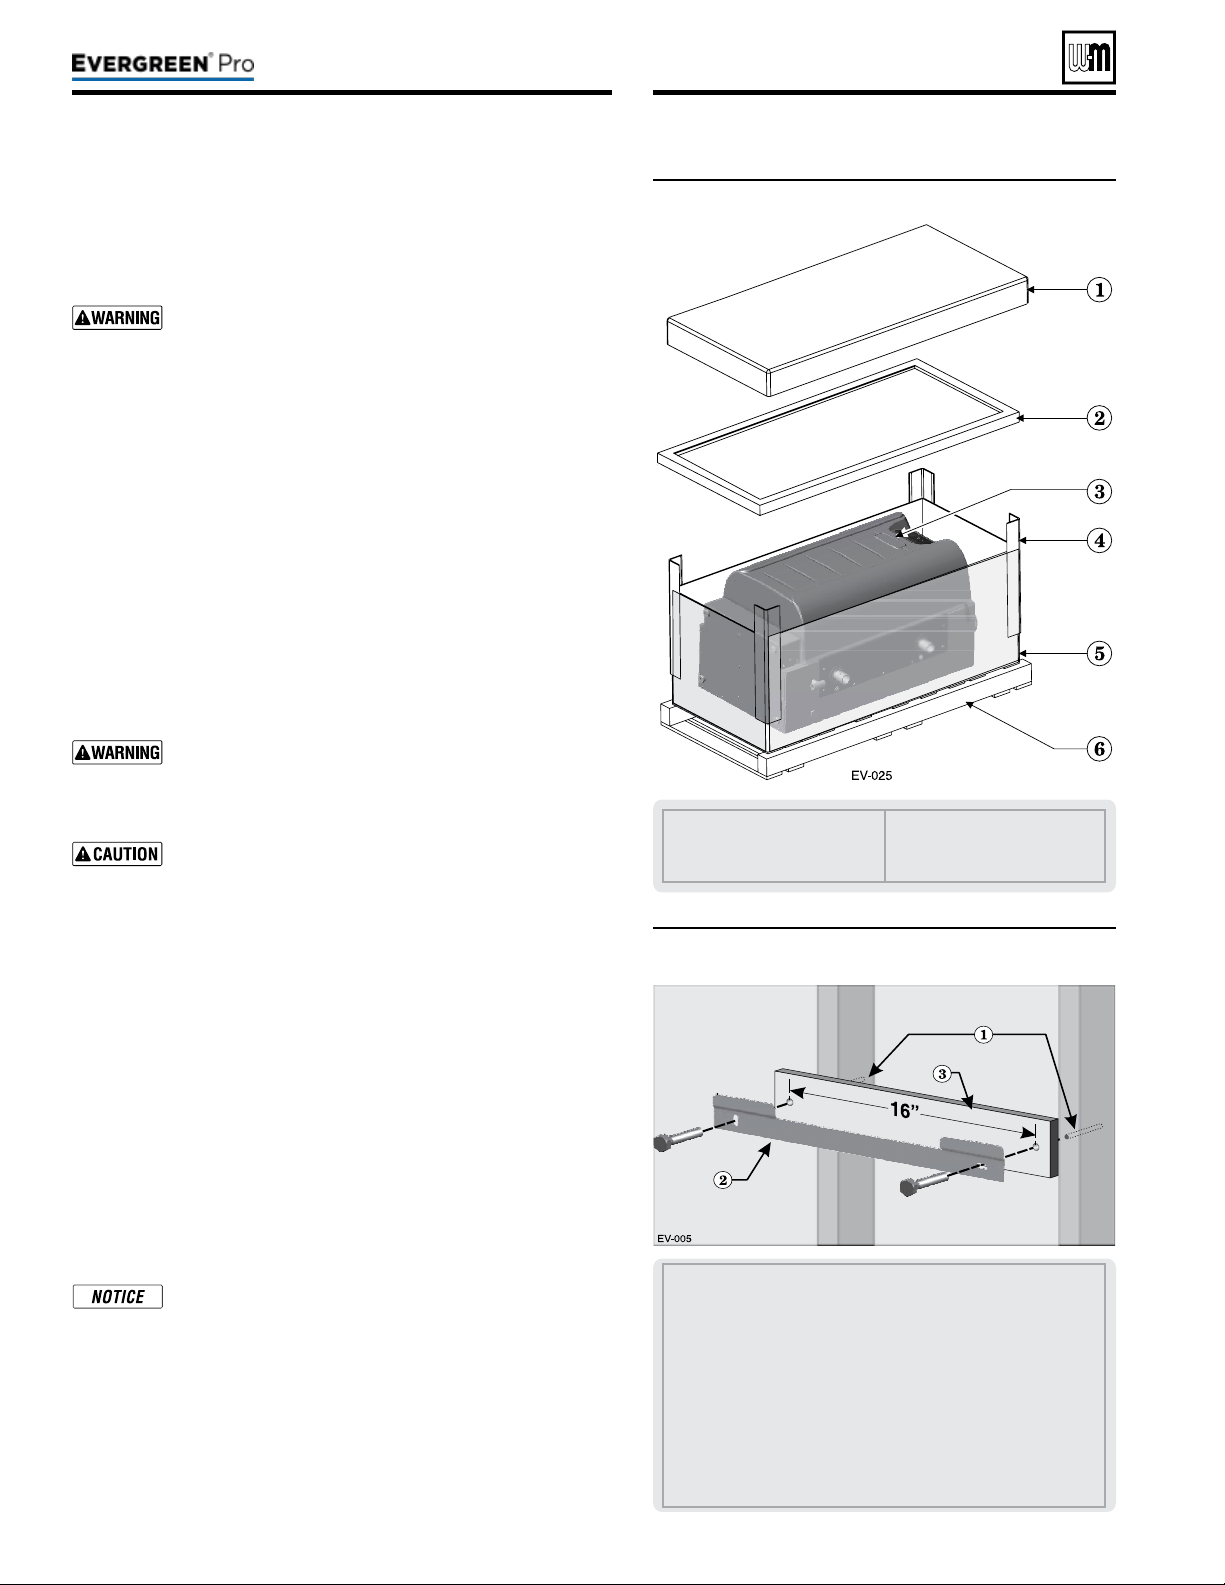
2. Remove items1, 2, 4, and 5 in Figure3. Remove trim kit and
parts from item6.
3. Aer removing outer shipping carton from boiler, REMOVE
jacket front door by opening door latches. Removing the door
will prevent possible damage to the door during handling.
4. Remove the additional trim kits from inside the boiler.
5. To remove boiler from pallet (aer removing jacket front door):
a. Remove the lag screws securing the shipping brackets.
b. Unscrew the two (2) rear boiler legs and remove the ship-
ping brackets and discard. e shipping brackets are NOT
to be used for wall mounting.
c. Discard the cardboard protector insert on the rear of the
boiler.
Do not drop boiler or bump jacket on oor or pallet.
Damage to boiler can result.
1. Set boiler in place, plumb and level.
a. Adjust legs, if necessary to plumb and/or level boiler.
1. Boilers can be wall mounted ONLY if using the optional wall-
mount kit available from Weil-McLain.
Figure3 Boiler shipping container
1 Studs — Pre-drill through the wall into the studs ¼ inch
diameter x 3 inches deep for 3/8-inch lag screws— Studs must
be on 16-inch centers. If studs are any other spacing, provide
a secure, solid mounting surface on which to attach the boiler
wall-mounting bracket.
2 Wall-mount bracket.
3 Provide a spacer board pre-drilled with two clearance holes,
spaced on 16 inch centers. Board must be minimum ½ inch
thick by 3½” high by 18 inches long. Clearance holes (2) should
be ½” diameter for 3/8-inch lag bolts or ¼” diameter for 3/16-
inch toggle bolts.
RECOMMENDED for drywall or plaster lathe.
Figure4 Wall-mount bracket and spacer board
Part number 550-100-211/0122
– 8 –
1 Cardboard cap, top
2 Cardboard support
3 Boiler
4 Cardboard corners
5 Cardboard outside sleeve
6 Pallet
220 /29 9/3 00 /39 9
Loading ...
Loading ...
Loading ...