Loading ...
Loading ...
Loading ...
MAKING STANDARD CUTS
THE ROUGHING OFF-CUT
Reducing a square or odd shaped workpiece down to a cylin-
der of approximate size for finish turning is called "roughing
off". Faceplate turnings and large diameter spindles should
first be partly reduced by sawing, but small spindles are easily
turned down entirely with the large (3/4")gouge.
Figure 39
• Start the first cut about 2" from tailstock end - then run it
toward the tailstock and off the end of the workpiece.
• Next, start another cut 2" nearer the headstock - and run it
back towards the tailstock, to merge with the first cut.
• Continue cutting in this manner until 2 to 4" from the head-
stock is left uncut. Reverse the direction of tool travel and
work one or two cuts in succession toward the headstock
and off this end of the workpiece.
• Never start a cut directly at the end - if the chisel catches
the end, it will damage the workpiece.
• Never take long cuts while corners remain on the work, as
this tends to tear long slivers from the corners.
• The first series of cuts should not be too deep. It is better
to partially reduce the work to a cylinder all along its
length. After that, start a second series of cuts to complete
reducing it to a cylinder.
• Once a cylinder has been formed, step lathe up to next
faster speed. Further reductions in size can now be
accomplished by cutting as deeply as desired at any spot
along the work. At this stage, long cuts can be made from
the center to either end.
• Generally, roughing off is continued until the cylinder is
approximately 1/8"larger than the desired finished size.
• Roundness can be tested by laying the gouge on top of
the work - it will not ride up and down when cylinder is
perfectly round.
First Cuts
Figure 40 _ Testing Roundness
ROUGH-CUTTING TO SIZE
The roughing-off cut can be made to accurately size the cylin-
der to a given diameter.
Another method is to make a number of sizing cuts at inter-
vals along the work, then use the gouge to reduce the whole
cylinder down to the diameter indicated by these cuts.
MAKING SIZING CUTS
Sizing cuts are useful to establish approximate finished size
diameters at various points along a workpiece. The work can
then be turned down to the diameters indicated and be ready
for finishing.
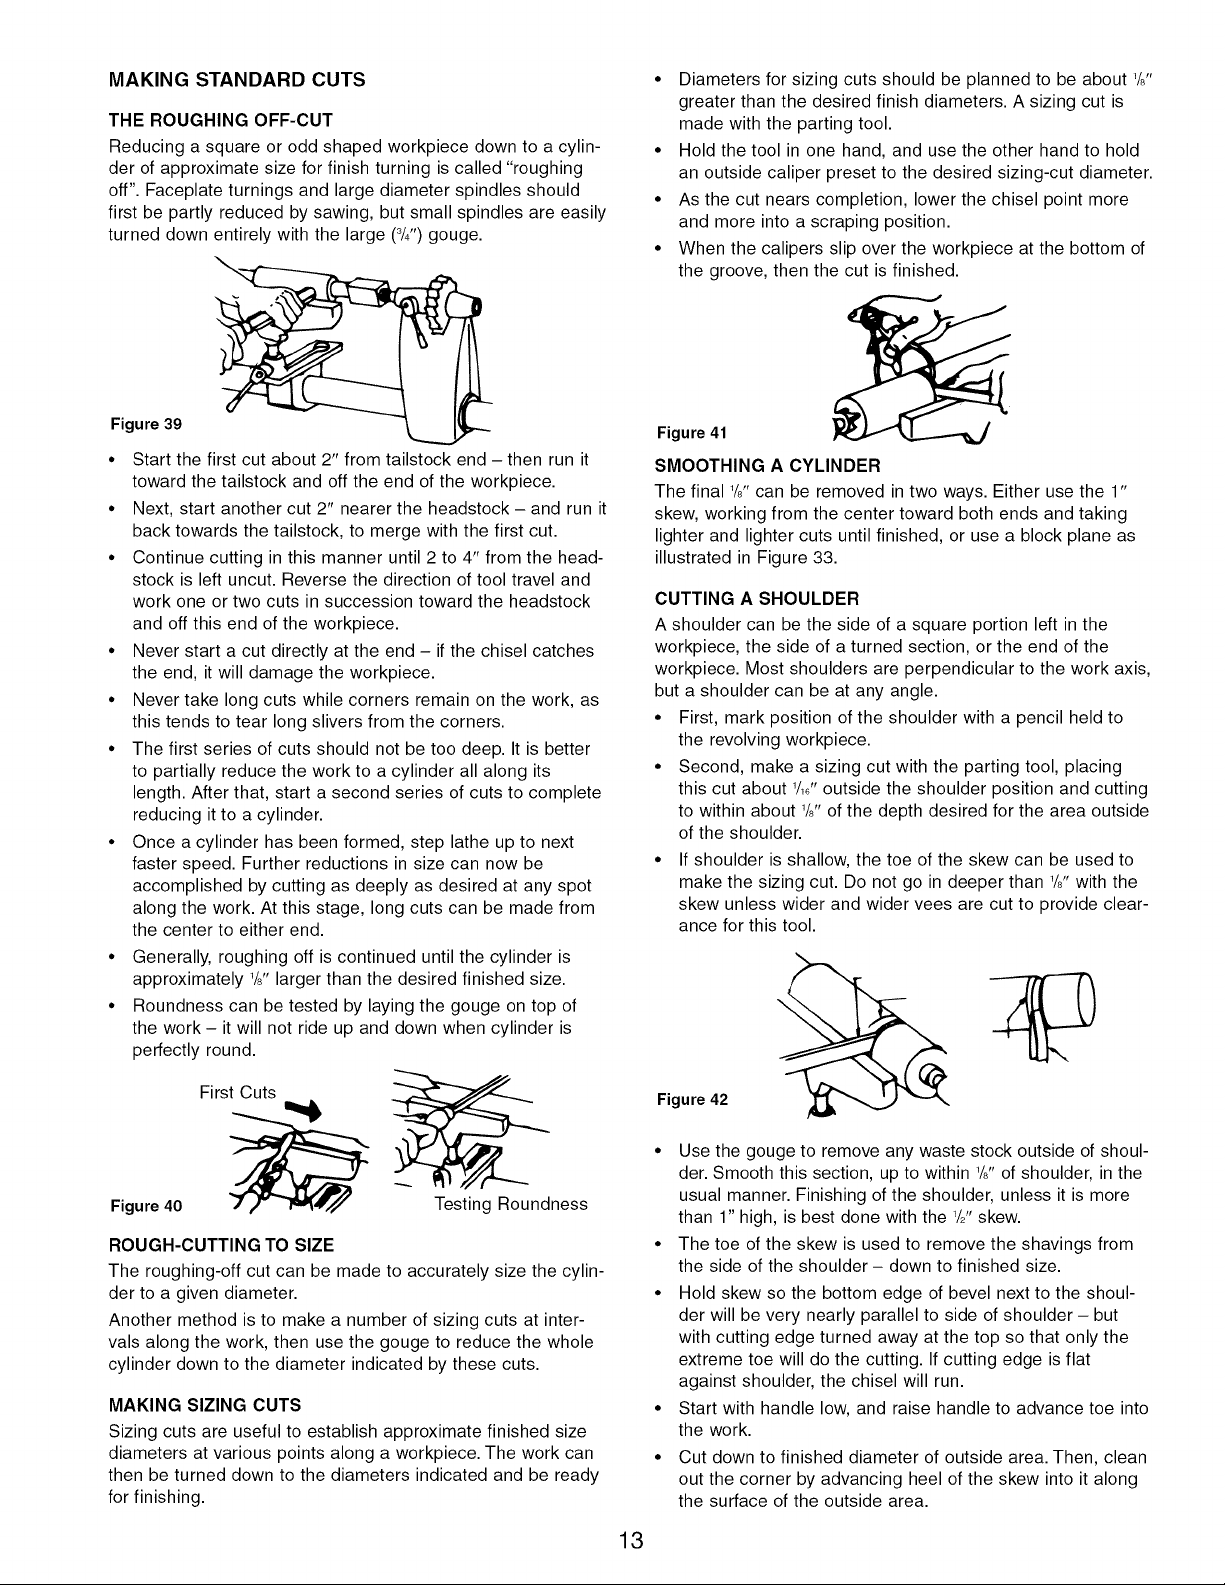
• Diameters for sizing cuts should be planned to be about 1/8"
greater than the desired finish diameters. A sizing cut is
made with the parting tool.
• Hold the tool in one hand, and use the other hand to hold
an outside caliper preset to the desired sizing-cut diameter.
• As the cut nears completion, lower the chisel point more
and more into a scraping position.
• When the calipers slip over the workpiece at the bottom of
the groove, then the cut is finished.
Figure 41
SMOOTHING A CYLINDER
The final 1/,, can be removed in two ways. Either use the 1"
skew, working from the center toward both ends and taking
lighter and lighter cuts until finished, or use a block plane as
illustrated in Figure 33.
CUTTING A SHOULDER
A shoulder can be the side of a square portion left in the
workpiece, the side of a turned section, or the end of the
workpiece. Most shoulders are perpendicular to the work axis,
but a shoulder can be at any angle.
• First, mark position of the shoulder with a pencil held to
the revolving workpiece.
• Second, make a sizing cut with the parting tool, placing
this cut about 1/16"outside the shoulder position and cutting
to within about 1/,, of the depth desired for the area outside
of the shoulder.
• If shoulder is shallow, the toe of the skew can be used to
make the sizing cut. Do not go in deeper than 1/,, with the
skew unless wider and wider vees are cut to provide clear-
ance for this tool.
Figure 42
• Use the gouge to remove any waste stock outside of shoul-
der. Smooth this section, up to within 1/,, of shoulder, in the
usual manner. Finishing of the shoulder, unless it is more
than 1" high, is best done with the 1/2"skew.
• The toe of the skew is used to remove the shavings from
the side of the shoulder - down to finished size.
• Hold skew so the bottom edge of bevel next to the shoul-
der will be very nearly parallel to side of shoulder - but
with cutting edge turned away at the top so that only the
extreme toe will do the cutting. If cutting edge is flat
against shoulder, the chisel will run.
• Start with handle low, and raise handle to advance toe into
the work.
• Cut down to finished diameter of outside area. Then, clean
out the corner by advancing heel of the skew into it along
the surface of the outside area.
13
Loading ...
Loading ...
Loading ...