Loading ...
Loading ...
Loading ...
USING SHAPER OR MOULDING KNIVES
• An old chisel can be made to serve as a holder for shaper
or moulding knives.
Such knives make it possible to scrape many interesting
shapes into the workpiece surface using one or two operations
instead of the many operations required with standard chisels.
It is generally not practical to use cutting methods with special
shape tools. Scraping methods should be used instead.
• The holder should provide a shoulder against which the
butt end of the knife can be firmly seated.The knife must
be securely mounted, either by means of a screw threaded
into the holder, or by compressing it between two prongs
bolted together.
Figure 32 _ _l
USING A BLOCK PLANE
Clear, glass-smooth finishes (especially on softwoods) can be
obtained by using a block plane set to take a fine shaving.
• The tool rest should be raised up approximately to the top
of the workpiece - and the plane should be horizontal, but
turned slightly in the direction of travel so that it will take a
shearing cut.
• Two tool rests, one in front and the other behind the work, can
be used to advantage in positioning the plane so as to exactly
limit the depth of cut (and finished size of the workpiece).
Figure 33
USING WOOD RASPS AND FILES
• A wood rasp will remove stock quickly when held against
the revolving workpiece. Care should be taken to support
the rasp firmly against the tool rest. An improperly held
rasp, when used on a rough surface, can kick back and
cause operator injury.
• The rasp will leave a very rough finish.
• Finer finishes (similar to those produced by scraping) can
be obtained by using files in the same manner. Various
types of files can be used for shaping vees, beads, coves,
etc. If pressed too hard into the wood, some files can burn
the workpiece.
• Keep the file clean to keep it cutting uniformly. Files work
best on hardwoods.
Figure 34
HAND POSITIONS
When using any of the chisels, the hand takes a natural position
on the tool handle.This position may be near the middle of the
handle or towards the end, depending upon the amount of
leverage required. The position of the hand near the tool rest is a
matter of individual preference, but there are three generally
accepted positions, each best for certain types of operations.
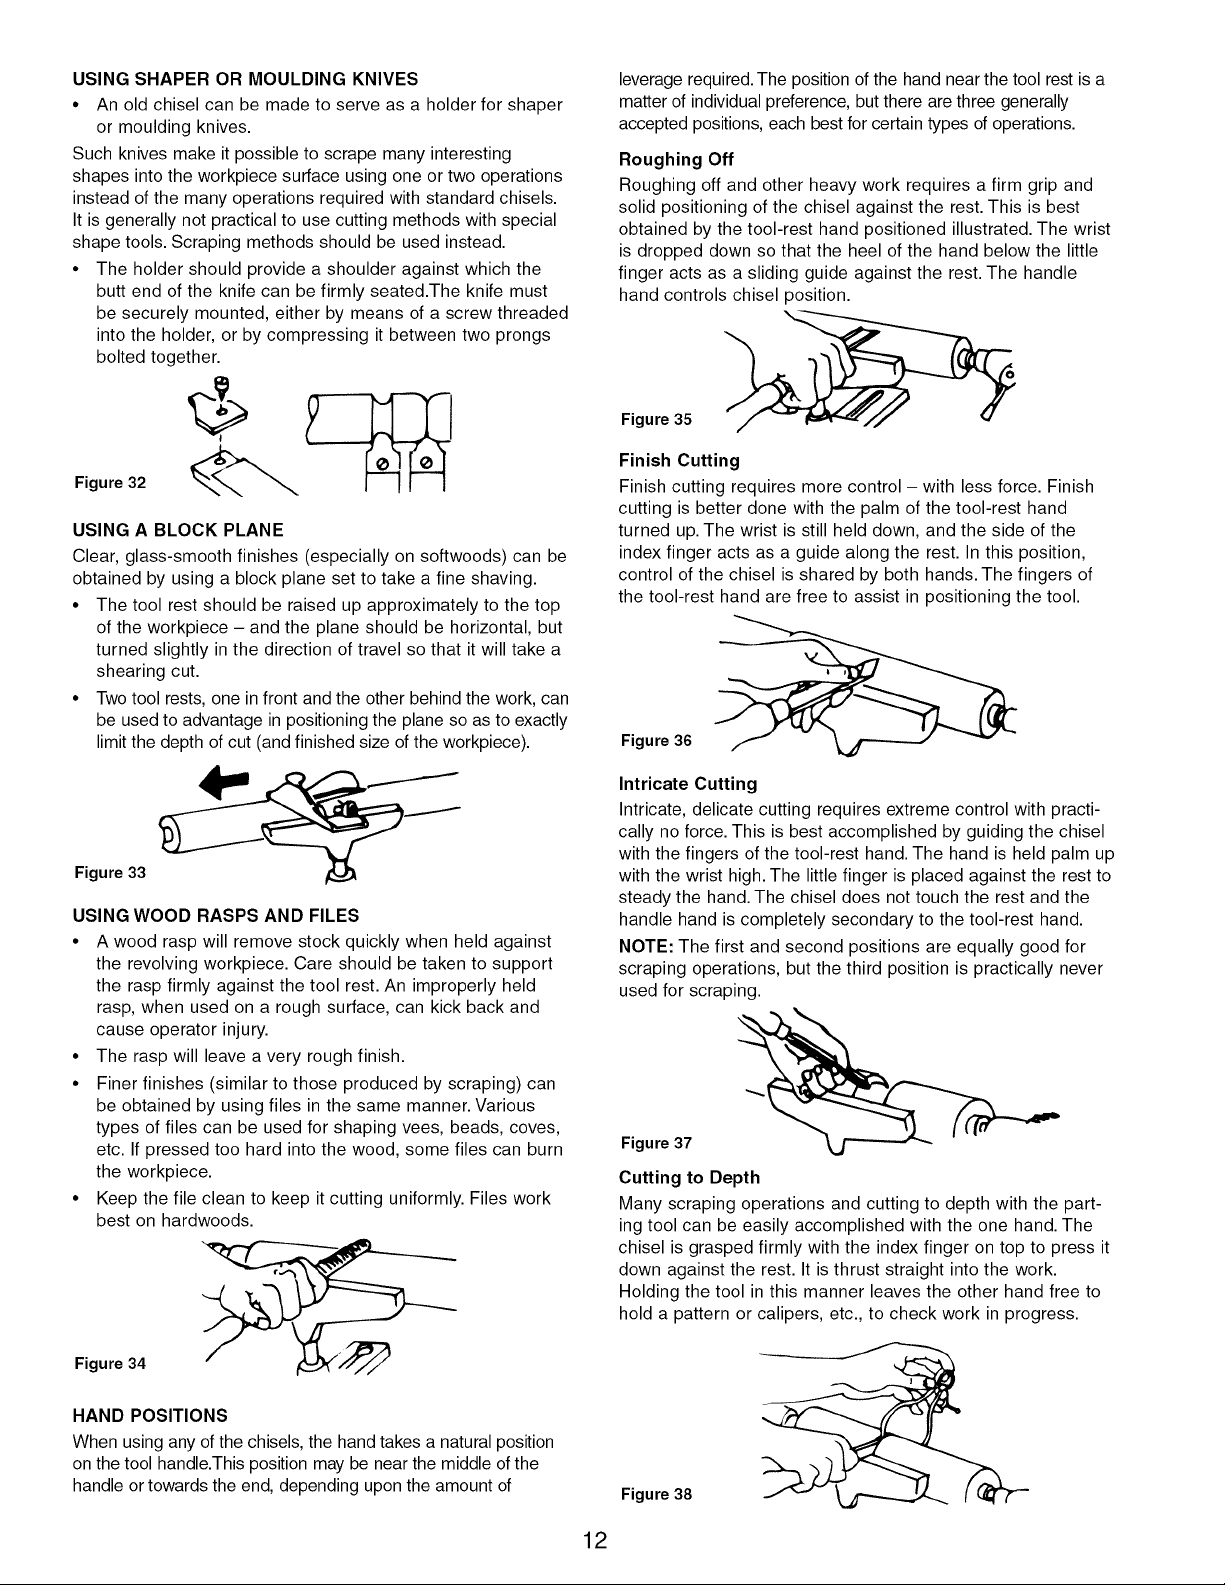
Roughing Off
Roughing off and other heavy work requires a firm grip and
solid positioning of the chisel against the rest. This is best
obtained by the tool-rest hand positioned illustrated. The wrist
is dropped down so that the heel of the hand below the little
finger acts as a sliding guide against the rest. The handle
hand controls chisel position.
Figure 35 _
Finish Cutting
Finish cutting requires more control - with less force. Finish
cutting is better done with the palm of the tool-rest hand
turned up. The wrist is still held down, and the side of the
index finger acts as a guide along the rest. In this position,
control of the chisel is shared by both hands. The fingers of
the tool-rest hand are free to assist in positioning the tool.
Figure 36
Intricate Cutting
Intricate, delicate cutting requires extreme control with practi-
cally no force. This is best accomplished by guiding the chisel
with the fingers of the tool-rest hand. The hand is held palm up
with the wrist high. The little finger is placed against the rest to
steady the hand. The chisel does not touch the rest and the
handle hand is completely secondary to the tool-rest hand.
NOTE: The first and second positions are equally good for
scraping operations, but the third position is practically never
used for scraping.
Figure 37
Cutting to Depth
Many scraping operations and cutting to depth with the part-
ing tool can be easily accomplished with the one hand. The
chisel is grasped firmly with the index finger on top to press it
down against the rest. It is thrust straight into the work.
Holding the tool in this manner leaves the other hand free to
hold a pattern or calipers, etc., to check work in progress.
Figure 38
12
Loading ...
Loading ...
Loading ...