
Loading ...
Loading ...
Loading ...
79 / 91
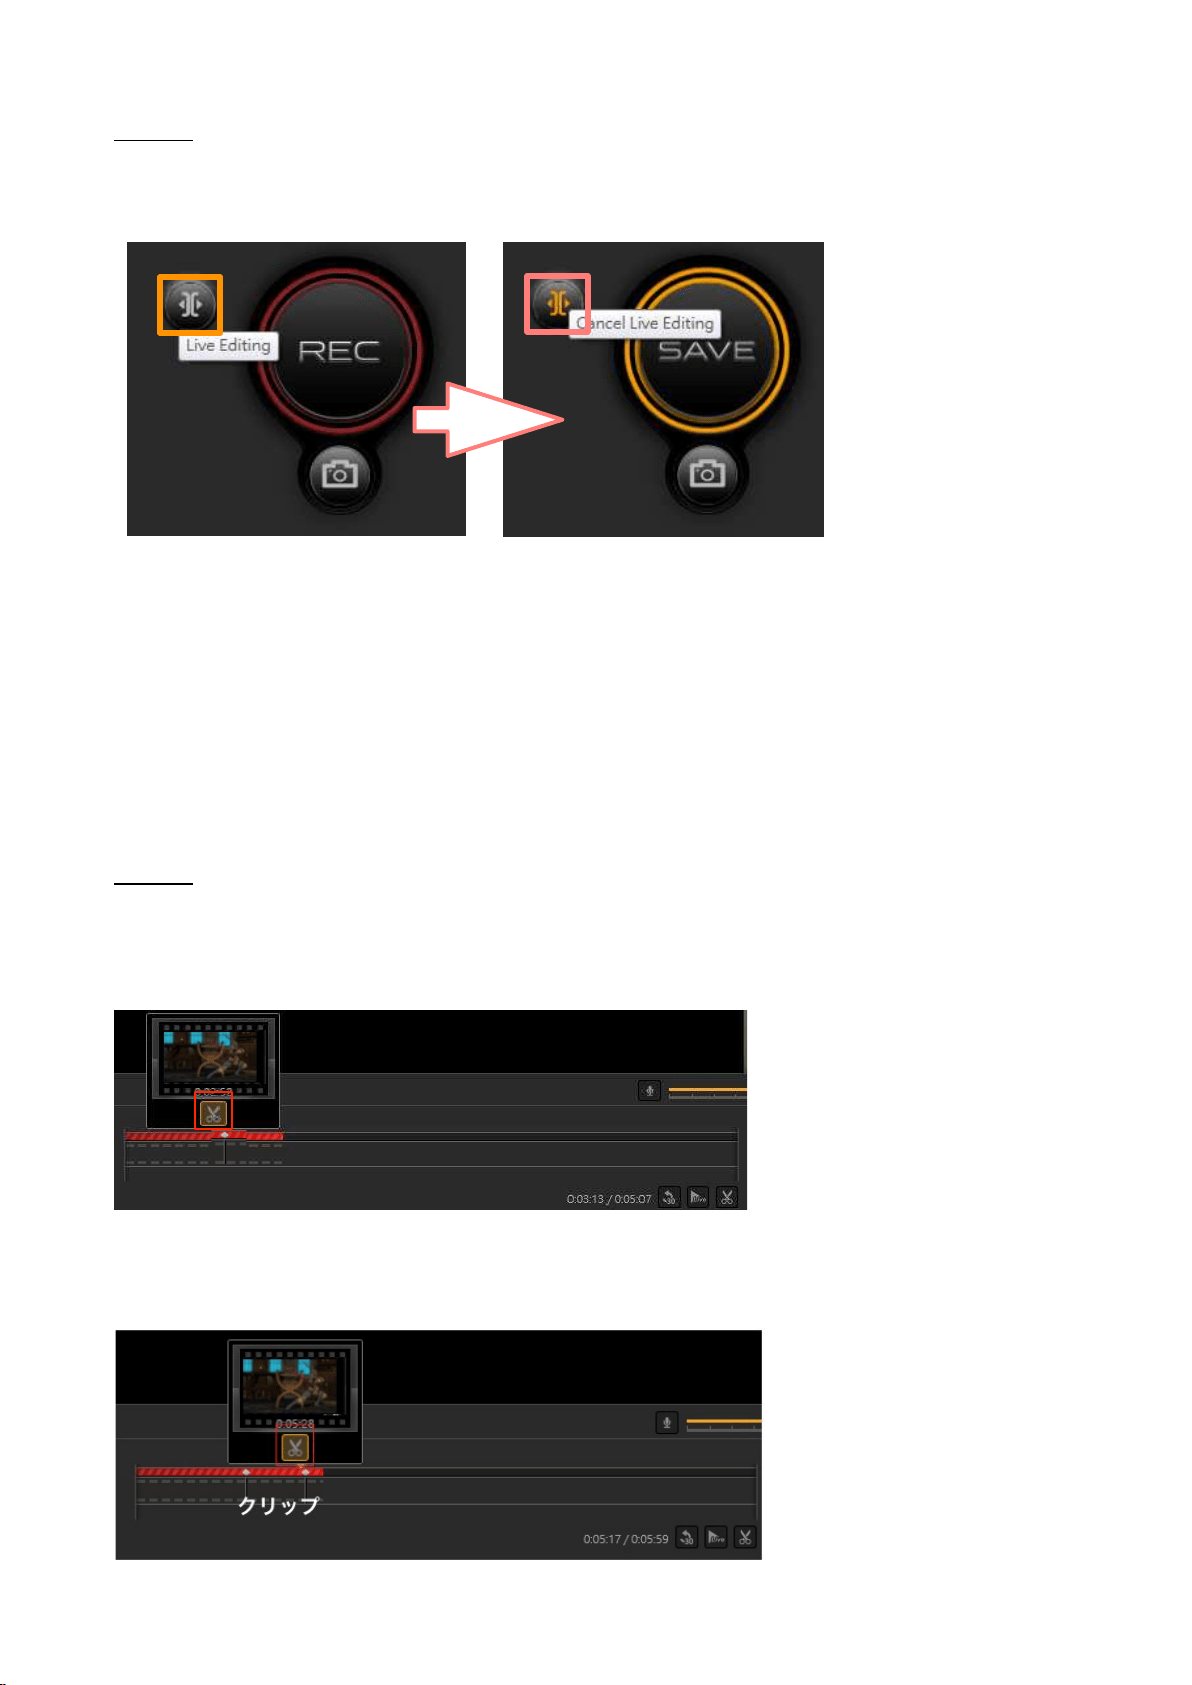
Step 1:
Click the “Live Editing" button next to the “Record” button to enable the function. Click the
“Live Editing" button again to disable the function.
※ When Live Editing is enabled, click the SAVE but
ton to save the cache
d data. As the cached
data are saved, the time left for Live Editing changes according to the remaining HDD
capacity.
※ Once Live Editing is enabled, you cannot change the recording quality settings.
※ Whenever you change “Live Editing” to “Cancel Live Editing", a confirmation message will
prompt you to make sure if you want to discard the temporarily buffered data.
Step 2:
Add a ƚime ŵark ŽŶ the video ƚŝŵĞůŝŶĞfirst, and then create a delimiter. Specify the time and
click the “Scissors” icon or right-click your mouse to add the time mark at the starting point.
※ Right-click the time mark again to delete it.
Follow the same steps to add a time mark at the ending point. Then a delimiter is created.
Creating a clip between the starting mark and the ending mark.
Loading ...
Loading ...
Loading ...