Loading ...
Loading ...
Loading ...
33
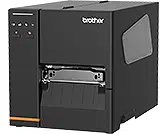
7. Adjust the Front Label Guide to fix the
media position.
Note
• Make sure you thread the media
through the Media Sensor.
• The sensor locations are marked by
the triangle mark (Gap Sensor)
and the arrow mark (Black Mark
Sensor) at the sensor housing.
• The Media Sensor position is
adjustable. Make sure the position of
the Gap or Black Mark Sensor
matches the position of the
Gap/Black Mark on the label roll.
8. Close the Print Head on both sides and
make sure it locks into place.
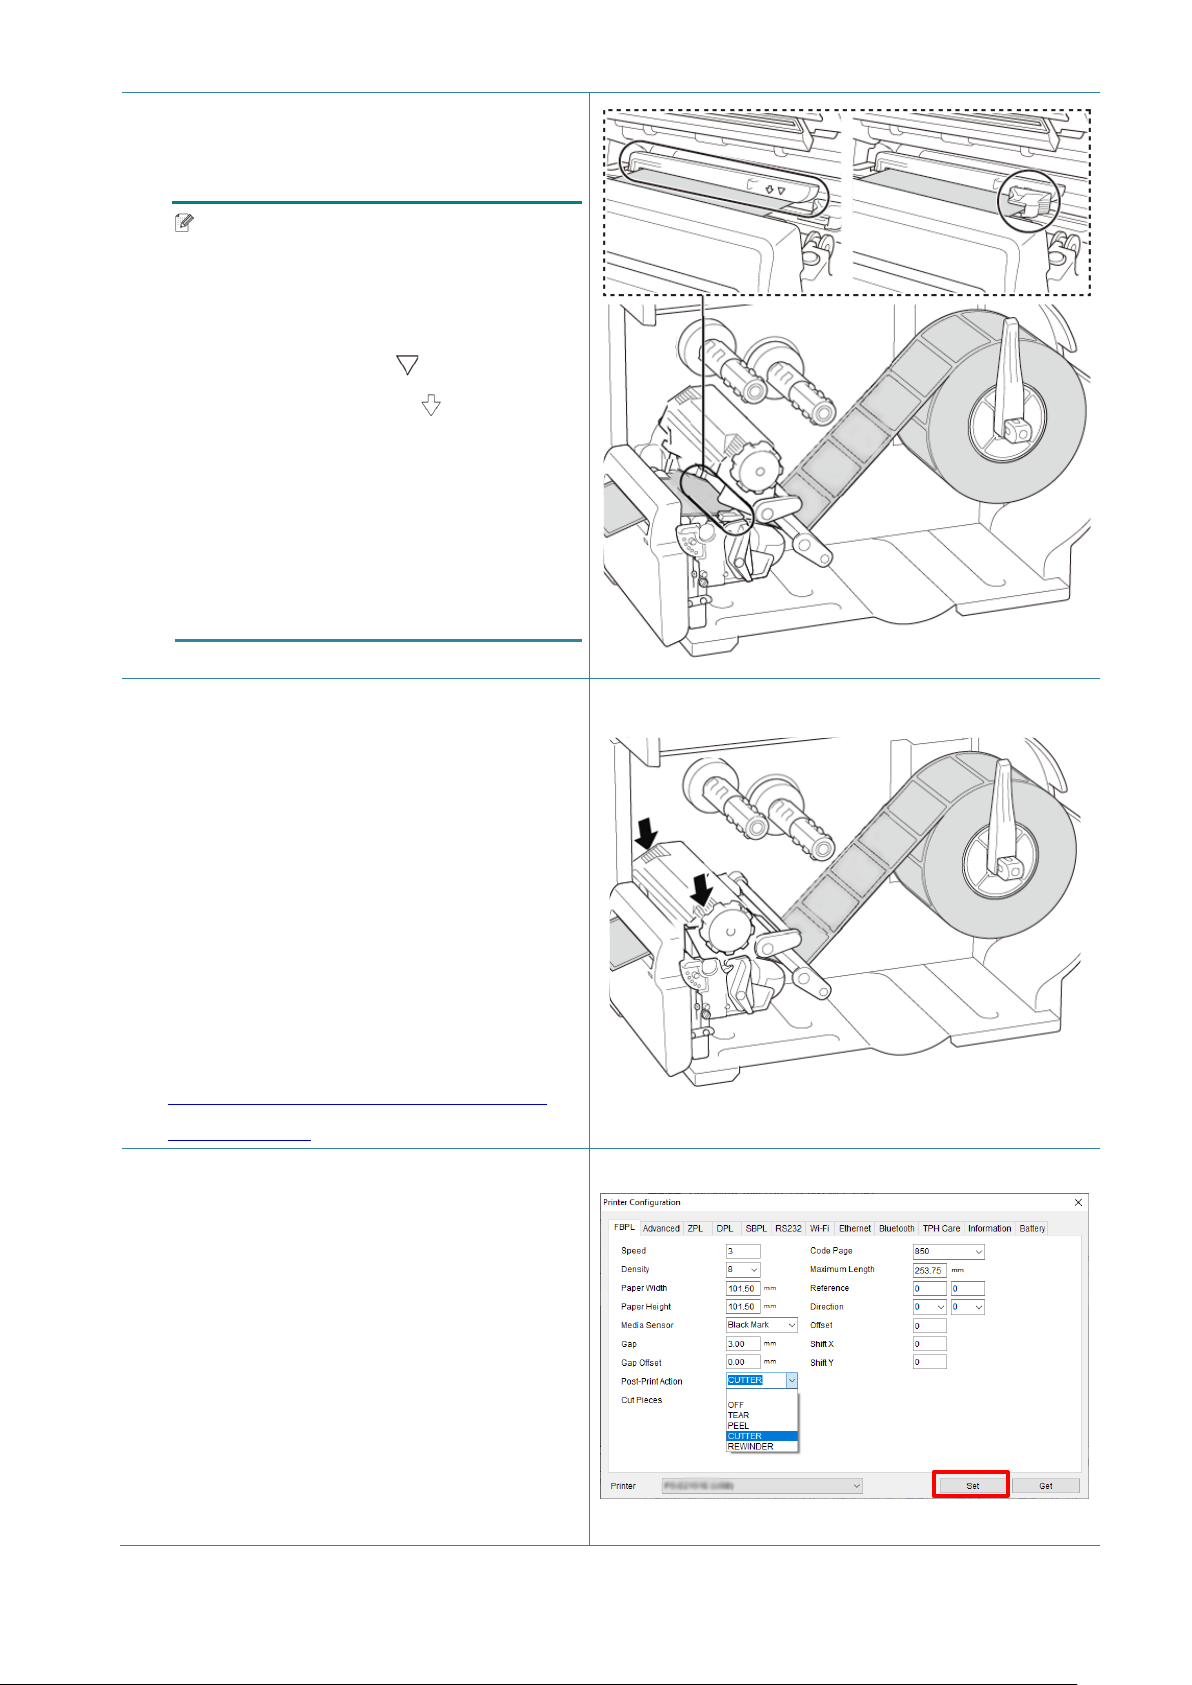
9. Set the media sensor type and calibrate
the selected sensor.
10. Use the Touchscreen to perform the
calibration first, and set the printer mode
to Cutter Mode.
For models without a Touchscreen,
perform the calibration using the BPM.
For more information about sensor
calibration, see section
8.2 Auto-Calibrating the Media Sensor
using the BPM.
11. Set the printer mode to “Cutter” using the
Main Menu (Main Menu > Setting > Print
Mode > Cutter mode) or using the
Brother Printer Management Tool (BPM)
as follows.
a. Start the BPM.
b. Click the Printer Configration button.
c. Click the FBPL tab.
d. Click the CUTTER option from the
Post-Print Action drop-down list.
e. Click Set.
Loading ...
Loading ...
Loading ...