Loading ...
Loading ...
Loading ...
54
Advanced Operation
Using Special Settings
1. Load your document in the ADF with the 1
st
page facing down and the top
of the pages pointing to the feeder.
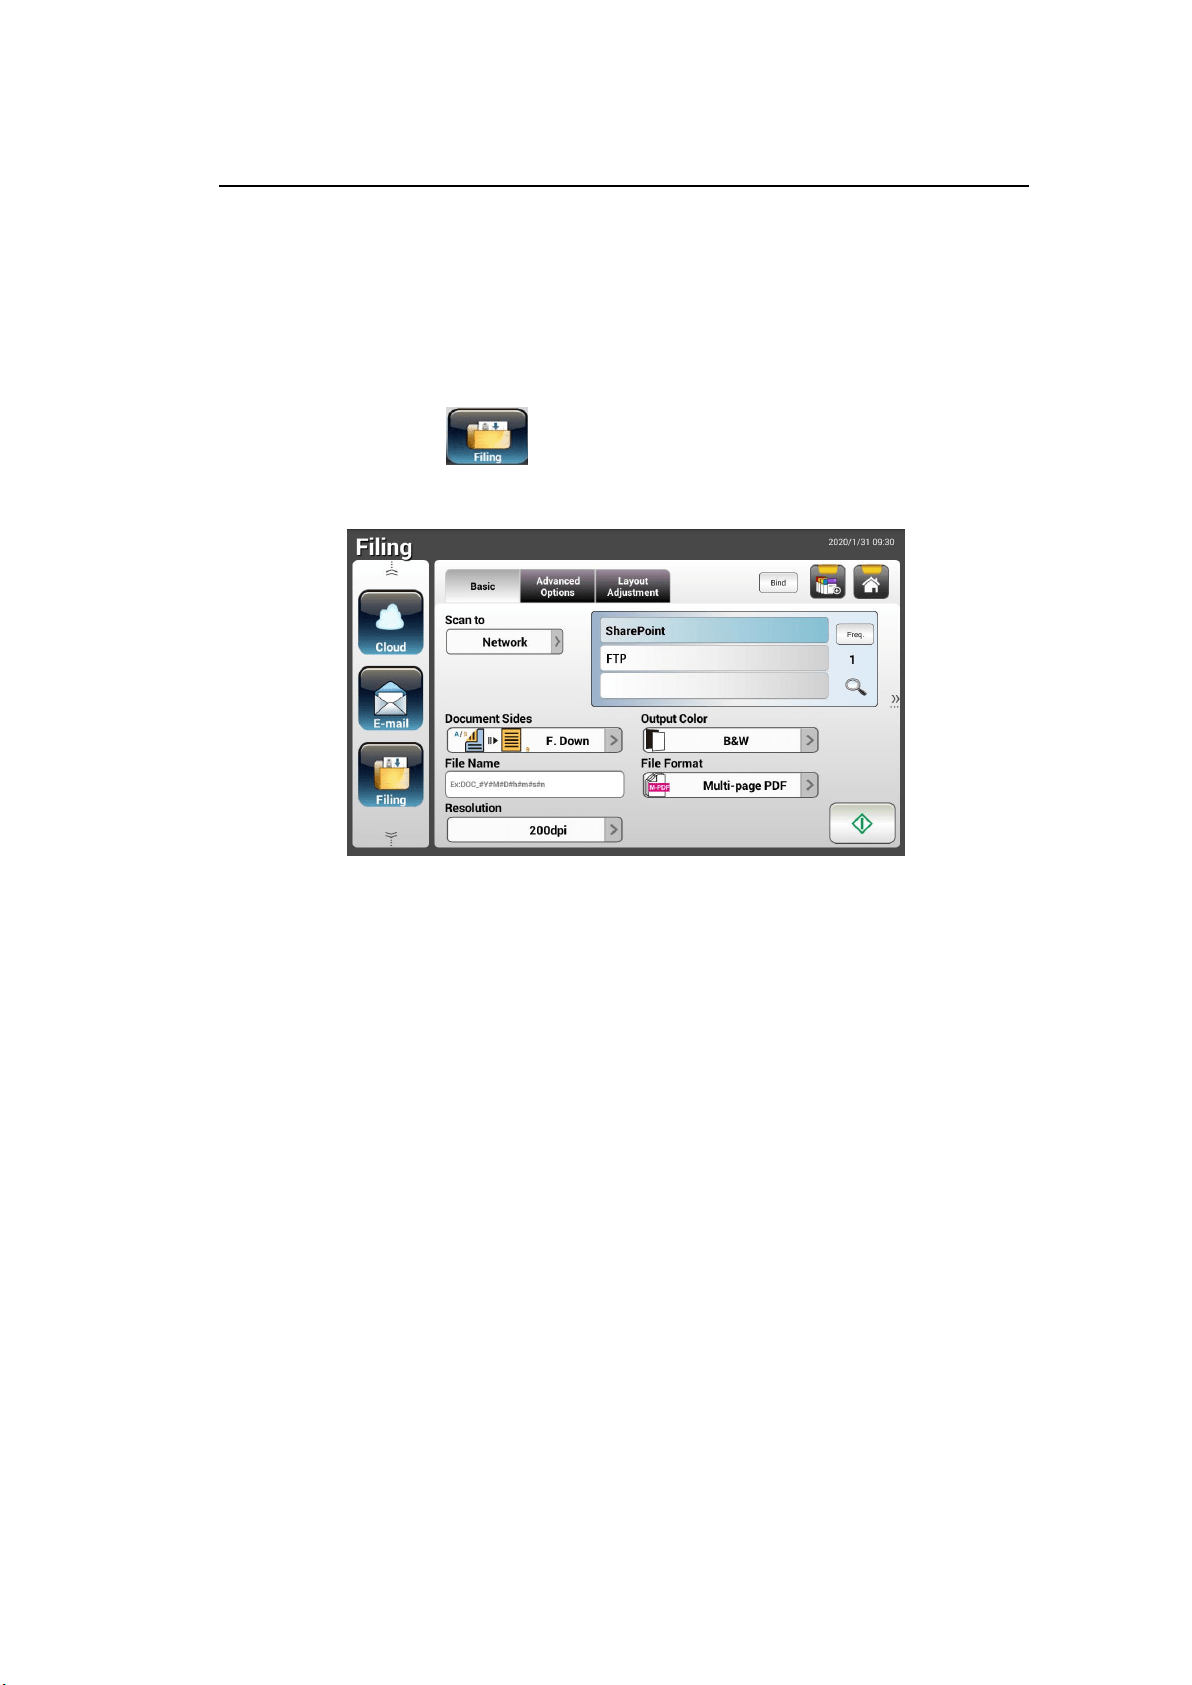
2. Press the Filing button on the Home screen. The LCD Touch Panel
prompts the following Filing main screen.
3. Choose your [Scan to] destination to store your scanned image.
- Choose Network or Local.
- If Network is selected, the available network servers will be displayed
at the right box. You may use the Up-arrow or Down-arrow button
to scroll from the list including SharePoint, FTP, FTPS.
- If Local is selected, USB and Public Folder will be displayed at the
right box. If USB is selected, make sure a USB flash drive has been
inserted to the USB flash drive port of the product.
If Public Folder is selected, the scanned image will be stored in the
product’s memory. Enter the PIN number (folder name) during scanning
and then access the scanned image via the product’s embedded web
page. (Refer more detailed information on subsequent section -
Customizing the Product’s Settings via the Embedded Web Page.)
4. On the Basic screen, enter your desired file name and check if document
side, output color, or file format meets your requirements. If not, change
the settings to suit your needs.
5. Tap the Advanced Settings tab to prompt the Advanced Settings
screen. Change the density, contract, resolution, and quality level if the
default settings are not satisfactory. (For more information about the
settings, see the settings description described in the preceding section –
Scanning and Sending Your Documents to E-mail Addresses on page 31.)
Loading ...
Loading ...
Loading ...