Loading ...
Loading ...
Loading ...
General
Cleaning
FEATURE OVERVIEW
• Oven Cleaning (Left
Oven)
• To Remove and
Replace Oven Door
Adhere to the following
cleaning precautions:
* AIIowthe oven to cool
before cleaning.
* Wear rubber gloves
when cleaning the
appliance manually.
Remove spillovers and
heavy soils as soon as
possible. Regular clean-
ings will reduce the
number of future major
cleanings.
Ammonia
must be rinsed before
operating the oven.
Provide adequate
ventilation.
Porcelain Enamel Oven Cleaning (If equipped)
Porcelain has a smooth finish and is a type of glass fused to metal. Oven cleaners can
be used on all interior oven surfaces.
General Cleaning
Remove soils using hot, soapy water. Do not allow food spills with a high sugar or acid
content (such as milk, tomatoes, saukerkraut, fruit juices or pie filling) to remain on the
surface as they may cause a dull spot even after cleaning.
To Remove Heavy Soil
1. Allow a dish of ammonia to sit in the oven overnight or for several hours with the
oven door closed. Clean softened spots using hot, soapy water. Rinse well with wa-
ter and a clean cloth.
2. If soil remains, use a soap-filled scouring pad or a nonabrasive cleaner. If necessary,
use an oven cleaner following manufacturer's instructions. DO NOT mix ammonia
with other cleaners.
Adhere to the following precautions when using oven cleaners:
1. DO NOT spray on the electrical controls or switches because it could cause a short
circuit and result in sparking or fire.
2. DO NOT allow a film from the cleaner to build up on the temperature sensing bulb
located at the top left rear corner of the oven; it could cause the oven to heat im-
properly. Carefully wipe the bulb clean after each oven cleaning, being careful not
to move the bulb. A change in its position could affect how the oven bakes. Avoid
bending the bulb and capillary tube.
3. DO NOT spray any cleaner on the oven door trim or gasket, handles or any exterior
surfaces of the range, wood or painted surfaces. The cleaner can damage these
surfaces.
To Clean the Oven Bottom
Clean using hot, soapy water, a mild abrasive cleanser, a soap-filled abrasive pad or
oven cleaner following oven cleaner manufacturer's instructions.
DO NOT line the oven walls, bottom, racks or any other part of the appli-
ance with aluminum foil. Doing so will destroy heat distribution, produce poor baking
results and cause permanent damage to the oven interior (aluminum foil will melt to
the interior surface of the oven).
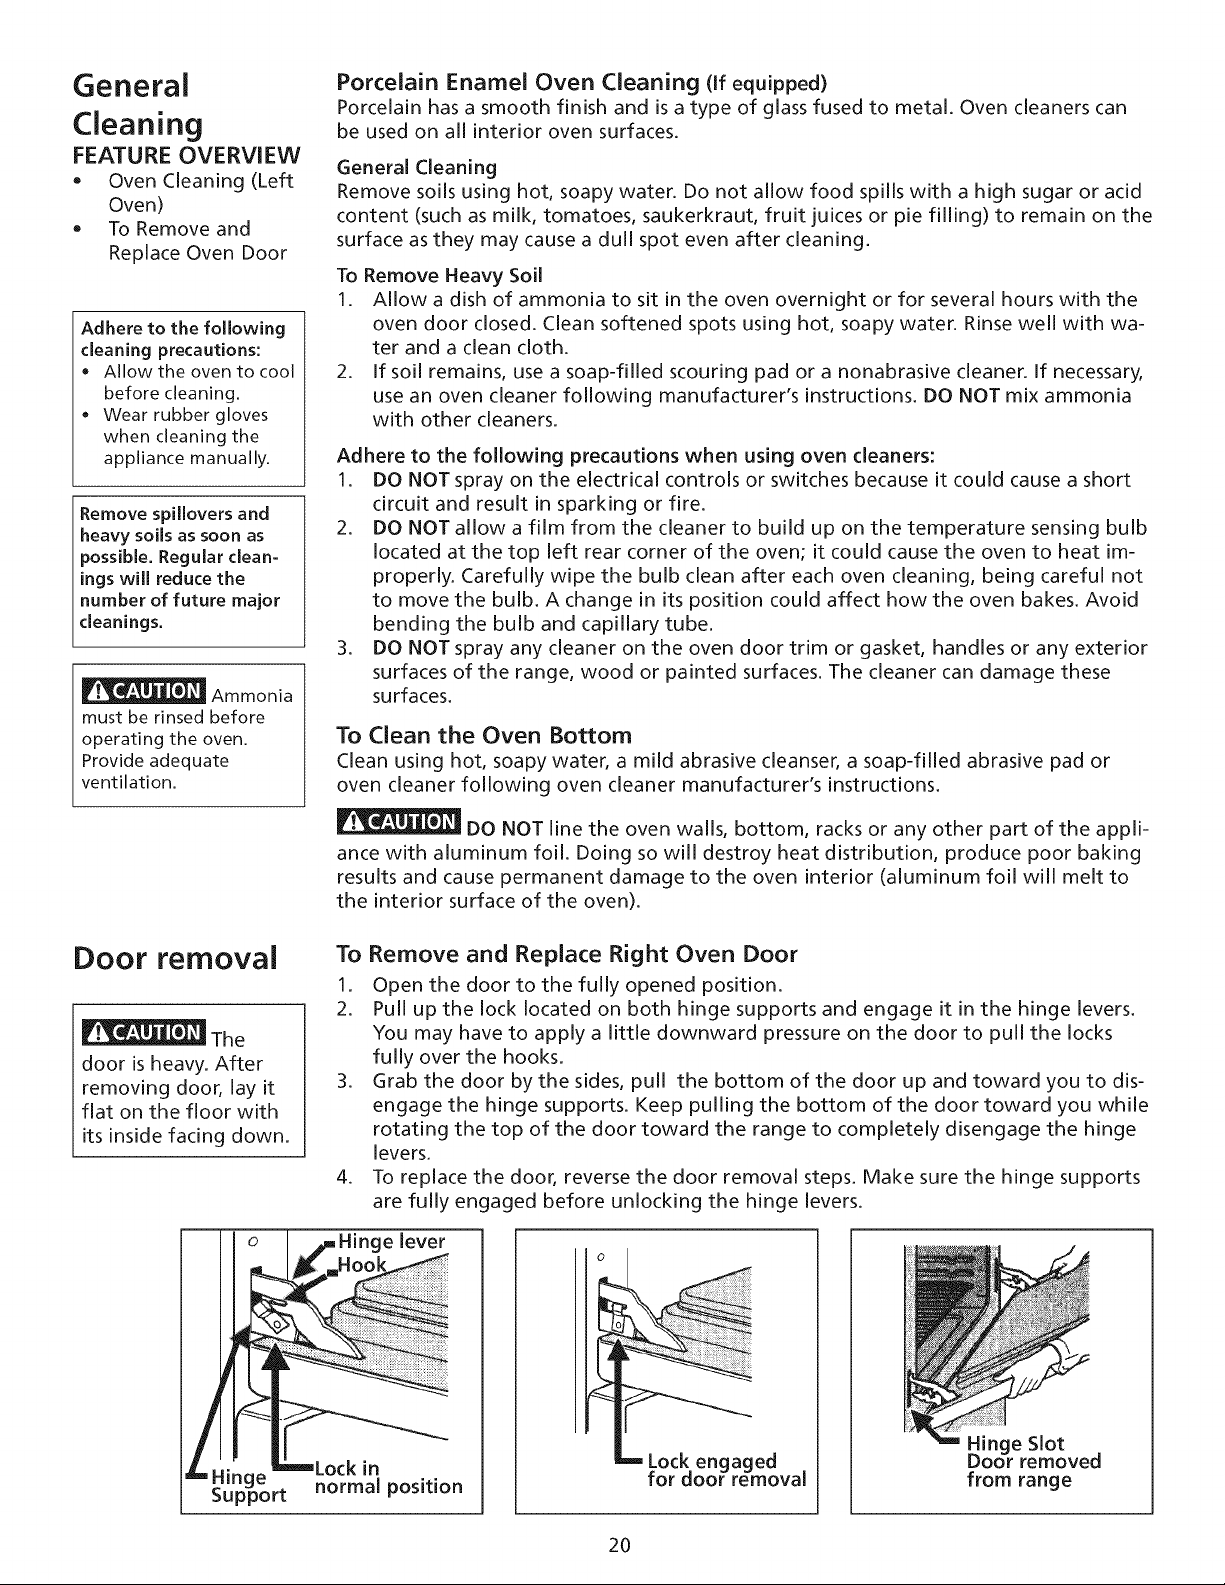
Door removal
The
door is heavy. After
removing door, lay it
flat on the floor with
its inside facing down.
To Remove and Replace Right Oven Door
1. Open the door to the fully opened position.
2. Pull up the lock located on both hinge supports and engage it in the hinge levers.
You may have to apply a little downward pressure on the door to pull the locks
fully over the hooks.
3. Grab the door by the sides, pull the bottom of the door up and toward you to dis-
engage the hinge supports. Keep pulling the bottom of the door toward you while
rotating the top of the door toward the range to completely disengage the hinge
levers.
4. To replace the door, reverse the door removal steps. Make sure the hinge supports
Lock in
normal position
are fully engaged before unlocking the hinge levers.
e lever
Lock engaged
for door removal
Hinge Slot
Door removed
from range
2O
Loading ...
Loading ...
Loading ...