®
DUAL FUEL RANGE
S "" ,, •
ESTUFA DE DUAL
..... L)+....-,,
',,Ji." J" .....J""' '" ......
..................., ::,..Jc;C.
FUEL
tJ
t,/"_
Sears Roebuck and Co., Hoffman Estates, IL 60179 U.S.A.
Visit our website: www.sears.com
318200750 (9906) Rev, A
Table of Contents
Product Record ................................................................. 2
Range Warranty ............................................................... 2
iMPORTANT SAFETY iNSTRUCTiONS ........................... 3-5
Selecting Surface Cooking Utensils ................................ 6
Range Features ................................................................. 7
Liquefied Petroleum (Propane) Gas Conversion ............ 8
Surface Cooking .......................................................... 8=10
• Flame Size .................................................................. 8
• Proper Burner Adjustment ........................................ 9
• Placement of Burner Bases and Caps ....................... 9
• Placement of Burner Grates .................................... 10
• Setting Surface Controls .......................................... 10
Before Setting Oven Controls ....................................... 11
Setting Ovens Controls .................................................. 11
Changing Oven and/or cooktop Lights ........................ 12
Adjusting Oven Temperature ........................................ 12
Convection Cooking ....................................................... 13
Convection Roasting ...................................................... 13
Oven Baking ................................................................... 14
Air Circulation in the Oven ............................................ 14
Broiling ........................................................................... 15
General Cleaning ....................................................... 16-22
• Cleaning Various Parts of Your Range .................... 16
• To Clean the Cooktop Glass .................................... 17
• To Clean Burner Grates, Countered Burner Pan
Burner Cap, and Burner Base .................................. 18
• Self-Clean Oven Cycle (Right Oven) ........................ 19
• Setting Controls for Clean Cycle ............................. 19
• Porcelain Enamel Oven Cleaning (If equipped) ..... 20
• To Remove and Replace Oven Door ....................... 20
• To Remove and Replace Storage Drawer ............... 21
Avoid Service Checklist ............................................. 22-23
Notes ............................................................................... 24
Espa_ol ........................................................................... 25
Sears Service .................................................... Back Cover
Product Record
In this space below, record the date of purchase, model and serial number of your product. You will find the model and serial
number printed on an identification plate. The identification plate is located on the left side of the range and are visible when
the oven door is open or on the inside of the drawer along the side of the frame.
Model No. 790. Date of purchase
Serial No Save these instructions and your sales receipt for future reference.
Range Warranty
FULL ONE YEAR WARRANTY ON ALL PARTS
If, within one year from the date of installation, any part of this product fails to function properly due to a defect
in material or workmanship, Sears will repair or replace it, at our option, free of charge.
If the product is subjected to other than private family use, the above warranty is effective for only 90 days.
WARRANTY SERVICE ISAVAILABLE BY CONTACTING THE NEAREST SEARS SERVICECENTER IN THE UNITED STATES.
This warranty gives you specific legal rights, and you may also have other rights which vary from state to state.
Sears Roebuck and Co. Dept. 817 WA Hoffman Estates, IL 60179
To Further Add To The Value Of Your Range, Buy a Sears Maintenance Agreement.
"We Service What We Sell" is our assurance to you that you can depend on Sears for service. Your Kenmore
appliance has added value when consider that Sears has service units nationwide, staffed with professional
technicians trained on all appliance Sears sells. They have the knowledge and skills, tools, parts and equipment to
ensure our pledge to you that "We Service What We Sell".
Maintain the value of your purchase with a Sears Maintenance Agreement. Kenmore appliances are designed,
manufactured, and tested for years of dependable operation. Yet any major appliance may require service from
time to time. The Sears Maintenance Agreement offers you an outstanding service program for your product.
The Sears Maintenance Agreement:
• Is your way to buy tomorrow's service at today's prices.
• Eliminates repair bills resulting from normal use.
• Allows for as many service calls as you need.
• Provides an annual Preventive Maintenance Check at your request
to keep your Kenmore Appliance in proper running condition.
For more information, call 1-800-827-6655
iMPORTANT SAFETY iNSTRUCTiONS
Read all instructions before using this appliance.
Save these instructions for future reference.
This manual contains mang_important safety messages. Always read and obey all safety messages.
The safety alert symbol u calls your attention to safety messages that inform you of hazards that can kill or hurt
or cause damage to the product.
indicates an imminently hazardous situation which, if not avoided may result in death or serious
_ Indicates an imminently hazardous situation which, if not avoided may result in minor or moderate
injury, or product-damage-only.
All safety messages will identify the hazard, tell you how to reduce the chance of injury, and tell you what can
happen if the instructions are not followed.
If the information in this manual is not followed
exactly, a fire or explosion may result causing property damage,
personal injury or death.
FOR YOUR SAFETY:
-- Do not store or use gasoline or other flammable vapors
and liquids in the vicinity of this or any other appliance.
-- WHAT TO DO IF YOU SMELL GAS:
• Do not try to light any appliance.
• Do not touch any electrical switch; do not use any phone
in your building.
• Immediately call your gas supplier from a neighbor's
phone. Follow the gas supplier's instructions.
• If you cannot reach your gas supplier, call the fire
department.
-- Installation and service must be performed by a qualified
installer, servicer or the gas supplier.
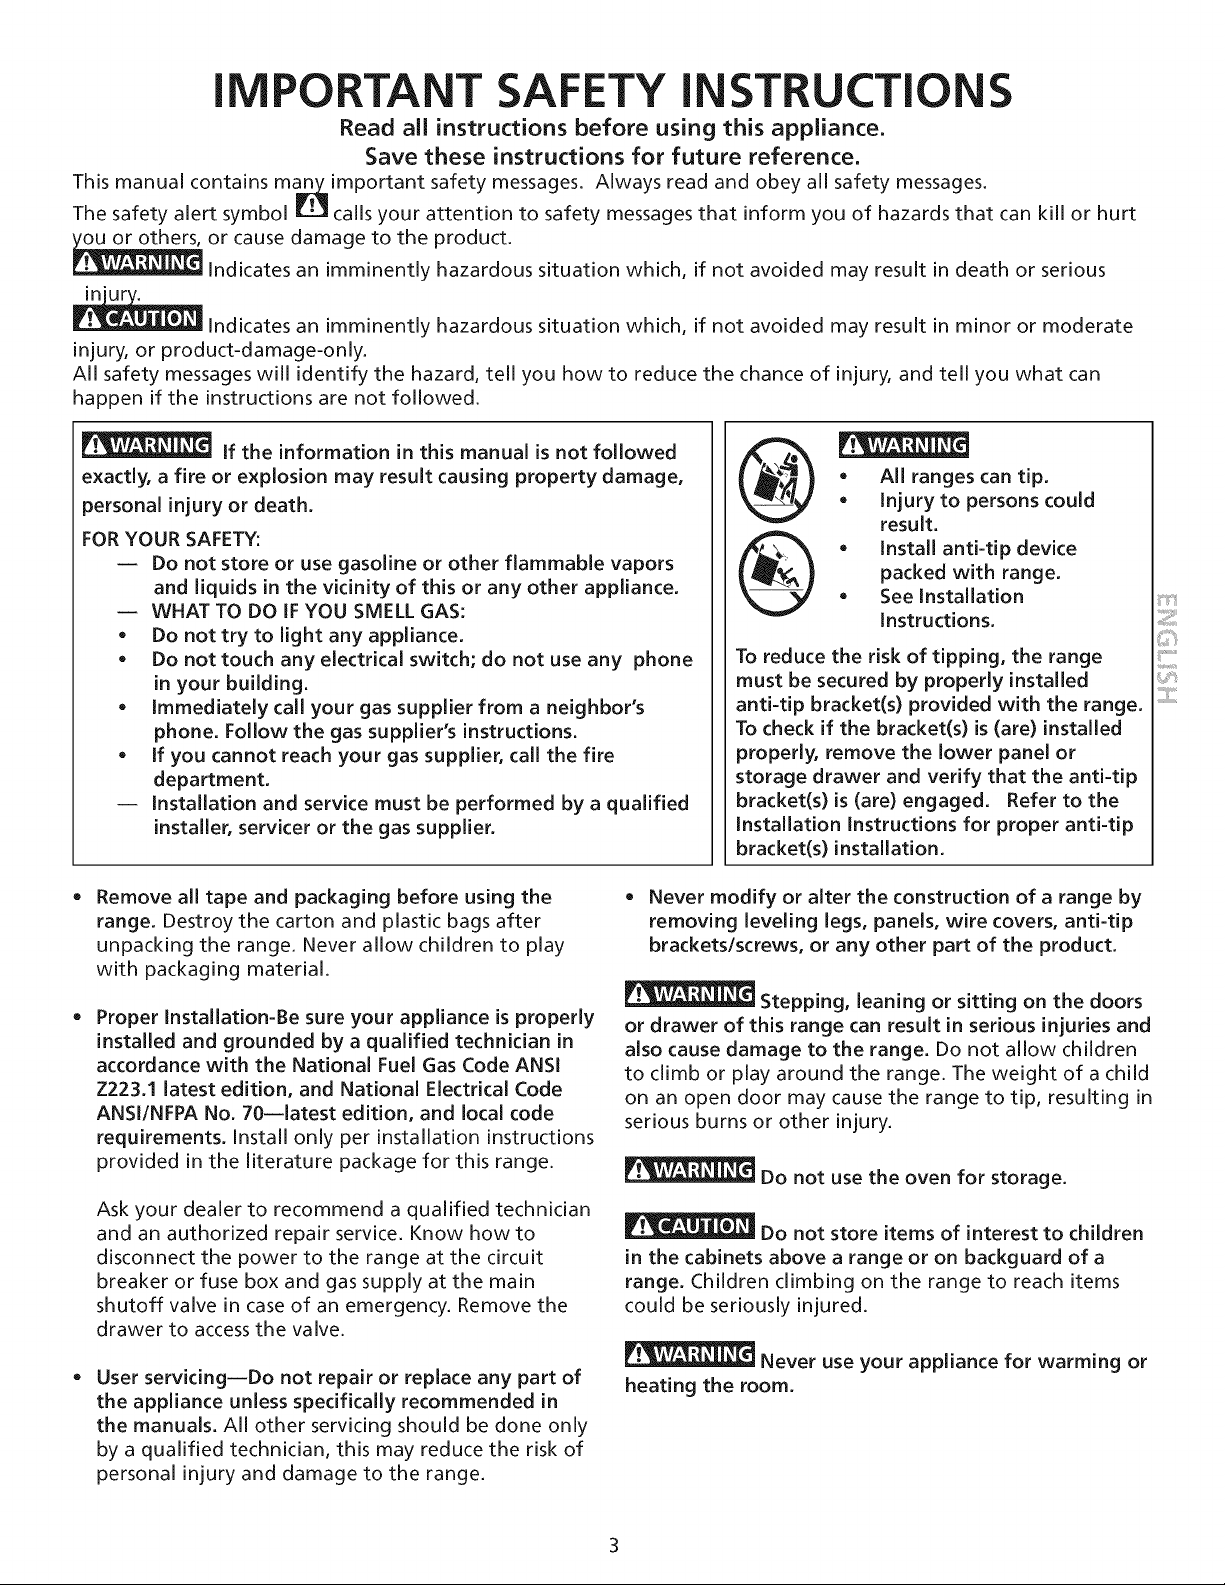
• All ranges can tip.
• Injury to persons could
result.
• Install anti-tip device
packed with range.
• See Installation
Instructions.
To reduce the risk of tipping, the range
must be secured by properly installed
anti-tip bracket(s) provided with the range.
To check if the bracket(s) is (are) installed
properly, remove the lower panel or
storage drawer and verify that the anti-tip
bracket(s) is (are) engaged. Refer to the
Installation Instructions for proper anti-tip
bracket(s) installation.
Remove all tape and packaging before using the
range. Destroy the carton and plastic bags after
unpacking the range. Never allow children to play
with packaging material.
Proper Installation=Be sure your appliance is properly
installed and grounded by a qualified technician in
accordance with the National Fuel Gas Code ANSI
Z223.1 latest edition, and National Electrical Code
ANSI/NFPA No. 70--latest edition, and local code
requirements. Install only per installation instructions
provided in the literature package for this range.
Ask your dealer to recommend a qualified technician
and an authorized repair service. Know how to
disconnect the power to the range at the circuit
breaker or fuse box and gas supply at the main
shutoff valve in case of an emergency. Remove the
drawer to access the valve.
User servicing--Do not repair or replace any part of
the appliance unless specifically recommended in
the manuals. All other servicing should be done only
by a qualified technician, this may reduce the risk of
personal injury and damage to the range.
• Never modify or alter the construction of a range by
removing leveling legs, panels, wire covers, anti-tip
brackets/screws, or any other part of the product.
Stepping, leaning or sitting on the doors
or drawer of this range can result in serious injuries and
also cause damage to the range. Do not allow children
to climb or play around the range. The weight of a child
on an open door may cause the range to tip, resulting in
serious burns or other injury.
Do not use the oven for storage.
Do not store items of interest to children
in the cabinets above a range or on backguard of a
range. Children climbing on the range to reach items
could be seriously injured.
Never use your appliance for warming or
heating the room.
iMPORTANT SAFETY iNSTRUCTiONS
Storage inor on Appliance--Flare mable materials should
not be stored in an oven, near surface burners or in the
drawer (if equipped). This includes paper, plastic and
cloth items, such as cookbooks, plasticware and towels, as
well as flammable liquids. Do not store explosives, such
as aerosol cans, on or near the appliance. Flammable
materials may explode and result in fire or property
damage.
Do not leave children alone--Children should not be
left alone or unattended in the area where appliance
is in use. They should never be allowed to sit or stand
on any part of the appliance.
DO NOT TOUCH SURFACE BURNERS, AREAS NEAR
THESE BURNERS, OVEN HEATING ELEMENTS OR
INTERIOR SURFACESOF THE OVEN. Both surface
burners and oven heating elements may be hot even
though they are dark in color. Areas near surface
burners may become hot enough to cause burns.
During and after use, do not touch, or let clothing
or other flammable materials touch these areas until
they have had sufficient time to cool. Among these
areas are the cooktop, surfaces facing the cooktop,
the oven vent openings and surfaces near these
openings, oven door and window.
Wear proper apparel--Loose-fitting or hanging
garments should never be worn while using the
appliance. Do not let clothing or other flammable
materials contact hot surfaces.
• Do not use water or flour on grease fires--Smother
the fire with a pan lid, or use baking soda, a dry
chemical or foam=type extinguisher.
When heating fat or grease, watch it closely. Fat or
grease may catch fire if allowed to become too hot.
In case of fire or gas leak, be sure to turn
off the main gas shutoff valve.
Use only dry potholders--Moist or damp potholders
on hot surfaces may result in burns from steam. Do
not let potholders touch hot heating elements. Do
not use a towel or other bulky cloth instead of a
potholder.
Do not heat unopened food containers--Build=up of
pressure may cause container to burst and result in
injury.
Remove the oven doors from any unused range if it
is to be stored or discarded.
IMPORTANT--Do not attempt to operate the oven
during a power failure. If the power fails, always turn
the ovens off. If the ovens are not turns off and the
power resumes, the oven may begin to operate again.
Food left unattended could catch fire or spoil.
Use proper pan size--Adjust flame size so
it does not extend beyond the edge of the utensil. The
use of undersize utensils will exposed a portion of the
burner flame to direct contact and may result in ignition
of clothing. Proper relationship of utensil to flame will
also improve efficiency.
Do not use stove top grills on the burner
grates of sealed gas burners. If you use a stove top
grill on a sealed gas burner, it will cause incomplete
combustion and can result in exposure to carbon
monoxide levels above allowable current standards. This
can be hazardous to your health.
Electronic controllers can be damaged
by cold temperatures. When you use your appliance
for the first time, or if it has not been used for a long
period of time, make sure that it has been exposed to a
temperature above 0°C/32°F for at least 3 hours before
connecting it to the power supply.
IMPORTANT INSTRUCTIONS FOR USING YOUR
COOKTOP
Know which knob controls each surface heating
unit. Always turn the knob to the LITE position when
igniting the burners. Visually check that burner
has lit. Then adjust the flame so it does not extend
beyond the edge of the utensil.
Use proper pan size. This appliance is equipped with
one or more surface burners of different sizes. Select
utensils having flat bottoms large enough to cover
the surface burner. The use of undersized utensils
will expose a portion of the surface burner to direct
contact and may result in ignition of clothing. Proper
relationship of utensil to the surface burner will also
improve efficiency.
Utensil handles should be turned inward and not
extend over adjacent surface burners--To reduce the
risk of burns, ignition of flammable materials, and
spillage due to unintentional contact with the utensil.
The handle of the utensil should be positioned so
that it is turned inward, and does not extend over
adjacent surface burners.
Never leave surface burners unattended at high
heat settings--Boilovers cause smoking and greasy
spillovers that may ignite, or a pan that has boiled
dry may melt.
4
iMPORTANT SAFETY iNSTRUCTiONS
Protective liners--Do not use aluminum foil to line
oven bottom or any other part of the appliance. Only
use aluminum foil as recommended for baking if
used as a cover placed on the food. Any other use of
protective liners or aluminum foil may result in a risk
of electric shock or fire or short circuit.
Glazed cooking utensils--Only certain types of glass,
glass/ceramic, ceramic, earthenware, or other glazed
utensils are suitable for rangetop service without
breaking due to the sudden change in temperature.
Check the manufacturer's recommendations for
rangetop use.
Do not use decorative surface burner covers. If a
burner is accidentally turned on, the decorative cover
will become hot and possibly melt. Burns will occur
if the hot covers are touched. Damage may also be
done to the cooktop or burners because the covers
may cause overheating. Air will be blocked from the
burner and cause combustion problems.
FOR GLASS COOKTOPS ONLY
• Do not clean or operate a broken cooktopilf cooktop
should break, cleaning solutions and spillovers may
penetrate the broken cooktop and create a risk
of electric shock. Contact a qualified technician
immediately.
Clean cooktop glass with caution--If a wet sponge
or cloth is used to wipe spills on a hot cooking area,
be careful to avoid a steam burn. Some cleaners can
produce harmful fumes if applied to a hot surface.
Do not place hot cookware on cold cooktop glass.
This could cause glass to break.
Avoid scratching the cooktop glass with sharp
objects.
iMPORTANT iNSTRUCTiONS FOR USING YOUR
OVEN
Use care when opening oven dooriStand to the side
of the range when opening the door of a hot oven.
Let hot air or steam escape before you remove or
replace food in the oven.
Keep ovens vents unobstructed. Each vent has its own
vent located on the top, near each side and towards
the back of the cooktop. Touching the surfaces in this
area when the oven is operating may cause severe
burns. Also, do not place plastic or heat-sensitive items
on or near an oven vent. These items could melt or
ignite.
SAVE THESE INSTRUCTIONS
Placement of ovens racks. Always place oven racks
in desired location while ovens are cool. If rack must
be moved while oven is hot use extreme caution.
Use potholders and grasp the rack with both hands
to reposition. Do not let potholders contact the hot
heating elements in the ovens. Remove all utensils
from the rack before moving.
Do not use the broiler pan without its grid. The
broiler pan and its grid allow dripping fat to drain and
be kept away from the high heat of the broiler.
• Do not cover the broiler grid with aluminum foil.
Exposed fat and grease could ignite.
Do not touch a hot light bulb with a damp cloth.
Doing so could cause the bulb to break. Disconnect
the appliance or turn off the power to the appliance
before removing and replacing light bulb.
IMPORTANT INSTRUCTIONS FOR CLEANING
YOUR RANGE
Clean the range regularly to keep all parts free of
grease that could catch fire. Exhaust fan ventilation
hoods and grease filters should be kept clean. Do not
allow grease to accumulate on hood or filter. Greasy
deposits in the fan could catch fire. When you are
flaming food under the hood, turn the fan on. Refer
to the hood manufacturer's instructions for cleaning.
Kitchen cleaners and aerosols--Always follow the
manufacturer's recommended directions for use. Be
aware that excess residue from cleaners and aerosols
may ignite causing damage and injury.
SELF CLEANING OVENS
• In the self-Cleaning cycle only clean the parts listed
in this Use and Care Guide. Before self cleaning the
oven, remove the broiler pan and any utensils or
foods from the oven.
Do not use oven cleaners--No commercial oven
cleaner or ovens liner protective coating of any kind
should be used in or around any part of the oven.
Do not clean door gasket--The door gasket is
essential for a good seal. Care should be taken not to
rub, damage or move the gasket.
Remove oven racks. Oven racks color will change if
left in the oven during a self-cleaning cycle.
The health of some birds is extremely
sensitive to the fumes given off during the self-
cleaning cycle of any range. Move birds to another
well ventilated room.
::iii:i!!ii::
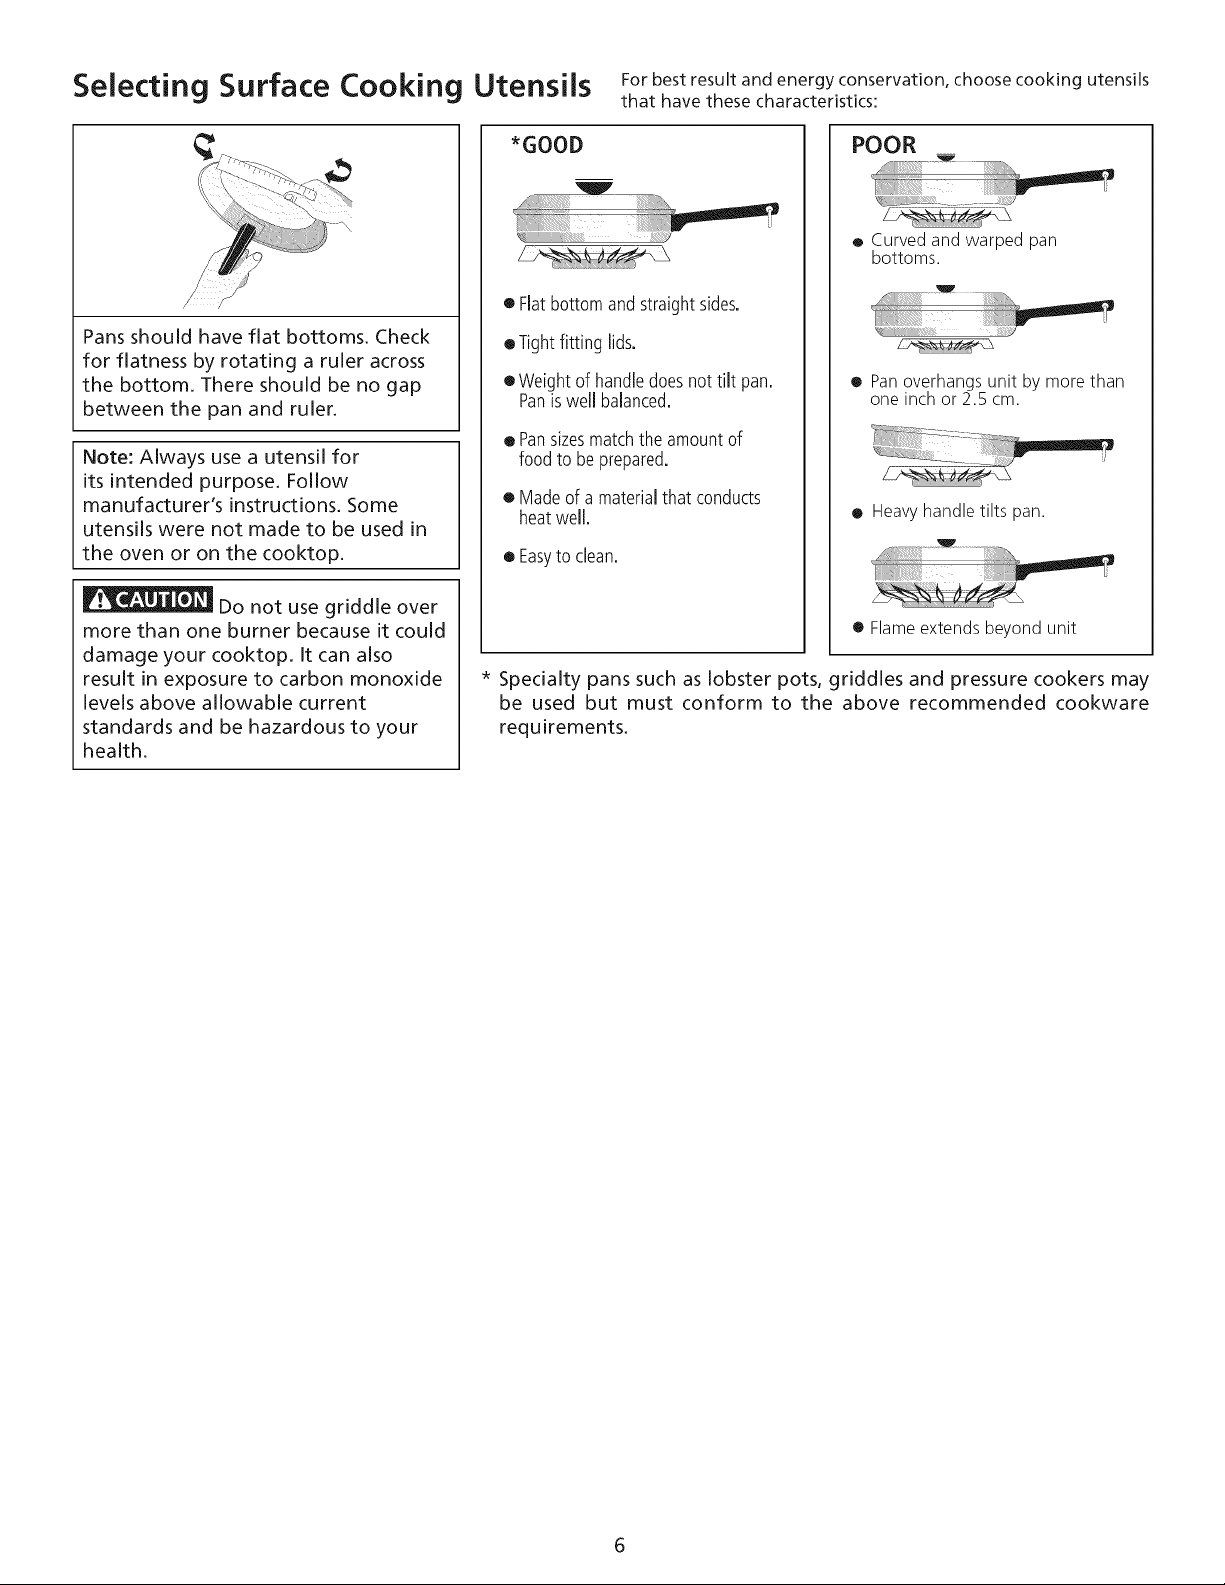
Selecting Surface Cooking
Pans should have flat bottoms. Check
for flatness by rotating a ruler across
the bottom. There should be no gap
between the pan and ruler.
Note: Always use a utensil for
its intended purpose. Follow
manufacturer's instructions. Some
utensils were not made to be used in
the oven or on the cooktop.
Do not use griddle over
more than one burner because it could
damage your cooktop. It can also
result in exposure to carbon monoxide
levels above allowable current
standards and be hazardous to your
health.
Utensi Is For best result and energy conservation, choose cooking utensils
that have these characteristics:
*GOOD
• Flatbottomand straightsides.
eTight fitting lids.
• Weightof handledoesnot tilt pan.
Paniswell balanced.
• Pansizesmatchthe amountof
food to beprepared.
o Madeof a materialthat conducts
heatwell.
• Easyto clean.
POOR
o Curved and warped pan
bottoms.
• Pan overhangs unit by more than
one inch or 2.5 cm.
e Heavy handle tilts pan.
o Flame extends beyond unit
* Specialty pans such as lobster pots, griddles and pressure cookers may
be used but must conform to the above recommended cookware
requirements.
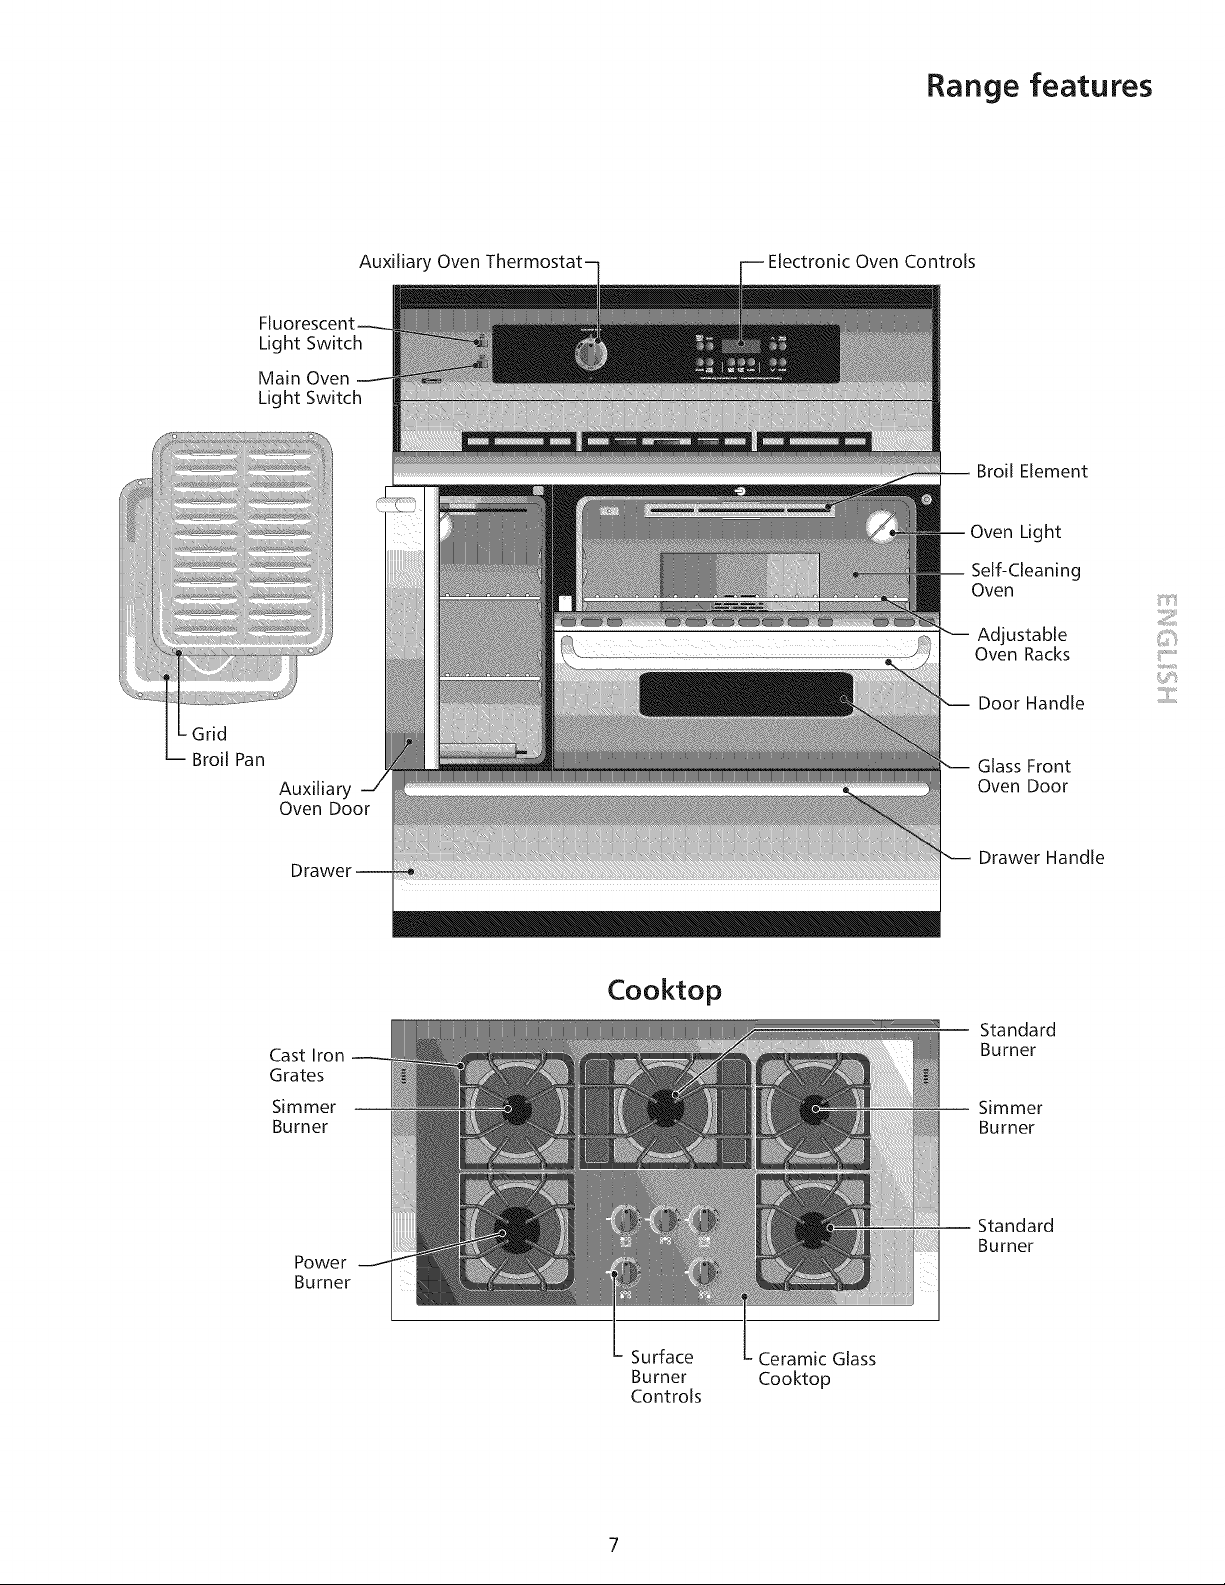
Range features
Auxiliary Oven
Electronic Oven Controls
Light Switch
Main Oven
Light Switch
Broil Element
Grid
Broil Pan
Auxiliary
Oven Door
Oven Light
Self-Cleaning
Oven
Adjustable
Oven Racks
Door Handle
Glass Front
Oven Door
Drawer Handle
::ii;:,i!!ii::
Cast Iron
Grates
Simmer
Burner
Cooktop
Standard
Burner
Simmer
Burner
Power
Burner
Standard
Burner
Surface
Burner
Controls
Ceramic Glass
Cooktop
Liquefied Petroleum
(Propane) Gas
Conversion
This appliance can be used with Natural Gas or Propane Gas. It is shipped
from the factory for use with natural gas.
If you wish to convert your range for use with LP/Propane gas, follow
instructions and use the fixed orifices you will find in the bag marked
"FOR LP/PROPANE GAS CONVERSION".
The conversion must be performed by a qualified installer, LP supplier
or service technician in accordance with the installation instructions
furnished with this range and all codes and requirements of all local codes
and requirements. Failure to follow instructions could result in serious
injury or property damage. The qualified agency performing this work
assumes responsibility for the conversion.
Personal injury or death from electrical shock may occur if
the range is not installed by a qualified installer or electrician.
Any additions, changes or conversions required in order for
this appliance to satisfactorily meet the application needs must be made
by an authorized Sears Service Center, Distributor or Qualified Agency.
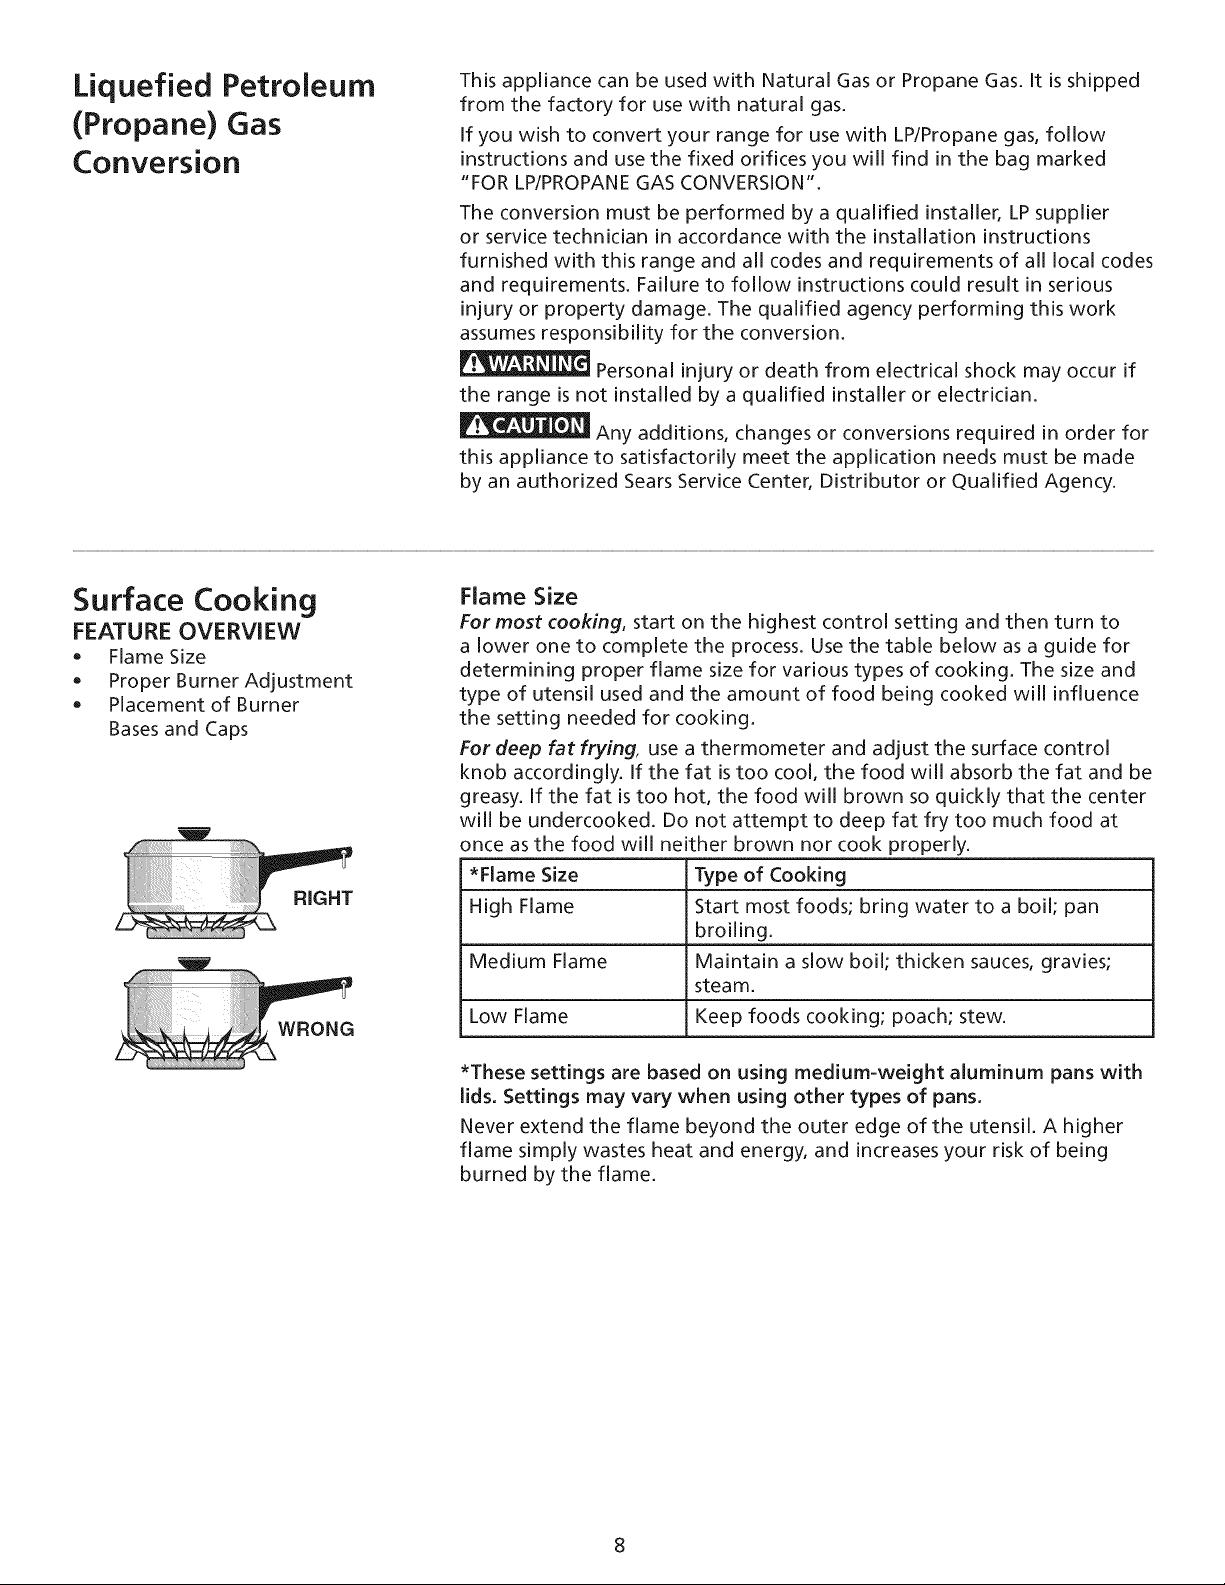
Surface Cooking
FEATURE OVERVIEW
• Flame Size
• Proper Burner Adjustment
• Placement of Burner
Bases and Caps
*Flame Size
High Flame
Medium Flame
Low Flame Keep foods cooking; poach; stew.
Flame Size
Formost cooking, start on the highest control setting and then turn to
a lower one to complete the process. Use the table below as a guide for
determining proper flame size for various types of cooking. The size and
type of utensil used and the amount of food being cooked will influence
the setting needed for cooking.
For deep fat frying, use a thermometer and adjust the surface control
knob accordingly. If the fat istoo cool, the food will absorb the fat and be
greasy. If the fat istoo hot, the food will brown so quickly that the center
will be undercooked. Do not attempt to deep fat fry too much food at
once as the food will neither brown nor cook properly.
Type of Cooking
Start most foods; bring water to a boil; pan
broiling.
Maintain a slow boil; thicken sauces, gravies;
steam.
*These settings are based on using medium-weight aluminum pans with
lids. Settings may vary when using other types of pans.
Never extend the flame beyond the outer edge of the utensil. A higher
flame simply wastes heat and energy, and increases your risk of being
burned by the flame.
Proper Burner Adjustments
The color of the flame is the key to proper burner adjustment. A good
flame is clear, blue and hardly visible in a well-lighted room. Each cone
of flame should be steady and sharply defined. Adjust or clean burner
if flame is yellow-orange. To adjust the flame see the Installation
Instructions and to clean burner, see instructions under General Cleaning.
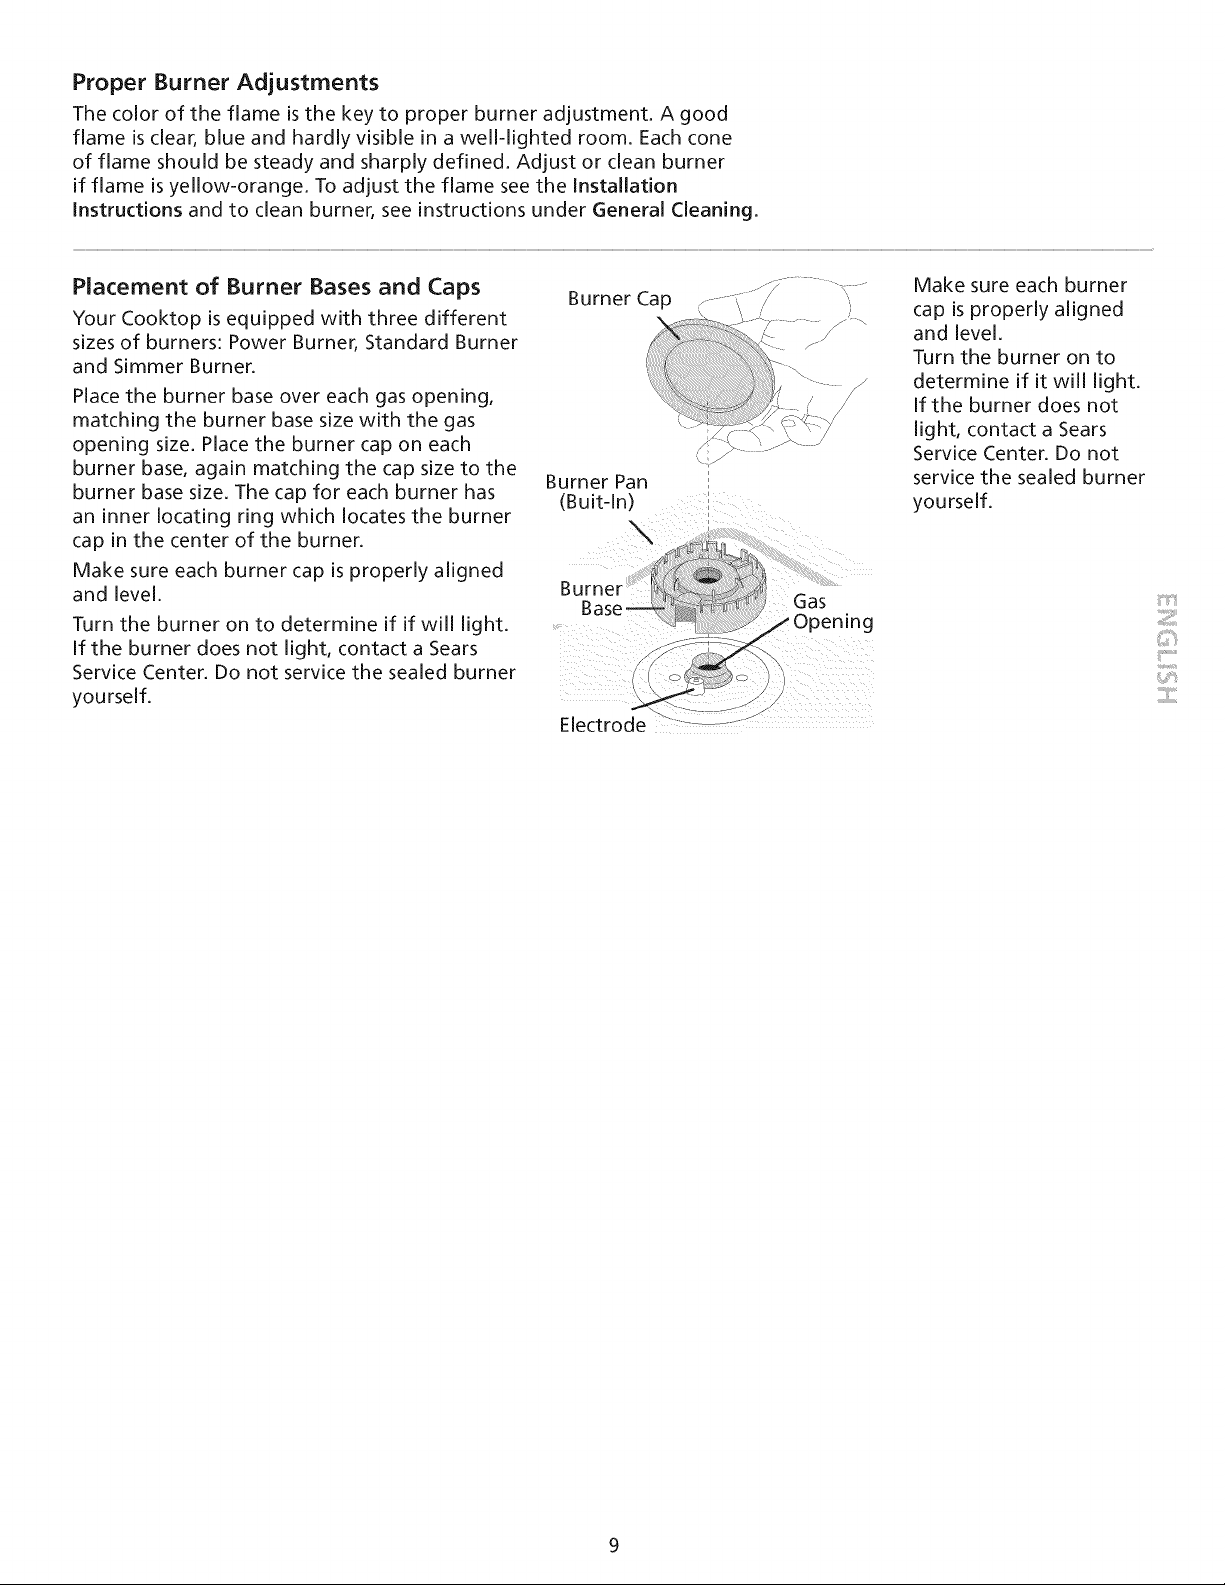
Placement of Burner Bases and Caps
Your Cooktop is equipped with three different
sizes of burners: Power Burner, Standard Burner
and Simmer Burner.
Place the burner base over each gas opening,
matching the burner base size with the gas
opening size. Place the burner cap on each
burner base, again matching the cap size to the
burner base size. The cap for each burner has
an inner locating ring which locates the burner
cap in the center of the burner.
Make sure each burner cap is properly aligned
and level.
Turn the burner on to determine if if will light.
If the burner does not light, contact a Sears
Service Center. Do not service the sealed burner
yourself.
Burner Cap
\iJ
Burner Pan
(Buit-ln)
\
Electrode ................
Make sure each burner
cap is properly aligned
and level.
Turn the burner on to
determine if it will light.
If the burner does not
light, contact a Sears
Service Center. Do not
service the sealed burner
yourself.
iiiiiii:i!!iiii
iiiiiii_i!!iiiiiii
Surface Cooking
FEATURE OVERVIEW
• Placement of Burner Grates
Setting Surface Controls
Grate
Burner pan
lip
top
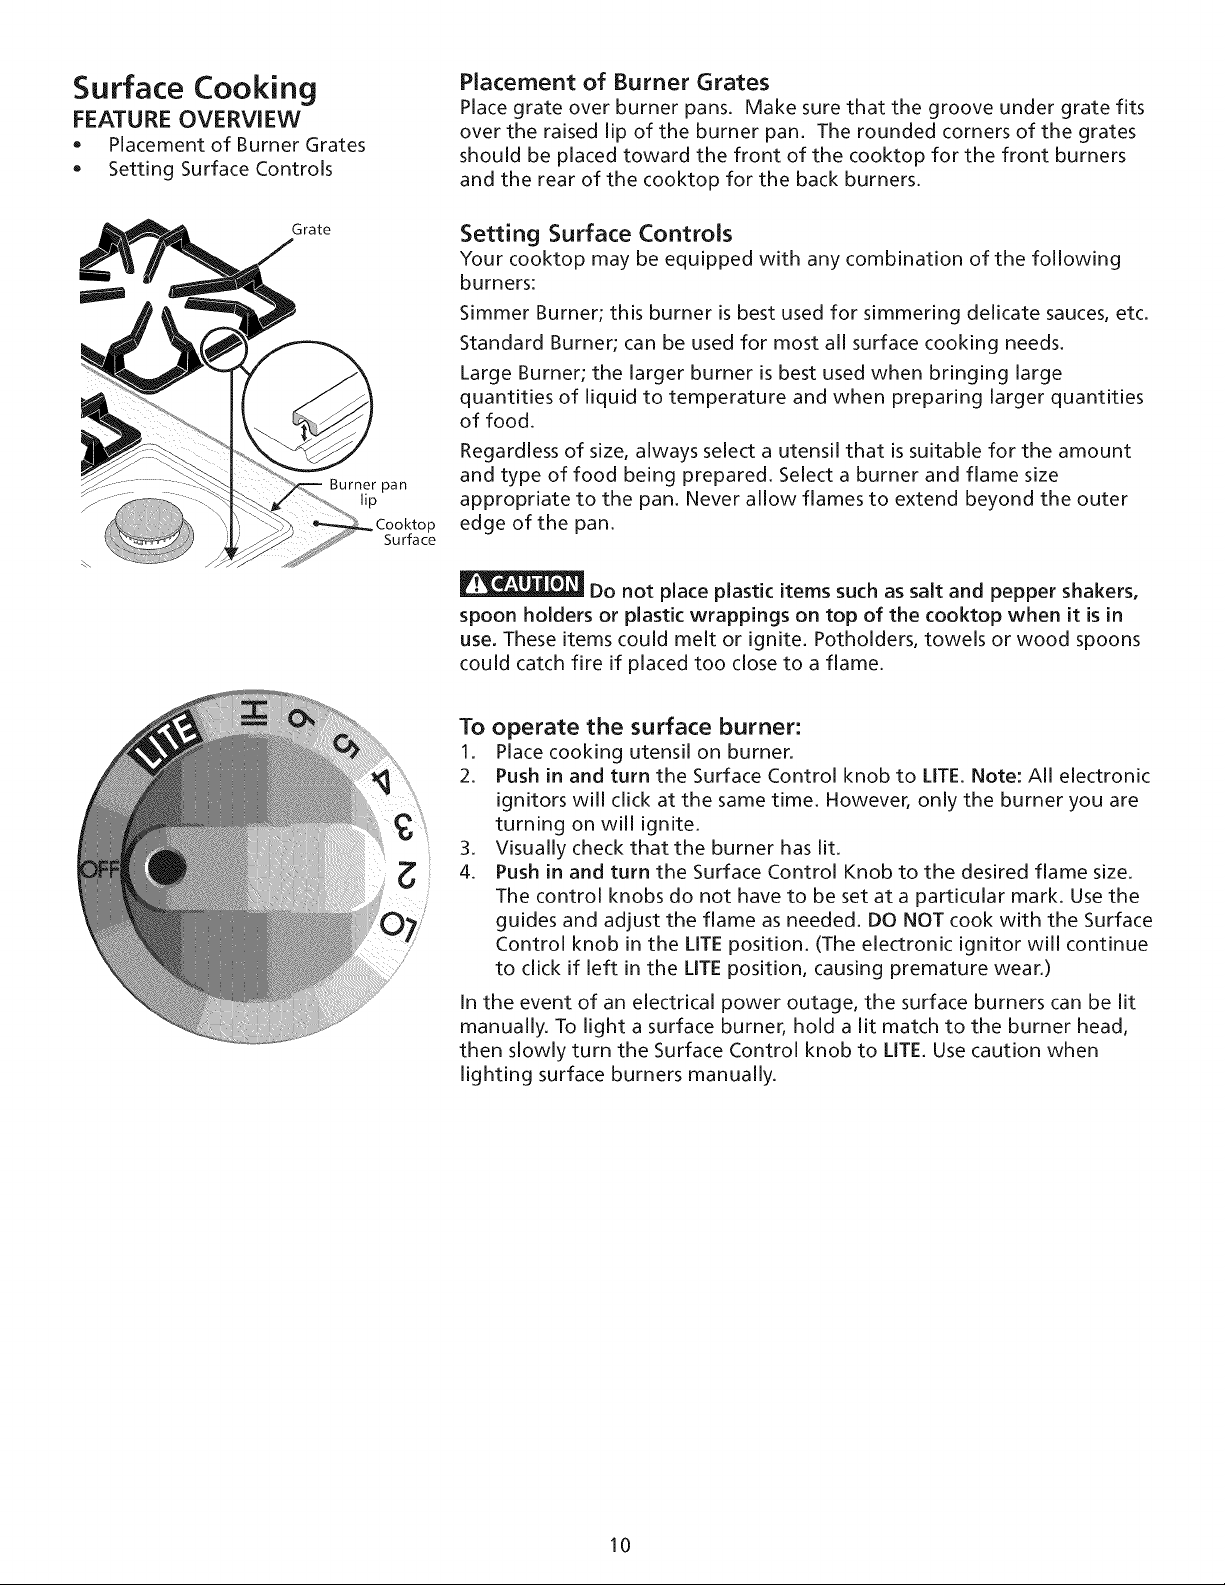
Placement of Burner Grates
Place grate over burner pans. Make sure that the groove under grate fits
over the raised lip of the burner pan. The rounded corners of the grates
should be placed toward the front of the cooktop for the front burners
and the rear of the cooktop for the back burners.
Setting Surface Controls
Your cooktop may be equipped with any combination of the following
burners:
Simmer Burner; this burner is best used for simmering delicate sauces, etc.
Standard Burner; can be used for most all surface cooking needs.
Large Burner; the larger burner is best used when bringing large
quantities of liquid to temperature and when preparing larger quantities
of food.
Regardless of size, always select a utensil that is suitable for the amount
and type of food being prepared. Select a burner and flame size
appropriate to the pan. Never allow flames to extend beyond the outer
edge of the pan.
Do not place plastic items such as salt and pepper shakers,
spoon holders or plastic wrappings on top of the cooktop when it is in
use. These items could melt or ignite. Potholders, towels or wood spoons
could catch fire if placed too close to a flame.
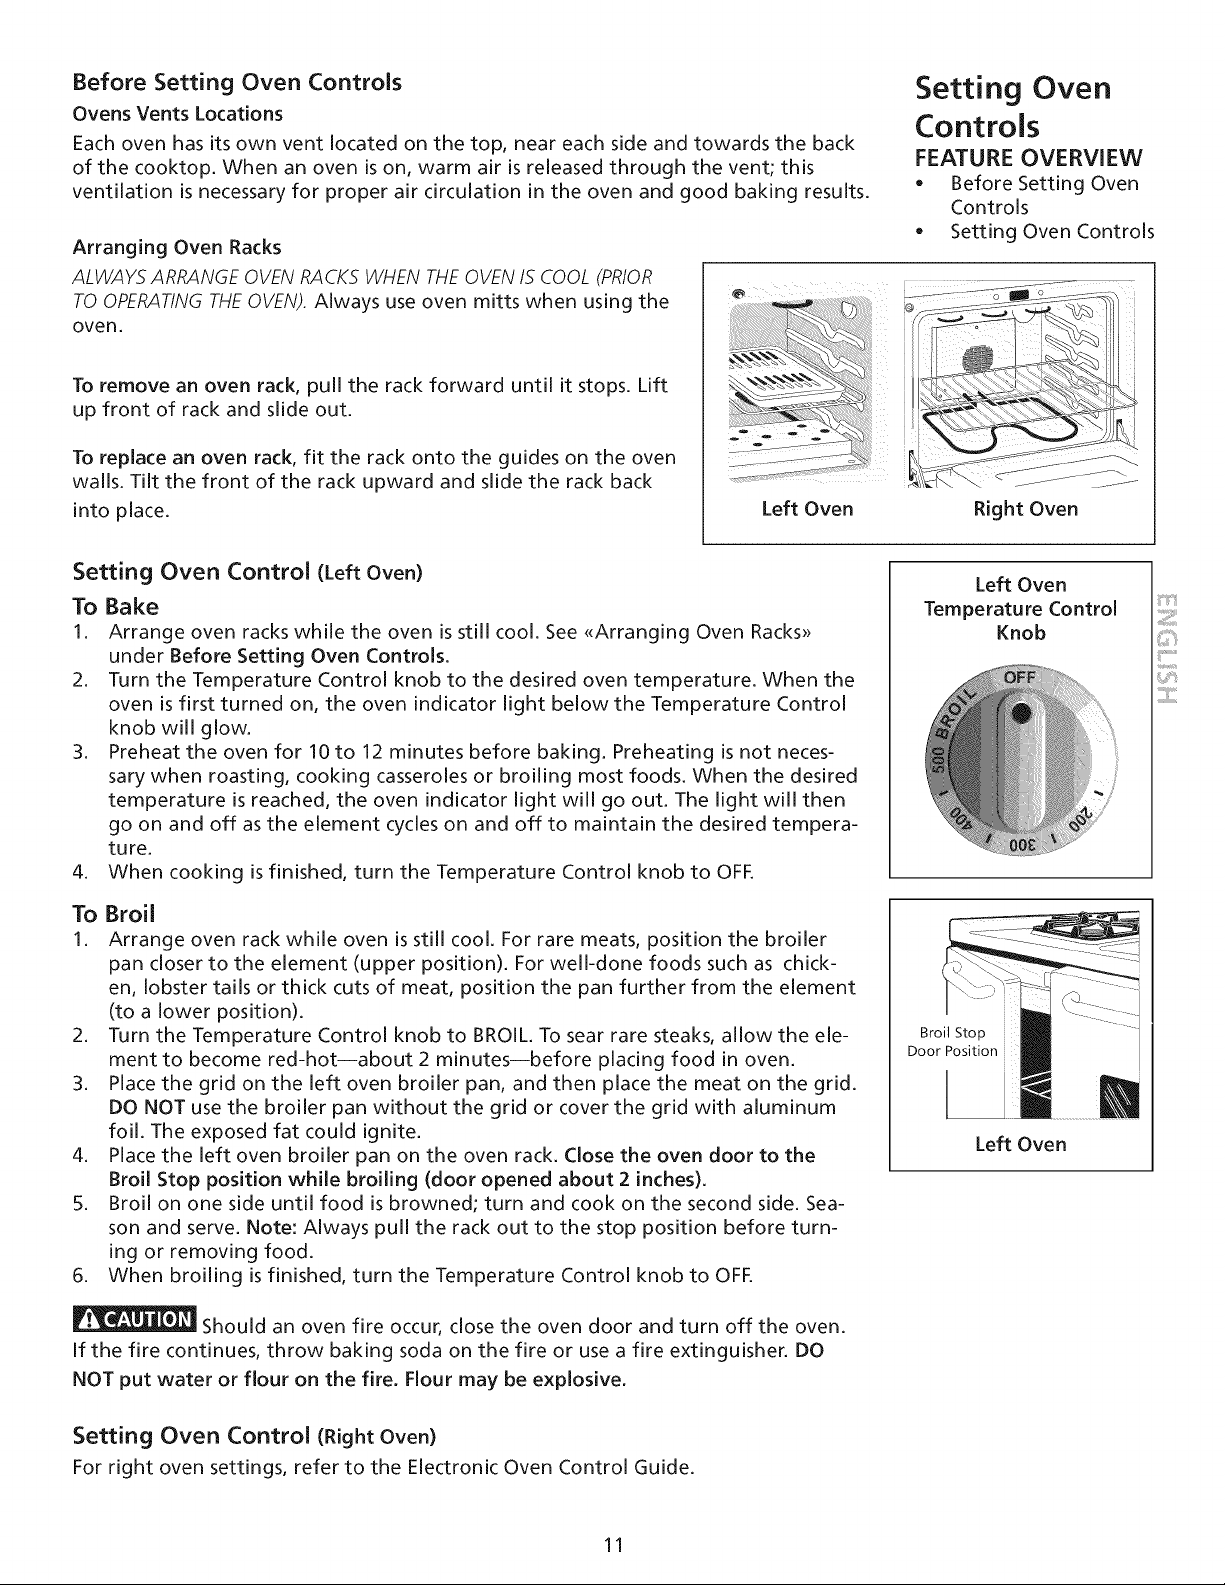
To operate the surface burner:
1. Place cooking utensil on burner.
2. Push in and turn the Surface Control knob to LITE. Note: All electronic
ignitors will click at the same time. However, only the burner you are
turning on will ignite.
3. Visually check that the burner has lit.
4. Push in and turn the Surface Control Knob to the desired flame size.
The control knobs do not have to be set at a particular mark. Use the
guides and adjust the flame as needed. DO NOT cook with the Surface
Control knob in the LITE position. (The electronic ignitor will continue
to click if left in the LITE position, causing premature wear.)
In the event of an electrical power outage, the surface burners can be lit
manually. To light a surface burner, hold a lit match to the burner head,
then slowly turn the Surface Control knob to LITE. Use caution when
lighting surface burners manually.
10
Before Setting Oven Controls
OvensVentsLocations
Eachovenhasits own vent located on the top, near each side and towards the back
of the cooktop. When an oven is on, warm air is released through the vent; this
ventilation is necessary for proper air drcu[ation in the oven and good baking results.
Arranging Oven Racks
ALWAYS ARRANGE OVEN RACKSWHEN THEOVEN IS COOL (PRIOR
TO OPERATINGTHE OVEN). Always use oven mitts when using the
oven.
Setting Oven
Controls
FEATURE OVERVIEW
• Before Setting Oven
Controls
• Setting Oven Controls
To remove an oven rack, pull the rack forward until it stops. Lift
up front of rack and slide out.
To replace an oven rack, fit the rack onto the guides on the oven
walls. Tilt the front of the rack upward and slide the rack back
into place.
...........................................................................
Left Oven
Right Oven
Setting Oven Control (Left Oven)
To Bake
I. Arrange oven racks while the oven is still cool. See <<Arranging Oven Racks_>
under Before Setting Oven Controls.
2. Turn the Temperature Control knob to the desired oven temperature. When the
oven is first turned on, the oven indicator light below the Temperature Control
knob will glow.
3. Preheat the oven for 10 to 12 minutes before baking. Preheating is not neces-
sary when roasting, cooking casseroles or broiling most foods. When the desired
temperature is reached, the oven indicator light will go out. The light will then
go on and off as the element cycles on and off to maintain the desired tempera-
ture.
4. When cooking is finished, turn the Temperature Control knob to OFE
To Broil
1. Arrange oven rack while oven is still cool. For rare meats, position the broiler
pan closer to the element (upper position). For well-done foods such as chick-
en, lobster tails or thick cuts of meat, position the pan further from the element
(to a lower position).
2. Turn the Temperature Control knob to BROIL. To sear rare steaks, allow the ele-
ment to become red-hot--about 2 minutes--before placing food in oven.
3. Place the grid on the left oven broiler pan, and then place the meat on the grid.
DO NOT use the broiler pan without the grid or cover the grid with aluminum
foil. The exposed fat could ignite.
4. Place the left oven broiler pan on the oven rack. Close the oven door to the
Broil Stop position while broiling (door opened about 2 inches).
5. Broil on one side until food is browned; turn and cook on the second side. Sea-
son and serve. Note: Always pull the rack out to the stop position before turn-
ing or removing food.
6. When broiling is finished, turn the Temperature Control knob to OFE
Should an oven fire occur, close the oven door and turn off the oven.
If the fire continues, throw baking soda on the fire or use a fire extinguisher. DO
NOT put water or flour on the fire. Flour may be explosive.
Setting Oven Control (Right Oven)
For right oven settings, refer to the Electronic Oven Control Guide.
Left Oven
Temperature Control
Knob
Broil Stop
Door Position
Left Oven
11

Changing
Oven and / or
Cooktop Lights
(if equipped)
Be sure the oven is unplugged and all parts are COOL before replacing
the oven light bulb. Do not turn the oven light on during a self-cleaning cycle. High
temperature will reduce lamp life.
To Change the Oven Light
The oven light automatically turns on when the door is opened (some models). To turn the
oven light on and off when the door is closed, use the OVEN LIGHT switch located in the con-
trol panel.
1. Turn electrical power off at the main source or unplug the oven.
2. Wear a leather-faced glove for protection against possible broken glass.
3. Presswire holder to one side to release the glass shield.
4. Replace bulb with a new 40 watt appliance bulb.
5. Replace glass shield in socket and snap wire holder into place.
6. Turn power back on again at the main source (or plug the appliance back in).
7. The clock will then need to be reset. To reset, see Setting the Clock and Minute Timer in
the Electronic Oven Control Guide.
To Change the Cooktop Light (If equipped)
Your model will either have a canopy cover that lifts up or 2 phillips head screws that secure
the light cover. BEFORECHANGING THE COOKTOP LIGHT,BESURETO TURNTHE POWEROFF
AT THE MAIN SOURCEOR UNPLUG THE RANGE.
For models with a canopy cover that lifts up, follow these instructions:
1. Grasp the front edge of the canopy cover as illustrated in the side column. Pull forward and
lift the cover up and off toward rear of range.
2. Remove bulb by rolling up and out. Install the new bulb by sliding down into place and roll-
ing toward front of range.
3. Align front edge of light cover with inside lip of end cap. Lower rear of cover into place
and snap down.
4. Turn power back on at the main source (or plug the range back in).
Adjusting
Right Oven
Temperature
To adjust the right oven temperature, refer to the Electronic Oven Control Guide.
12
NOTE:Theconvectionfan automaticallyturns off whenthe ovendoor isopenedwhile
ovenisin aconvectionmode,andresumeswhenthedoorisclosedagain.
Theconvectionovenusesafan locatedinthe rearwall ovento circulateheatedair
aroundthe foodto becooked.Theconvectionmodereducesthe cooktime.It retains
thenaturalfoodjuiceandallowsthefood itemsto keepmoreflavor.Thismethodof
cookingenablesyouobtainthe bestresultswhenbaking,thawing,dehydratingand
roastingfoods.
Convection
Cooking
(If equipped)
ROASTING
Convection Notes:
1. Batch cooking is more convenient and provides better results.
2. Defrosting is quicker in convection mode compared to regular radiant cooking.
3. Remember to use tested recipes with times adjusted for convection baking/roasting
when using the convection mode. Times may be reduced by as much as 30% when
using the convection feature.
4. For oven temperature and setting, refer to the Electronic Oven Control Guide.
GRID,
BROILER
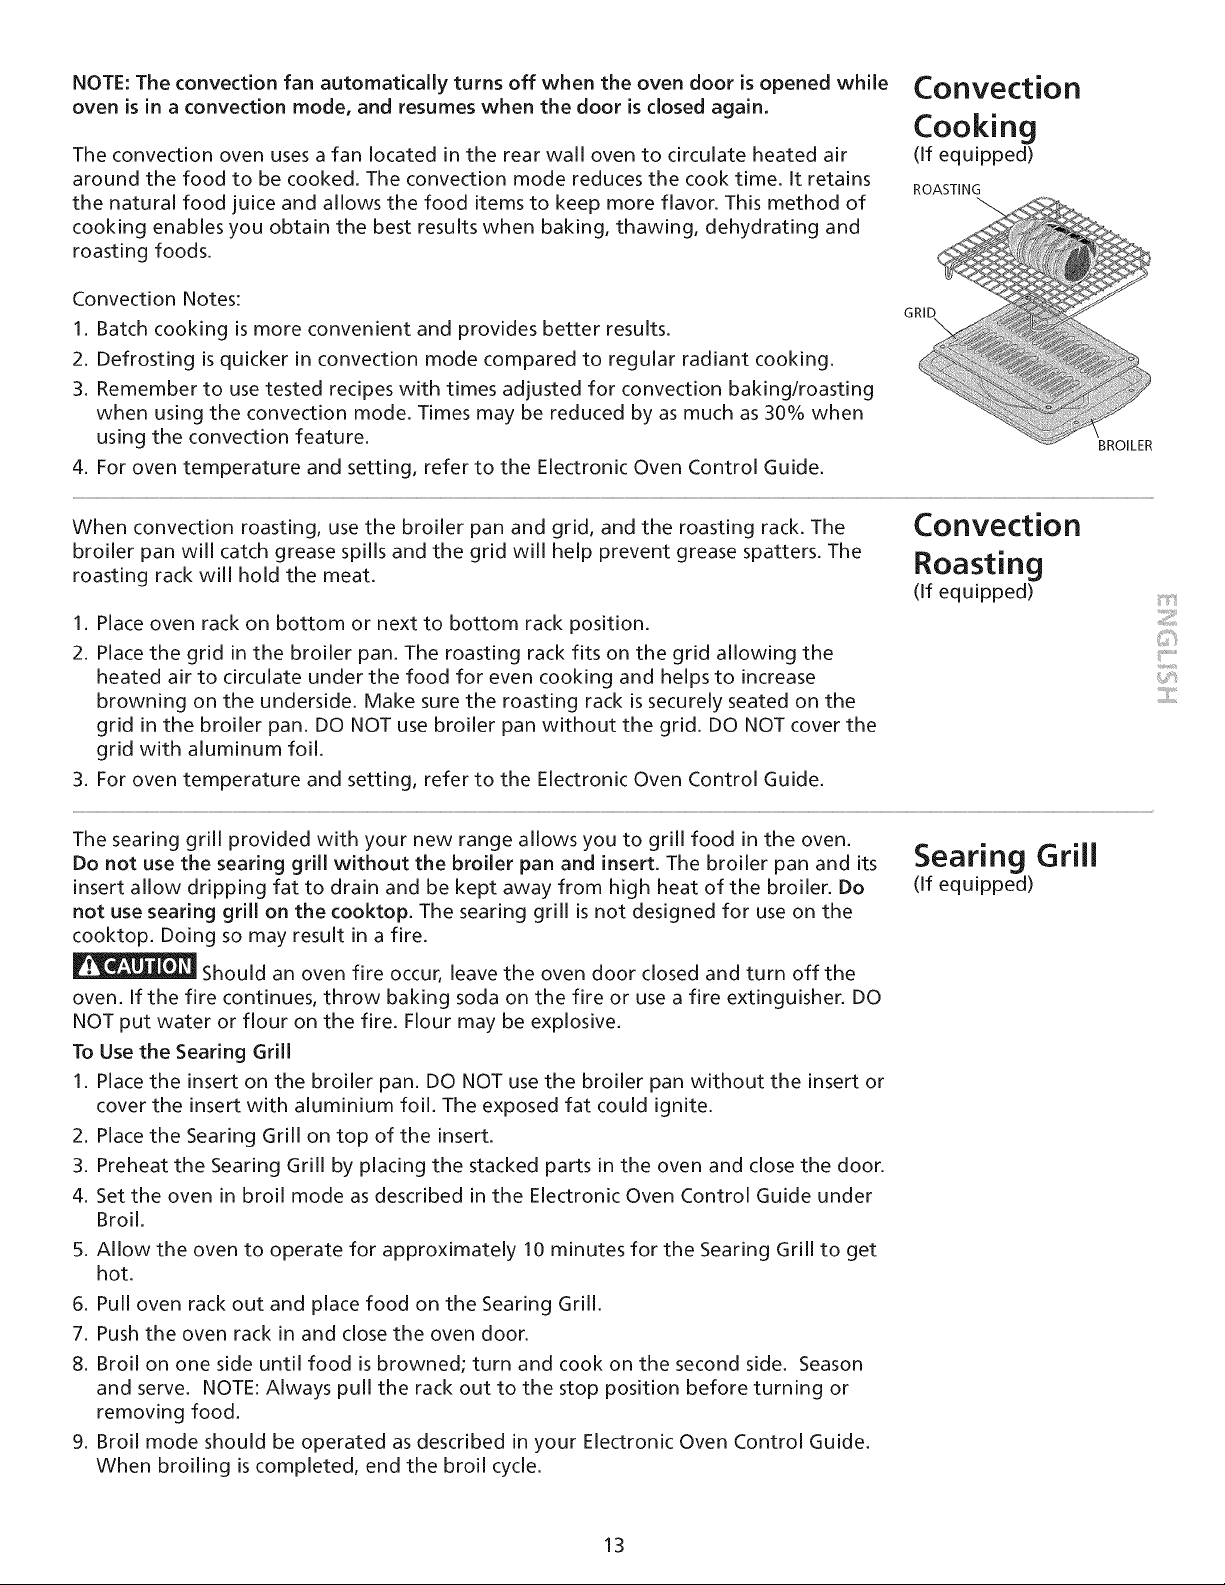
When convection roasting, use the broiler pan and grid, and the roasting rack. The
broiler pan will catch grease spills and the grid will help prevent grease spatters. The
roasting rack will hold the meat.
1. Place oven rack on bottom or next to bottom rack position.
2. Place the grid in the broiler pan. The roasting rack fits on the grid allowing the
heated air to circulate under the food for even cooking and helps to increase
browning on the underside. Make sure the roasting rack is securely seated on the
grid in the broiler pan. DO NOT use broiler pan without the grid. DO NOT cover the
grid with aluminum foil.
3. For oven temperature and setting, refer to the Electronic Oven Control Guide.
Convection
Roasting
(If equipped)
iiiiiii:i!!iiii
iiiiiii_i!!iiiiiii
The searing grill provided with your new range allows you to grill food in the oven.
Do not use the searing grill without the broiler pan and insert. The broiler pan and its
insert allow dripping fat to drain and be kept away from high heat of the broiler. Do
not use searing grill on the cooktop. The searing grill is not designed for use on the
cooktop. Doing so may result in a fire.
Should an oven fire occur, leave the oven door closed and turn off the
oven. If the fire continues, throw baking soda on the fire or use a fire extinguisher. DO
NOT put water or flour on the fire. Flour may be explosive.
To Use the Searing Grill
1. Place the insert on the broiler pan. DO NOT use the broiler pan without the insert or
cover the insert with aluminium foil. The exposed fat could ignite.
2. Place the Searing Grill on top of the insert.
3. Preheat the Searing Grill by placing the stacked parts in the oven and close the door.
4. Set the oven in broil mode as described in the Electronic Oven Control Guide under
Broil.
5. Allow the oven to operate for approximately 10 minutes for the Searing Grill to get
hot.
6. Pull oven rack out and place food on the Searing Grill.
7. Push the oven rack in and close the oven door.
8. Broil on one side until food is browned; turn and cook on the second side. Season
and serve. NOTE: Always pull the rack out to the stop position before turning or
removing food.
9. Broil mode should be operated as described in your Electronic Oven Control Guide.
When broiling is completed, end the broil cycle.
Searing Grill
(If equipped)
13
Oven
Baking
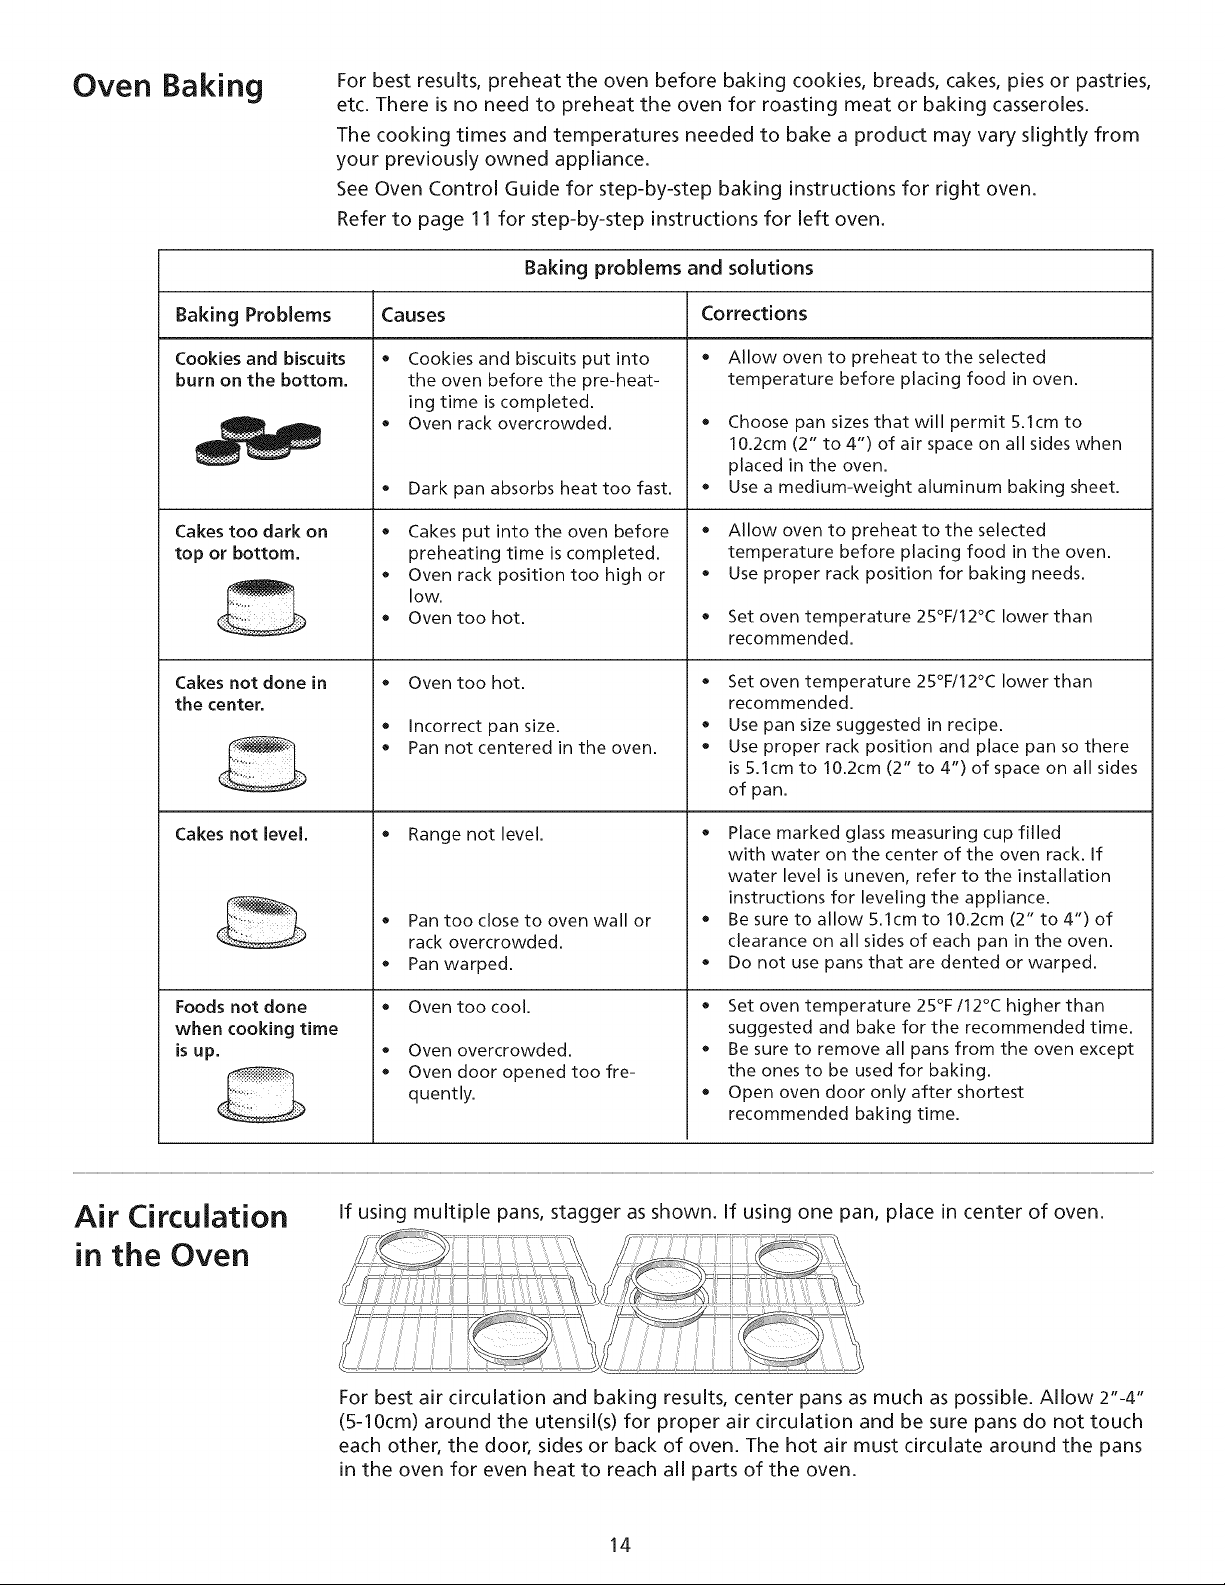
Baking Problems
Cookies and biscuits
burn on the bottom,
Cakes too dark on
top or bottom.
Cakes not done in
the center.
Cakes not level,
Foods not done
when cooking time
is up,
For best results, preheat the oven before baking cookies, breads, cakes, pies or pastries,
etc. There is no need to preheat the oven for roasting meat or baking casseroles.
The cooking times and temperatures needed to bake a product may vary slightly from
your previously owned appliance.
See Oven Control Guide for step-by-step baking instructions for right oven.
Refer to page 11 for step-by-step instructions for left oven.
Baking problems and solutions
Causes Corrections
o
Cookies and biscuits put into
the oven before the pre-heat-
ing time is completed.
Oven rack overcrowded.
• Dark pan absorbs heat too fast.
• Cakes put into the oven before
preheating time is completed.
• Oven rack position too high or
low.
• Oven too hot.
• Oven too hot.
• Incorrect pan size.
Pan not centered in the oven.
Range not level.
• Pan too close to oven wall or
rack overcrowded.
Pan warped.
• Oven too cool.
• Oven overcrowded.
• Oven door opened too fre-
quently.
• Allow oven to preheat to the selected
temperature before placing food in oven.
• Choose pan sizes that will permit 5.1cm to
10.2cm (2" to 4") of air space on all sides when
placed in the oven.
• Use a medium-weight aluminum baking sheet.
• Allow oven to preheat to the selected
temperature before placing food in the oven.
• Use proper rack position for baking needs.
• Set oven temperature 25°F/12°C lower than
recommended.
• Set oven temperature 25°F/12°C lower than
recommended.
• Use pan size suggested in recipe.
• Use proper rack position and place pan so there
is 5.1cm to 10.2cm (2" to 4") of space on all sides
of pan.
Place marked glass measuring cup filled
with water on the center of the oven rack. If
water level is uneven, refer to the installation
instructions for leveling the appliance.
• Be sure to allow 5.1cm to 10.2cm (2" to 4") of
clearance on all sides of each pan in the oven.
• Do not use pans that are dented or warped.
• Set oven temperature 25°F/12°C higher than
suggested and bake for the recommended time.
• Be sure to remove all pans from the oven except
the ones to be used for baking.
• Open oven door only after shortest
recommended baking time.
Air Circulation If using multiple pans, stagger as shown. If using one pan, place in center of oven.
in the Oven
For best air circulation and baking results, center pans as much as possible. Allow 2"-4"
(5-10cm) around the utensil(s) for proper air circulation and be sure pans do not touch
each other, the door, sides or back of oven. The hot air must circulate around the pans
in the oven for even heat to reach all parts of the oven.
14
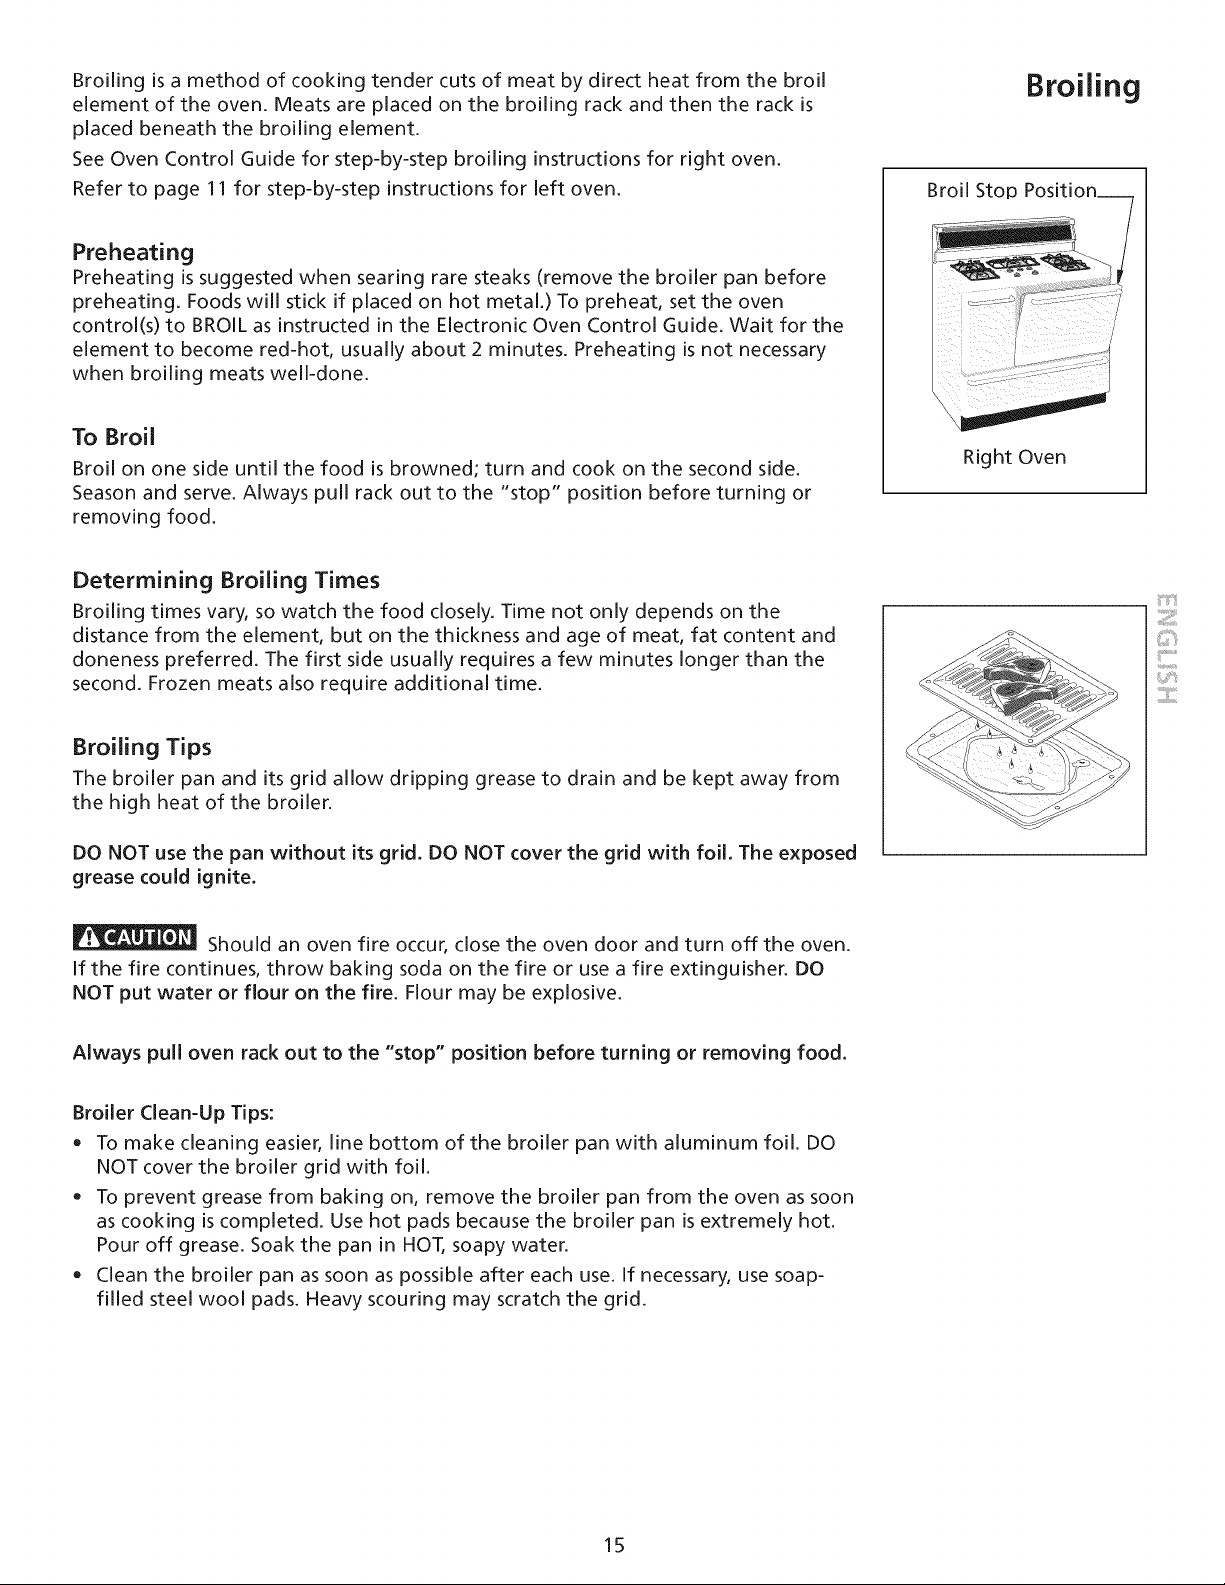
Broilingisamethodof cookingtendercutsof meatbydirectheatfromthe broil
elementof theoven.Meatsareplacedonthe broilingrackandthenthe rackis
placedbeneaththe broilingelement.
SeeOvenControlGuidefor step-by-stepbroilinginstructionsfor right oven.
Referto page11for step-by-stepinstructionsfor left oven.
Preheating
Preheating is suggested when searing rare steaks (remove the broiler pan before
preheating. Foods will stick if placed on hot metal.) To preheat, set the oven
control(s) to BROIL as instructed in the Electronic Oven Control Guide. Wait for the
element to become red-hot, usually about 2 minutes. Preheating is not necessary
when broiling meats well-done.
To Broil
Broil on one side until the food is browned; turn and cook on the second side.
Season and serve. Always pull rack out to the "stop" position before turning or
removing food.
Broiling
Broil Stop
/
Right Oven
Determining Broiling Times
Broiling times vary, so watch the food closely. Time not only depends on the
distance from the element, but on the thickness and age of meat, fat content and
doneness preferred. The first side usually requires a few minutes longer than the
second. Frozen meats also require additional time.
Broiling Tips
The broiler pan and its grid allow dripping grease to drain and be kept away from
the high heat of the broiler.
DO NOT use the pan without its grid. DO NOT cover the grid with foil. The exposed
grease could ignite.
Should an oven fire occur, close the oven door and turn off the oven.
If the fire continues, throw baking soda on the fire or use a fire extinguisher. DO
NOT put water or flour on the fire. Flour may be explosive.
iiiiiii:i!!iiii
iiiiiii_i!!iiiiiii
Always pull oven rack out to the "stop" position before turning or removing food.
Broiler Clean-Up Tips:
• To make cleaning easier, line bottom of the broiler pan with aluminum foil. DO
NOT cover the broiler grid with foil.
To prevent grease from baking on, remove the broiler pan from the oven as soon
as cooking is completed. Use hot pads because the broiler pan is extremely hot.
Pour off grease. Soak the pan in HOT, soapy water.
Clean the broiler pan as soon as possible after each use. If necessary, use soap-
filled steel wool pads. Heavy scouring may scratch the grid.
15
General
Cleaning
Cleaning Various Parts of Your Range
Before cleaning any part of the range, be sure all controls are turned OFF and the
range is cool. Remove spillovers and heavy soiling as soon as possible. Regular cleanings
will reduce the effort required for major cleanings later.
Surfaces How to Clean
Vinyl and Use hot, soapy water and a cloth. Dry with a clean cloth.
Aluminum (Trim Pieces)
Control Panel
Stainless Steel
Control panel,
Oven door and
Drawer front panel
Oven Racks
Searing Grill (If equipped)
Cooktop, under Cooktop,
Broiler Pan and Insert,
Door Liner, Small Oven
Oven Door
= .
-- DO HAND
ii CLEAN FRAME
DO HAND i ,"_ _'_, _1_',
CLEAN DOOR ! (il _'qF__,_ _
_! _ S,>__ DO NOT_° V
_,#_ - _'j:__-_ HAND _
.............CLEAN GASKET ....
Before cleaning the controlpanel, turn all controls to OFF and remove the control
knobs. To remove, pull each knob straight off the shaft. Clean using hot, soapy
water and a dishcloth. Be sure to squeeze excess water from the cloth before
wiping the panel; especially when wiping around the controls. Excesswater in or
around the controls may cause damage to the appliance. To replace knobs after
cleaning, line up the flat sides of both the knob and the shaft; then push the knob
into place.
Cleaners made especially for stainless steel as Stainless Steel Magic, or other similar
cleaners are recommended. Always follow the manufacturer's instructions. Be
sure to rinse the cleaners as bluish stains may occur during heating and cannot be
removed.
Remove racks. See <{Removing and Replacing Oven Racks>>under Before Setting
Oven Controls. Use a mild, abrasive cleaner, following manufacturer's instructions.
Rinse with clean water and dry. After cleaning the racks, rub the sides of the racks
with wax paper or a cloth containing a small amount of baby oil or salad oil (this
will make the racks glide easier into the rack positions).
For general cleaning, put in hot soapy water for approximately 10 minutes. Use a
soft cloth to remove difficult soils. Rinse with a damp cloth and dry. DO NOT use
abrasive cleaners or pads; they can scratch.
Gentle scouring with a soapy scouring pad will remove most spots. Rinse with a
1:1 solution of clear water and ammonia. If necessary, cover difficult spots with an
ammonia-soaked paper towel for 30 to 40 minutes. Rinse with clean water and
a damp cloth and then scrub with a soap-filled scouring pad. Rinse and wipe dry
with a clean cloth. Remove all cleaners or the porcelain may become damaged
during future heating. DO NOT use spray oven cleaners on the cooktop.
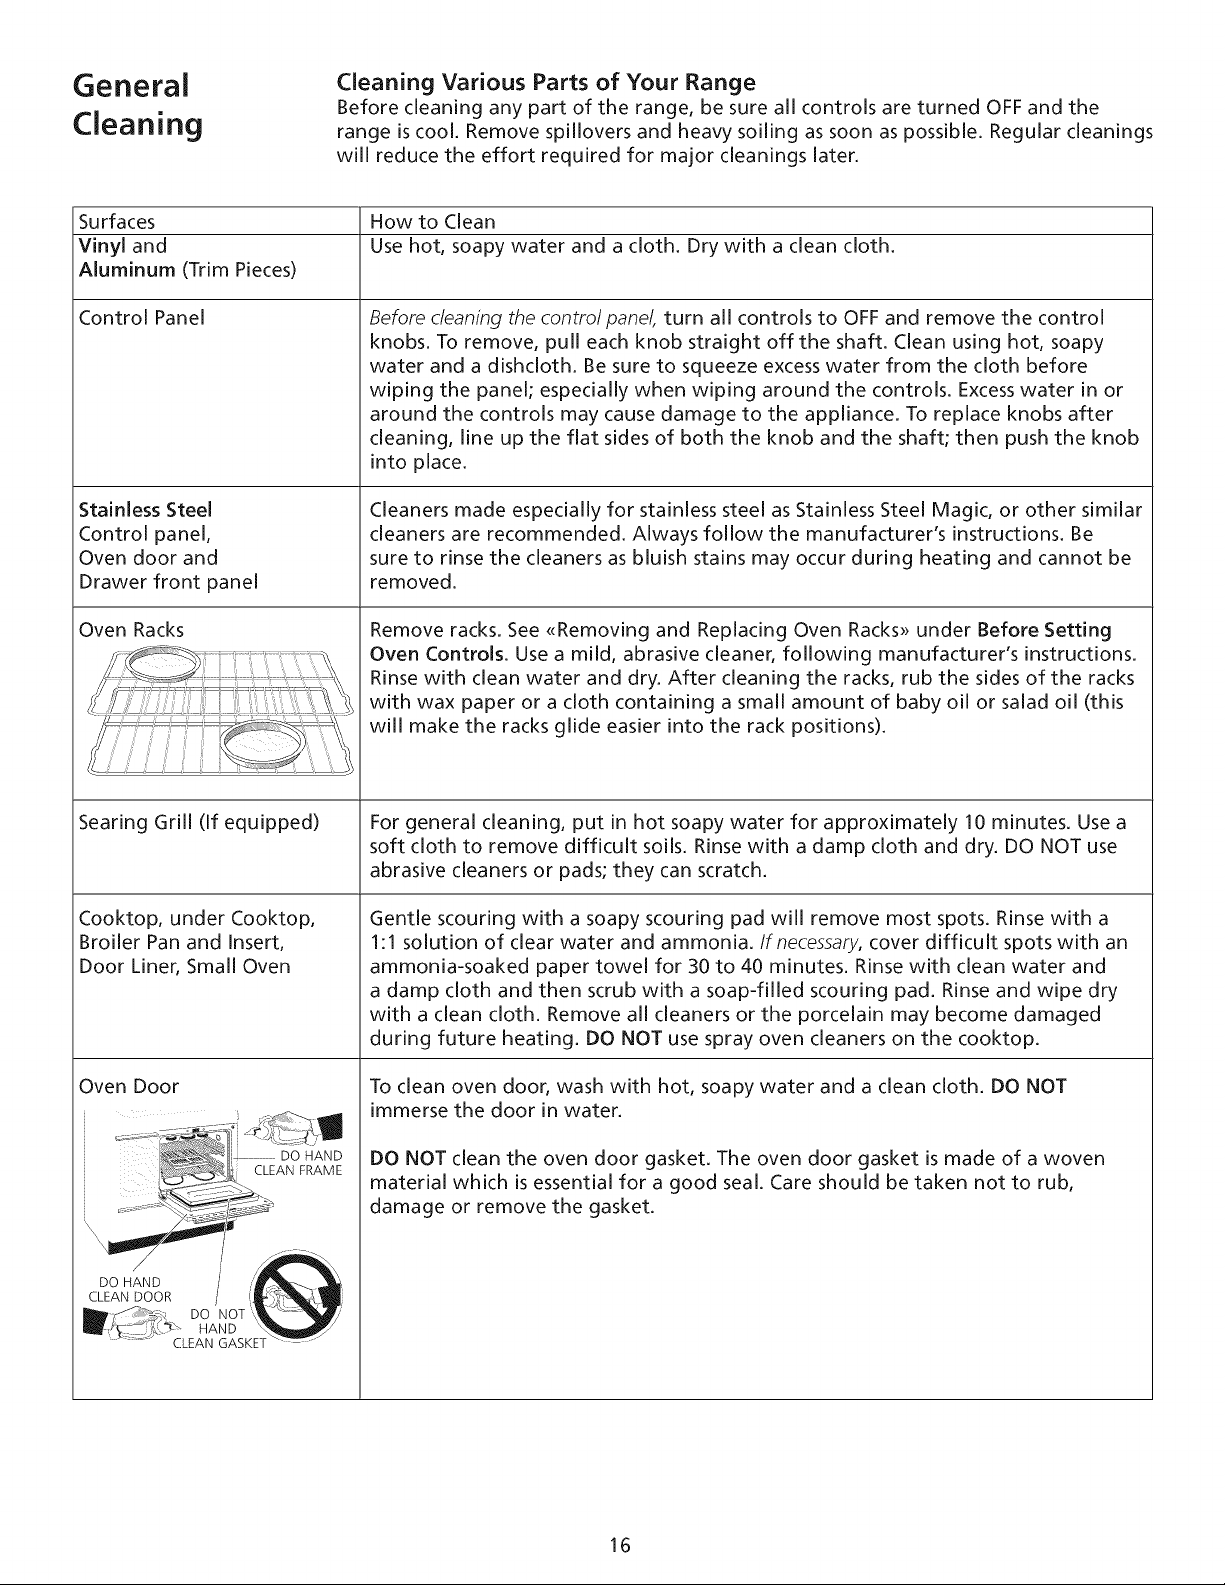
To clean oven door, wash with hot, soapy water and a clean cloth. DO NOT
immerse the door in water.
DO NOT clean the oven door gasket. The oven door gasket is made of a woven
material which is essential for a good seal. Care should be taken not to rub,
damage or remove the gasket.
16
To Clean the Cooktop Glass
Thecooktopisdesignedto makecleaningeasier.Becausethe burnersaresealed,
cleanupsareeasywhenspilloversarecleanedup immediately.Removeburnergrates
beforecleaning.Tocleanthe cooktop,wipewith a clean,dampclothandwipedry.
Correctandconsistentcleaningisessentialto maintainingyour heat-resistantglass
top. Spillsandspattersshouldbewipedup usingacleanpapertowel andsudsy
water.Thisshouldbedoneeitherassoonaspossibleafterthe spilloccurs,after
cookingiscompleted,or at the latest,beforeusingthe cooktopagain.Usecautionif
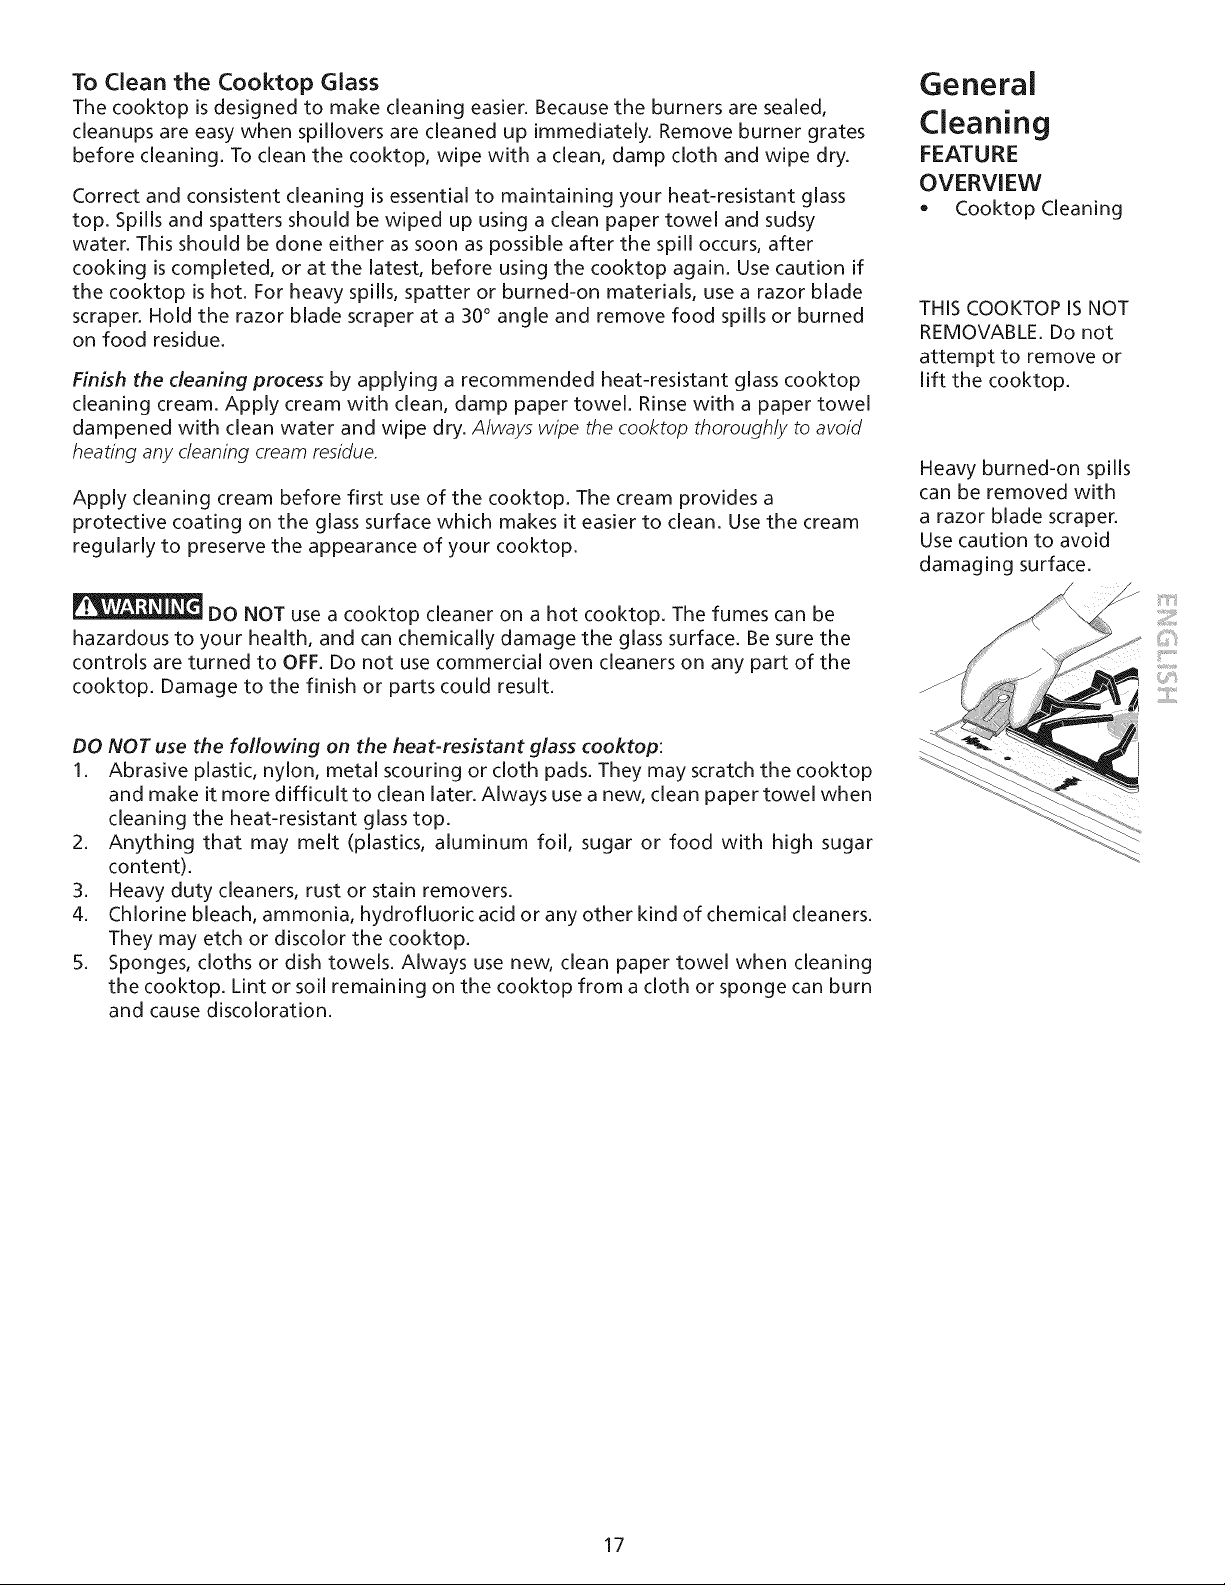
thecooktopishot. Forheavyspills,spatteror burned-onmaterials,usea razorblade
scraper.Holdthe razorbladescraperat a 30° angleandremovefood spillsor burned
on food residue.
Finish the cleaning process by applying a recommended heat-resistant glass cooktop
cleaning cream. Apply cream with clean, damp paper towel. Rinse with a paper towel
dampened with clean water and wipe dry. Always wipe the cooktop thoroughly to avoid
heating any deaning cream residue.
Apply cleaning cream before first use of the cooktop. The cream provides a
protective coating on the glass surface which makes it easier to clean. Use the cream
regularly to preserve the appearance of your cooktop.
DO NOT use a cooktop cleaner on a hot cooktop. The fumes can be
hazardous to your health, and can chemically damage the glass surface. Be sure the
controls are turned to OFF. Do not use commercial oven cleaners on any part of the
cooktop. Damage to the finish or parts could result.
DO NOT use the following on the heat-resistant glass cooktop:
1. Abrasive plastic, nylon, metal scouring or cloth pads. They may scratch the cooktop
and make it more difficult to clean later. Always use a new, clean paper towel when
cleaning the heat-resistant glass top.
2. Anything that may melt (plastics, aluminum foil, sugar or food with high sugar
content).
3. Heavy duty cleaners, rust or stain removers.
4. Chlorine bleach, ammonia, hydrofluoric acid or any other kind of chemical cleaners.
They may etch or discolor the cooktop.
5. Sponges, cloths or dish towels. Always use new, clean paper towel when cleaning
the cooktop. Lint or soil remaining on the cooktop from a cloth or sponge can burn
and cause discoloration.
General
Cleaning
FEATURE
OVERVIEW
* Cooktop Cleaning
THIS COOKTOP IS NOT
REMOVABLE. Do not
attempt to remove or
lift the cooktop.
Heavy burned-on spills
can be removed with
a razor blade scraper.
Use caution to avoid
damaging surface.
Z!!!IIIIII
17

General
Cleaning
• Cooktop Cleaning
To Clean the Burner Grates, Contoured Burner Pans, Burner Cap, and
Burner Base
The burner grates, contoured burner pans, burner cap, and burner base should be
routinely cleaned. Keeping the burner ports clean will prevent improper ignition and
an uneven flame. Follow instructions below.
To Clean the Contoured Burner Pans
The square burner pans are attached to the cooktop and are not removable. The
burner pan forms a recessed well area located around each burner unit. If a spill occurs
in one of the four well areas, blot up spill with an absorbent cloth. Rinse with a clean,
damp cloth and wipe dry.
To Clean the Grates
The burner grates and wok stand are dishwasher safe. Any remaining soil may be
removed by gently scouring with a soapy scouring pad. Rinse with a 1:1 solution of
clean water and ammonia. If necessary, cover difficult spots with an ammonia-soaked
paper towel for 30 to 40 minutes. Rinse with clean water and a damp cloth, then
scrub with a soap-filled scouring pad. Rinse and wipe dry with a clean cloth. Remove
all cleaners thoroughly or the grate porcelain may become damaged during future
heating. DO NOT use spray oven cleaners.
To Clean the Burner Cap
Use a soap-filled scouring pad or a mild abrasive cleanser to clean burner caps. If
necessary, cover stubborn spots with an ammonia-soaked paper towel for 30 minutes.
Rub gently with a soap-filled scouring pad and rinse with a mixture of clean water and
vinegar. Wipe dry. Remove all cleaners thoroughly or the burner cap porcelain may
become damaged during future heating.
To Clean the Burner Base and Gas Opening
The ports (or slots) around the burner base must be routinely cleaned. Use a small-
gauge wire or needle to clean small slots or holes. Use care to prevent damage to the
electrode. If a cleaning cloth should catch the electrode, it could break or damage
the electrode. If the electrode is damaged or broken, the surface burner will not light
because it will not spark. Manual lighting with a match is still possible.
For proper flow of gas and ignition of the burner--DO NOT ALLOW SPILLS,FOOD,
CLEANING AGENTS OR ANY OTHER MATERIAL TO ENTER THE GAS OPENING. Gas must
flow freely through the small hole in the brass orifice for the burners to light properly.
If the gas opening orifice becomes soiled or clogged, use a small-gauge wire or needle
to clean. ALWAYS keep the burner cap assembly and ring in place whenever a surface
burner is in use.
After cleaning make sure each burner cap is properly aligned and level. Turn the
burner on to determine if it will light. If the burner does not light after cleaning,
contact a Sears Service Center. Do not service the sealed burner yourself.
18
Self-Clean Oven Cycle (RightOven)
Adhere to the Following Precautions:
- Allow the oven to cool before cleaning.
- Wear rubber gloves when cleaning any exterior parts of the oven manually.
During the self-clean cycle, the outside of the wall can become very hot
to touch. DO NOT leave small children unattended near the appliance. A ventilation
system starts automatically; it is normal for the hot air to be evacuated through the
front of the appliance.
Before cleaning any part of the oven, be sure the electronic oven control
is turned off or else push CANCEL pad. Wait until the oven is cool.
The health of some birds is extremely sensitive to the fumes given off
during the self-cleaning cycle of any range. Move birds to another well ventilated
room.
DO NOT use commercial oven cleaners or oven protective coatings in or around any
part of the self-cleaning oven. DO NOT clean the oven door gasket. The gasket on the
oven door is essential for a good seal. Care should be taken not to rub, damage or
move the gasket. DO NOT use aluminum foil to line the oven bottom. This may affect
cooking, or the foil could melt and damage the oven surface.
A self-cleaning oven cleans itself with high temperatures (well above cooking
temperatures) which eliminate soil completely or reduce it to a fine powdered ash you
can wash away with damp cloth.
Preparing the Oven for Self-Cleaning
1. Remove excess spillovers in the oven cavity before starting the self-dean cycle. To
clean, use hot soapy water and a cloth. Large spillovers can cause heavy smoke or
fire when subjected to high temperatures. DO NOT allow food spills with a high
sugar or acid content (such as tomatoes, sauerkraut, fruit juices or pie filling) to
remain on the surface as they may cause a dull spot even after cleaning.
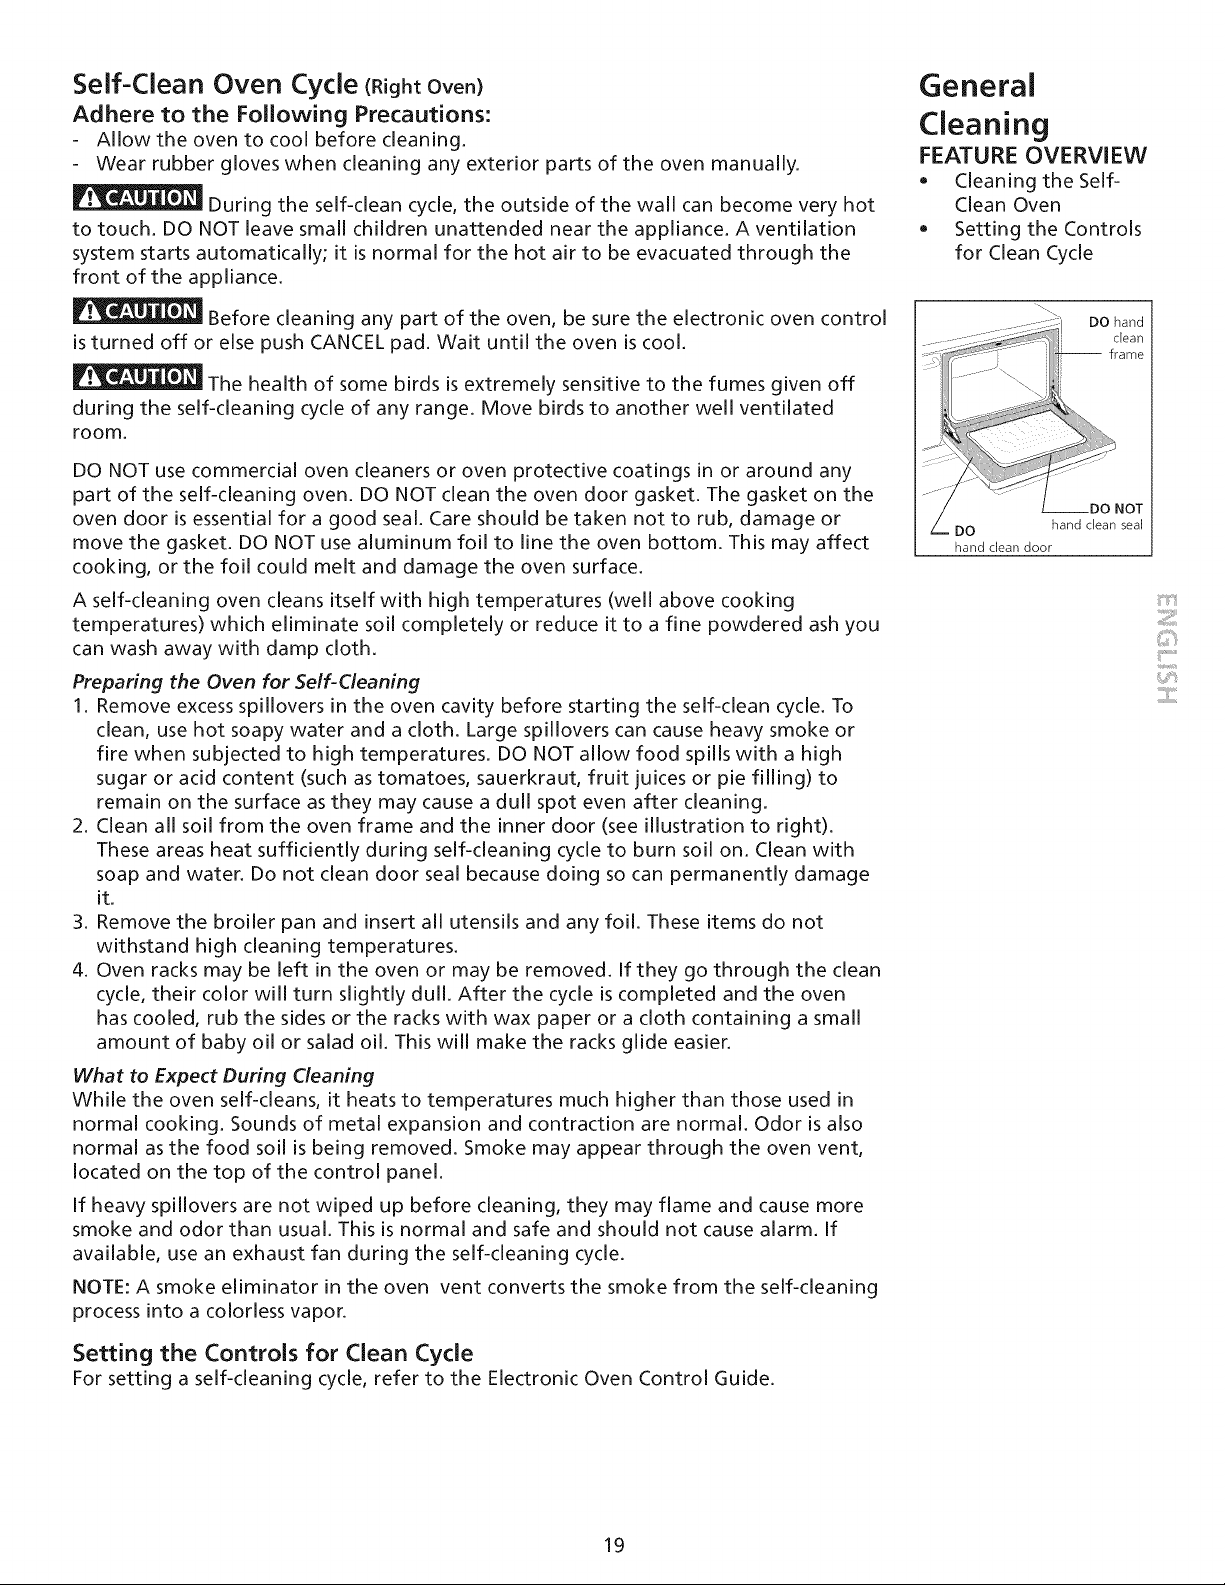
2. Clean all soil from the oven frame and the inner door (see illustration to right).
These areas heat suffidently during self-cleaning cycle to burn soil on. Clean with
soap and water. Do not clean door seal because doing so can permanently damage
it.
3. Remove the broiler pan and insert all utensils and any foil. These items do not
withstand high cleaning temperatures.
4. Oven racks may be left in the oven or may be removed, if they go through the clean
cycle, their color will turn slightly dull. After the cycle is completed and the oven
has cooled, rub the sides or the racks with wax paper or a cloth containing a small
amount of baby oil or salad oil. This will make the racks glide easier.
What to Expect During Cleaning
While the oven self-cleans, it heats to temperatures much higher than those used in
normal cooking. Sounds of metal expansion and contraction are normal. Odor is also
normal as the food soil is being removed. Smoke may appear through the oven vent,
located on the top of the control panel.
if heavy spillovers are not wiped up before cleaning, they may flame and cause more
smoke and odor than usual. This is normal and safe and should not cause alarm, if
available, use an exhaust fan during the self-cleaning cycle.
NOTE: A smoke eliminator in the oven vent converts the smoke from the self-cleaning
process into a colorless vapor.
Setting the Controls for Clean Cycle
For setting a self-cleaning cycle, refer to the Electronic Oven Control Guide.
General
Cleaning
FEATURE OVERVIEW
• Cleaning the Self-
Clean Oven
• Setting the Controls
for Clean Cycle
DO hand
clean
-- frame
--DO NOT
DO hand clean seal
hand clean door
iii:iii:i!!iiii
iiiiiii!!iiiiii
19
General
Cleaning
FEATURE OVERVIEW
• Oven Cleaning (Left
Oven)
• To Remove and
Replace Oven Door
Adhere to the following
cleaning precautions:
* AIIowthe oven to cool
before cleaning.
* Wear rubber gloves
when cleaning the
appliance manually.
Remove spillovers and
heavy soils as soon as
possible. Regular clean-
ings will reduce the
number of future major
cleanings.
Ammonia
must be rinsed before
operating the oven.
Provide adequate
ventilation.
Porcelain Enamel Oven Cleaning (If equipped)
Porcelain has a smooth finish and is a type of glass fused to metal. Oven cleaners can
be used on all interior oven surfaces.
General Cleaning
Remove soils using hot, soapy water. Do not allow food spills with a high sugar or acid
content (such as milk, tomatoes, saukerkraut, fruit juices or pie filling) to remain on the
surface as they may cause a dull spot even after cleaning.
To Remove Heavy Soil
1. Allow a dish of ammonia to sit in the oven overnight or for several hours with the
oven door closed. Clean softened spots using hot, soapy water. Rinse well with wa-
ter and a clean cloth.
2. If soil remains, use a soap-filled scouring pad or a nonabrasive cleaner. If necessary,
use an oven cleaner following manufacturer's instructions. DO NOT mix ammonia
with other cleaners.
Adhere to the following precautions when using oven cleaners:
1. DO NOT spray on the electrical controls or switches because it could cause a short
circuit and result in sparking or fire.
2. DO NOT allow a film from the cleaner to build up on the temperature sensing bulb
located at the top left rear corner of the oven; it could cause the oven to heat im-
properly. Carefully wipe the bulb clean after each oven cleaning, being careful not
to move the bulb. A change in its position could affect how the oven bakes. Avoid
bending the bulb and capillary tube.
3. DO NOT spray any cleaner on the oven door trim or gasket, handles or any exterior
surfaces of the range, wood or painted surfaces. The cleaner can damage these
surfaces.
To Clean the Oven Bottom
Clean using hot, soapy water, a mild abrasive cleanser, a soap-filled abrasive pad or
oven cleaner following oven cleaner manufacturer's instructions.
DO NOT line the oven walls, bottom, racks or any other part of the appli-
ance with aluminum foil. Doing so will destroy heat distribution, produce poor baking
results and cause permanent damage to the oven interior (aluminum foil will melt to
the interior surface of the oven).
Door removal
The
door is heavy. After
removing door, lay it
flat on the floor with
its inside facing down.
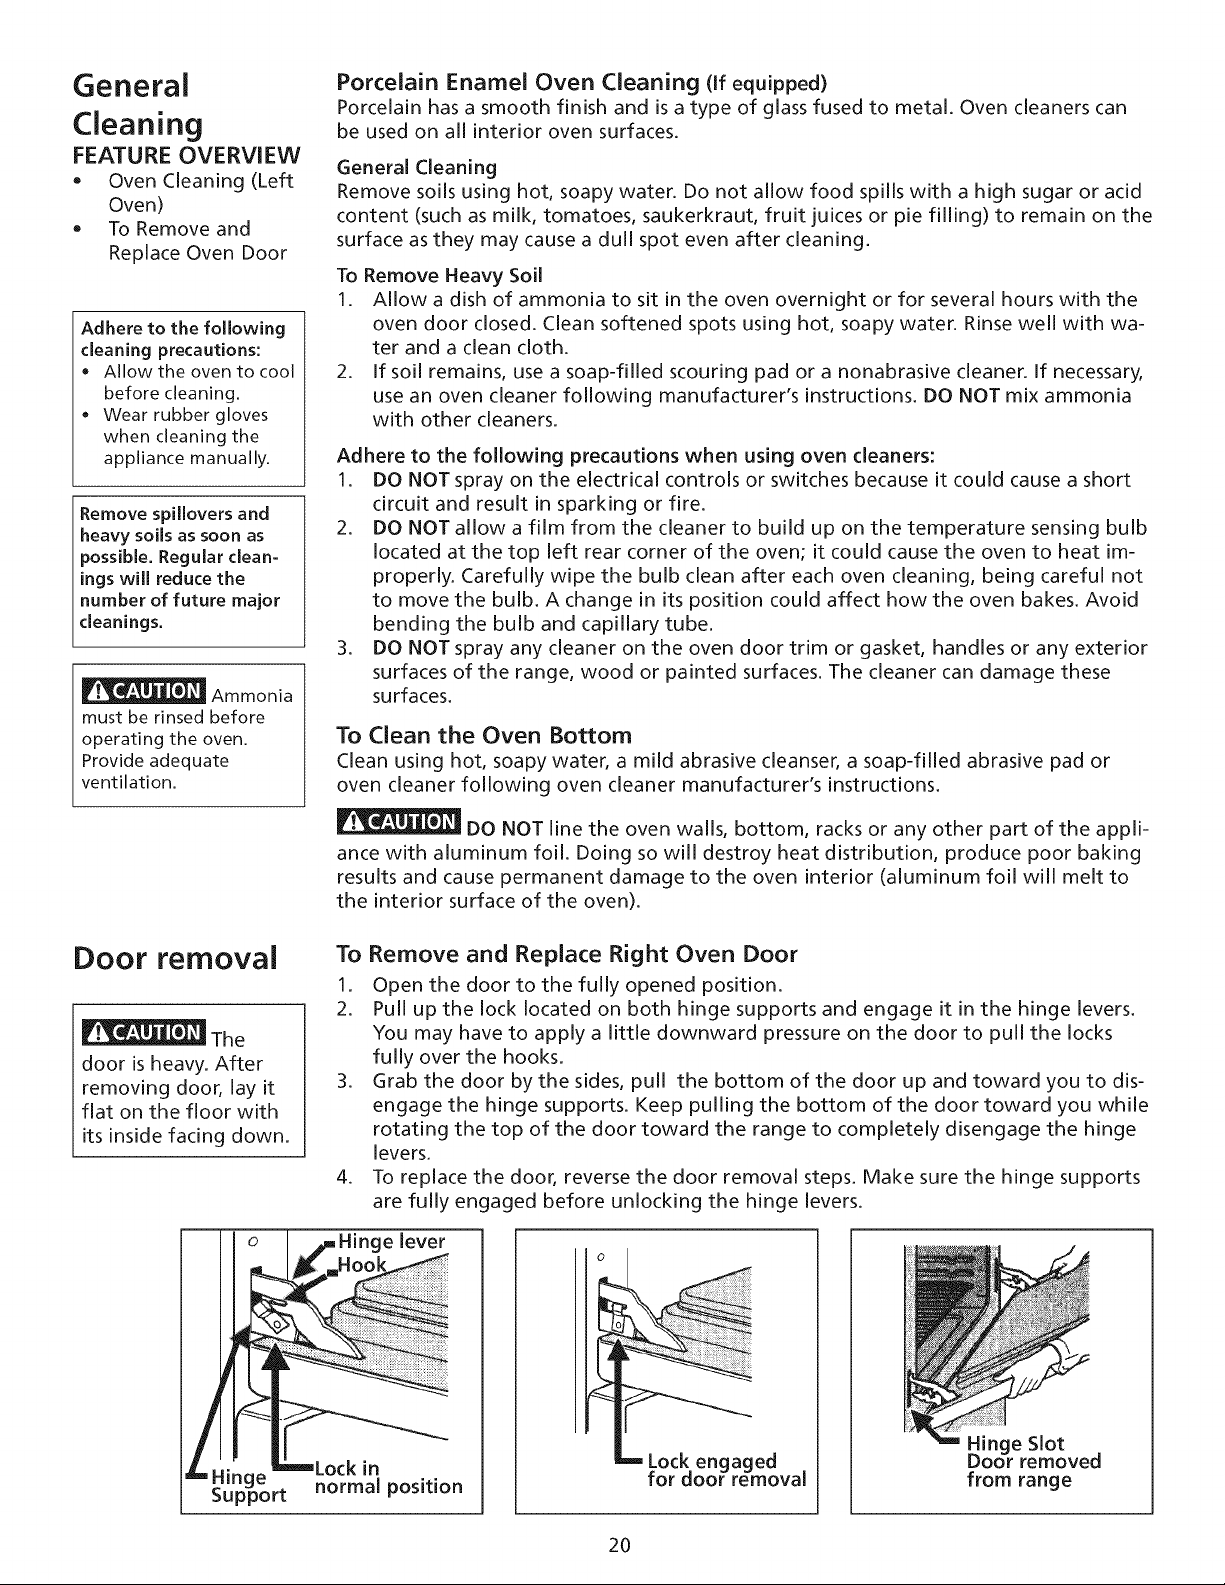
To Remove and Replace Right Oven Door
1. Open the door to the fully opened position.
2. Pull up the lock located on both hinge supports and engage it in the hinge levers.
You may have to apply a little downward pressure on the door to pull the locks
fully over the hooks.
3. Grab the door by the sides, pull the bottom of the door up and toward you to dis-
engage the hinge supports. Keep pulling the bottom of the door toward you while
rotating the top of the door toward the range to completely disengage the hinge
levers.
4. To replace the door, reverse the door removal steps. Make sure the hinge supports
Lock in
normal position
are fully engaged before unlocking the hinge levers.
e lever
Lock engaged
for door removal
Hinge Slot
Door removed
from range
2O
To Remove and Replace Storage Drawer
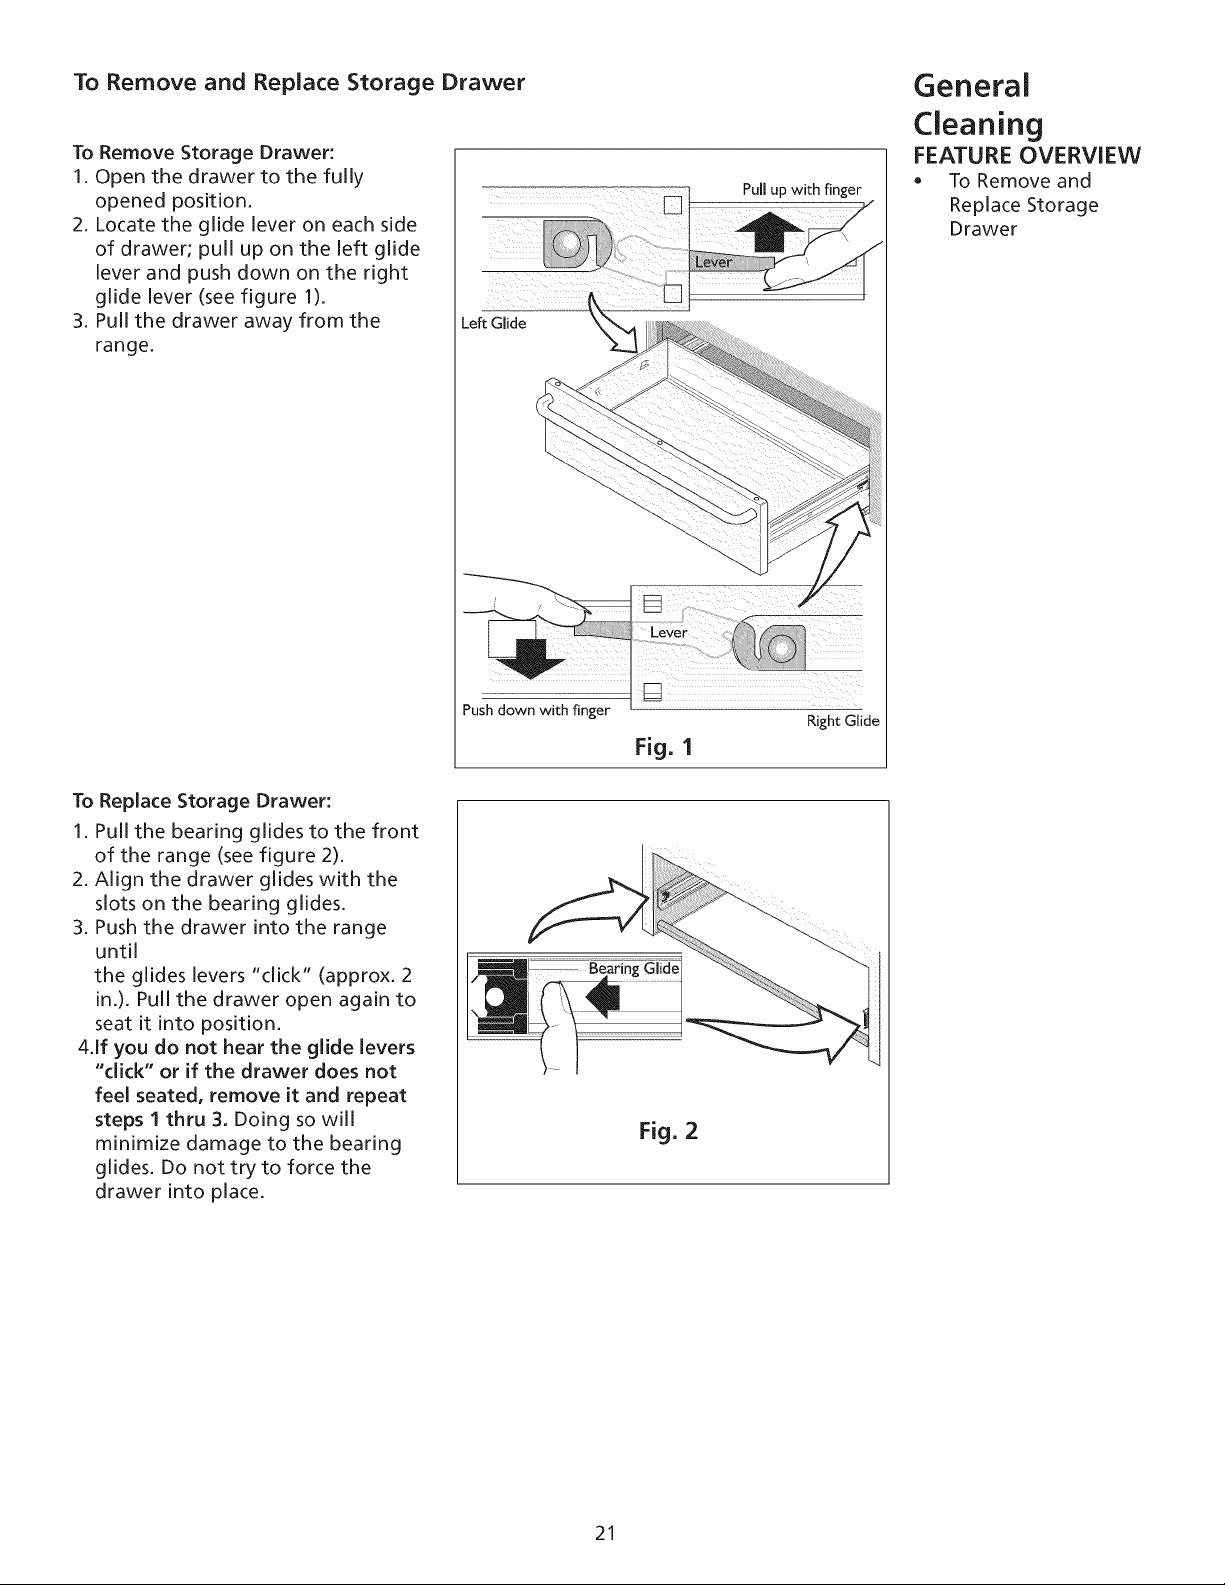
To Remove Storage Drawer:
1. Open the drawer to the fully
opened position.
2. Locate the glide lever on each side
of drawer; pull up on the left glide
lever and push down on the right
glide lever (see figure I).
3. Pull the drawer away from the
range.
To Replace Storage Drawer:
1. Pull the bearing glides to the front
of the range (see figure 2).
2. Align the drawer glides with the
slots on the bearing glides.
3. Push the drawer into the range
until
the glides levers "click" (approx. 2
in.). Pull the drawer open again to
seat it into position.
4.If you do not hear the glide levers
"click" or if the drawer does not
feel seated, remove it and repeat
steps I thru 3. Doing so will
minimize damage to the bearing
glides. Do not try to force the
drawer into place.
Pull up with finger
Left Glide
Push down with finger
Right Glide
Fig. 1
Fig. 2
General
Cleaning
FEATURE OVERVIEW
• To Remove and
Replace Storage
Drawer
21
Avoid Service
Checklist
You may save the cost and inconvenience of an unnecessary service call by first
reviewing this Checklist of commonly encountered problem situations.
You will be charged for a service call while the appliance is in warranty if the problem
is not caused by defective product workmanship or materials.
OCCURRENCE
Range is not level.
Your new appliance is a carefully engineered product. Many times, what appears to be
a reason to call service requires nothing more than a simple adjustment you can easily
make in your own home.
POSSIBLE CAUSE/SOLUTION
Poor installation. To level range, refer to Leveling Guide, page 8 in the Installation
Instructions. When range is level, cooktop may appear out of alignment if
countertop is not level.
Weak, unstable floor. Be sure floor is level and can adequately support range.
Contact a carpenter to correct sagging or sloping floor.
Kitchen cabinet misalignment may make range appear to be unlevel. Be sure
cabinets are square and have sufficient room for range clearance.
Cannot move appliance easily. Appliance
must be accessible for service.
Cabinets not square or are built in too tight. Contact a cabinet maker to correct
the problem.
Contact builder or installer to make appliance accessible.
Carpeting interferes with range. Provide sufficient space so range can be lifted
over carpet.
Entire range or oven does not operate. Make sure cord/plug is tightly into outlet.
Service wiring is not complete. Contact your dealer, installing agent or authorized
servicer.
Power outage. Check house lights to be sure. Call your local electric company for
service.
*Oven control beeps and displays F1, F3
or Fg.
Electronic control has detected a fault condition. Push CLEAR to clear the display
and stop beeping. Program oven again. If fault recurs, record fault number. Push
CLEAR and contact an authorized servicer.
Oven and/or cooktop lights does not Replace or tighten bulb. See "Changing Oven Light" in this owner's Guide for
work. instructions.
Surface unit does not heat. No power to the appliance. Check steps under "Entire Range or Oven Does Not
Operate" in this Avoid Service Checklist.
Incorrect control setting. Make sure the correct control is on for the surface unit to
be used.
Surface burners do not light. Surface control knob has not been completely turned to LITE. Push in and turn
the surface control knob to LITE (until burner ignites) and then turn the surface
control knob to the desired flame size.
Burner ports are clogged. Clean burners. See "To Clean Burner Grates, Contoured
Burner Pans, Burner Cap and Burner Base" under General Cleaning. With the
burner off, use small-gauge wire or needle to clean ports or slots.
Gas supply is turned off. Turn gas supply on.
Surface burner flame burns half way
around.
Burner ports or slots are clogged. With the burner off, clean by using a small-
gauge wire or needle to lean prots or slots.
Moisture is present after cleaning. Lightly fan the flame and allow the burner to
operate until flame is full. Dry the burners thoroughly following instructions under
General Cleaning.
22
Surface burner flame is orange. Dust particles in main line. Allow the burner to operate a few minutes until
flame turns blue.
Salt air in coastal areas. A slightly orange flame is unavoidable.
Poor baking results. Many factors affect baking results. Make sure the proper rack position is used.
Center food in the oven and space pans to allow air to circulate. Allow the oven
to preheat to the set temperature before placing food in the oven. Try adjusting
the recipes' recommended temperature or baking time. If you feel the oven is
too hot or cool, see "Adjusting Oven Temperature" in this owner's guide.
Flames inside oven or smoking from vent. Excessive spillovers in oven. Set self-clean cycle for a longer cleaning time.
Excessive spillovers in oven. This is normal, especially for pie spillovers or large
amounts of grease on the oven bottom. Wipe up excessive spillovers before
starting the self-clean cycle. If flames or excessive smoke are present, stop the
self-clean cycle and follow the steps under _Stopping or Interrupting the Self-
Cleaning Cycle_ in the Electronic Oven Control Guide.
Oven smokes excessively during broiling. Control(s) not set properly. Follow instructions under Setting Oven Controls in
the Electronic Oven Control Guide.
Make sure oven is opened to Broil Stop Position.
Meat too close to the element. Reposition the rack to provide proper clearance
between the meat and the element. Preheat broil element. Preheat broil
element for searing.
Grid on broiler pan wrong side up and grease not draining. Always place grid on
the broiler pan with ribs up and slots down to allow grease to drip into pan.
Grease has built up on oven surfaces. Regular cleaning is necessary when
broiling frequently. Old grease or food spatters cause excessive smoking.
Self-cleaning cycle does not work. Control(s) not set properly. Follow instructions under Oven Cleaning in the
Electronic Oven Control Guide.
Self-cleaning cycle was interrupted. Stop time must be 3 to 4 hours past the start
time. Follow steps under _Stopping or Interrupting the Self-Cleaning Cycle_ in
the Electronic Oven Control Guide.
Soil not completely removed after self-
cleaning cycle.
Failure to clean bottom, front top or oven, frame or door area outside oven
seal. These areas are not in the self-cleaning area, but get hot enough to burn
on residue. Clean these areas before the self-cleaning cycle is started. Burned-on
residue can be cleaned with a stiff nylon brush and water or nylon scrubber. Be
careful not to damage the oven seal.
23

Notes
24
Tabla de rnaterias
Registro del producto .................................................... 25
Garantia de la estufa desizable ................................... 25
IMPORTANTES INSTRUCCIONES DE SEGURIDAD .... 26-28
Selecd6n de los utenslios de codna ............................ 29
Caracteristicas de la estufa ............................................ 30
Conversi6n al gas propano/icuado .............................. 31
Cocdon a la superfide .............................................. 31-33
• Tamafio de llama ..................................................... 31
• A]uste correcto del quemador ................................ 31
• Colocaci6n de las basasy lastapas del quemador 32
• Colocaci6n de las rejillas del quemador ................. 32
• Programaci6n de los controles de superficie ......... 33
Antes de programar los controles del homo ............... 34
Ajuste del control del homo izquierdo ........................ 34
Ajuste del control del homo derecho ........................... 34
Para remplazar la bombila del homo .......................... 35
Para ajustar la temperatura del homo derecho .......... 35
Ajustado la temperatura de la gaveta de entibiar
(si equipada) .................................................................. 35
Cocdon de convection ................................................... 36
Rostizados de convecd6n .............................................. 36
Horneado ........................................................................ 37
Circulad6n de aire en el homo ..................................... 37
Rostizado ........................................................................ 38
Umpieza general ....................................................... 39-45
Limpieza de diferentes partes de su estufa ........... 39
Para limpiar la plancha de codnar .................... 40-41
Limpiando el horno auto-limpiable ....................... 42
Ajuste de los controles para el dclo de limpieza... 42
Para retirar y remplazar la puerta del horno ......... 43
Limpieza del horno de esmalte de porcelana ........ 43
Para retirar y remplazar la gaveta de entibiar ...... 44
Usta de verificacion .................................................. 45-46
Notas ............................................................................... 47
Servicio Sears ........................................... cubierta trasera
Registro del producto
En este espacio, inscriba la fecha de compra, modelo y numero de serie de su producto. Ud. encontrara el modelo y
el numero de serie en una placa de identificacibn. La placa esta Iocalizada al lado izquierdo de la estufa yes visible
cuando la puerta del homo esta abierta o en el interior de la gaveta en la parte lateral de la estufa.
Modelo No ]!gQ Fecha de compra
No de serie Guarde estas instrucciones y su boleta de pago para consultacion futura.
Garantia de la estufa deslizable
UN ANO COMPLETO DE GARANTiA SOBRE TODOS LOS COMPONENTES.
Si, dentro del afio a partir de la fecha de instalaci6n, cualquier componente de este producto deja de funcionar
debido a algun defecto del material o de la fabricaci6n, Sears Io reparara o Io remplazara, segun su criterio, sin
costo alguno.
LOS SERVICIOS DE GARANTiA SON DISPONIBLES CONTACTANDO AL CENTRO DE SERVICIO MAS CERCANO EN LOS
ESTADOS UNIDOS.
Esta garantia le otorga derechos legales especificos, y Ud puede tenet otros derechos que puedan varias de un
estado a otto.
Sears Roebuck and Co. Dept. 817 WA Hoffman Estates, IL 60179
!i
i
©
Para aumentar el valor de su aicance, compre un Acuerdo de Mantenirniento SEARS.
"Mantenemos Io que vendemos" es nuestra garantia para que Ud. pueda depender del servicio Sears. Su
electrodomestico Kenmore ha aumentado de valor cuando Ud considera que Sears posee unidades de servicio a
traves de todo el pais con personal capacitado en la reparacibn de todo electrodomestico vendido pot Sears. EIIos
poseen el conocimiento y las habilidades, las herramientas, componentes y el material para asegurar nuestra
prenda: "Mantenemos Io que vendemos".
Mantenga el valor de su compra con un Acuerdo de Mantenimiento Sears. Los aparatos Kenmore son disefiados,
fabricados y verificados para obtener afios de operaciones. El Acuerdo de Mantenimiento Sears le ofrece un
excelente programa de servicio para su producto.
El Acuerdo de Mantenimiento SEARS:
Es su manera de comprar los servicios del mafiana a los precios de hoy.
Elimina las facturas pot reparaci6n que resultan del uso normal.
Permite las Ilamadas de servicio que necesite.
Le ofrece una Verificaci6n Annual Preventiva cuando Io desee para mantener su aparato Kenmore en las mejores
condiciones.
Para rnas inforrnaci6no ilamar ai 1-800-827-6655
25
IMPORTANTES INSTRUCCIONES DE SEGURIDAD
Lea todas ias instrucciones antes de utilizar el aparato
Guarde estas instrucciones para futura consultation
Este manual contiene importantes mensajes de seguridad. Simpre lea y obedezca todo mensaje de seguridad.
Este es el simbolo _ de alerta de seguridad. Le advierte sobre mensajes de seguridad que le informan de los peligros que
pueden herir o matar a Ud y a otros, o ocasionar da_o al producto.
Indica una situaci6n muy peligrosa, la cual de no set evitada puede ocasionar graves heridas y hasta la muerte.
Indica una situaci6n de peligro inminente, la cual de no ser evitada puede ocasionar heridas leves o da_os al
producto solamente.
Todos los mensajes de seguridad identificar_n el peligro, le dir_n como reducir el riesgo de heridad y adem_s le dir_n Io que
)uede ocurrir si no sigue las instrucciones.
Si todas las instrucciones de este manual no son
observadas a la letra, se puede ocurrir incendios o explosiones que pueden
causar da_os materiales, lesiones o la muerte.
PARA SU SEGURIDAD:
-- No almacene o utilice gasolina u otros vapores y liquidos inflamables
cerca de este o cualquier otro artefacto.
-- QUE HACER SI HAY FUGAS DE GAS/E:
No intente de encender ningun artefacto
No toque ningun interruptor electrico; no utilice ningun aparato
telef6nico en su edificio.
Llame inmediatamente el abastecedor de gas desde el telefono de un
vecino. Siga las instrucciones del abastecedor de gas.
En caso que no puede contactar el abastecedor de gas llame al
departamento de bomberos.
-- La instalaci6n y el servicio deben ser realizados por un instalador calificado,
por un servicio tecnico certificado o por el abastecedor de gas.
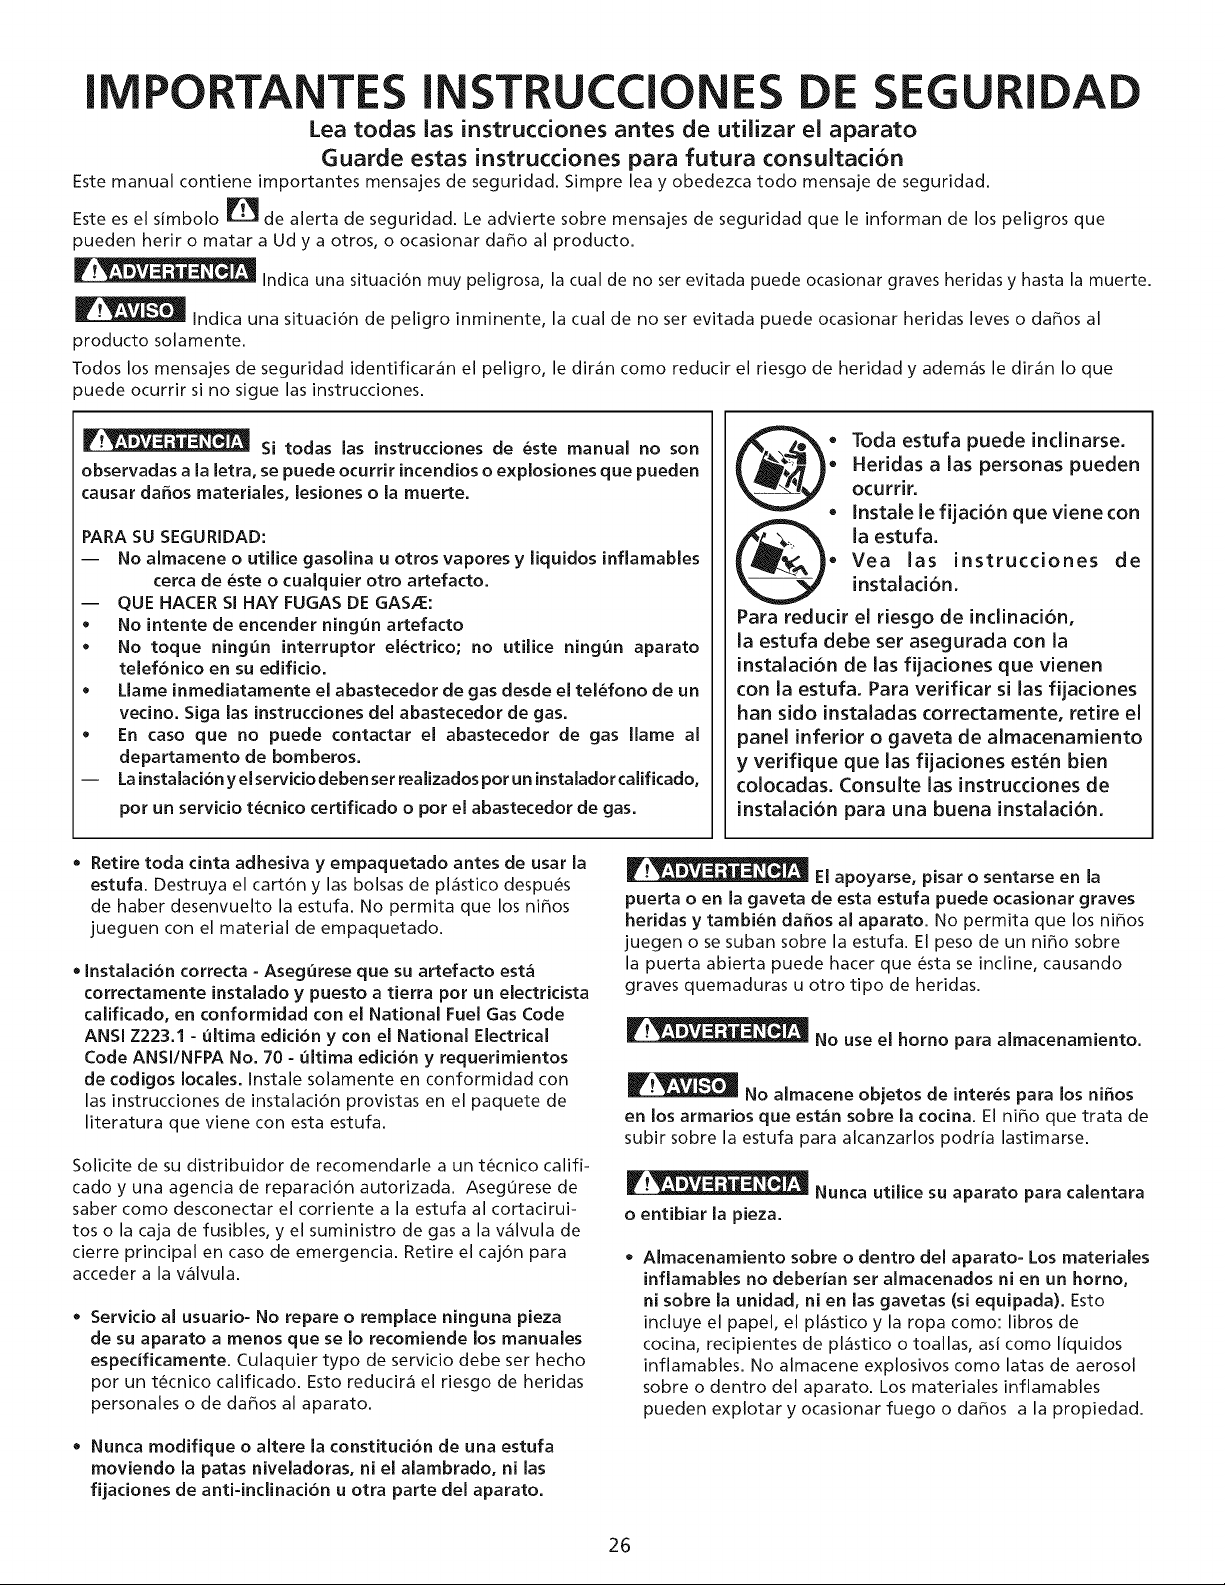
Toda estufa puede inclinarse.
Heridas alas personas pueden
ocurrir.
• Instale le fijaci6n que viene con
la estufa.
• Vea las instrucciones de
instalaci6n.
Para reducir el riesgo de inclinaci6n,
la estufa debe ser asegurada con la
instalaci6n de las fijaciones que vienen
con la estufa. Para verificar si las fijadones
ban sido instaladas correctamente, retire el
panel inferior o gaveta de almacenamiento
y verifique que las fijaciones est_n bien
colocadas. Consulte las instrucciones de
instalacion para una buena instalacion.
Retire toda cinta adhesiva y empaquetado antes de usar la
estufa. Destruya el cartbn y las bolsas de pl_stico despu_s
de haber desenvuelto la estufa. No permita que los ni_os
jueguen con el material de empaquetado.
Instalacion correcta - Asegurese que su artefacto esta
correctamente instalado y puesto a tierra por un electricista
calificado, en conformidad con el National Fuel Gas Code
ANSI Z223.1 - ultima edicion y con el National Electrical
Code ANSI/NFPA No. 70 - ultima edicion y requerimientos
de codigos locales. Instale solamente en conformidad con
las instrucciones de instalacibn provistas en el paquete de
literatura que viene con esta estufa.
Solicite de su distribuidor de recomendarle a un t_cnico califi-
cado y una agencia de reparaci6n autorizada. AsegOrese de
saber como desconectar el corriente a la estufa al cortacirui-
tos o la caja de fusibles, y el suministro de gas a la v_lvula de
cierre principal en caso de emergencia. Retire el caj6n para
acceder a la v_lvula.
• Servicio al usuario- No repare o remplace ninguna pieza
de su aparato a menos que se Io recomiende los manuales
especificamente. Culaquier typo de servicio debe ser hecho
por un t_cnico calificado. Esto reducir_ el riesgo de heridas
personales o de da_os al aparato.
Nunca modifique o altere la constitucion de una estufa
moviendo la patas niveladoras, ni el alambrado, ni las
fijaciones de anti-indinacion u otra parte del aparato.
El apoyarse, pisar o sentarse en la
puerta o en la gaveta de esta estufa puede ocasionar graves
heridas y tambien da_os al aparato. No permita que los ni_os
juegen o se suban sobre la estufa. El peso de un ni_o sobre
la puerta abierta puede hacer que _sta se incline, causando
graves quemaduras u otro tipo de heridas.
No use el horno para almacenamiento.
No almacene objetos de interes para los ni_os
en los armarios que estan sobre la cocina. El ni_o que trata de
subir sobre la estufa para alcanzarlos podria lastimarse.
Nunca utilice su aparato para calentara
o entibiar la pieza.
Almacenamiento sobre o dentro del aparato- Los materiales
inflamables no deberian ser almacenados ni en un horno,
ni sobre la unidad, ni en las gavetas (si equipada). Esto
incluye el papel, el pl_stico y la ropa como: libros de
cocina, recipientes de pl_stico o toallas, asi como liquidos
inflamables. No almacene explosivos como latas de aerosol
sobre o dentro del aparato. Los materiales inflamables
pueden explotar y ocasionar fuego o da_os a la propiedad.
26
IMPORTANTES INSTRUCCIONES DE SEGURIDAD
No deje a los nihos solos- Los nihos no deben set dejados
solos o sin atencion donde el aparato este fundonando.
No les permita sentarse o pararse sobre ninguna parte dei
aparato.
NO TOQUE A LA SUPERFICIEDE LOS QUEMADORES, AREAS
CERCA DE ESTOS QUEMADORES, ELEMENTOS CAUENTES
DEL HORNO O LA SUPERFICIEAL INTERIOR DEL HORNO.
La superficie de los quemadores y los elementos dei homo
pueden estar calientes a0n cuando est_n de color moreno.
Areas cerca de la superficie de los quemadores pueden
estar suficientemente calientes para causar quemaduras.
Durante y despu6s uso, no toque y no deje ropa o otro
material inflamable entrar en contacto con estos _reas antes
de dejaries enfriarse. Entre estos _reas son la plancha de
cocinar y la superficie en frente de la plancha de cocinar, las
aberturas de ventilaci6n del homo y la superficie cerca de
estas aberturas, la puerta dei homo y la ventana.
Use una vestimenta apropiada- No use ropa que es suelta u
holgada cuando utilice el aparato. No ponga la ropa u otros
materiales inflamables en contacto con las areas calientes.
No utilice agua o harina para apagar un fuego= Apague
el fuego con la tapa de una sarten o use soda caustica, un
quimico seco o un extinguidor en aerosol.
Cuando caliente substancias grasosas, tenga cuidado. Puede
ocasionar un fuego si es calentado pot mucho tiempo.
En caso de incendio o fugas de gas,
asegurese de cerrar la valvula de cierre principal.
• Utilice unicamente los soportes para recipientes que esten
secos= Los soportes que esten humedos o mojados pueden
ocasionar quemaduras a causa del vapor. No permita que
los soportes est6n en contacto con las superficies calientes.
No utilice una toalla o un papel para remplazar al soporte.
No caliente recipientes de comida que estan cerrados- La
presi6n al interior de estos puede hacerlos explotar y
ocasionar heridas.
Retire la puerta del horno de toda estufa inutilizada siesta
va set almacenada o destruida.
IMPORTANTE= No trate de utilizar el homo durante un torte
de electricidad. Si no hay electricidad, apaga su estufa. Si no
apaga el homo y que la electricidad es restablecida, el homo
puede seguir funcionando. La comida que deja sin cuidado
puede quemarse o deteriorarse.
Use un tama_o de caldera adecuada -
Gradue el tama_o de la llama de modo que no sobrepase el
borde del utensilio de cocina. El uso de utensilio de tama_o
menor que Io normal expondr_ directamente una parte de la
llama del quemador y puede causar a la ropa de encenderse.
El tama_o de utensilio apropiado a la llama mejorar_ tambi6n
la eficacia.
No use parrillas de horno superiores sobre
las depresiones de los quemadores sellados a gas - Si use una
parrilla de horno superior sobre un quemador a gas sellado,
va a ocurrir una combusti6n incompleta, y puede generar
niveles de mon6xido de carbono superiores a los est_ndares
permitidos. Esto puede ser perjudicial para la salud.
Los controles electricos pueden set
dahados con frias temperaturas. Cuando utilice su estufa pot
la primera vez, o si no ha sido utilizada pot mucho tiempo
asegurese que no haya sido expuestas a temperaturas mas
altas que 0°C/32°F pot mas de 3 horas antes de conectar su
estufa al suministro electrico.
INSTRUCCIONES IMPORTANTES PARA UTILIZAR
SU PLANCHA DE COClNAR
Aseg0rese de saber cual bot6n enciende cada unidad de
superficie. Use siempre la posici6n de ENCENDIDO (Lite) para
prender los quemadores. Aseg0rese de que el quemador
halla encendido. Entonces ajuste la llama de manera que no
sobrepase el borde del utensilio de cocina.
Utilice una sarten de tamaho apropiado. Este aparato est_
equipado con quemadores de diferentes tamahos. Elija
utensilios con las bases aplanadas y Io suficientemente
grandes para cubrir todo el area del quemador. Utilizar
utensilios m_s pequehos puede exponer parte del quemador
y ocasionar quemaduras de las prendas que Ileva puesta.
Los mangos de los utensilios deben set colocados hacia
el interior y no sobre otras unidades de superficie- Para
reducir el riesgo de quemaduras, el encendido de materiales
inflamables y los derrames ocasionados de casualidad. El
mango del utensilio debe set colocado hacia el interior y no ::
sobre otras unidades de superficie. _
Nunca deje los quemadores con alta temperatura sin
Los derrames ocasionan humo y derrames grasosos i:::::;
cuidado-
que pueden encenderse, o una sart6n que ha calentado por
mucho tiempo puede derretirse.
Delineadores protectores- No utilice pelicula de aluminio
a la base del homo u otra parte del aparato. $61o utilizela
para cubrir la comida cuando est6 coci6ndola. Cualquier otra
utilizaci6n puede ocasionar un incendio, una electrocuci6n o
un cortocircuito.
Utensilios de cocina envidriados- $61o algunos tipos de
utensilios de vidrio, de vidrio/cer_mica, de cer_mica pueden
resistir la temperatura del quemador de su plancha de
cocinar. Verifique las recomendaciones del fabricante sobre
el uso con las planchas de cocinar.
No use cubiertas decorativas de superficie de quemador.
Si un quemador se enciende accidentalmente, la cubierta
decorativa va a calentarse y posiblemente fundirse.
Se puede ocurrir quemaduras si toque alas cubiertas
calientes. Esto puede tambi6n da_ar la plancha de
cocinar o los quemadores porque las cubiertas pueden
causar sobrecalentamiento. El aire va a bloquear desde el
quemador y causar problemas de combusti6n.
27
IMPORTANTES INSTRUCCIONES DE SEGURIDAD
PARA PLANCHAS DE COCiNAR SOLAMENTE
• No limpie o utilice una plancha de cocinar clue est=i rota.
Limpie el vidrio de la plancha de cocinar con cuidado No
coloque recipientes de cocina calientes sobre el vidrio de la
plancha de cocinar=Evite de raspar el vidrio de la plancha de
cocinar con objetos muy filados.
INSTRUCCIONES IMPORTANTES PARA UTILIZAR
SU HORNO.
Tenga cuidado cuando abra la puerta del homo. Pareseal
lado de la estufa cuando abra la puerta de un homo caliente.
Permita que el humo y el vapor se escapen antes de retirar o de
colocar comida en el homo/gaveta de entibiar.
Mantenga el conducto de ventilation del homo sin
obstruction.
• Colocaci6n de las rejillas del homo.
• No utilice la cubeta parrillera sin su accesorio
• No cubra el accesorio de la parrilla con pelicula de aluminio.
• No toque la bombilla de luz caliente con una tela mojada
IMPORTANTES INSTRUCCIONES PARA LIMPIAR
SU COCINA.
Limpie la estufa regularmente para rnantener todas
las pares sin grasa clue puede encenderse y causar un
incendio. La cubierta del escape de ventilaci6n y los filtros de
grasa deben estar limpios. No permita que la grasa se acumule
en la cubierta o en el filtro. Los dep6sitos grasosos pueden
encenderse y causar un incendio. Cuando caliente comida bajo
la cubierta, encienda el ventilador. Consulte las instrucciones del
fabricante para la limpieza.
Limpiadores de estufa y aerosoles
HORNO CON AUTO-UMPIEZA
Limpie en el ciclo de auto=limpieza unicamente las partes
que est=in en la lista del "Manual del usuario". Antes de
auto-limpiar el homo, retire la cubeta parrilla y cualquier otro
utensilio o comida del homo.
• No utilice limpiadores de homo.
• No limpie las empaquetadoras del homo.
• Retire las rejillas del homo.
GUARDE ESTAS INSTRUCCIONES
28
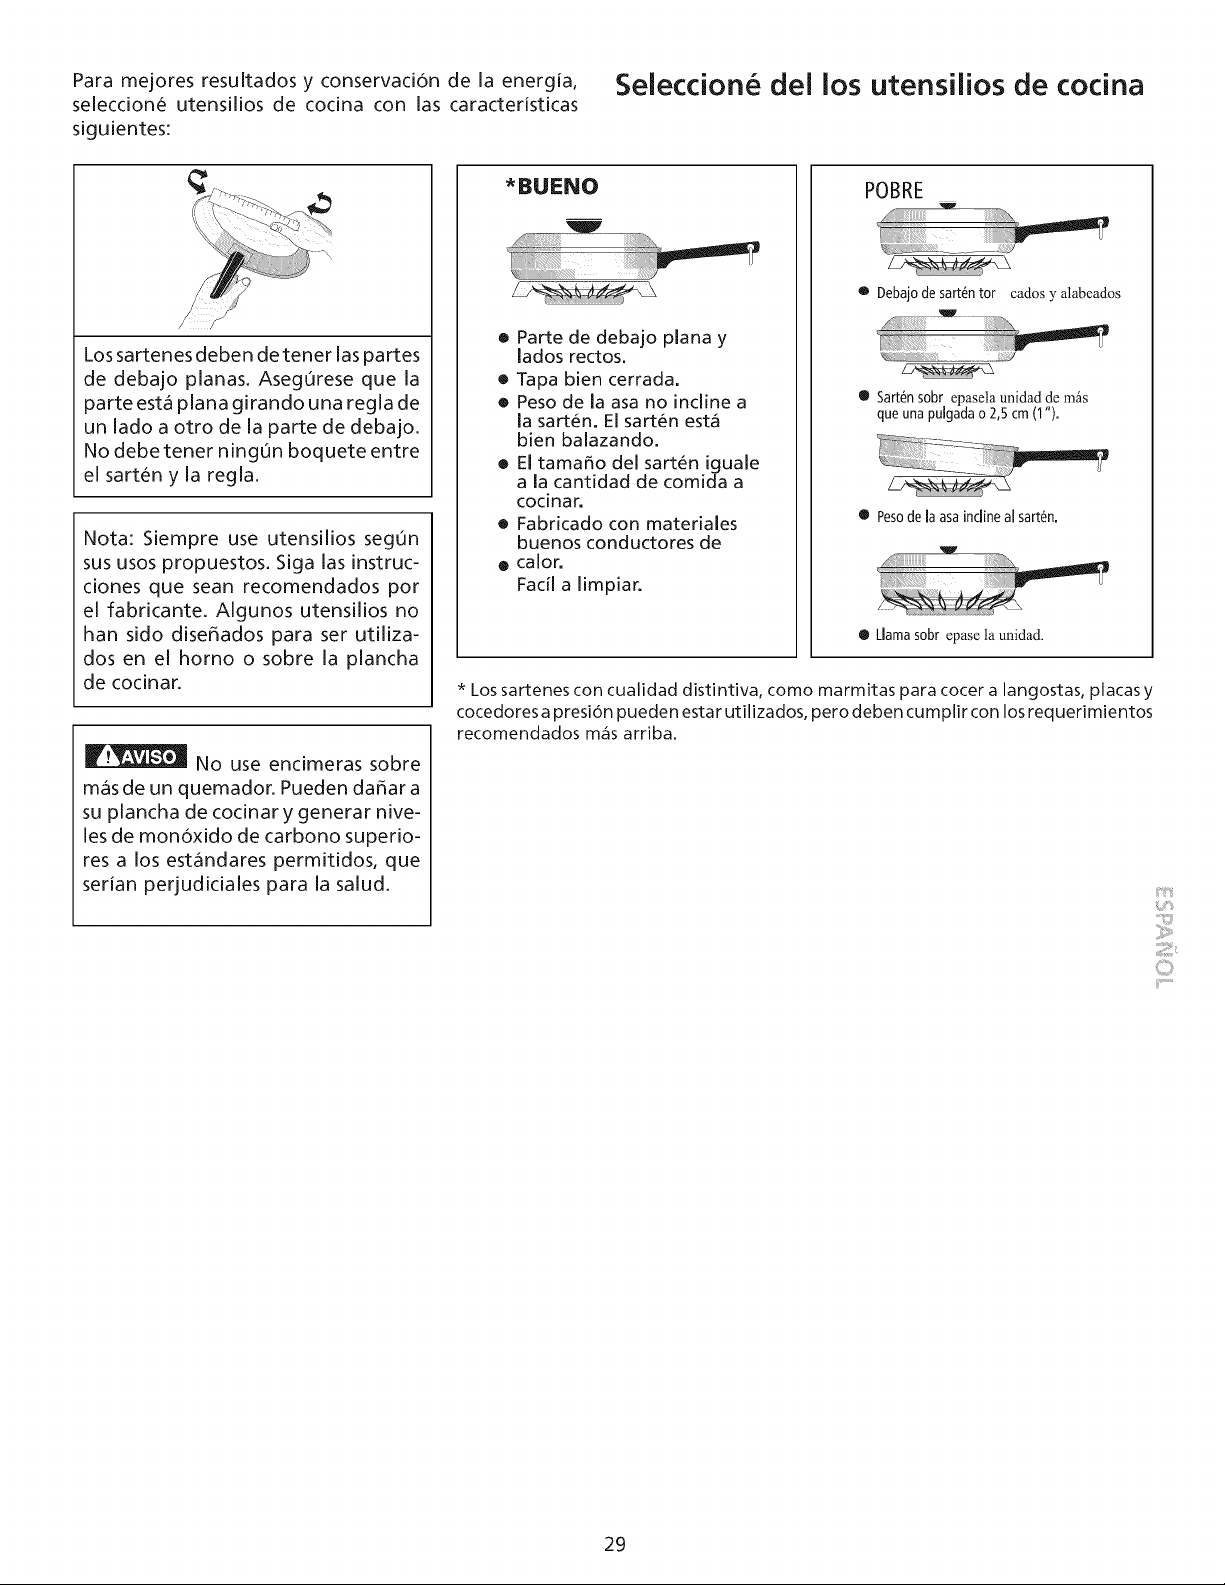
Paramejoresresultadosy conservad6nde la energia,
seleccioneutensiliosde codna con lascaracteristicas
siguientes:
Selecdone dei los utensilios de codna
Los sartenes deben de tener las partes
de debajo planas. Asegurese que la
parte esta plana girando una regla de
un lado a otro de la parte de debajo.
No debetener ning0n boquete entre
el sarten y la regla.
Nota: Siempre use utensilios seg0n
sus usos propuestos. Siga las instruc-
ciones que sean recomendados por
el fabricante. Algunos utensilios no
han sido dise6ados para ser utiliza-
dos en el homo o sobre la plancha
de cocinar.
No use endmeras sobre
mas de un quemador. Pueden da_ar a
su plancha de cocinar y generar nive-
les de mondxido de carbono superio-
res a los estandares permitidos, que
serian perjudiciales para la salud.
*BUENO
W
• Parte de debajo plana y
lados rectos.
• Tapa bien cerrada.
• Peso de la asa no incline a
la sart_n. El sart_n est_
bien balazando.
• El tama_o del sart_n iguale
a la cantidad de comida a
cocinar.
• Fabricado con materiales
buenos conductores de
e calor.
Facil a limpian
POBRE
e Debajode sart_ntot cadosy alabeados
® Sart_nsobr epasela unidad de mils
queuna pulgadao 2,5 cm (I ").
• Pesode la asainclineal sart_n.
® Llama sobr epase la unidad.
* Los sartenes con cualidad distintiva, como marmitas para cocer a langostas, placas y
cocedores a presidn pueden estar utilizados, pero deben cumplir con los requerimientos
recomendados m_s arriba.
C::i¸
29

CaracterJsticas
de la estufa
Termostato de
homo auxiliar
Controles del homo electr6nico
Interruptor de luz
fluorescent
Interruptor de luz
de homo principal
-- Pieza adjunta
Puerta de
auxiliar
Gaveta --
Elemento
asado
Luz del homo
Homo
autolimpiable
Rejillas
homo
ajustables
de puerta
de frente
de puerta del
homo
Rejillasde
hierro
Quemador para
cocer a fuego
lento
Quemador
potente
Cubierta
es del
quemador de
superficie
Cubierta en vidrio
cer_imico
Quemador
est_qndar
Quemador
para cocer
a fuego lento
)uemador
est_qndar
30
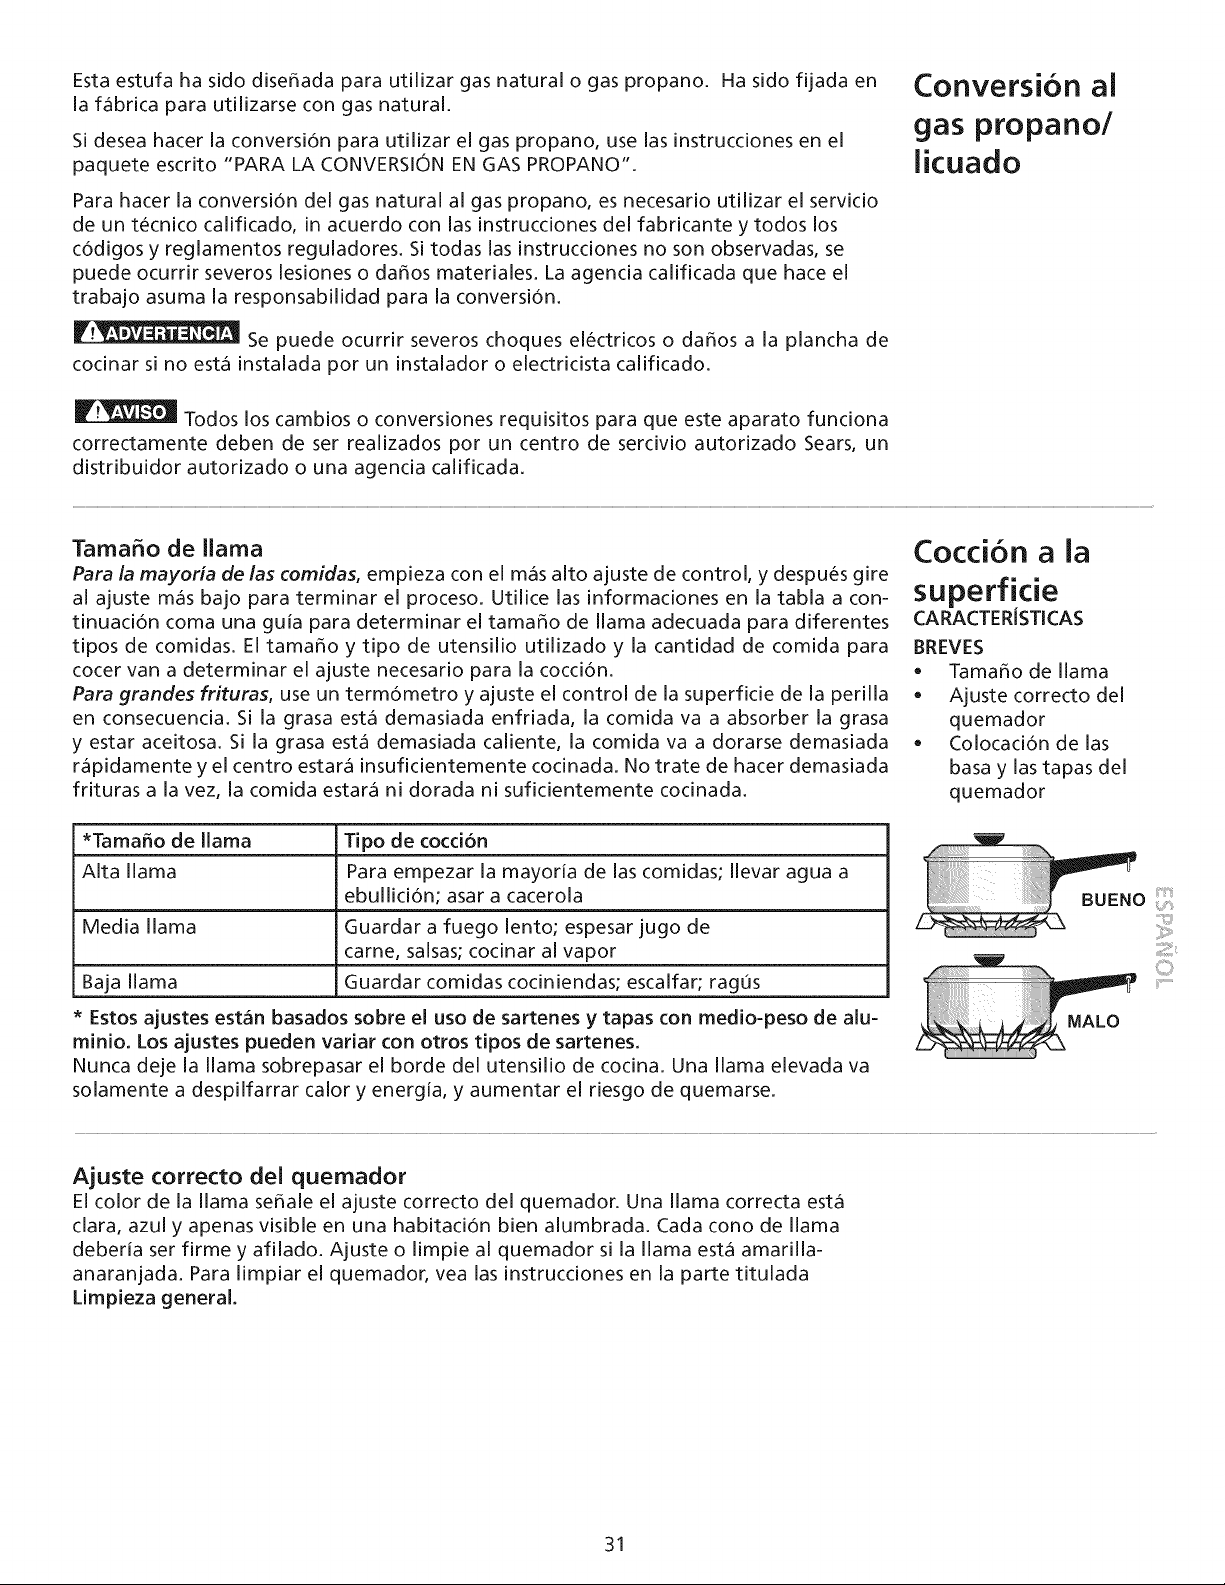
Estaestufahasidodisefiadaparautilizargasnaturalo gaspropano.Hasidofijada en
la fabricaparautilizarsecongasnatural.
Sideseahacerlaconversionparautilizar el gaspropano,uselasinstruccionesenel
paqueteescrito"PARALACONVERSIONENGASPROPANO".
Parahacerla conversiondelgasnaturalal gaspropano,esnecesarioutilizarel servicio
de untecnicocalificado,in acuerdoconlasinstruccionesdelfabricantey todoslos
cOdigosy reglamentosreguladores.Sitodaslasinstruccionesno sonobservadas,se
puedeocurrirseveroslesioneso dafiosmateriales.Laagenciacalificadaquehaceel
trabajoasumala responsabilidadparala conversion.
Sepuedeocurrirseveroschoqueselectricoso dafiosa la planchade
cocinarsinoestainstaladapor un instaladoro electricistacalificado.
Todosloscambioso conversionesrequisitosparaqueesteaparatofunciona
correctamentedebende serrealizadospor un centrode sercivioautorizadoSears,un
distribuidorautorizadoo unaagenciacalificada.
Conversi6n al
gas propanol
licuado
Tamafio de llama
Para la mayoria de las comidas, empieza con el mas alto ajuste de control, y despues gire
al ajuste mas bajo para terminar el proceso. Utilice las informaciones en la tabla a con-
tinuaciOn coma una guia para determinar el tamafio de llama adecuada para diferentes
tipos de comidas. El tamafio y tipo de utensilio utilizado y la cantidad de comida para
cocer van a determinar el ajuste necesario para la cocciOn.
Para grandes frituras, use un termOmetro y ajuste el control de la superficie de la perilla
en consecuencia. Si la grasa esta demasiada enfriada, la comida va a absorber la grasa
y estar aceitosa. Si la grasa esta demasiada caliente, la comida va a dorarse demasiada
rapidamente y el centro estara insuficientemente cocinada. No trate de hacer demasiada
frituras a la vez, la comida estara ni dorada ni suficientemente cocinada.
Cocci6n a la
superf!cie
CARACTERISTICAS
BREVES
• Tamafio de llama
• Ajuste correcto del
quemador
• ColocaciOn de las
basa y las tapas del
quemador
*Tamafio de llama Tipo de coccion
Alta llama Para empezar la mayoria de las comidas; llevar agua a
ebulliciOn; asar a cacerola
Media llama Guardar a fuego lento; espesar jugo de
came, salsas; cocinar al vapor
Baja llama Guardar comidas cociniendas; escalfar; ragus
* Estos ajustes est_n basados sobre el uso de sartenes y tapas con medio-peso de alu-
minio. Los ajustes pueden variar con otros tipos de sartenes,
Nunca deje la llama sobrepasar el borde del utensilio de cocina. Una llama elevada va
solamente a despilfarrar calory energia, y aumentar el riesgo de quemarse.
Ajuste correcto del quemador
El color de la llama sefiale el ajuste correcto del quemador. Una llama correcta esta
clara, azul y apenas visible en una habitaciOn bien alumbrada. Cada cono de llama
deberia set firme y afilado. Aiuste o limpie al quemador si la llama esta amarilla-
anaranjada. Para limpiar el quemador, vea las instrucciones en la parte titulada
Limpieza general,
31
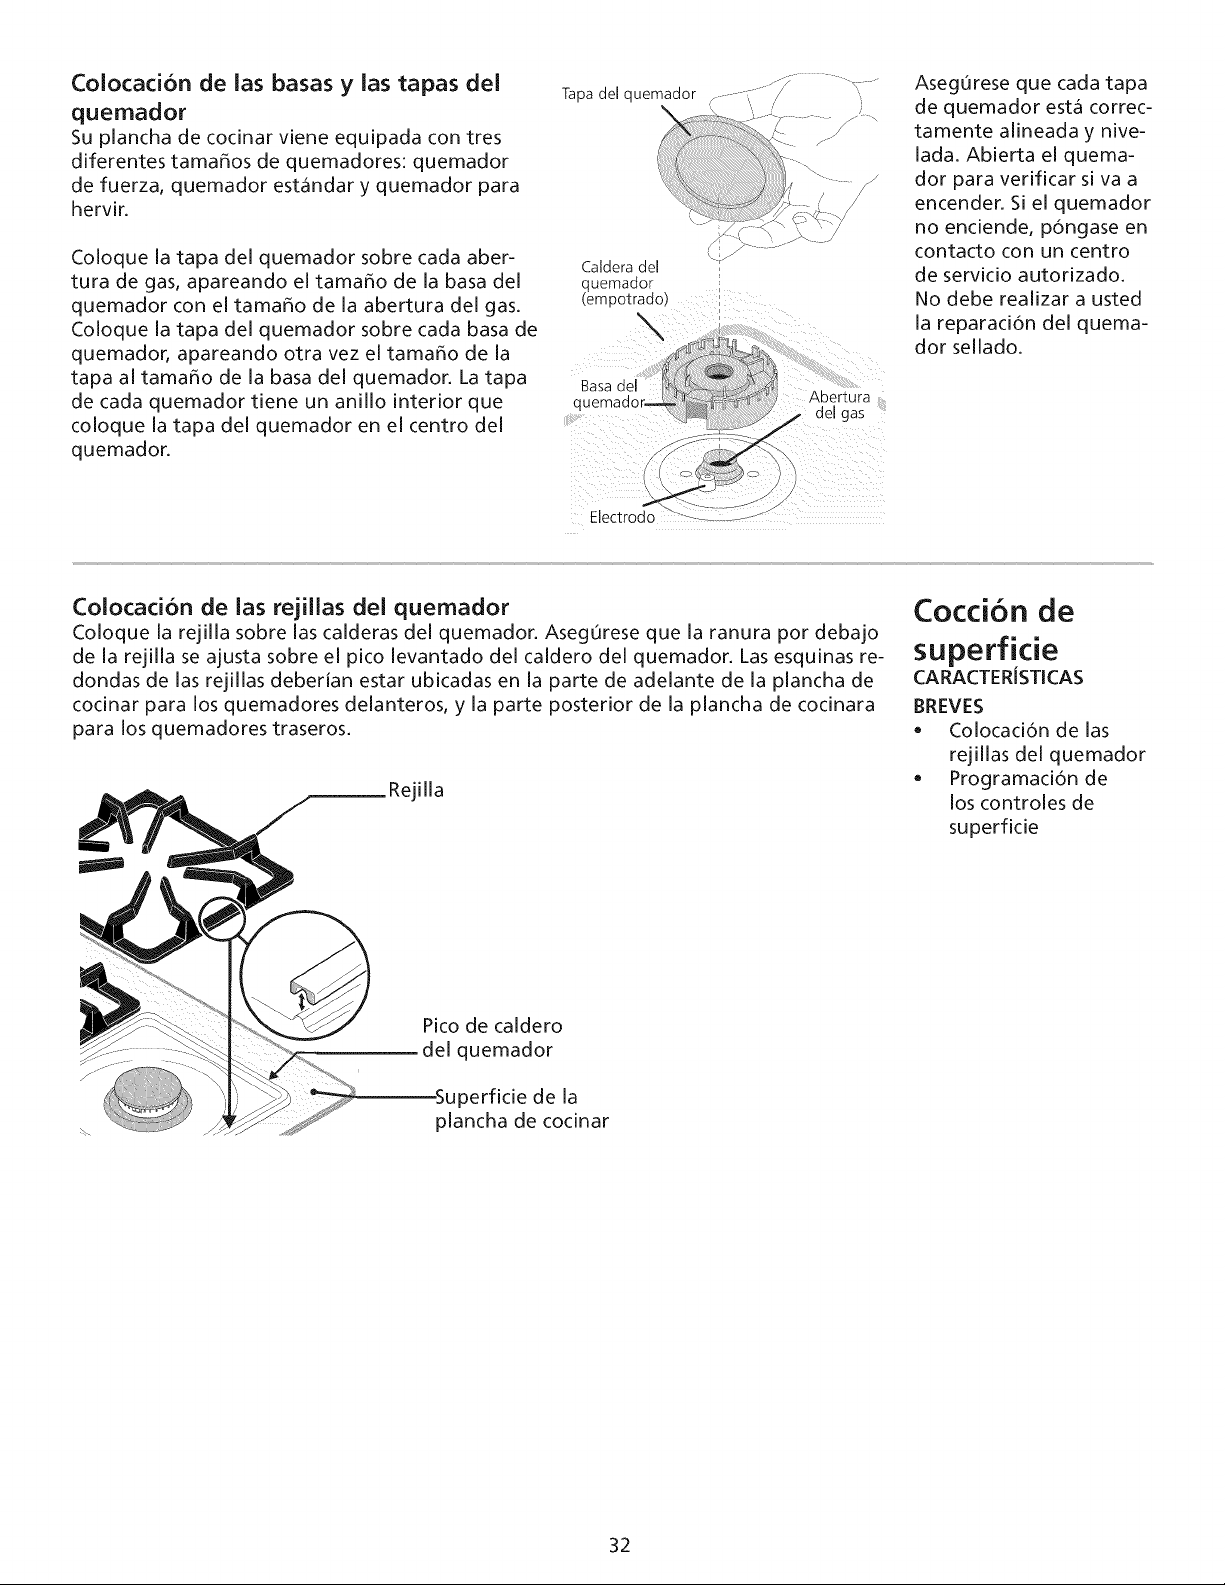
Coiocad6n de ias basas y ias tapas del
quemador
Su plancha de cocinar viene equipada con tres
diferentes tama_os de quemadores: quemador
de fuerza, quemador est_indar y quemador para
hervir.
Coloque la tapa del quemador sobre cada aber-
tura de gas, apareando el tama_o de la basa del
quemador con el tama_o de la abertura del gas.
Coloque la tapa del quemador sobre cada basa de
quemador, apareando otra vez el tama_o de la
tapa al tama_o de la basa del quemador. La tapa
de cada quemador tiene un anillo interior que
coloque la tapa del quemador en el centro del
quemador.
Tapa del quemador F ( z-.,/ -\,
/ /
Caldera del
_luemador
emuotrado}
\
Basa del _
quemador Abertura.,
_..j / ael gas
Electrodo .................. _
AsegOrese que cada tapa
de quemador esta correc-
tamente alineada y nive-
lada. Abierta el quema-
dor para verificar si va a
encender. Si el quemador
no enciende, p6ngase en
contacto con un centro
de servicio autorizado.
No debe realizar a usted
la reparaci6n del quema-
dot sellado.
Colocad6n de ias rejiilas del quemador
Coloque la rejilla sobre las calderas del quemador. Asegurese que la ranura por debajo
de la rejilla se ajusta sobre el pico levantado del caldero del quemador. Las esquinas re-
dondas de las rejillas deberian estar ubicadas en la parte de adelante de la plancha de
cocinar para los quemadores delanteros, y la parte posterior de la plancha de cocinara
para los quemadores traseros.
Rejilla
Pico de caldero
del quemador
perficie de la
plancha de cocinar
Cocci6n de
superf!cie
CARACTERISTICAS
BREVES
• Colocad6n de las
rejillas del quemador
Programaci6n de
los controles de
superficie
32
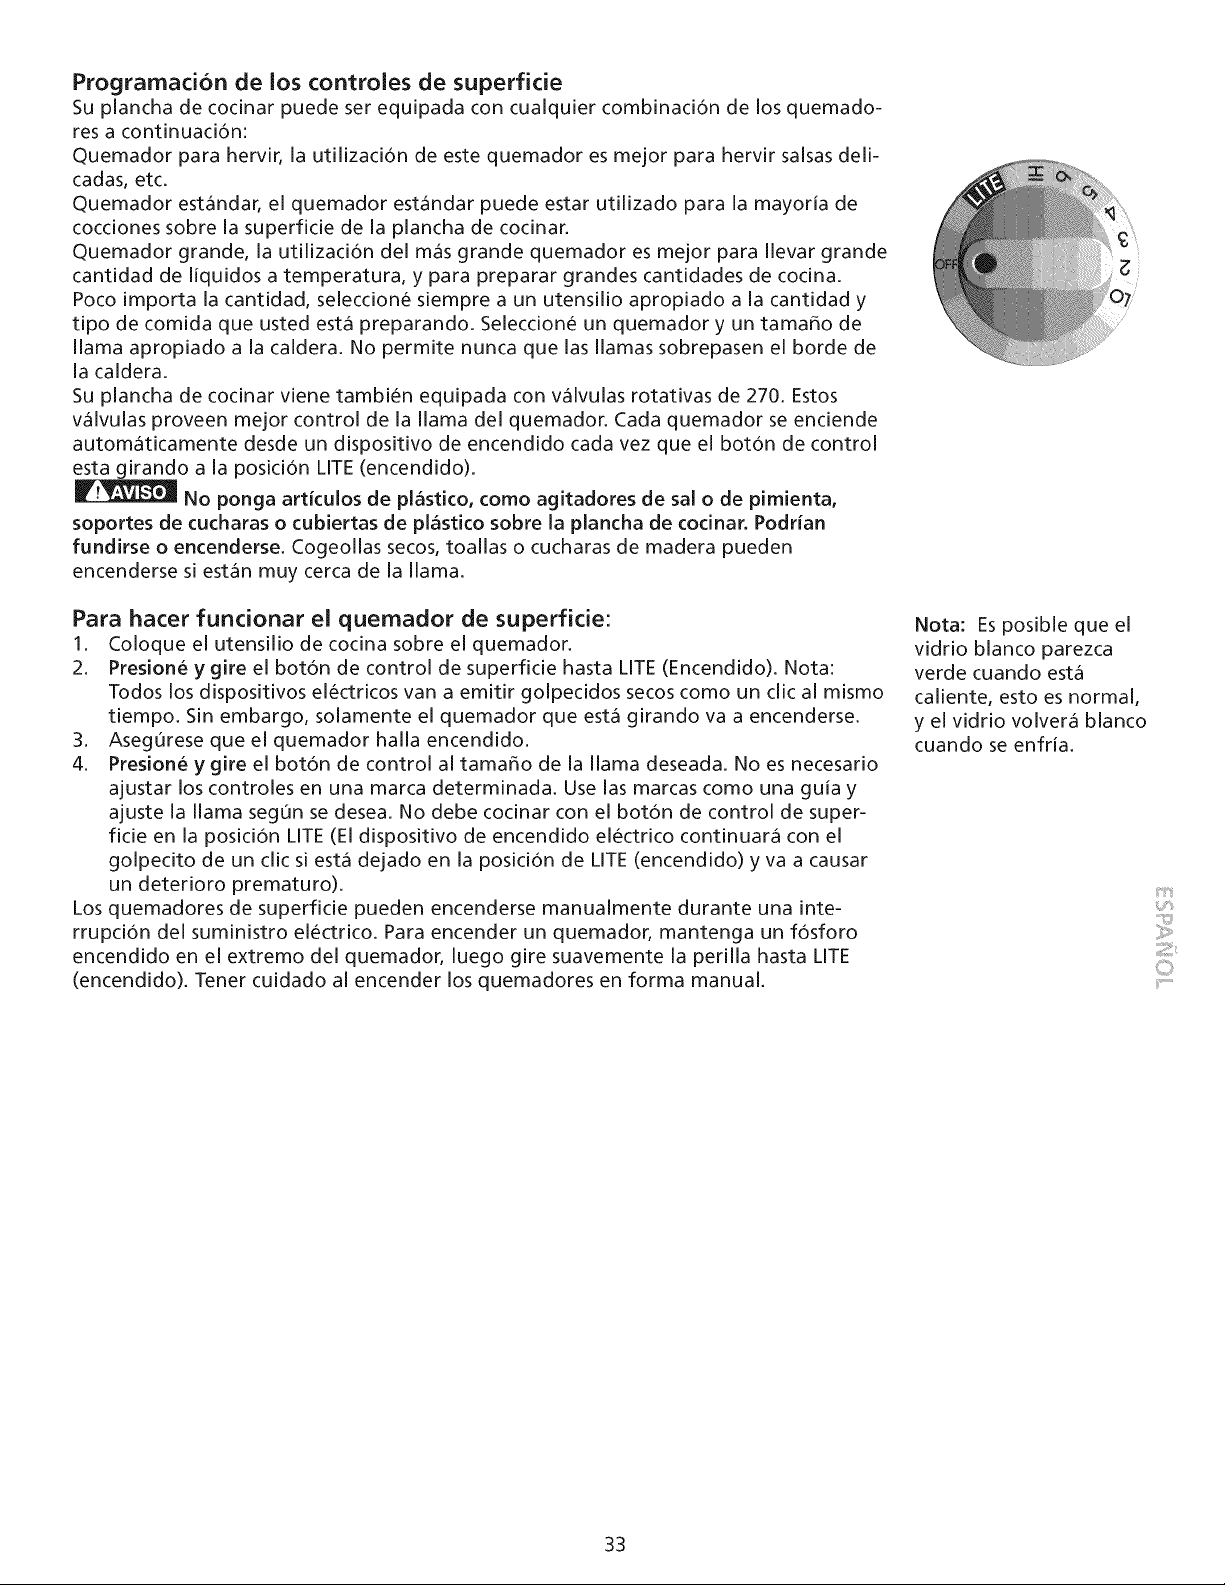
Programacion de los controles de superficie
Su plancha de cocinar puede set equipada con cualquier combinaci6n de los quemado-
res a continuaci6n:
Quemador para hervir, la utilizaci6n de este quemador es mejor para hervir salsas deli-
cadas, etc.
Quemador estandar, el quemador estandar puede estar utlizado para la mayoria de
cocciones sobre la superficie de la plancha de cocinar.
Quemador grande, la utilizaci6n del mas grande quemador es mejor para llevar grande
cantidad de liquidos a temperatura, y para preparar grandes cantidades de cocina.
Poco importa la cantidad, seleccione siempre a un utensilio apropiado a la cantidad y
tipo de comida que usted esta preparando. Seleccione un quemador y un tamaEo de
llama apropiado a la caldera. No permite nunca que las llamas sobrepasen el borde de
la caldera.
Su plancha de cocinar viene tambien equipada con valvulas rotativas de 270. Estos
valvulas proveen mejor control de la llama del quemador. Cada quemador se enciende
automaticamente desde un dispositivo de encendido cada vez que el bot6n de control
esta girando a la posici6n LITE (encendido).
No ponga articulos de plastico, como agitadores de sal o de pimienta,
soportes de cucharas o cubiertas de plastico sobre la plancha de cocinar. Podrian
fundirse o encenderse. Cogeollas secos, toallas o cucharas de madera pueden
encenderse si estan muy cerca de la llama.
Para hacer funcionar el quemador de superficie:
1. Coloque el utensilio de cocina sobre el quemador.
2. Presione y gire el bot6n de control de superficie hasta LITE (Encendido). Nota:
Todos los dispositivos electricos van a emitir golpecidos secos como un clic al mismo
tiempo. Sin embargo, solamente el quemador que esta girando va a encenderse.
3. Asegurese que el quemador halla encendido.
4. Presione ygire el bot6n de control al tamaEo de la llama deseada. No es necesario
ajustar los controles en una marca determinada. Use las marcas como una guia y
ajuste la llama segun se desea. No debe cocinar con el bot6n de control de super-
ficie en la posici6n LITE (El dispositivo de encendido electrico continuara con el
golpecito de un clic si esta dejado en la posici6n de LITE (encendido) y va a causar
un deterioro prematuro).
Los quemadores de superficie pueden encenderse manualmente durante una inte-
rrupci6n del suministro electrico. Para encender un quemador, mantenga un f6sforo
encendido en el extremo del quemador, luego gire suavemente la perilla hasta LITE
(encendido). Tener cuidado al encender los quemadores en forma manual.
Nota: Es posible que el
vidrio blanco parezca
verde cuando esta
caliente, esto es normal,
y el vidrio volvera blanco
cuando se enfria.
!i
i
©
33
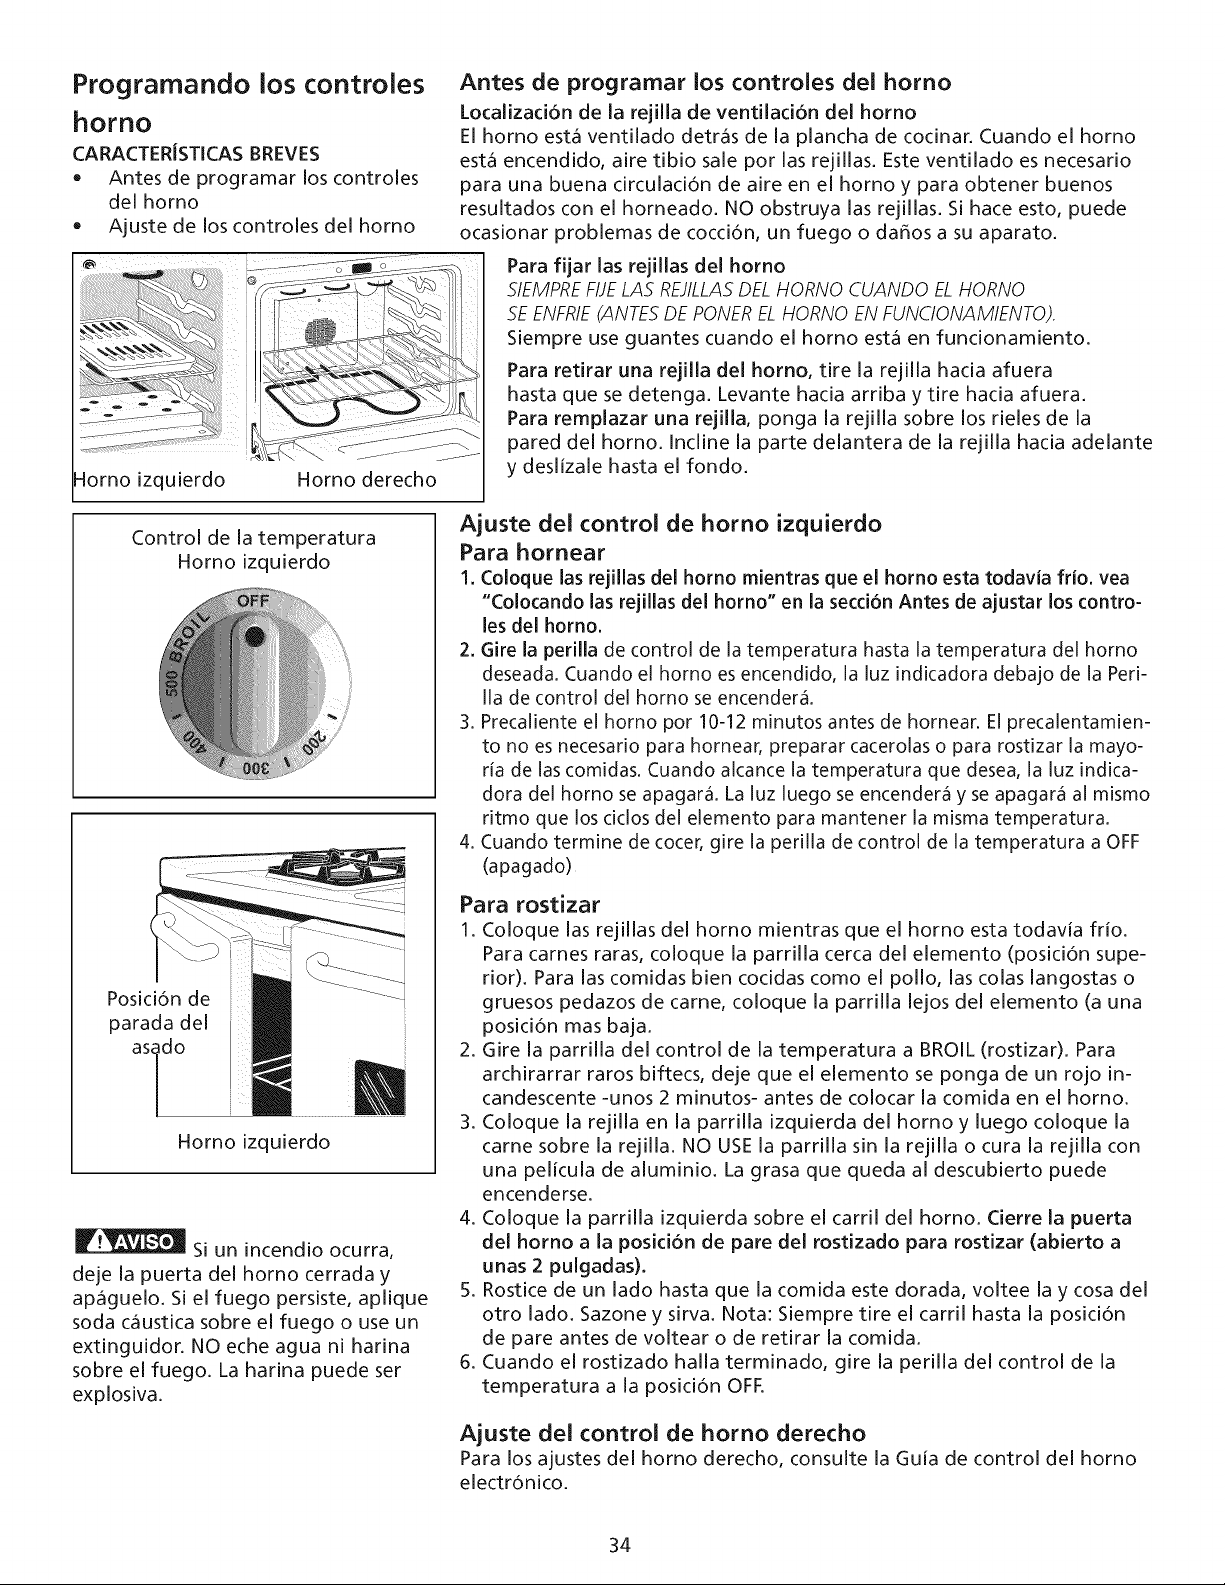
Programando los controles
horno
CARACTERJSTICAS BREVES
• Antes de programar los controles
del homo
• Ajuste de Ioscontroles del homo
Horno izquierdo
Horno derecho
Control de la temperatura
Horno izquierdo
Posici6n de
parada del
as]do
Horno izquierdo
Si un incendio ocurra,
deje la puerta del horno cerrada y
apaguelo. Si el fuego persiste, aplique
soda caustica sobre el fuego o use un
extinguidor. NO eche agua ni harina
sobre el fuego. La harina puede ser
explosiva.
Antes de programar los controles del homo
Localizad6n de la rejilla de ventilaciOn del homo
El homo esta ventilado detras de la plancha de cocinar. Cuando el homo
esta encendido, aire tibio sale pot las rejillas. Este ventilado es necesario
para una buena circulaci6n de aire en el homo y para obtener buenos
resultados con el homeado. NO obstruya las rejillas. Si hace esto, puede
ocasionar problemas de cocci6n, un fuego o da_os a su aparato.
Para fijar las rejillas del homo
SIEMPREFIJELAS REJILLASDEL HORNO CUANDO ELHORNO
SEENFRIE(ANTESDE PONERELHORNO EN FUNCIONAMIENTO).
Siempre use guantes cuando el homo est_flen funcionamiento.
Para retirar una rejilla del homo, tire la rejilla hacia afuera
hasta que se detenga. Levante hacia arriba y tire hacia afuera.
Para remplazar una rejilla, ponga la rejilla sobre los rieles de la
pared del horno. Incline la parte delantera de la rejilla hacia adelante
y deslizale hasta el fondo.
Ajuste dei control de homo izquierdo
Para hornear
1. Coloque las rejillas del horno mientras que el homo esta todavia frio. vea
"Colocando las rejillas del homo" en la secd6n Antes de ajustar los contro-
les del horno.
2. Gire la perilla de control de la temperatura hasta la temperatura del homo
deseada. Cuando el homo es encendido, la luz indicadora debajo de la Peri-
Ila de control del homo se encender_.
3. Precaliente el homo por 10-12 minutos antes de hornear. El precalentamien-
to no es necesario para hornear, preparar cacerolas o para rostizar la mayo-
ria de las comidas. Cuando alcance la temperatura que desea, la luz indica-
dora del homo se apagar_. La luz luego se encender_ y se apagar_ al mismo
ritmo que los ciclos del elemento para mantener la misma temperatura.
4. Cuando termine de cocer, gire la perilla de control de la temperatura a OFF
(apagado)
Para rostizar
1. Coloque las rejillas del homo mientras que el homo esta todavia frio.
Para carnes raras, coloque la parrilla cerca del elemento (posici6n supe-
rior). Para las comidas bien cocidas como el polio, las colas langostas o
gruesos pedazos de came, coloque la parrilla lejos del elemento (a una
posici6n mas baja.
2. Gire la parrilla del control de la temperatura a BROIL (rostizar). Para
archirarrar taros biftecs, deje que el elemento se ponga de un rojo in-
candescente -unos 2 minutos- antes de colocar la comida en el homo.
3. Coloque la rejilla en la parrilla izquierda del homo y luego coloque la
came sobre la rejilla. NO USE la parrilla sin la rejilla o cura la rejilla con
una pelicula de aluminio. La grasa que queda al descubierto puede
encenderse.
4. Coloque la parrilla izquierda sobre el carril del homo. Cierre la puerta
del homo a la posicion de pare del rostizado para rostizar (abierto a
unas 2 pulgadas).
5. Rostice de un lado hasta que la comida este dorada, voltee lay cosa del
otto lado. Sazone y sirva. Nota: Siempre tire el carril hasta la posici6n
de pare antes de voltear o de retirar la comida.
6. Cuando el rostizado halla terminado, gire la perilla del control de la
temperatura a la posici6n OFE
Ajuste del control de homo derecho
Para los ajustes del homo derecho, consulte la Guia de control del homo
electr6nico.
34
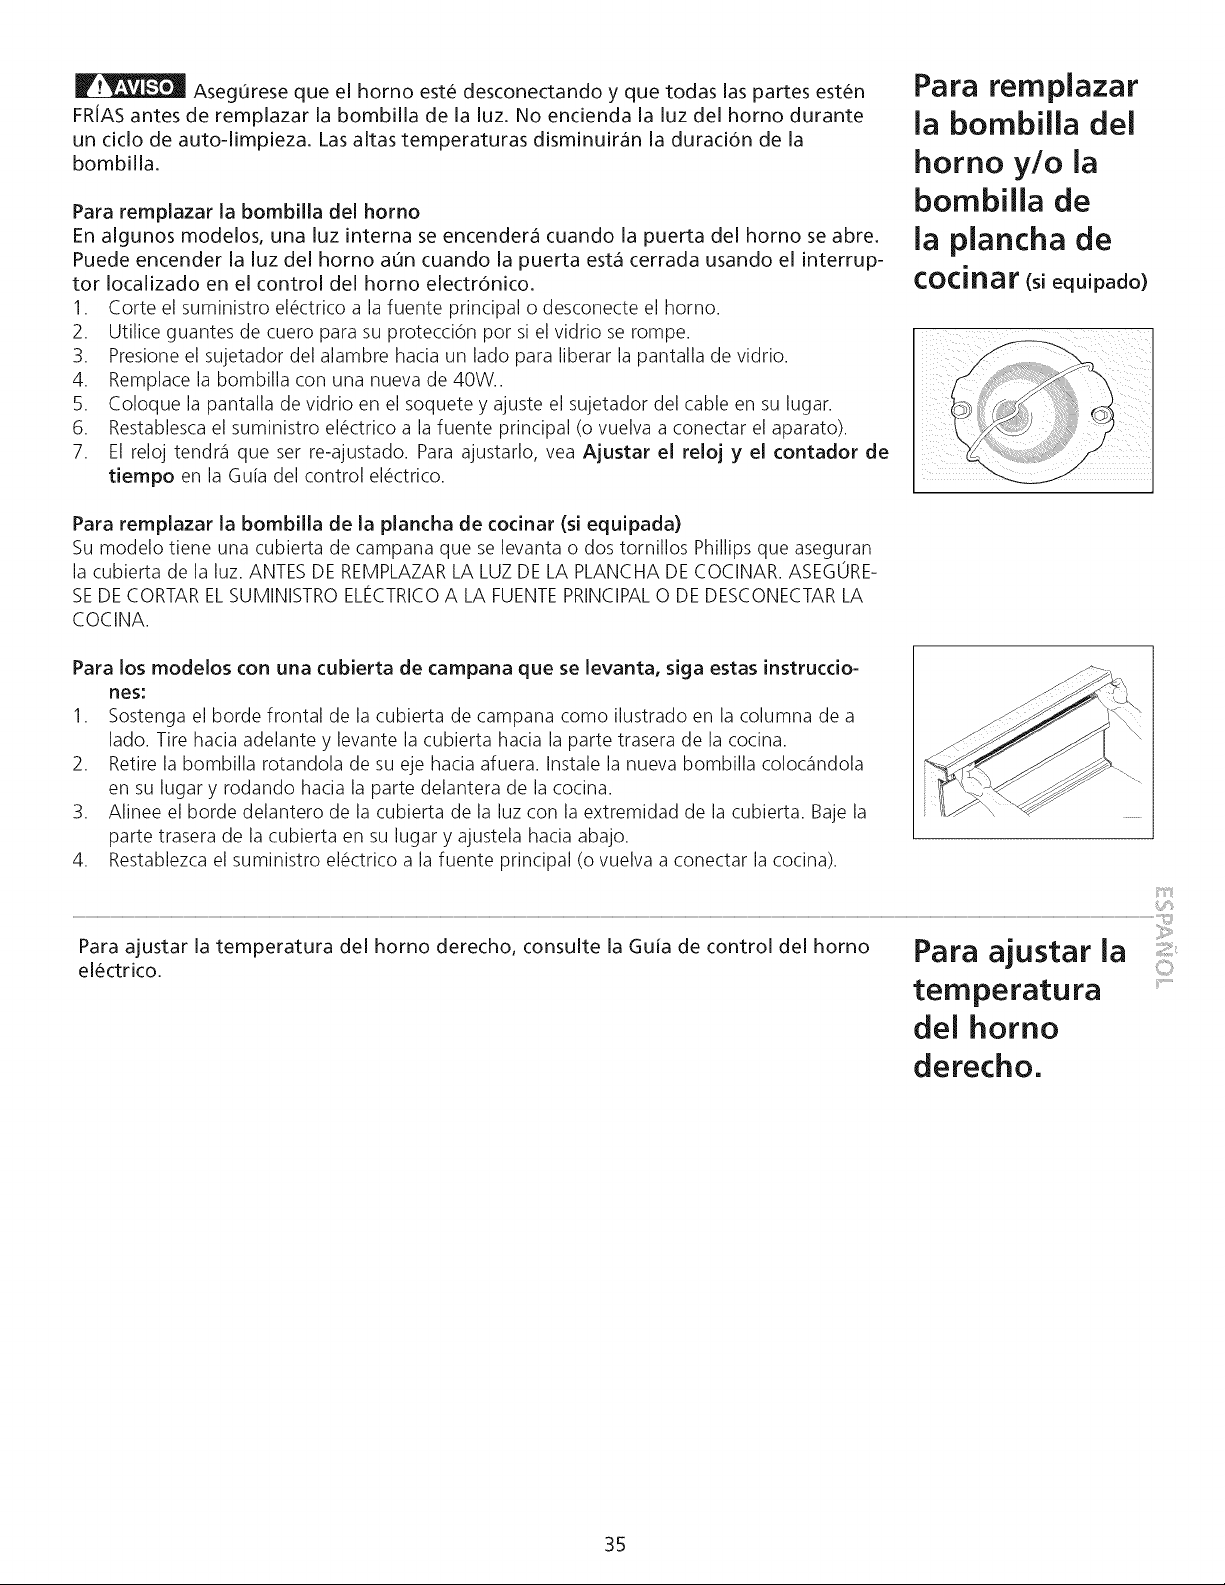
AsegOresequeel homoestedesconectandoy quetodaslaspartesesten
FRiASantesderemplazarlabombillade la luz.Noenciendala luzdel homodurante
un ciclode auto-limpieza.Lasaltastemperaturasdisminuir_inla duraci6nde la
bombilla.
Pararemplazarla bombilladel homo
Enalgunosmodelos,unaluz internaseencender_icuandola puertadelhomoseabre.
Puedeencenderla luz delhomoauncuandola puertaest.1cerradausandoel interrup-
tor localizadoenel controldel homoelectrbnico.
1. Corteelsuministroel_ctricoa lafuenteprincipalo desconecteelhomo.
2. Utiliceguantesdecueroparasuprotecci6nporsielvidrioserompe.
3. Presioneelsujetadordelalambrehaciaunladoparaliberarlapantalladevidrio.
4. Remplacelabombillaconunanuevade40W..
5. Coloquelapantalladevidrioenelsoqueteyajusteelsujetadordelcableensulugar.
6. Restablescaelsuministroel_ctricoa lafuenteprincipal(ovuelvaaconectarelaparato).
7. Elrelojtendr_iqueserre-ajustado.Paraajustarlo,veaAjustarel relojy el contadorde
tiempoenlaGuiadelcontrolel_ctrico.
Pararemplazarla bombillade la planchadecodnar(siequipada)
Sumodelotieneunacubiertadecampanaqueselevantao dostornillosPhillipsqueaseguran
lacubiertadelaluz.ANTESDEREMPLAZARLALUZDELAPLANCHADECOCINAR.ASEGORE-
SEDECORTARELSUMINISTROELECTRICOA LAFUENTEPRINCIPAL0 DEDESCONECTARLA
COCINA.
Paralosmodelosconunacubiertade campanaqueselevanta,sigaestasinstrucdo-
nes:
1. Sostengaelbordefrontaldelacubiertadecampanacomoilustradoenlacolumnadea
lado.Tirehaciaadelanteylevantelacubiertahacialapartetraseradelacocina.
2. Retirelabombillarotandoladesuejehaciaafuera.Instalelanuevabombillacoloc_qndola
ensulugary rodandohacialapartedelanteradelacocina.
3. Alineeelhordedelanterodelacubiertadelaluzconlaextremidaddelacubierta.Bajela
partetraseradelacubiertaensulugaryajustelahaciaabajo.
4. Restablezcaelsuministroel#ctricoalafuenteprincipal(ovuelvaaconectarlacocina).
Paraajustarlatemperaturadel hornoderecho,consultela Guiade controldelhorno
electrico.
Para remplazar
la bombilla del
horno y/o la
bombilla de
la plancha de
cocinar equipado)
Para ajustar la
temperatura
del homo
derecho.
C::i¸
35
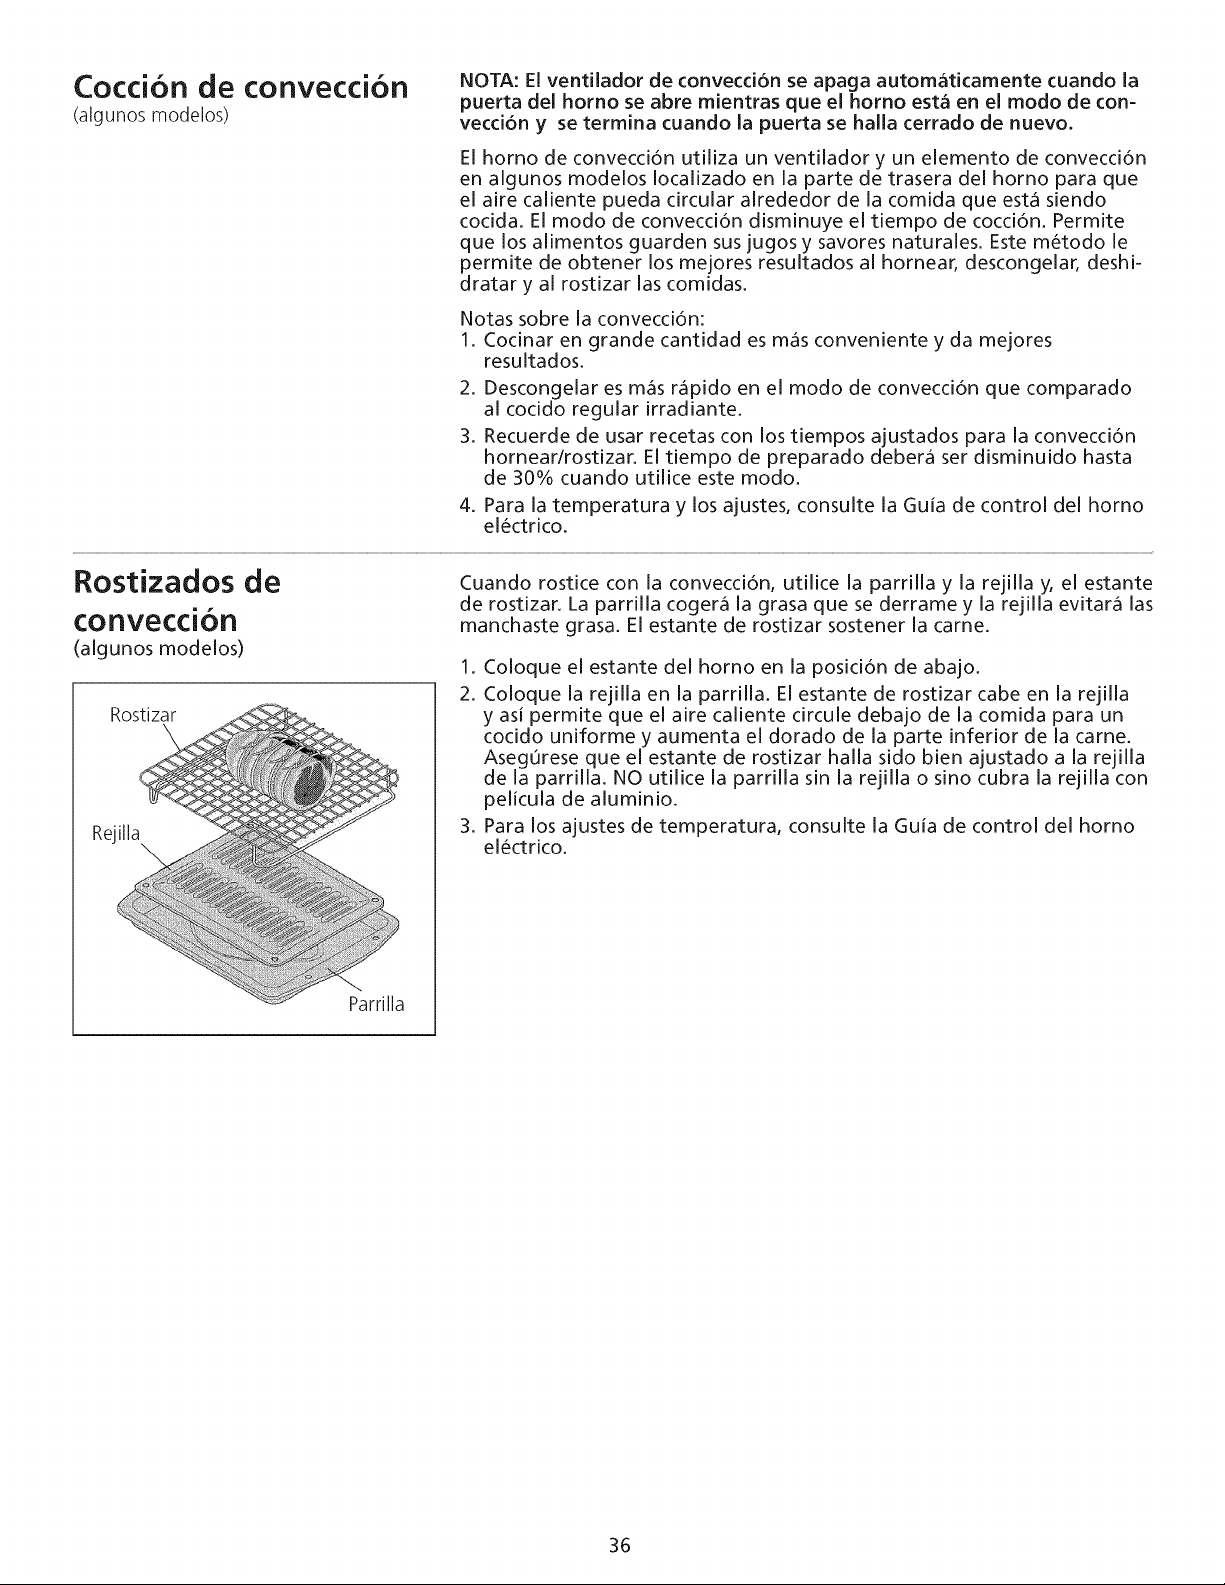
Cocci6n de convecci6n
(algunos modelos)
NOTA: El ventilador de conveccion se apaga automaticamente cuando la
puerta del horno se abre mientras que el homo esta en el modo de con-
veccion y se termina cuando la puerta se halla cerrado de nuevo.
El horno de convecci6n utiliza un ventilador y un elemento de convecci6n
en algunos modelos localizado en la parte de trasera del horno para que
el aire caliente pueda circular alrededor de la comida que est,1 siendo
cocida. El modo de convecci6n disminuye el tiempo de cocci6n. Permite
que los alimentos guarden sus jugos y savores naturales. Este metodo le
permite de obtener los mejores resultados al hornear, descongelar, deshi-
dratar y al rostizar las comidas.
Notas sobre la convecci6n:
1. Cocinar en grande cantidad es m_is conveniente y da mejores
resultados.
2. Descongelar es m_is r_ipido en el modo de convecci6n que comparado
al cocido regular irradiante.
3. Recuerde de usar recetas con los tiempos ajustados para la convecci6n
hornearlrostizar. El tiempo de preparado deber_i ser disminuido hasta
de 30% cuando utilice este modo.
4_
Para la temperatura y los ajustes, consulte la Guia de control del homo
electrico.
Rostizados de
conveccion
(algunos modelos)
Rostizar
Rejilla
Parrilla
Cuando rostice con la convecci6n, utilice la parrilla y la rejilla y, el estante
de rostizar. La parrilla coger_i la grasa que se derrame y la rejilla evitar_i las
manchaste grasa. El estante de rostizar sostener la carne.
1. Coloque el estante del homo en la posici6n de abajo.
2. Coloque la rejilla en la parrilla. El estante de rostizar cabe en la rejilla
y asi permite que el aire caliente circule debajo de la comida para un
cocido uniforme y aumenta el dorado de la parte inferior de la carne.
Aseg0rese que el estante de rostizar halla sido bien ajustado a la rejilla
de la parrilla. NO utilice la parrilla sin la rejilla o sino cubra la rejilla con
pelicula de aluminio.
3. Para los ajustes de temperatura, consulte la Guia de control del homo
electrico.
36
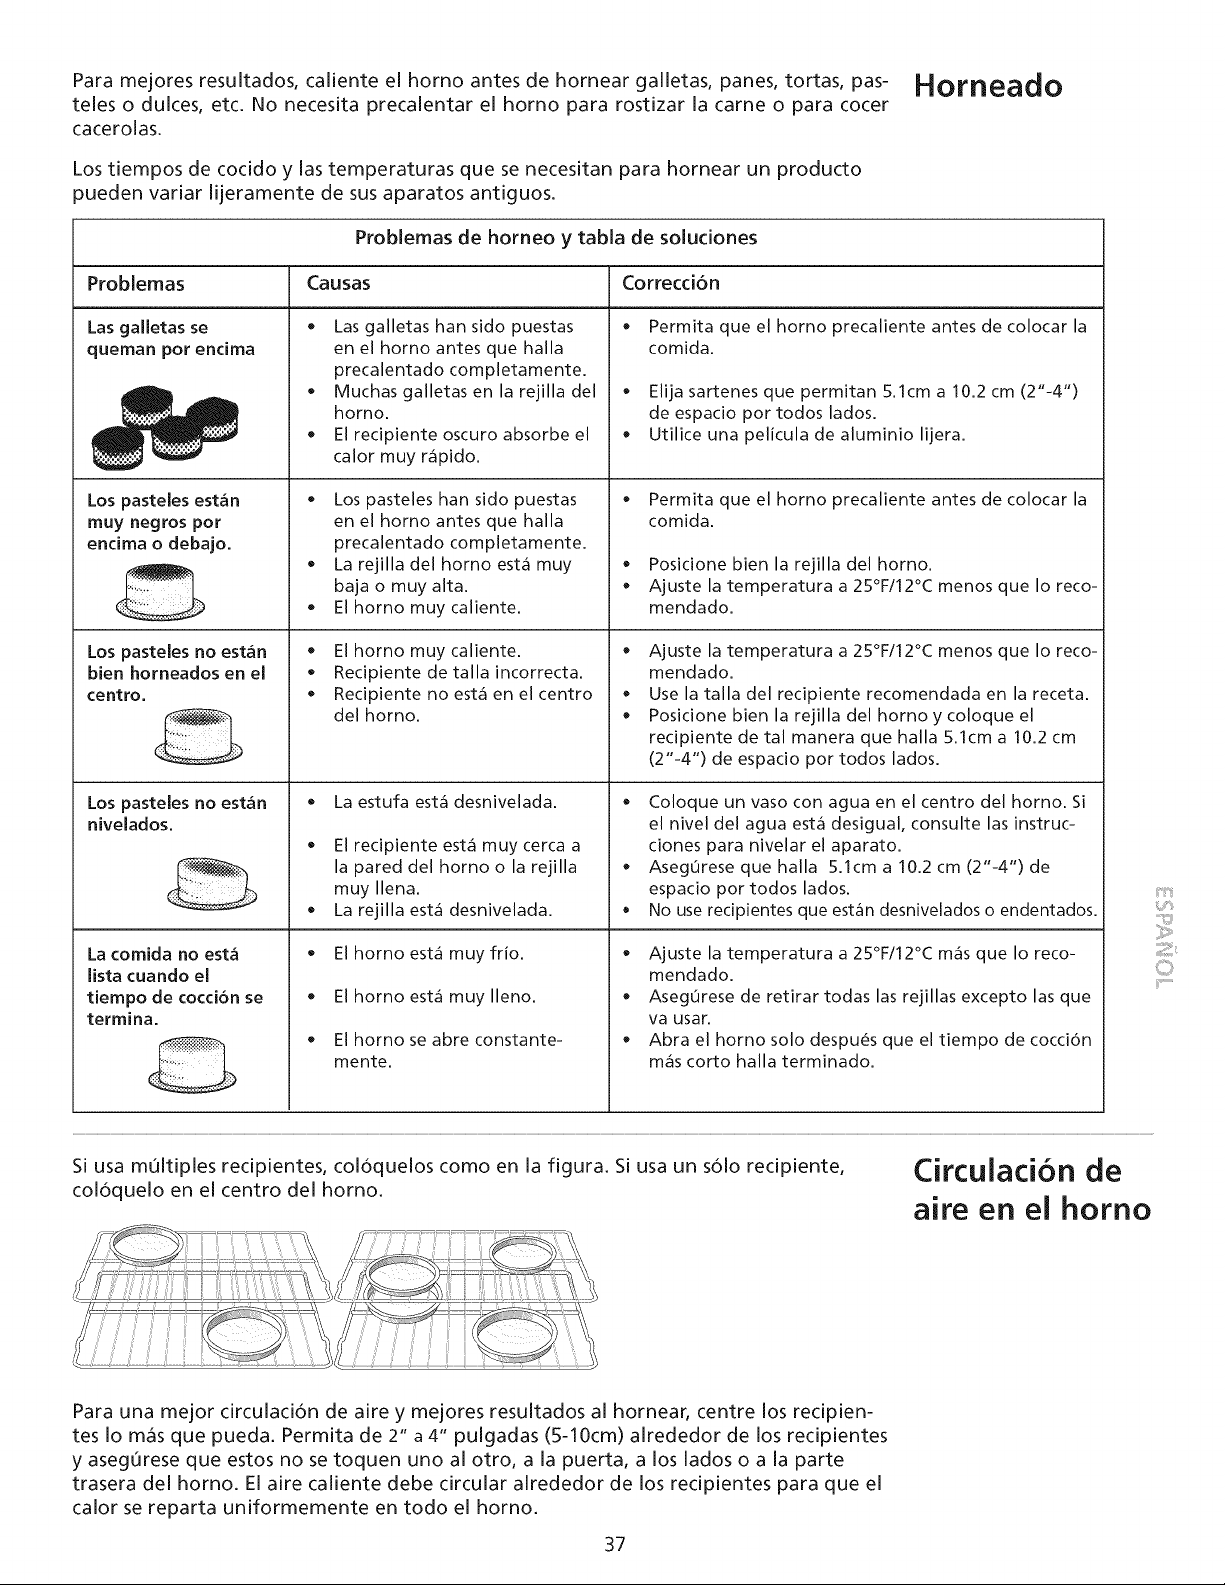
Paramejoresresultados,calienteel homoantesdehorneargalletas,panes,tortas,pas- Horneado
teles o dulces, etc. No necesita precalentar el homo para rostizar la came o para cocer
cacerolas.
Los tiempos de cocido y las temperaturas que se necesitan para hornear un producto
pueden variar lijeramente de sus aparatos antiguos.
Problemas de horneo y tabla de soludones
ProbJemas Causas Correction
o
Las galJetas se
queman pot endma
Los pasteJes est_in
muy negros por
encima o debajo.
Los pasteJes no estan
bien horneados en el
centro,
Los pasteJes no est_in
nivelados.
La comJda no esta
Jista cuando el
tiempo de cocdon se
termina.
o
o
Las galletas han sido puestas
en el homo antes que halla
precalentado completamente.
Muchas galletas en la rejilla del
homo.
El recipiente oscuro absorbe el
calor muy r_pido.
* Los pasteles han sido puestas
en el homo antes que halla
precalentado completamente.
* La rejilla del homo est_ muy
baja o muy alta.
* El horno muycaliente.
* El horno muy caliente.
* Recipiente de talla incorrecta.
* Recipiente no est_ en el centro
del horno.
* La estufa est_ desnivelada.
* El recipiente est_ muycerca a
la pared del horno o la rejilla
muy Ilena.
* La rejilla est_ desnivelada.
* El horno est_ muyfrio.
* El horno est_ muy Ileno.
* El horno se abre constante-
mente.
* Permita que el homo precaliente antes de colocar la
comida.
* Elija sartenes que permitan 5.1cm a 10.2 cm (2"-4")
de espacio por todos lados.
* Utilice una pelicula de aluminio lijera.
* Permita que el homo precaliente antes de colocar la
comida.
* Posicione bien la rejilla del horno.
* Ajuste la temperatura a 25°F/12°C menos que Io reco-
mendado.
* Ajuste la temperatura a 25°F/12°C menos que Io reco-
mendado.
* Use la talla del recipiente recomendada en la receta.
* Posicione bien la rejilla del homo y coloque el
recipiente de tal manera que halla 5.1cm a 10.2 cm
(2"-4") de espacio por todos lados.
* Coloque un vaso con agua en el centro del homo. Si
el nivel del agua estg desigual, consulte las instruc-
ciones para nivelar el aparato.
* Aseg0rese que halla 5.1cm a 10.2 cm (2"-4") de
espacio por todos lados.
* No use redpientes que estan desnivelados o endentados.
* Ajuste la temperatura a 25°F/12°C m_s que Io reco-
mendado.
* Aseg0rese de retirar todas las rejillas excepto las que
va usar.
* Abra el homo solo despu_s que el tiempo de cocci6n
m_s corto halla terminado.
Si usa multiples redpientes, col6quelos como en la figura. Si usa un s61o recipiente, Circulaci6n de
col6quelo en el centro del horno, aire en el homo
Para una mejor circulaci6n de aire y mejores resultados al hornear, centre los recipien-
tes Io mas que pueda. Permita de 2" a 4" pulgadas (5-10cm) alrededor de los recipientes
y aseg0rese que estos no se toquen uno al otro, a la puerta, a los lados o a la parte
trasera del horno. El aire caliente debe circular alrededor de los recipientes para que el
calor se reparta uniformemente en todo el horno.
37
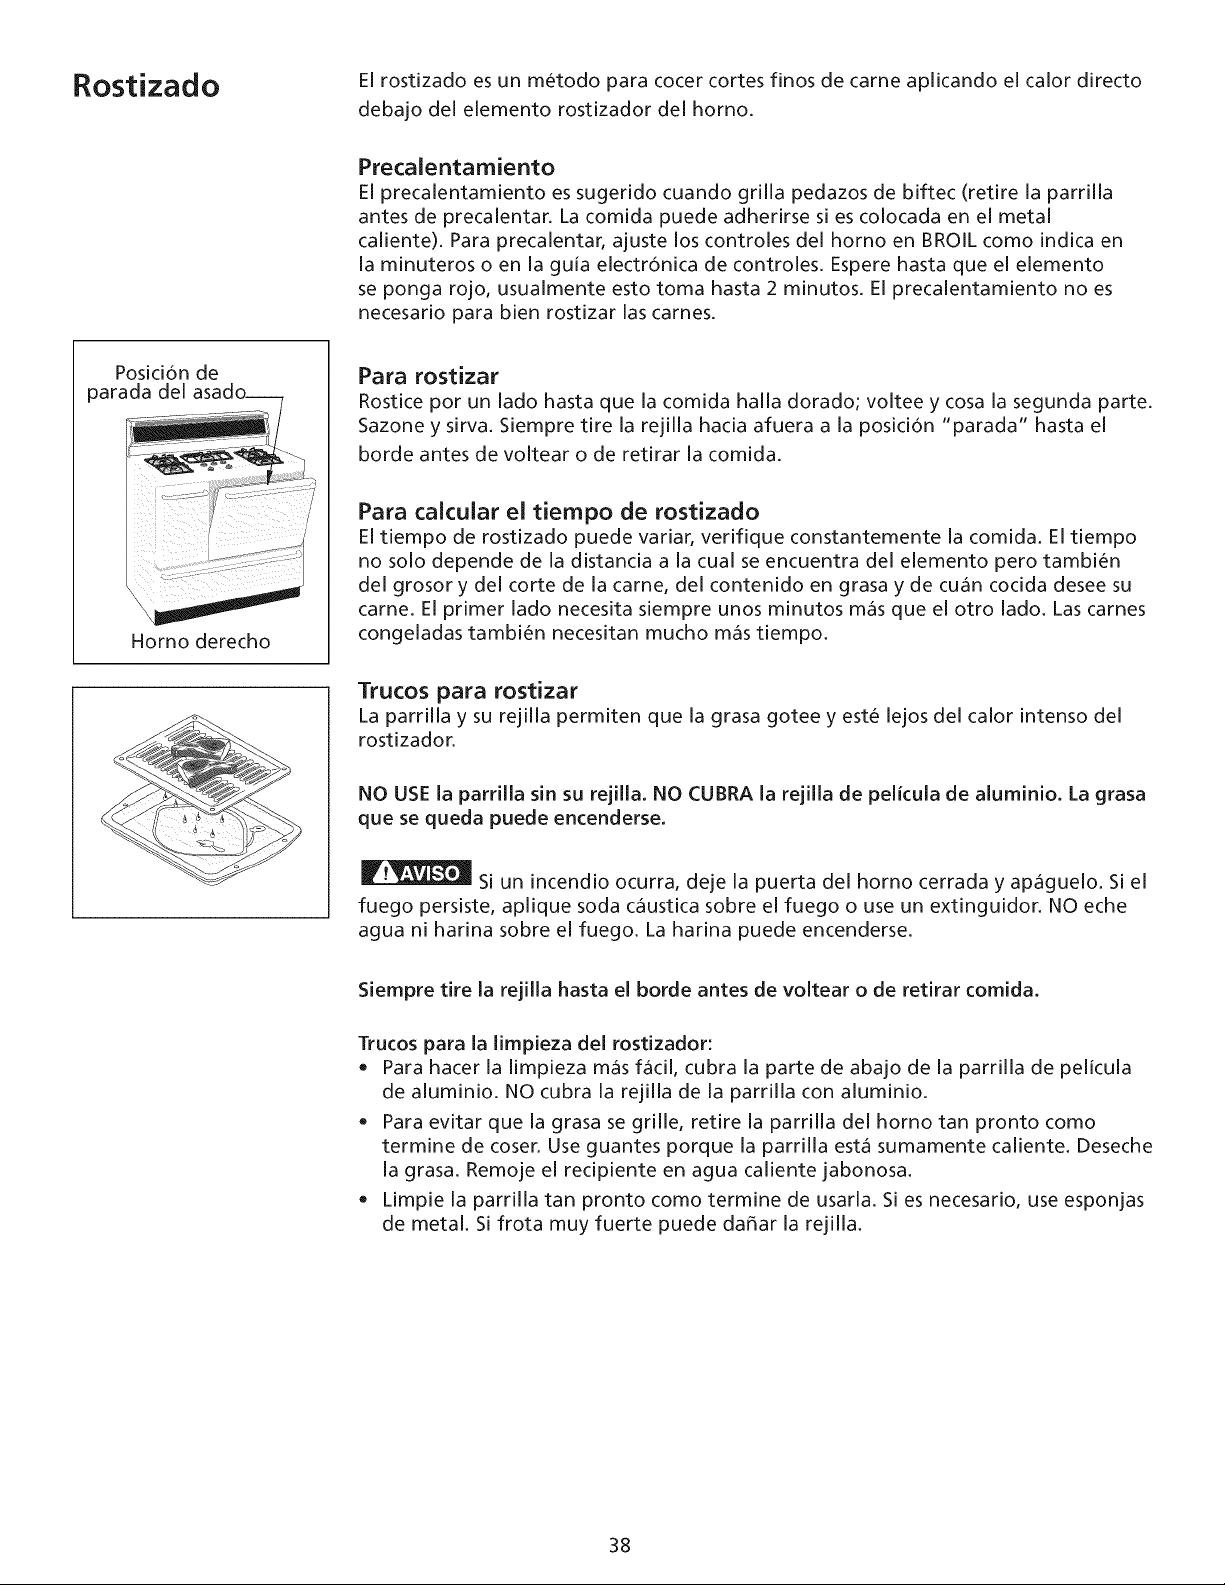
Rostizado
El rostizado es un metodo para cocer cortes finos de came aplicando el calor directo
debajo del elemento rostizador del homo.
Precalentamiento
El precalentamiento es sugerido cuando grilla pedazos de biftec (retire la parrilla
antes de precalentar. La comida puede adherirse si es colocada en el metal
caliente). Para precalentar, ajuste los controles del homo en BROIL como indica en
la minuteros o en la guia electr6nica de controles. Espere hasta que el elemento
se ponga rojo, usualmente esto toma hasta 2 minutos. El precalentamiento no es
necesario para bien rostizar las carnes.
Posici6n de
Homo derecho
Para rostizar
Rostice pot un lado hasta que la comida halla dorado; voltee y cosa la segunda parte.
Sazone y sirva. Siempre tire la rejilla hacia afuera a la posici6n "parada" hasta el
borde antes de voltear o de retirar la comida.
Para caicular el tiempo de rostizado
El tiempo de rostizado puede variar, verifique constantemente la comida. El tiempo
no solo depende de la distancia a la cual se encuentra del elemento pero tambien
del grosor y del corte de la came, del contenido en grasa y de cuan cocida desee su
came. El primer lado necesita siempre unos minutos masque el otto lado. Las carnes
congeladas tambien necesitan mucho mas tiempo.
Trucos para rostizar
La parrilla y su rejilla permiten que la grasa gotee y este lejos del calor intenso del
rostizador.
NO USE la parrilla sin su rejilla. NO CUBRA la rejilla de pelicula de aluminio. La grasa
que se queda puede encenderse.
fuego persiste,
agua ni harina
un incendio ocurra, deje la puerta del horno cerrada y apaguelo. Si el
aplique soda caustica sobre el fuego o use un extinguidor. NO eche
sobre el fuego. La harina puede encenderse.
Siempre tire la rejilla hasta el borde antes de voltear o de retirar comida.
Trucos para la limpieza del rostizador:
• Para hacer la limpieza mas facil, cubra la parte de abajo de la parrilla de pelicula
de aluminio. NO cubra la rejilla de la parrilla con aluminio.
• Para evitar que la grasa se grille, retire la parrilla del homo tan pronto como
termine de cosen Use guantes porque la parrilla esta sumamente caliente. Deseche
la grasa. Remoje el recipiente en agua caliente jabonosa.
• Limpie la parrilla tan pronto como termine de usarla. Si es necesario, use esponjas
de metal. Si frota muy fuerte puede da_ar la rejilla.
38
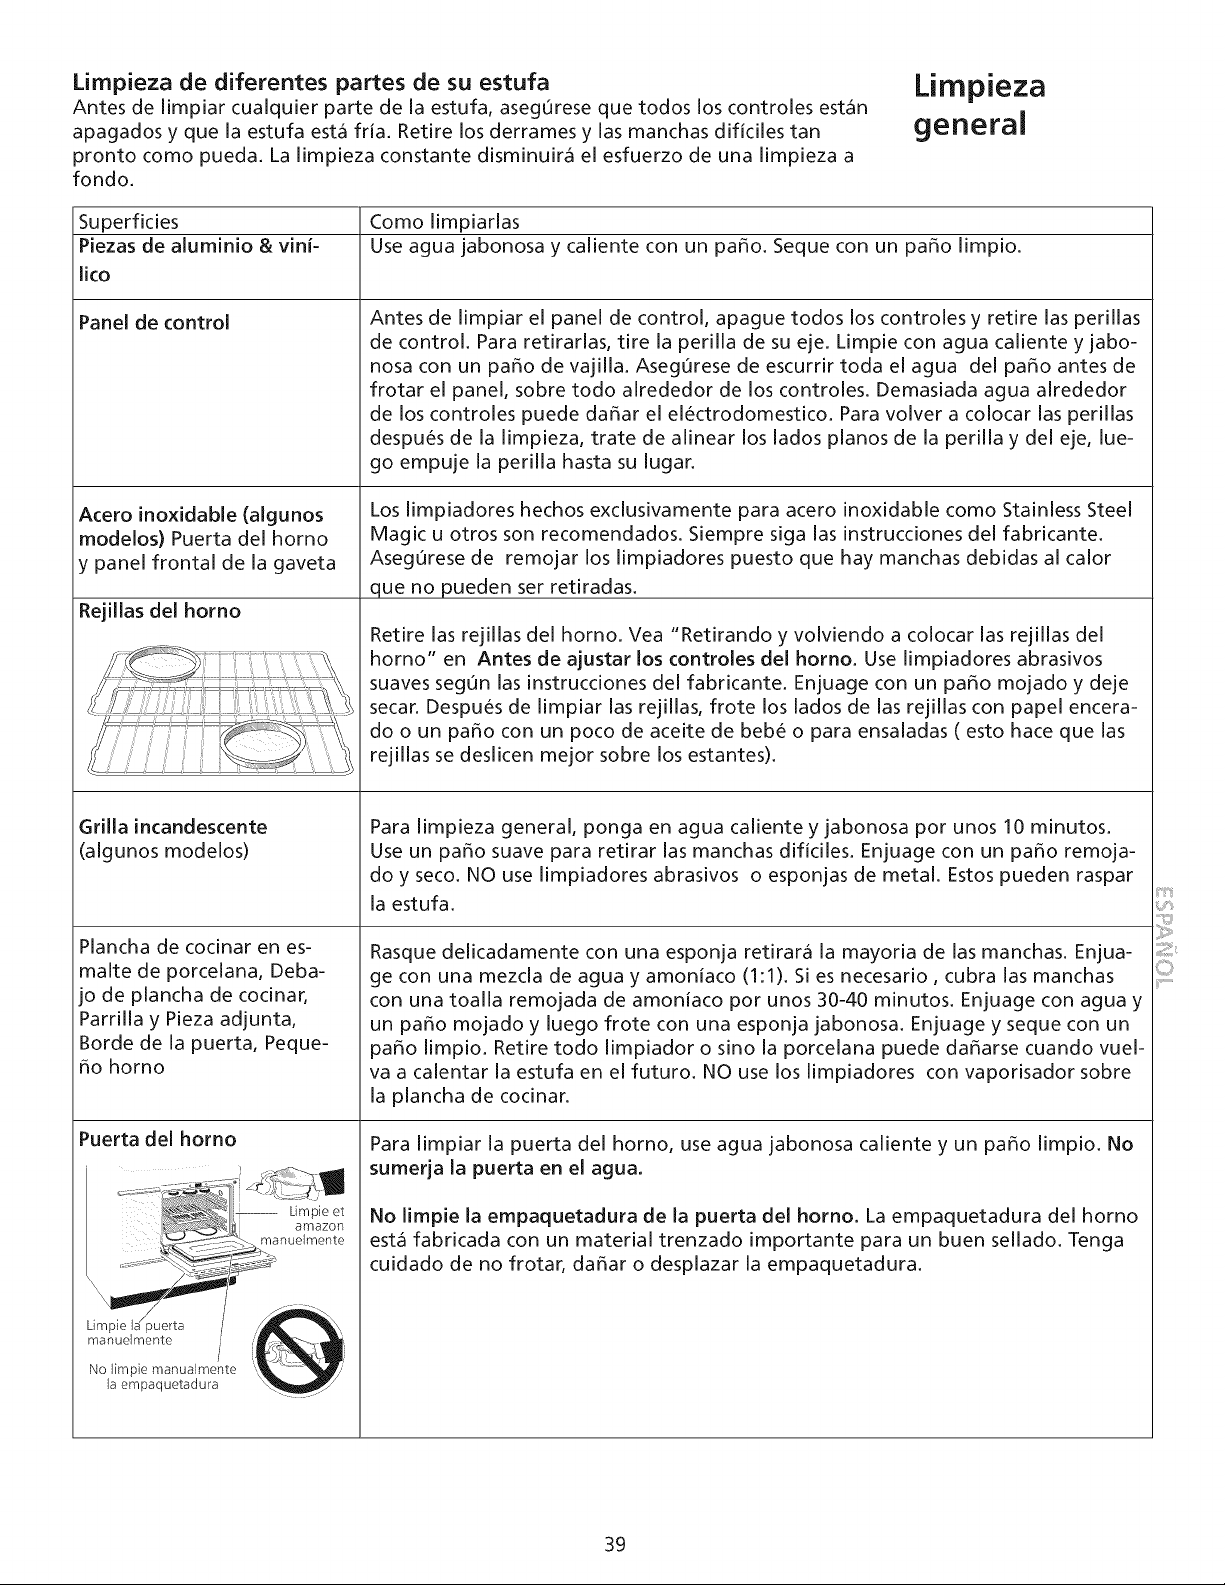
Mmpieza de diferentes partes de su estufa
Antesdelimpiarcualquierpartede la estufa,aseg0resequetodosloscontrolesest_in
apagadosy quelaestufaestafria. Retirelosderramesy lasmanchasdificilestan
prontocomopueda.Lalimpiezaconstantedisminuirael esfuerzode unalimpiezaa
fondo.
Limpieza
general
Superficies Como limpiarlas
Piezas de aluminio & vini- Use agua jabonosa y caliente con un paso. Seque con un paso limpio.
Iko
Panel de control
Acero inoxidable (algunos
modelos) Puerta del horno
y panel frontal de la gaveta
Rejillas del homo
Grilla incandescente
(algunos modelos)
Plancha de cocinar en es-
make de porcelana, Deba-
jo de plancha de cocinar,
Parrilla y Pieza adjunta,
Borde de la puerta, Peque-
_o homo
Puerta del homo
_\_ _'_:JLimpieJ Wet
amazon
_nanuelmente
Limpie la puerta / _ .........
manoo,monto/No limpie manualmente
la empaquetadura ........
Antes de limpiar el panel de control, apague todos los controles y retire las perillas
de control. Para retirarlas, tire la perilla de su eje. Limpie con agua caliente y jabo-
nosa con un paso de vajilla. Aseg0rese de escurrir toda el agua del paso antes de
frotar el panel, sobre todo alrededor de los controles. Demasiada agua alrededor
de los controles puede da_ar el electrodomestico. Para volver a colocar las perillas
despues de la Iimpieza, trate de alinear los lados pianos de la perilla y del eje, lue-
go empuje la perilla hasta su lugar.
Los limpiadores hechos exclusivamente para acero inoxidable como Stainless Steel
Magic u otros son recomendados. Siempre siga las instrucciones del fabricante.
AsegOrese de remojar los Iimpiadores puesto que hay manchas debidas al calor
que no pueden ser retiradas.
Retire las rejillas del horno. Yea "Retirando y volviendo a colocar las rejillas del
homo" en Antes de ajustar los controles del horno. Use limpiadores abrasivos
suaves seg0n las instrucciones del fabricante. Enjuage con un paso mojado y deje
secar. Despues de Iimpiar las rejillas, frote los lados de las rejillas con papel encera-
do o un paso con un poco de aceite de bebe o para ensaladas (esto hace que las
rejillas se deslicen mejor sobre los estantes).
Para limpieza general, ponga en agua caliente y jabonosa pot unos 10 minutos.
Use un paso suave para retirar las manchas dificiles. Enjuage con un paso remoja-
do y seco. NO use limpiadores abrasivos o esponjas de metal. Estos pueden raspar
la estufa.
Rasque delicadamente con una esponja retirar_q la mayoria de las manchas. Enjua-
ge con una mezcla de agua y amoniaco (1:1). Si es necesario, cubra las manchas
con una toalla remojada de amoniaco por unos 30-40 minutos. Enjuage con agua y
un paso mojado y luego frote con una esponja jabonosa. Enjuage y seque con un
paso limpio. Retire todo limpiador o sino la porcelana puede da_arse cuando vuel-
va a calentar la estufa en el futuro. NO use los limpiadores con vaporisador sobre
la plancha de cocinar.
Para limpiar la puerta del homo, use agua jabonosa caliente y un paso Iimpio. No
sumerja la puerta en el agua.
No limpie la empaquetadura de la puerta del horno. La empaquetadura del horno
esta fabricada con un material trenzado importante para un buen sellado. Tenga
cuidado de no frotar, da_ar o desplazar la empaquetadura.
39
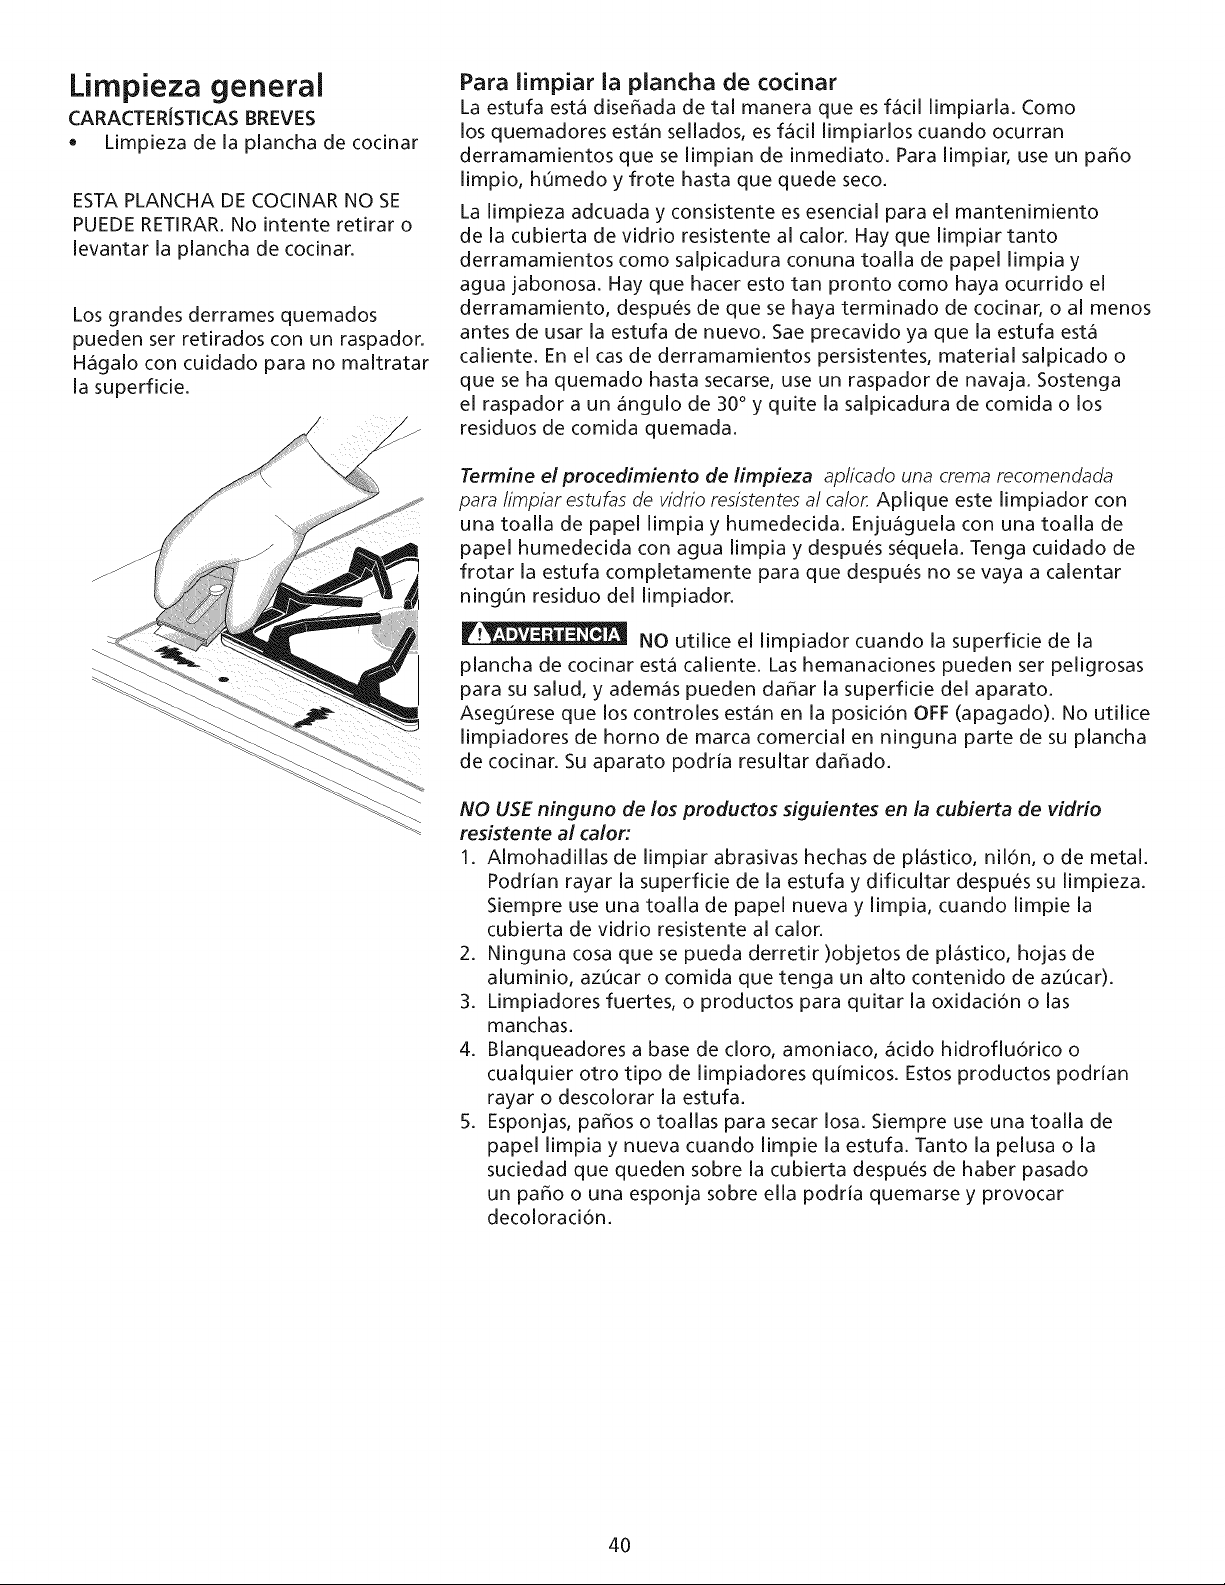
Limpieza general
CARACTER{STICAS BREVES
• Limpieza de la plancha de cocinar
ESTA PLANCHA DE COClNAR NO SE
PUEDE RETIRAR. No intente retirar o
levantar la plancha de cocinar.
Los grandes derrames quemados
pueden set retirados con un raspador.
Hagalo con cuidado para no maltratar
la superfide.
Para iimpiar ia plancha de cocinar
La estufa esta dise_ada de tal manera que es facil limpiarla. Como
los quemadores estan sellados, es facil limpiarlos cuando ocurran
derramamientos que se limpian de inmediato. Para limpiar, use un paso
limpio, h0medo y frote hasta que quede seco.
La limpieza adcuada y consistente es esencial para el mantenimiento
de la cubierta de vidrio resistente al calor. Hay que limpiar tanto
derramamientos como salpicadura conuna toalla de papel limpia y
agua jabonosa. Hay que hacer esto tan pronto como haya ocurrido el
derramamiento, despues de que se haya terminado de cocinar, o al menos
antes de usar la estufa de nuevo. Sae precavido ya que la estufa esta
caliente. En el cas de derramamientos persistentes, material salpicado o
que se ha quemado hasta secarse, use un raspador de navaja. Sostenga
el raspador a un angulo de 30° y quite la salpicadura de comida o los
residuos de comida quemada.
Termine el procedimiento de limpieza apficado una crema recomendada
para limpiar estufas de vidrio resistentes a/ca/or. Aplique este limpiador con
una toalla de papel limpia y humedecida. Enjuaguela con una toalla de
papel humedecida con agua limpia y despues sequela. Tenga cuidado de
frotar la estufa completamente para que despues no se vaya a calentar
ning0n residuo del limpiador.
NO utilice el limpiador cuando la superficie de la
plancha de cocinar esta caliente. Las hemanaciones pueden set peligrosas
para su salud, y ademas pueden da_ar la superficie del aparato.
Asegurese que los controles estan en la posici6n OFF (apagado). No utilice
limpiadores de homo de marca comercial en ninguna parte de su plancha
de cocinar. Su aparato podria resultar da_ado.
NO USE ninguno de los productos siguientes en la cubierta de vidrio
resistente al calor:
1. Almohadillas de limpiar abrasivas hechas de plastico, nil6n, o de metal.
Podrian rayar la superficie de la estufa y dificultar despues su limpieza.
Siempre use una toalla de papel nueva y limpia, cuando limpie la
cubierta de vidrio resistente al calor.
2. Ninguna cosa que se pueda derretir )objetos de plastico, hojas de
aluminio, azucar o comida que tenga un alto contenido de azucar).
3. Limpiadores fuertes, o productos para quitar la oxidaci6n o las
manchas.
4. Blanqueadores a base de cloro, amoniaco, acido hidroflu6rico o
cualquier otto tipo de limpiadores quimicos. Estos productos podrian
rayar o descolorar la estufa.
5. Esponjas, pa_os o toallas para secar Iosa. Siempre use una toalla de
papel limpia y nueva cuando limpie la estufa. Tanto la pelusa o la
suciedad que queden sobre la cubierta despues de haber pasado
un paso o una esponja sobre ella podria quemarse y provocar
decoloraci6n.
4O
Para lrnpiar ias parrllas, ias caideras contorneadas, ias tapas y
ia basas del quemador.
Lasparrllas,lascalderascontorneadas,latapay la basadel quemadorde-
benserlimpiadascontinuamente.Manteniendolosorifidosdelquemador
previeneunencendidoinadecuadoy unallamadesigual.
Sigalasinstrucdonessiguientes.
Para irnpiar ias caideras contorneadas dei quemador.
Lascalderasdelquemadorestanunidasa la planchade codnary sonfijas.
Lacalderadelquemadorforma unadepresi6nalrededorde cadaquema-
donSiun derrameocurreen unade estasareas,secarconun patioabsor-
bente.Enjuageconun patioremojado,limpioy sequecompletamente.
Para lrnpiar ias parrilas.
Aseguresequelosquemadoresy lasparrllasestenenfriadosantesde colo-
carsumano,un soporte,patiosde limpiezau otto materialsobreellos.Las
calderasdefierro puedenserlavadasenunalavadoradevajila oen agua
calientejabonosa. Enjuage a rondo y seque las parrilas con un patio. No las
coloque sobre la plancha de cocinar mientras que esten mojadas. Asegure-
se que las parrilas esten en buena posici6n sobre los quemadores.
Para retirar comida quemada, coloque las parrllas en un recipiente con
tapa o en una bolsa plastica. Afiada 1/4 de taza de amoniaco y remoje por
30 minutos. Lave, enjuage bien y seque. Un limpiador con poder abrasivo
puede ser utilizado para las manchas dificiles.
Para iirnpiar ia tapa del quemador
Retire la tapa del quemador. Utilice un tampon refregado con jab6n o un
abrasivo ligero para limpiar las tapas del quemador. Si es necesario, recu-
bra las manchas dificiles con una toalla de papel remojada con amoniaco
pot 30 minutos. Frote delicadamente con un tampon refregado en jab6n y
enjuage con una mezcla de agua y vinagre. Seque completamente. Retire
todo limpiador o la porcelana podria set dafiada cuando vuelva a set calen-
tada.
Para iirnpiar ia base arnovible del quemador y ia apertura de
gas.
Los orificios alrededor de la base del quemador deben set limpiados con-
tinuamente. Utilice una esponja de alambres o una aguja para limpiar pe-
que_as ranuras o agujeros. Tenga cuidado de no dafiar el electrodo. Si un
patio de limpieza Ilega a tocar el electrodo, este se puede romper o dafiar.
Si el electrodo es dafiado o roto, el quemador no podra set encendido por-
que no habra chispa. El encendido manual con un cerillo puede set posible.
Para un flujo de gas y un encendido adecuados- NO PERMITA QUE DERRA-
MES DE LIQUIDOS, COMIDA, LIMPIADORES O CUALQUIER OTRO MATERIAL
ENTREN EN LA APERTURA DEL GAS. El gas debe pasar libremente a traves
del pequefio orificio de los quemadores para poder encenderlos. Si el orifi-
cio del gas se obstruye, utilice una pequefia esponja de lambres o una agu-
ja para limpiarlo. SIEMPRE tenga la tapa del quemador en su lugar cuando
utilice cualquiera de los quemadores.
Limpieza general
CARACTERiSTICAS BREVES
• Limpieza de la plancha de
cocinar
!i
i
©
41
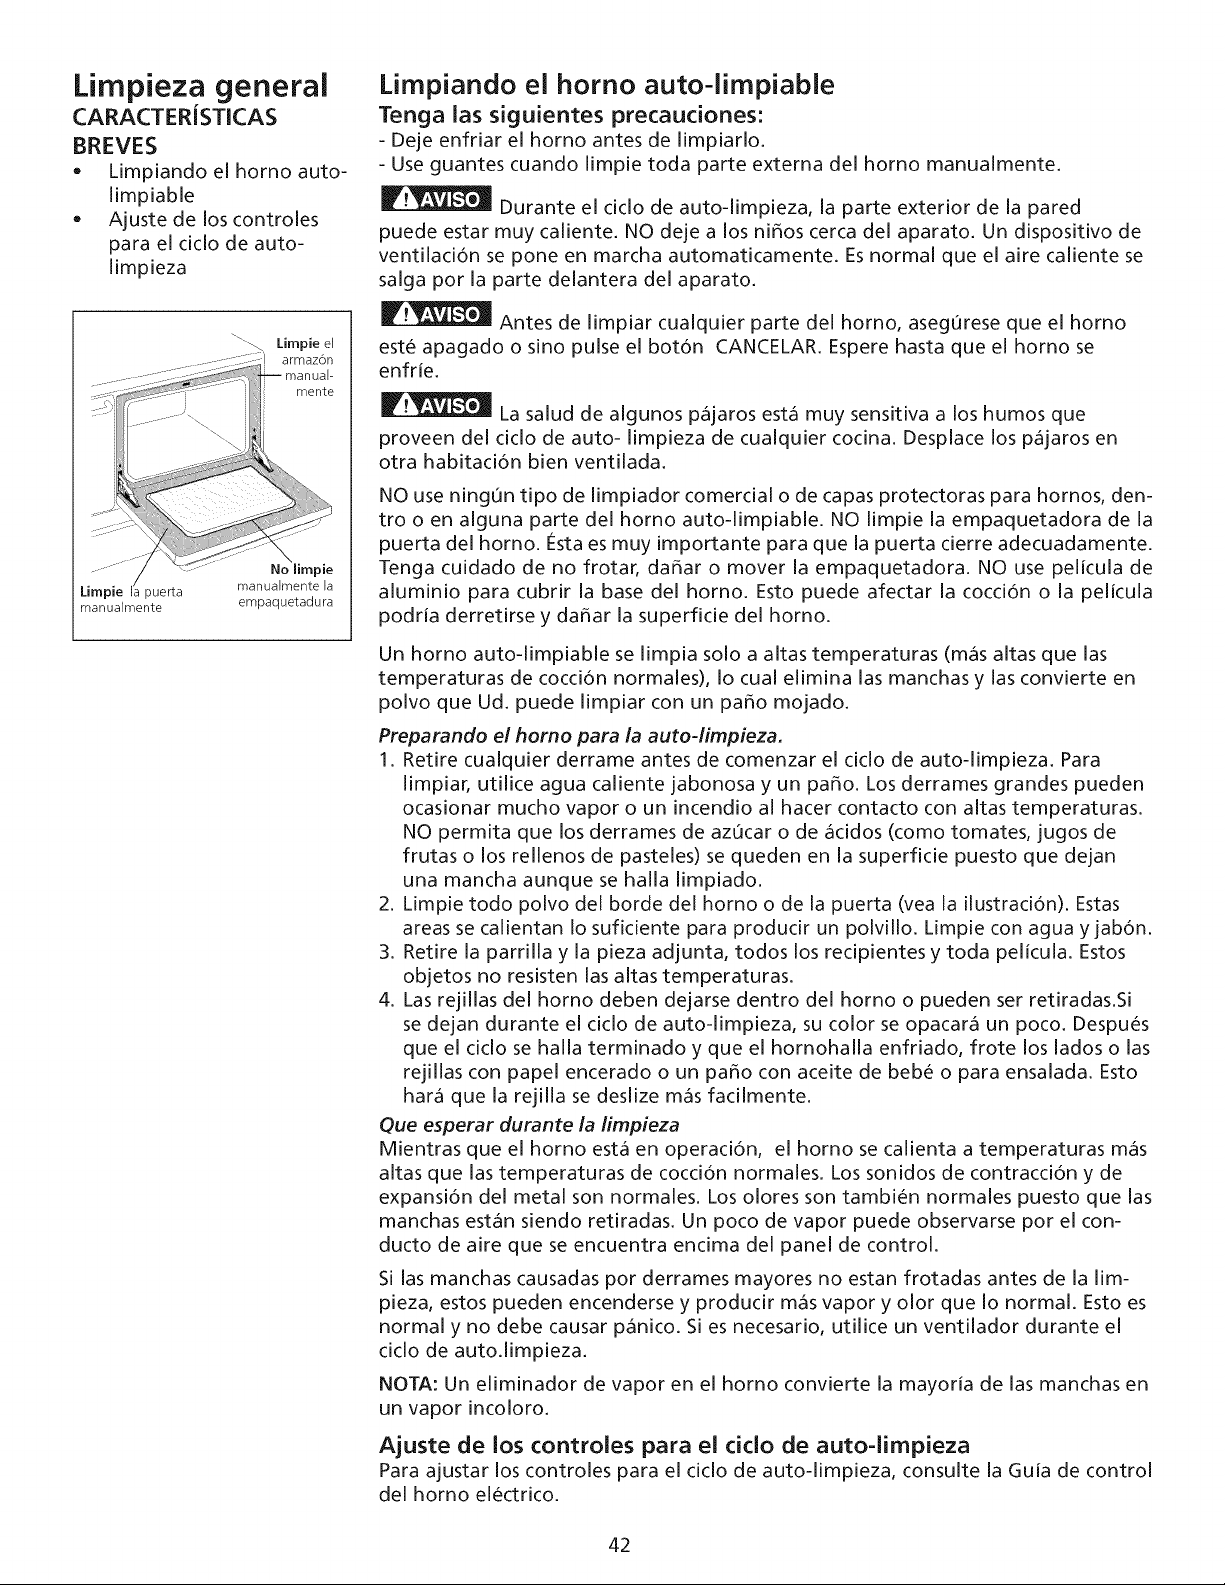
Limpieza general
CARACTERiSTICAS
BREVES
• Limpiando el homo auto-
limpiable
• Ajuste de Ioscontroles
para el ciclo de auto-
limpieza
mente
No limpie
puerta manua[mente [a
manualmente empaquetadura
Limpiando el horno auto-limpiable
Tenga ias siguientes precauciones:
- Deje enfriar el horno antes de limpiarlo.
- Use guantes cuando limpie toda parte externa del homo manualmente.
Durante el ciclo de auto-limpieza, la parte exterior de la pared
puede estar muy caliente. NO deje a los niffos cerca del aparato. Un dispositivo de
ventilaci6n se pone en marcha automaticamente. Es normal que el aire caliente se
salga por la parte delantera del aparato.
Antes de limpiar cualquier parte del homo, asegurese que el horno
este apagado o sino pulse el bot6n CANCELAR. Espere hasta que el homo se
enfrie.
La salud de algunos pajaros esta muy sensitiva a los humos que
proveen del ciclo de auto- limpieza de cualquier cocina. Desplace los pajaros en
otra habitaci6n bien ventilada.
NO use ningOn tipo de limpiador comerdal o de capas protectoras para hornos, den-
tro o en alguna parte del homo auto-limpiable. NO limpie la empaquetadora de la
puerta del horno. Esta es muy importante para que la puerta cierre adecuadamente.
Tenga cuidado de no frotar, daffar o mover la empaquetadora. NO use pelicula de
aluminio para cubrir la base del horno. Esto puede afectar la cocci6n o la pelicula
podria derretirse y daffar la superfide del horno.
Un horno auto-limpiable se limpia solo a altas temperaturas (mas altas que las
temperaturas de cocci6n normales), Io cual elimina las manchas y las convierte en
polvo que Ud. puede limpiar con un paffo mojado.
Preparando el homo para la auto-limpieza.
1. Retire cualquier derrame antes de comenzar el ciclo de auto-limpieza. Para
limpiar, utilice agua caliente jabonosa y un paffo. Los derrames grandes pueden
ocasionar mucho vapor o un incendio al hacer contacto con altas temperaturas.
NO permita que los derrames de azucar o de acidos (como tomates, jugos de
frutas o los rellenos de pasteles) se queden en la superficie puesto que dejan
una mancha aunque se halla limpiado.
2. Limpie todo po[vo del borde del horno o de la puerta (yea la ilustraci6n). Estas
areas se ca[ientan Io suficiente para producir un polvillo. Limpie con agua y jab6n.
3. Retire la parrilla y la pieza adjunta, todos los recipientes y toda pelicula. Estos
objetos no resisten las altas temperaturas.
4. Las rejillas del homo deben dejarse dentro del horno o pueden ser retiradas.Si
se dejan durante el ciclo de auto-limpieza, su color se opacara un poco. Despues
que el ciclo se halla terminado y que el hornohalla enfriado, frote los lados o las
rejillas con papel encerado o un paffo con aceite de bebe o para ensalada. Esto
hara que la rejilla se deslize mas facilmente.
Oue esperar durante la limpieza
Mientras que el horno esta en operaci6n, el homo se calienta a temperaturas mas
altas que las temperaturas de cocci6n normales. Los sonidos de contracci6n y de
expansi6n del metal son normales. Los olores son tambien normales puesto que las
manchas estan siendo retiradas. Un poco de vapor puede observarse por el con-
ducto de aire que se encuentra encima del panel de control.
Si las manchas causadas por derrames mayores no estan frotadas antes de la lim-
pieza, estos pueden encenderse y producir mas vapor y olor que Io normal. Esto es
normal y no debe causar panico. Si es necesario, utilice un ventilador durante el
ciclo de auto.limpieza.
NOTA: Un eliminador de vapor en el horno convierte la mayoria de las manchas en
un vapor incoloro.
Ajuste de los controles para el ciclo de auto-limpieza
Para ajustar los controles para el ciclo de auto-limpieza, consulte la Guia de control
del horno electrico.
42

Limpieza del homo de esmaite de porcelana (si equipado).
La porcelana tiene un terminado muy delicado yes un tipo de vidrio mezclado con metal.
Los limpiadores de horno pueden ser utilizados en todas las partes interiores del horno.
Limpieza general,
Retire las manchas usando agua caliente y jabonosa. No permita que derrames de comidas con alto
contenido en azOcar o en £cido (como leche, tomates, chucruta, jugos de fruta o rellenos de pastel)
queden en la superficie pues estos pueden causar manchas oscuras aOn despu_s de la limpieza.
Para retirar manchas dificiles.
1. Deje un plato con amoniaco dentro del horno toda la noche o pot unas horas con la
puerta del homo cerrada. Limpie manchas mas faciles con agua caliente y jabonosa.
Enjuague bien con agua y un paEo limpio.
2. Si las manchas perduran, utilice una esponja o un limpiador no abrasivo. Si es
necesario, use un limpiador de homo de acuerdo alas instrucciones del fabricante.
NO mezcle el amoniaco con otros productos de limpieza.
Tenga en cuenta las siguientes instrucciones cuando utilice los limpiadores de homo,
1. NO pulverice sobre los controles electricos o interruptores porque esto podria causar
un corto-drcuito y producir chispas o un fuego.
2. NO permita que una pelfcula de limpiadorse formesobre la bombilla sensor detemperatura,
esto puede hater que el homo se caliente de manera inapropiada. (La bombilla se
encuentra en la parte trasera del horno). Limpie cuidadosamente todo residuo sobre la
bombilla despu_s de cada limpieza, asegur_ndose de no mover la bombilla). Si mueve
la bombilla, el horneado podria estar afectado. Evite de doblar la bombilla o el capilar.
3. NO pulverice ningOn tipo de limpiador en el borde de la puerta o en la empaquetadora,
en Iostiradores o en cualquier otra area externa de la cocina, en la madera o areas
pintadas. El limpiador puede daEar estas areas.
Para limpiar la base del homo,
Limpie con agua caliente y jabonosa, un limpiador poco abrasivo, un paEo abrasivo
jabonoso o limpiador de horno de acuerdo alas instrucciones del fabricante.
NO forte las paredes del homo, la base, los carriles u cualquiera otra parte
del aparato con pelicula de aluminio. El hacer esto puede destruir la distribucion de
calor, producir pobres resultados al hornear y causar un da_o permanente al interior del
homo (la pelicula de aluminio se derretira al contacto con las areas internas del homo).
Para retirar y remplazar la puerta del homo
1. Abra la puerta del horno completamente.
2. Tire hacia arriba del tope situado en cada soporte de la bisagra y enganchelo en el
ganchodelaspalancasdelabisagra. Esposiblequetengaquehacerunpocode
presi6n hacia abajo sobre la puerta, para sacar los topes totalmente fuera de los
ganchos.
3. Agarre la puerta por ambos lados, tire la parte de abajo de la puerta hacia arriba y
hacia usted, para desenganchar los soportes de las bisagras. Continue a tirar la par-
te de abajo de la puerta hacia usted, girando la parte superior de la puerta hacia la
cocina para desenganchar completamente las palancas de la bisagra.
4. Vuelva a empezar las etapas precedentes en el sentido inversor para reponer la
puerta.
Limpieza
general
CARACTERISTICAS
BREVES
• Limpieza del homo
(Horno izquierdo)
Para retirar y
remplazar la puerta
del homo
Siga las siguientes
precauciones de limpieza
• Permita que el horno
enfrie antes de
limpiarlo.
Use guantes de caucho
cuando limpie el
aparato manualmente.
RETIRELOS DERRAMES Y
LAS MANCHAS DIFiCILES
LO M/kS PRONTO
POSIBLE. LA LIMPIEZA
REGULAR DISMINUIRA LA
NECESIDAD DE LIMPIEZAS
A FONDO MAS ADELANTE
DESPU_eS.
El amoniaco
debe ser retirado antes
de empezar a utilizar
el homo. Trate ventilar
adecuadamente.
Para retirar la
puerta
La puerta
esta pesada. Para
seguro, temporal
almacenamiento,
ponga la puerta sobre
una superficie plana
con la parte interior
de la puerta sobre la
superficie.
bisagra
anca de bisagra
Cierre en
posici6n normal
Cierre en posici6n enganchada,
para sacar la puerta
Agujero para la bisagra
puerta quitada del horno
!:
i
©
43
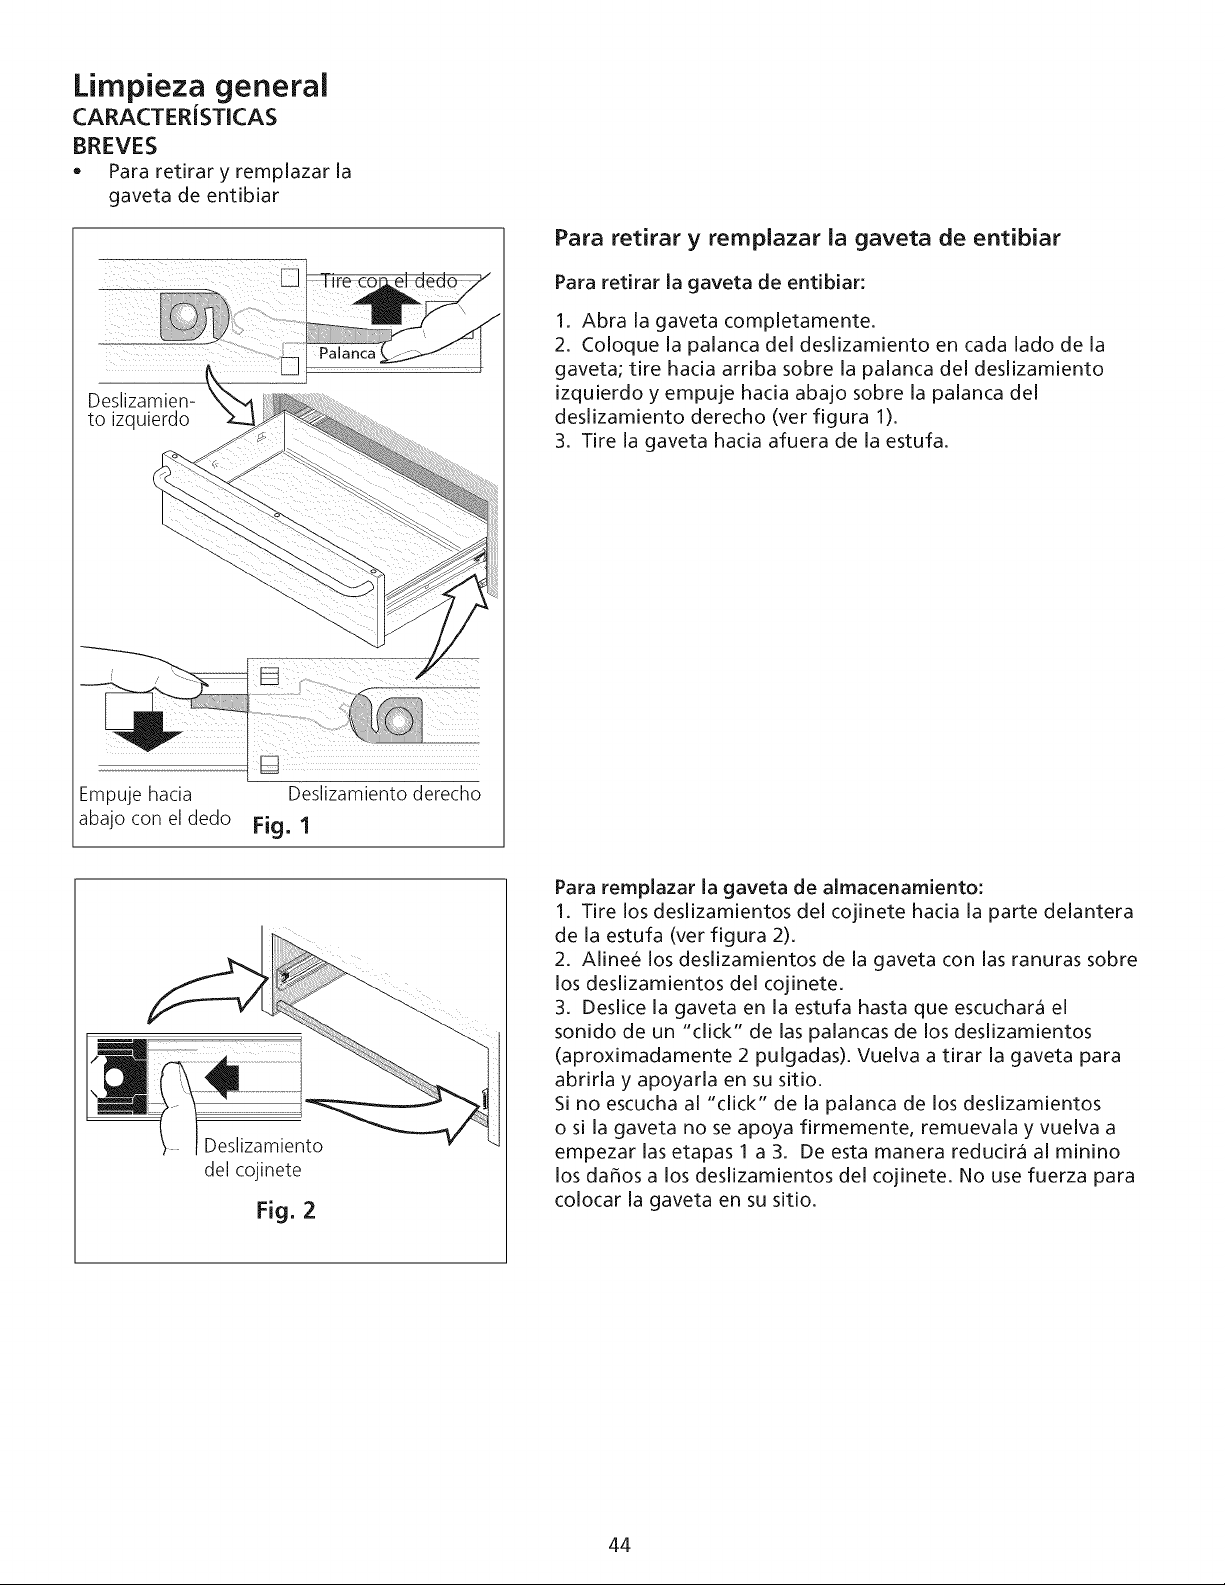
Limpieza general
CARACTERiSTICAS
BREVES
• Para retirar y remplazar la
gaveta de entibiar
Deslizamien-
to izquierdo
Empuje hacia
abajo con el dedo
Deslizamiento derecho
Fig. 1
Para retirar y remplazar ia gaveta de entibiar
Para retirar la gaveta de entibiar:
1. Abra la gaveta completamente.
2. Coloque la palanca del deslizamiento en cada lado de la
gaveta; tire hacia arriba sobre la palanca del deslizamiento
izquierdo y empuje hacia abajo sobre la palanca del
deslizamiento derecho (ver figura 1).
3. Tire la gaveta hacia afuera de la estufa.
Deslizamiento
del cojinete
Fig. 2
Para remplazar la gaveta de almacenamiento:
1. Tire los deslizamientos del cojinete hacia la parte delantera
de la estufa (ver figura 2).
2. Alinee los deslizamientos de la gaveta con las ranuras sobre
los deslizamientos del cojinete.
3. Deslice la gaveta en la estufa hasta que escuchar_i el
sonido de un "click" de las palancas de los deslizamientos
(aproximadamente 2 pulgadas). Vuelva a tirar la gaveta para
abrirla y apoyarla en su sitio.
Si no escucha al "click" de la palanca de los deslizamientos
o si la gaveta no se apoya firmemente, remuevala y vuelva a
empezar las etapas 1 a 3. De esta manera reducir_i al minino
los daSos a los deslizamientos del cojinete. No use fuerza para
colocar la gaveta en su sitio.
44
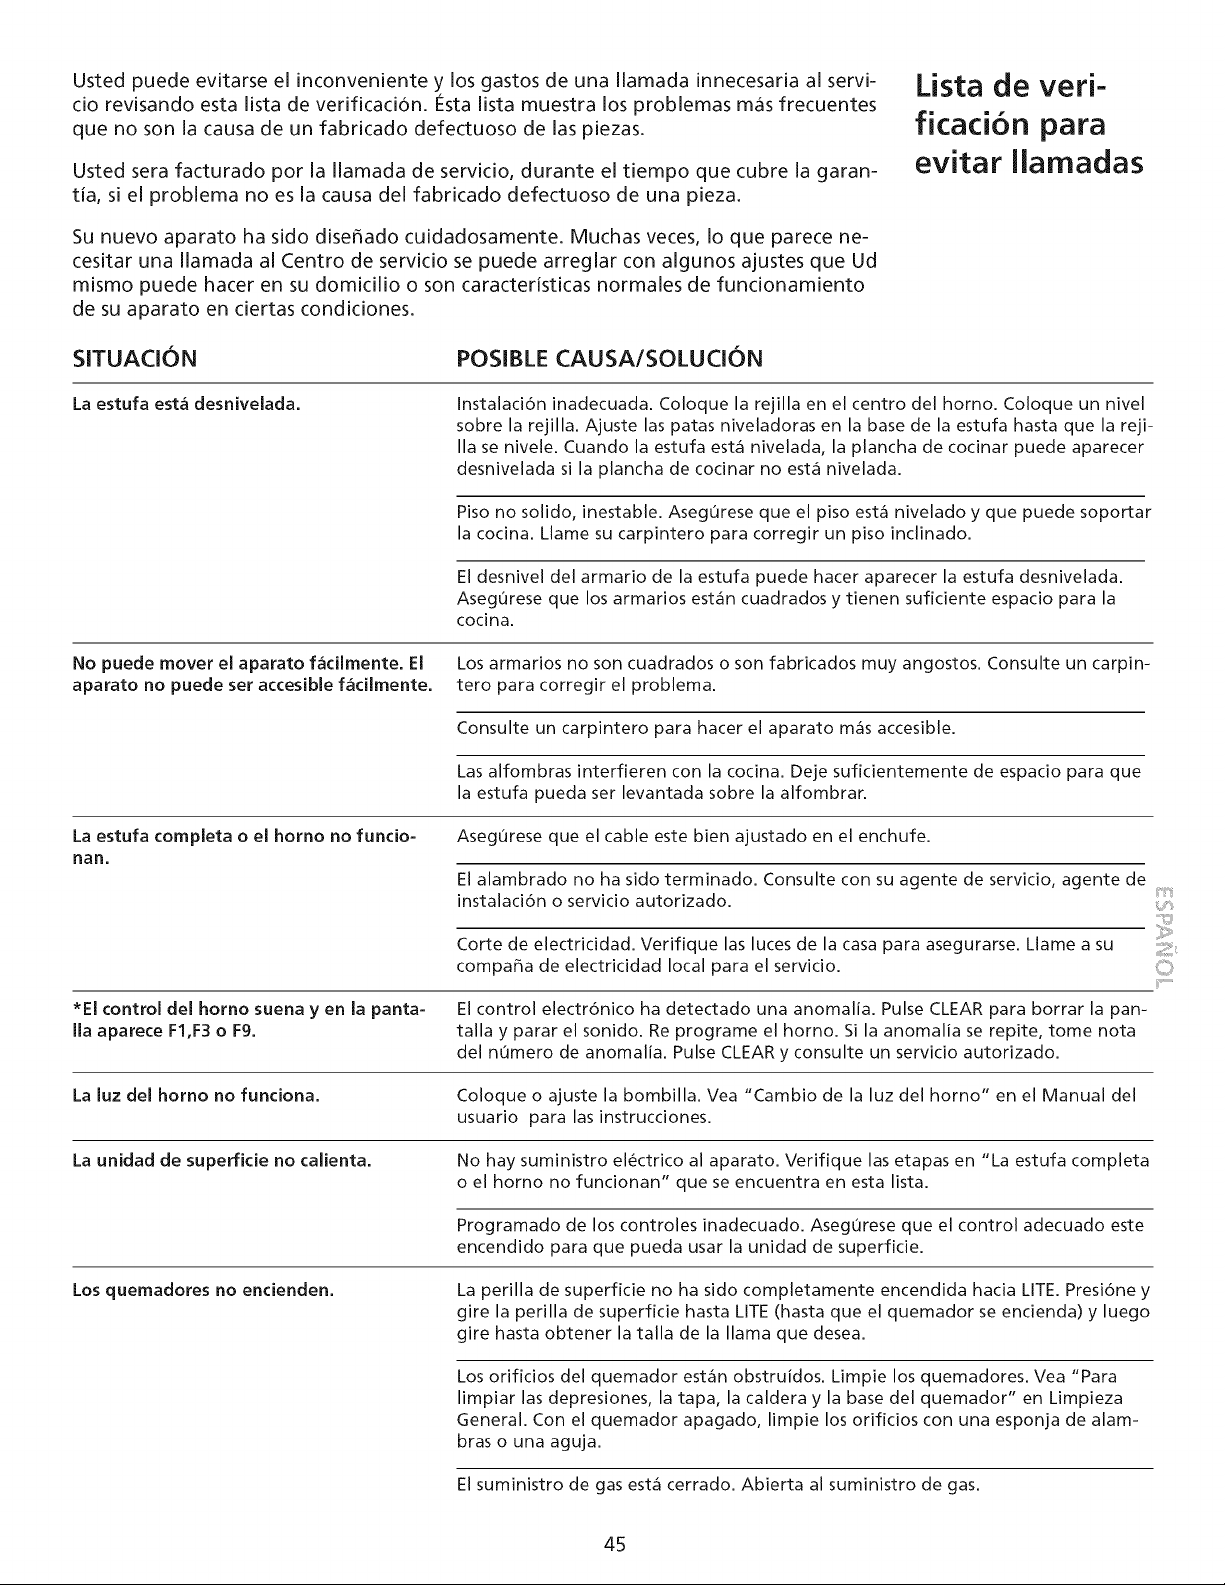
Ustedpuedeevitarseel inconveniente y los gastos de una llamada innecesaria al servi-
cio revisando esta lista de verificaciOn. Esta lista muestra los problemas mas frecuentes
que no son la causa de un fabricado defectuoso de las piezas.
Usted sera facturado por la Ilamada de servicio, durante el tiempo que cubre la garan-
tia, si el problema no es la causa del fabricado defectuoso de una pieza.
Su nuevo aparato ha sido dise_ado cuidadosamente. Muchas veces, Io que parece ne-
cesitar una Ilamada al Centro de servicio se puede arreglar con algunos ajustes que Ud
mismo puede hacer en su domicilio o son caracteristicas normales de funcionamiento
de su aparato en ciertas condiciones.
Lista de veri-
ficaci6n para
evitar llamadas
SITUAClON POSIBLE CAUSAISOLUClON
La estufa esta desnivelada.
Instalaci6n inadecuada. Coloque la rejilla en el centro del homo. Coloque un nivel
sobre la rejilla. Ajuste las patas niveladoras en la base de la estufa hasta que la reji-
Ila se nivele. Cuando la estufa est_ nivelada, la plancha de cocinar puede aparecer
desnivelada si la plancha de cocinar no est_ nivelada.
Piso no solido, inestable. Aseg0rese que el piso est_ nivelado y que puede soportar
la cocina. Llame su carpintero para corregir un piso inclinado.
El desnivel del armario de la estufa puede hacer aparecer la estufa desnivelada.
Aseg0rese que los armarios est_n cuadrados y tienen suficiente espacio para la
cocina.
No puede mover el aparato facilmente. El Los armarios no son cuadrados o son fabricados muy angostos. Consulte un carpin-
aparato no puede set accesible facilmente, tero para corregir el problema.
Consulte un carpintero para hacer el aparato m_s accesible.
Las alfombras interfieren con la cocina. Deje suficientemente de espacio para que
la estufa pueda ser levantada sobre la alfombrar.
La estufa completa o el homo no funcio=
nan,
Aseg0rese que el cable este bien ajustado en el enchufe.
El alambrado no ha sido terminado. Consulte con su agente de servicio, agente de
instalaci6n o servicio autorizado.
Corte de electricidad. Verifique las luces de la casa para asegurarse. Llame a su
compa_a de electricidad local para el servicio.
*El control del horno suena yen la panta- El control electr6nico ha detectado una anomalia. Pulse CLEAR para borrar la pan-
Ila aparece F1,F3 o F9. talla y parar el sonido. Re programe el horno. Si la anomalia se repite, tome nota
del n0mero de anomalia. Pulse CLEAR y consulte un servicio autorizado.
La luz del homo no funciona. Coloque o ajuste la bombilla. Yea "Cambio de la luz del horno" en el Manual del
usuario para las instrucciones.
La unidad de superficie no calienta. No hay suministro el_ctrico al aparato. Verifique las etapas en "La estufa completa
o el homo no funcionan" que se encuentra en esta lista.
Programado de los controles inadecuado. Aseg0rese que el control adecuado este
encendido para que pueda usar la unidad de superficie.
Los quemadores no encienden. La perilla de superficie no ha sido completamente encendida hacia LITE. Presi6ne y
gire la perilla de superficie hasta LITE (hasta que el quemador se encienda) y luego
gire hasta obtener la talla de la llama que desea.
Los orificios del quemador est_n obstruidos. Limpie los quemadores. Vea "Para
limpiar las depresiones, la tapa, la caldera y la base del quemador" en Limpieza
General. Con el quemador apagado, limpie los orificios con una esponja de alam-
bras o una aguja.
El suministro de gas est_ cerrado. Abierta al suministro de gas.
C::i¸
45
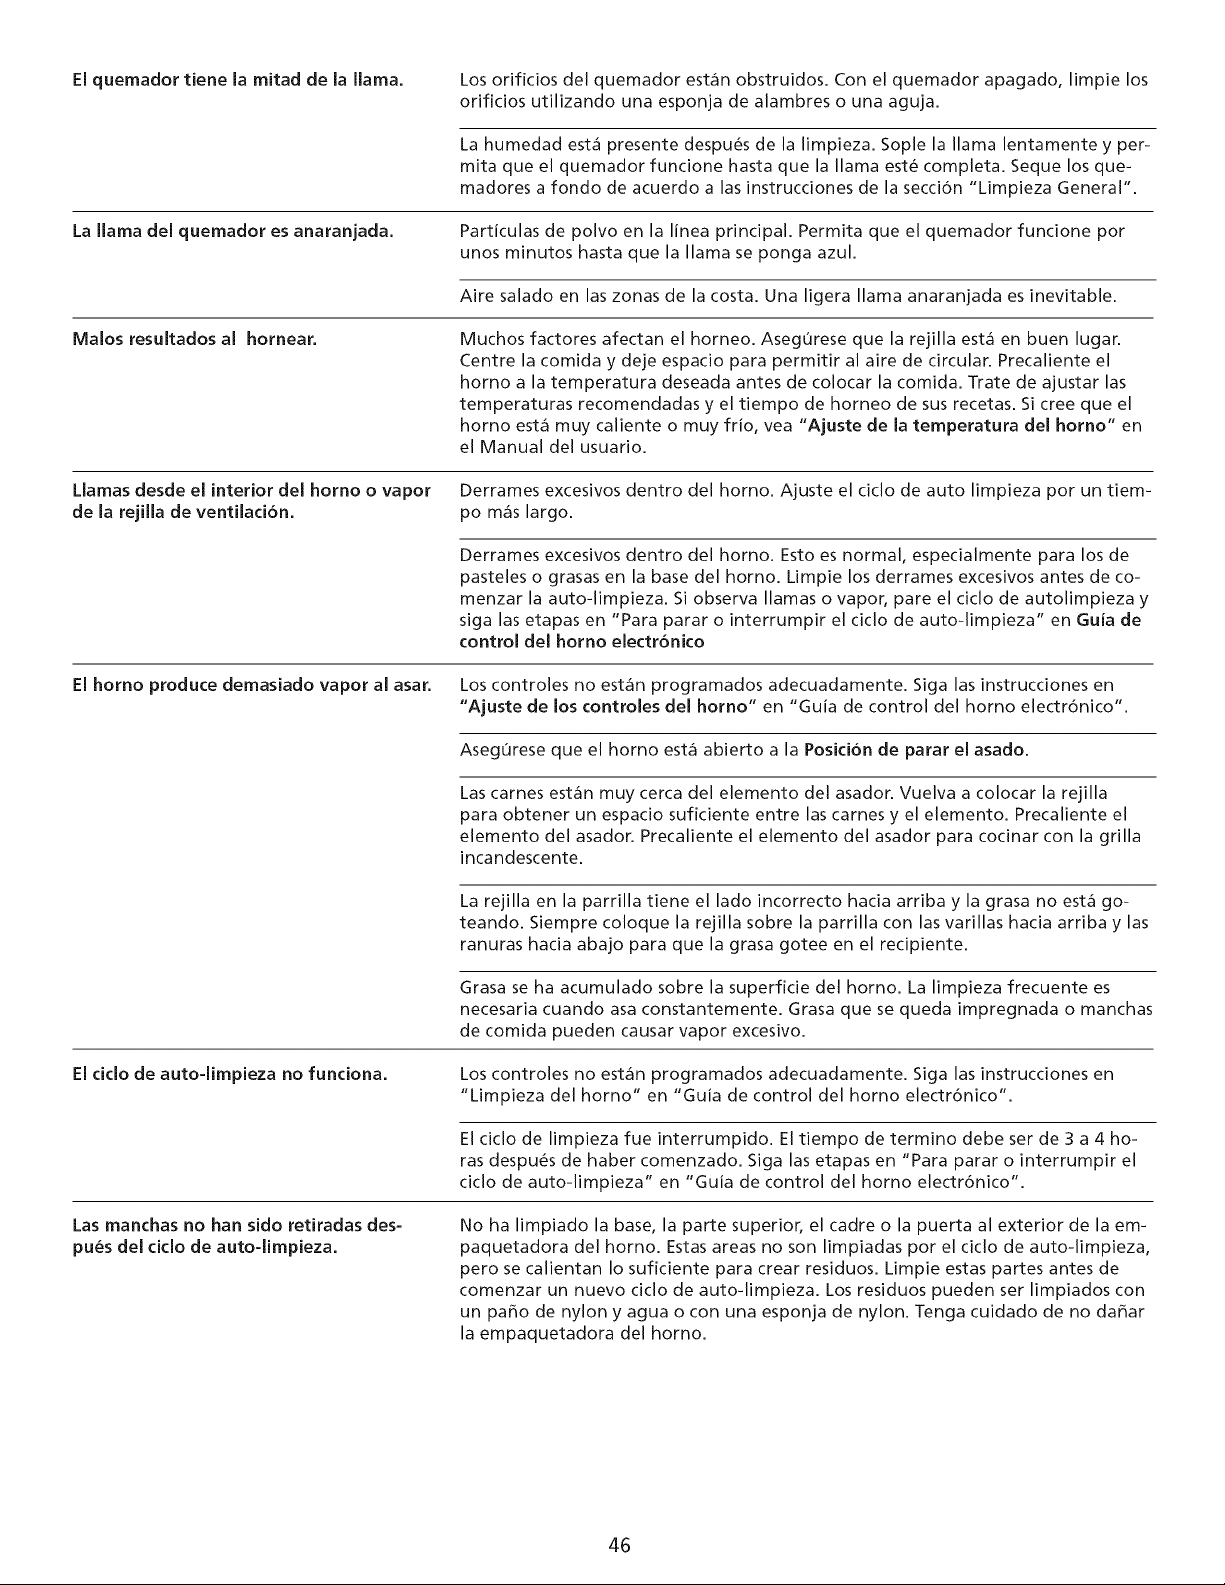
El quemador tiene la mitad de la llama. Los orificios del quemador est_n obstruidos. Con el quemador apagado, limpie los
orificios utilizando una esponja de alambres o una aguja.
La humedad est_ presente despu_s de la limpieza. Sople la llama lentamente y per-
mita que el quemador funcione hasta que la llama est_ completa. Seque los que-
madores a fondo de acuerdo a las instrucciones de la secci6n "Limpieza General".
La llama del quemador es anaranjada. Particulas de polvo en la linea principal. Permita que el quemador funcione por
unos minutos hasta que la llama se ponga azul.
Aire salado en las zonas de la costa. Una ligera llama anaranjada es inevitable.
Malos resultados al hornear.
Muchos factores afectan el horneo. Aseg0rese que la rejilla est_ en buen lugar.
Centre la comida y deje espacio para permitir al aire de circular. Precaliente el
horno a la temperatura deseada antes de colocar la comida. Trate de ajustar las
temperaturas recomendadas y el tiempo de horneo de sus recetas. Si cree que el
horno est_ muy caliente o muy frio, vea "Ajuste de la temperatura del homo" en
el Manual del usuario.
Llamas desde el interior del horno o vapor Derrames excesivos dentro del homo. Ajuste el ciclo de auto limpieza por un tiem-
de la rejilla de ventilacion, po m_s largo.
Derrames excesivos dentro del horno. Esto es normal, especialmente para los de
pasteles o grasas en la base del horno. Limpie los derrames excesivos antes de co-
menzar la auto-limpieza. Si observa llamas o vapor, pare el ciclo de autolimpieza y
siga las etapas en "Para parar o interrumpir el ciclo de auto-limpieza" en Guia de
control del horno electronico
El horno produce demasiado vapor al asar. Los controles no est_n programados adecuadamente. Siga las instrucciones en
"Ajuste de los controles del homo" en "Guia de control del homo electrbnico".
AsegOrese que el homo est_ abierto a la Posicion de parar el asado.
Las carnes est_n muy cerca del elemento del asador. Vuelva a colocar la rejilla
para obtener un espacio suficiente entre las carnes y el elemento. Precaliente el
elemento del asador. Precaliente el elemento del asador para codnar con la grilla
incandescente.
La rejilla en la parrilla tiene el lado incorrecto hacia arriba y la grasa no est_ go-
teando. Siempre coloque la rejilla sobre la parrilla con las varillas hacia arriba y las
ranuras hacia abajo para que la grasa gotee en el recipiente.
Grasa se ha acumulado sobre la superficie del horno. La limpieza frecuente es
necesaria cuando asa constantemente. Grasa que se queda impregnada o manchas
de comida pueden causar vapor excesivo.
El ciclo de auto-limpieza no funciona. Los controles no est_n programados adecuadamente. Siga las instrucciones en
"Limpieza del horno" en "Guia de control del homo electr6nico".
El ciclo de limpieza fue interrumpido. El tiempo de termino debe ser de 3 a 4 ho-
ras despu6s de haber comenzado. Siga las etapas en "Para parar o interrumpir el
ciclo de auto-limpieza" en "Guia de control del homo electr6nico".
Las manchas no ban sido retiradas des-
pues del ciclo de auto-limpieza.
No ha limpiado la base, la parte superior, el cadre o la puerta al exterior de la em-
paquetadora del horno. Estas areas no son limpiadas por el ciclo de auto-limpieza,
pero se calientan Io suficiente para crear residuos. Limpie estas partes antes de
comenzar un nuevo ciclo de auto-limpieza. Los residuos pueden ser limpiados con
un paso de nylon y agua o con una esponja de nylon. Tenga cuidado de no daSar
la empaquetadora del horno.
46

Notas