Loading ...
Loading ...
Loading ...
Performing a Decompression Stop
You should always perform all the required decompression stops during a dive to help reduce the risk of
decompression sickness. Missing a decompression stop adds significant risk.
1 When you exceed the no-decompression limit (NDL) time, begin your ascent.
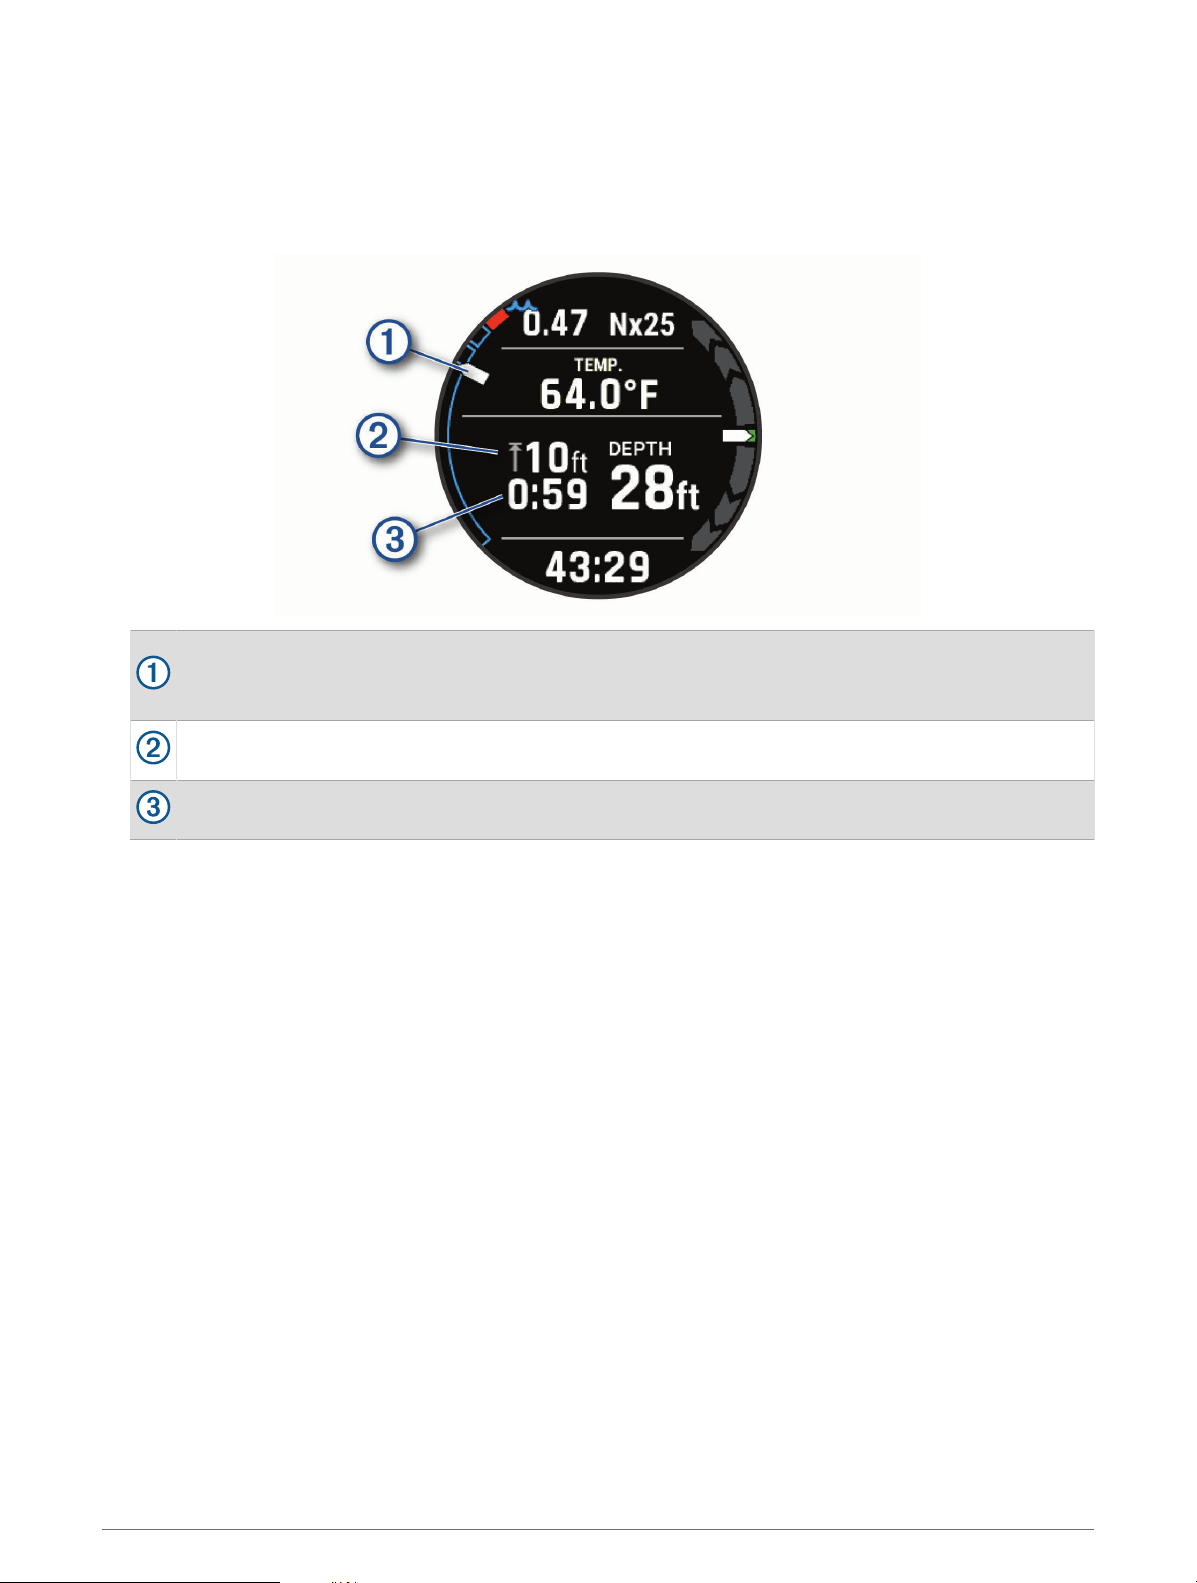
Decompression stop information appears on the data screens.
Your depth relative to the surface.
As you ascend, your position moves upward toward the required decompression stop depth. The
empty segments represent cleared stops. You may clear a stop before ascending to it.
The decompression stop ceiling depth.
The decompression stop timer.
2 Stay within 0.6 m (2 ft.) of the decompression stop ceiling depth until the decompression stop timer reaches
zero.
NOTE: If you ascend more than 0.6 m (2 ft.) above the decompression stop ceiling depth, the decompression
stop timer pauses, and the device alerts you to descend below the ceiling depth.
3 Continue ascending to the surface or the next decompression stop.
Diving with the Map
You can view your dive entry and exit locations on the map during apnea surface intervals.
TIP: You can view map data for all dive modes in the dive log widget and in the Garmin Dive app.
1 During an apnea dive activity, scroll to the map.
2 Press START, and select an option:
• To pan or zoom the map, select Pan/Zoom.
TIP: You can press START to toggle between panning up and down, panning left and right, or zooming.
You can hold START to select the point indicated by the crosshairs.
• To mark your location, select Save Location.
TIP: You can press DOWN to change the icon.
20 Diving
Loading ...
Loading ...
Loading ...