Loading ...
Loading ...
Loading ...
En
35
Changing the settings
Displaying the [UTILITY] screen
Touch [MENU (UTILITY)] for over 1 second.
The [UTILITY] screen is displayed.
Description of the screen
21
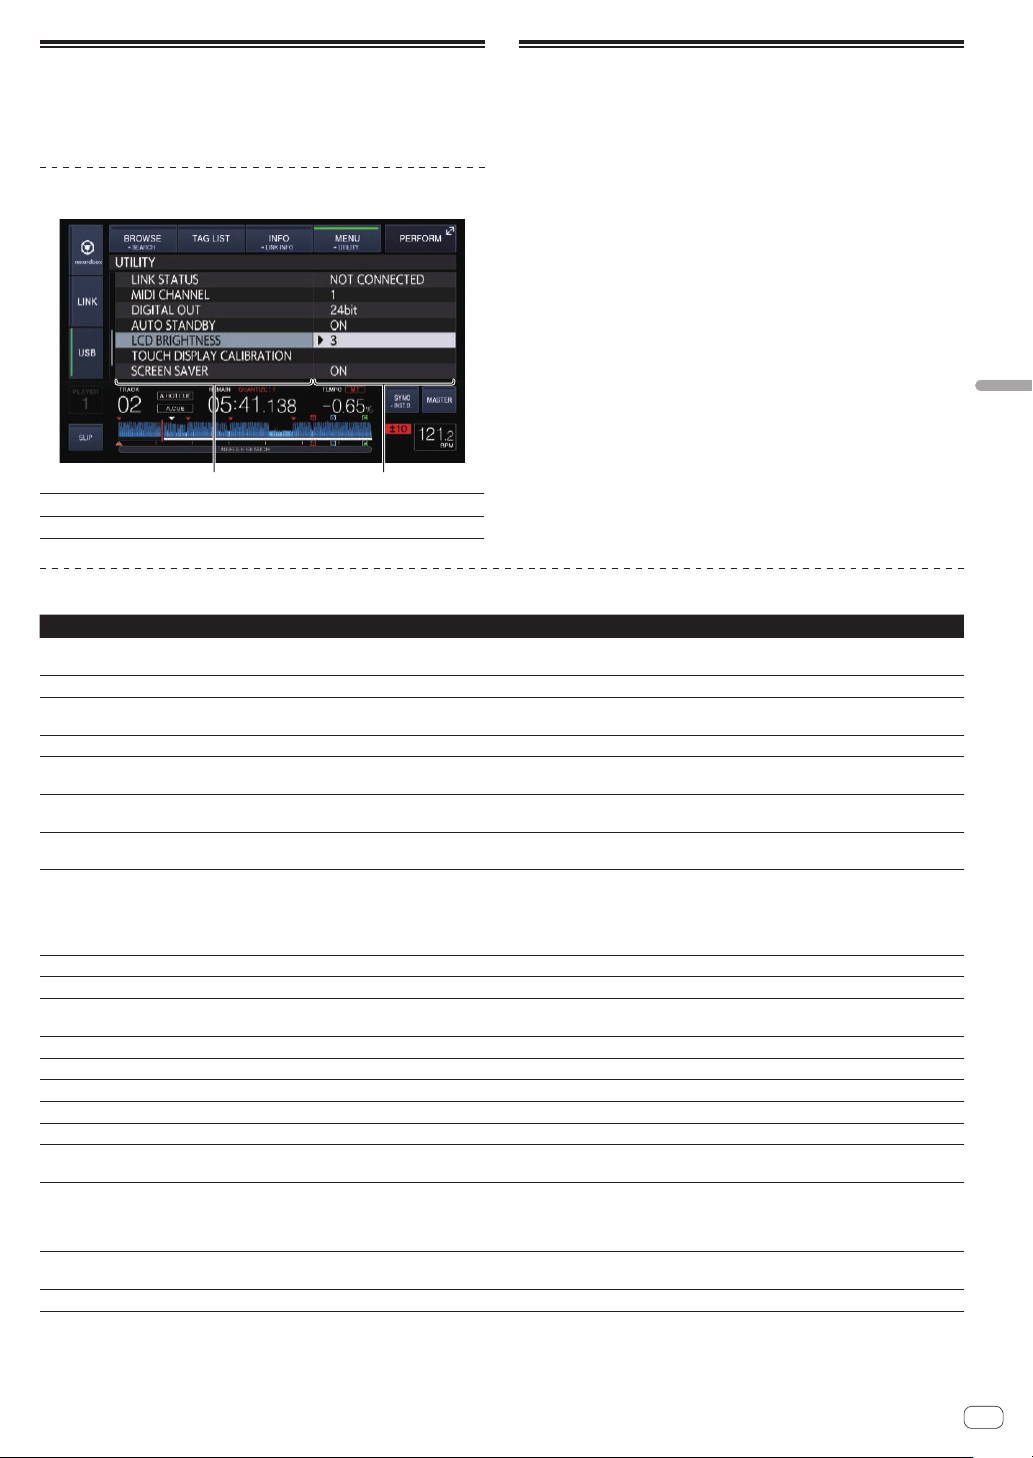
1
Options settings This unit’s settings items are displayed here.
2
Setting The settings for the various items are displayed here.
Changing the settings
1 Touch [MENU (UTILITY)] for over 1 second.
The [UTILITY] screen is displayed.
2 Use the rotary selector to select the setting item.
3 Set the cursor to the item you want to change, then
press the rotary selector.
The cursor moves to the setting.
4 Turn the rotary selector and change the setting.
5 Press the rotary selector to enter the setting.
The cursor returns to the setting.
! When the [BACK] button is pressed before entering the setting, the
change is aborted.
6 Touch [MENU (UTILITY)].
Returns to the last screen before [MENU (UTILITY)] was touched.
Setting preferences
Options settings Setting ranges Descriptions
PLAY MODE
CONTINUE*/SINGLE
Changes the way the tracks loaded in this unit are played.
For details, see Changing the play mode on page
36 .
LOAD LOCK
LOCK/UNLOCK* Sets whether to disable or enable loading of new tracks during playback.
QUANTIZE BEAT VALUE
1/8, 1/4, 1/2, 1*
Changes the beat size of QUANTIZE.
The setting can also be changed on the [SHORTCUT] screen.
HOT CUE AUTO LOAD ON/rekordbox SETTING*/OFF For details, see Calling out hot cues automatically when tracks are loaded on page
25 .
HOT CUE COLOR
ON/OFF*
The lighting color of the [HOT CUE] (A to H) buttons can be changed.
For details, see Lighting color of the [HOT CUE] (A to H) buttons on page
24 .
AUTO CUE LEVEL
–36 dB/–42 dB/–48 dB/–54 dB/–60 dB/–66 d
B/–72 dB/–78 dB/MEMORY*
For details, see Setting the cue point for auto cueing on page 25 .
SLIP FLASHING
ON*/OFF
Sets whether or not the indicators of buttons, etc., for which the slip function is activated
should flash when [SLIP] is touched.
ON AIR DISPLAY
ON*/OFF
Sets whether or not to display the tracks’ ON AIR status on the main unit display. When
connected by PRO DJ LINK to a mixer supporting the ON AIR DISPLAY function (e.g. DJM-
2000nexus), it is possible to display the ON AIR status in association with the operation of the
mixer’s channel fader and crossfader. Also see the operating instructions of the mixer support-
ing the ON AIR DISPLAY function.
LANGUAGE
— Sets the main unit display’s language.
HISTORY NAME
— For details, see Setting the playing history list name on page
36 .
PLAYER No.
AUTO*, 1 – 4
Sets this unit’s player number. The player number cannot be changed when a medium is
loaded in this unit.
LINK STATUS
— When PRO DJ LINK connections are made, the connection status is displayed here.
MIDI CHANNEL
1* to 16 For details, see Changing the MIDI channel setting on page
37 .
DIGITAL OUT
16 bit/24 bit* This switches the number of bits of the audio signals output from the [DIGITAL OUT] terminal.
AUTO STANDBY
ON*/OFF For details, see Setting the auto standby mode on page
36 .
LCD BRIGHTNESS
1 – 3* – 5 Sets the main unit display’s brightness.
TOUCH DISPLAY
CALIBRATION
— For details, see Correct the alignment of touch display on page
36 .
SCREEN SAVER
ON*/OFF
When set to [ON], the screensaver starts up in the following cases:
!
When no track is loaded in this unit for over 5 minutes
! When no operation is performed for over 100 minutes while in the pause or cue standby
mode or when [END] is displayed on the main unit display.
DUPLICATION
DEFAULT*, ALL, PLAYER1–4
For details, see Duplicating the settings onto DJ players connected by PRO DJ LINK on
page
36 .
VERSION No.
— Displays this unit’s software version.
*: Setting upon purchase
Loading ...
Loading ...
Loading ...