Loading ...
Loading ...
Loading ...
19
PAGE HEADER.....A BEGINNER'S GUIDE TO PRESSURE COOKING
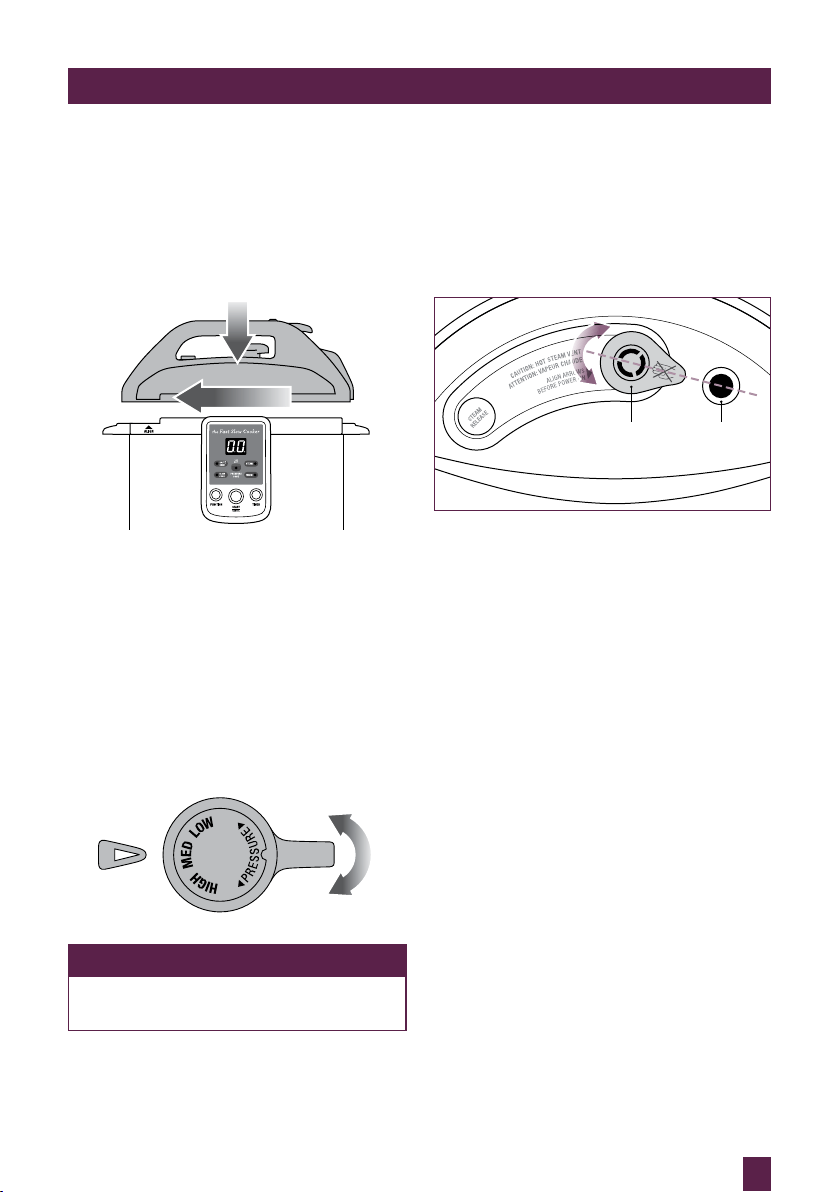
6. Ensure the Pressure Release Valve is
turned to the PRESSURE position.
For correct PRESSURE position, align
the pressure release valve with the dash
graphic that goes across the pressure
safety valve.
See diagram below.
Pressure
Release
Valve
Pressure
Safety
Valve
PRESSURE
POSITION
The illustration above shows the correct
Pressure Release Valve position.
You may need to adjust the Pressure Release
Valve until it is in the correct position.
Note: The arrows should be aligned.
7. Press the FUNCTION button until
PRESSURE COOK indicator light
flashes red.
8. To set the TIMER; press the TIMER
button to increase cooking time. This
will be illuminated on LED display from
02 minutes to maximum 99 minutes.
To fast advance time, press and hold
down the TIMER button. When desired
cooking time is displayed, press the
START/CANCEL button.
The function indicator light will stop
flashing and will illuminate a solid red.
Preheating will begin, control panel will
continue to display selected cooking
time. As selected pressure setting is
achieved, there will be a slight hissing of
steam from the Pressure Release Valve.
After approximately 10 minutes, or more
depending on the amount of liquid added
to cooking bowl, selected cooking time
will begin to count down in minutes and
this is shown on LED display.
4. Close and lock lid by using the handle.
Close lid in a clockwise direction by
aligning “ALIGN” arrows. The Lid arrow
should align with stainless steel base
arrow until it locks into place and is in
the CLOSE position. This should be
effortless.
2
1
5. Select one of the following settings
using the Pressure Control dial located
on the handle:
− Low (Low Pressure)
− Medium (Moderate Pressure)
− High (High Pressure)
NOTE
Refer to Pressure Cooking guide
and recipes on pages 22–43.
Loading ...
Loading ...
Loading ...