Loading ...
Loading ...
Loading ...
Viewing 3D Movies
1
Connect this unit to a 3D-compatible
HDMI device, and turn on the power
to play back the 3D video image
0
For details on how to play back 3D video images,
please refer to the instruction manual of the
player or recorder in use.
0
This unit supports the following 3D formats.
- Frame packing
- Side-by-side
- Top-and-bottom
Setting the 3D format
A
Select “Input Signal” " “3D
Setting” " “3D Format” in the menu
to switch the format
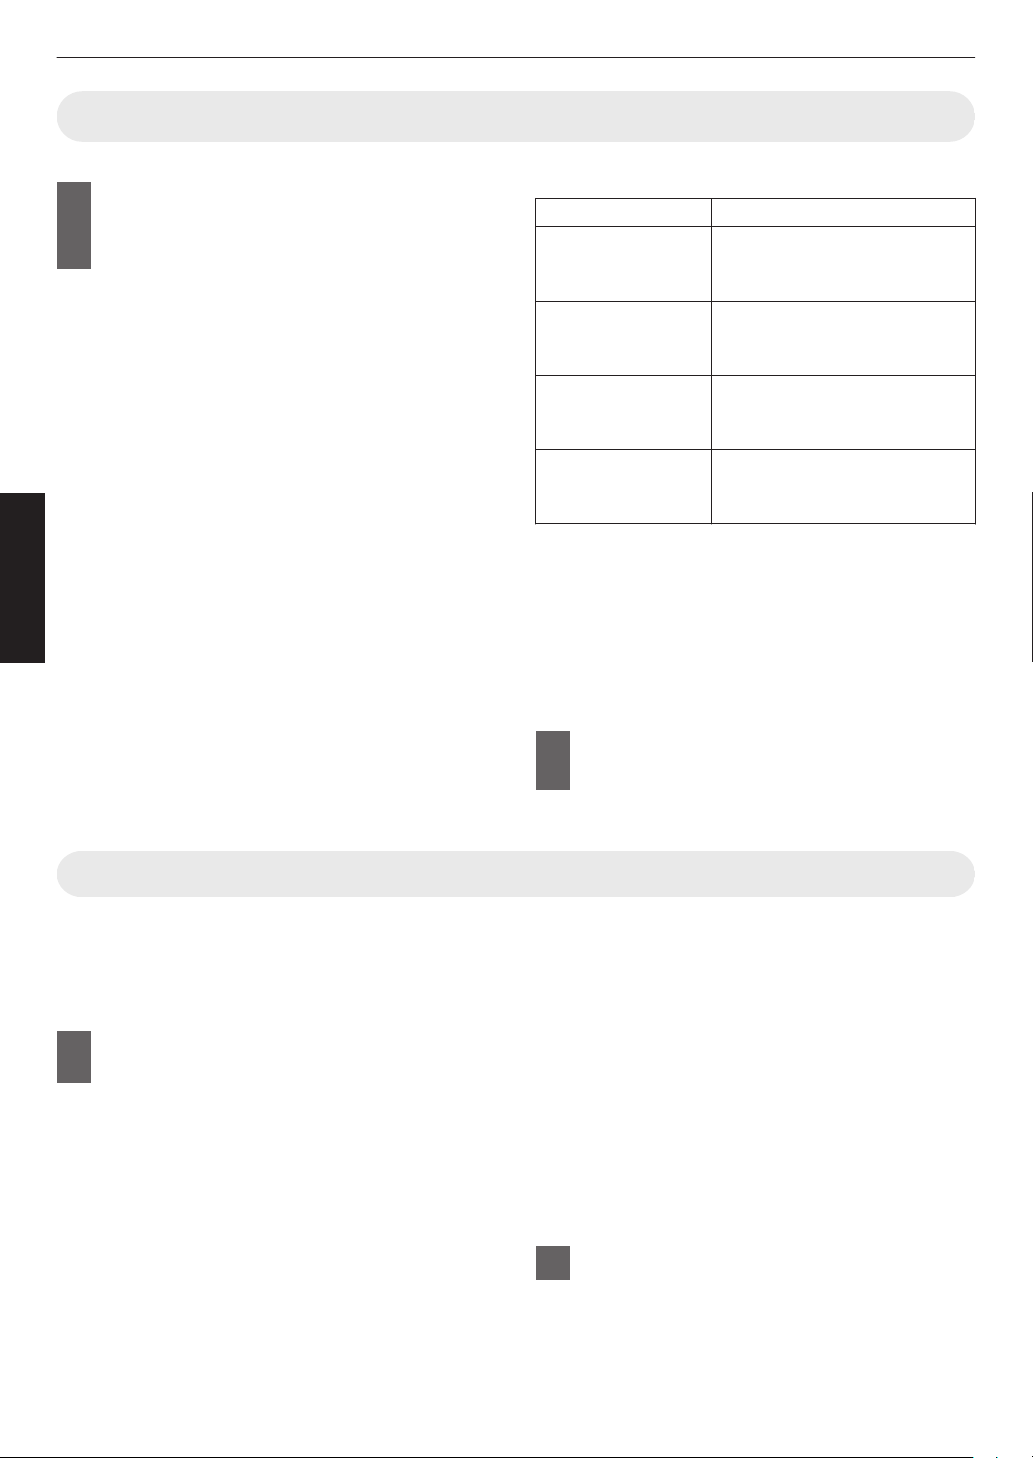
Format Description
Auto Automatically determines and
sets the format upon receiving 3D
signal.
Side by Side Select this setting if the 3D input
signal is of the side-by-side
format.
Top and Bottom Select this setting if the 3D input
signal is of the top-and-bottom
format.
2D Select this setting if 2D images
are falsely recognized as 3D
ones.
* If a signal cannot be displayed as 3D image,
selecting the format does not switch the signal
to a 3D image.
For more information on possible input signals,
please refer to “Types of Possible Input
Signals”P. 86.
* In the default setting, “3D Format” is set to “Auto”
for automatic projection of 3D images.
2
Turn on the power of the 3D Glasses
and put them on
0
The PK-AG1 powers on automatically.
Adjusting 3D Movies
3D video images may appear differently to different
viewers. It may also be affected by your physical
condition at the time of viewing.
You are therefore recommended to adjust the video
images accordingly.
1
Select “Input Signal”"“3D Setting”
from the menu
Adjusting parallax (Parallax)
Adjust the displacement of the image for the left
and right eyes separately to obtain the best 3D
effect.
0
To do so, use the H I keys to move the cursor.
0
Setting range: -15 to +15
Adjusting crosstalk (Crosstalk Cancel)
Double images (overlapping of the left image with
the one on the right or vice versa) can be reduced
to deliver a clear quality.
0
To do so, use the H I keys to move the cursor.
0
Setting range: -8 to +8
2
Press the [MENU] button to exit
28
Operate
Loading ...
Loading ...
Loading ...