Loading ...
Loading ...
Loading ...
69
3
Sorting
Images
1
2
4
5
Introduction/
Contents
Downloading
Images
Viewing
Images
Printing
Images
Editing
Images
6
Processing
Large Numbers
of RAW Images
7
Remote
Shooting
9
HDR PQ
Mode
8
Playing Back
Movies and Saving
Still Photos
10
Specifying
Preferences
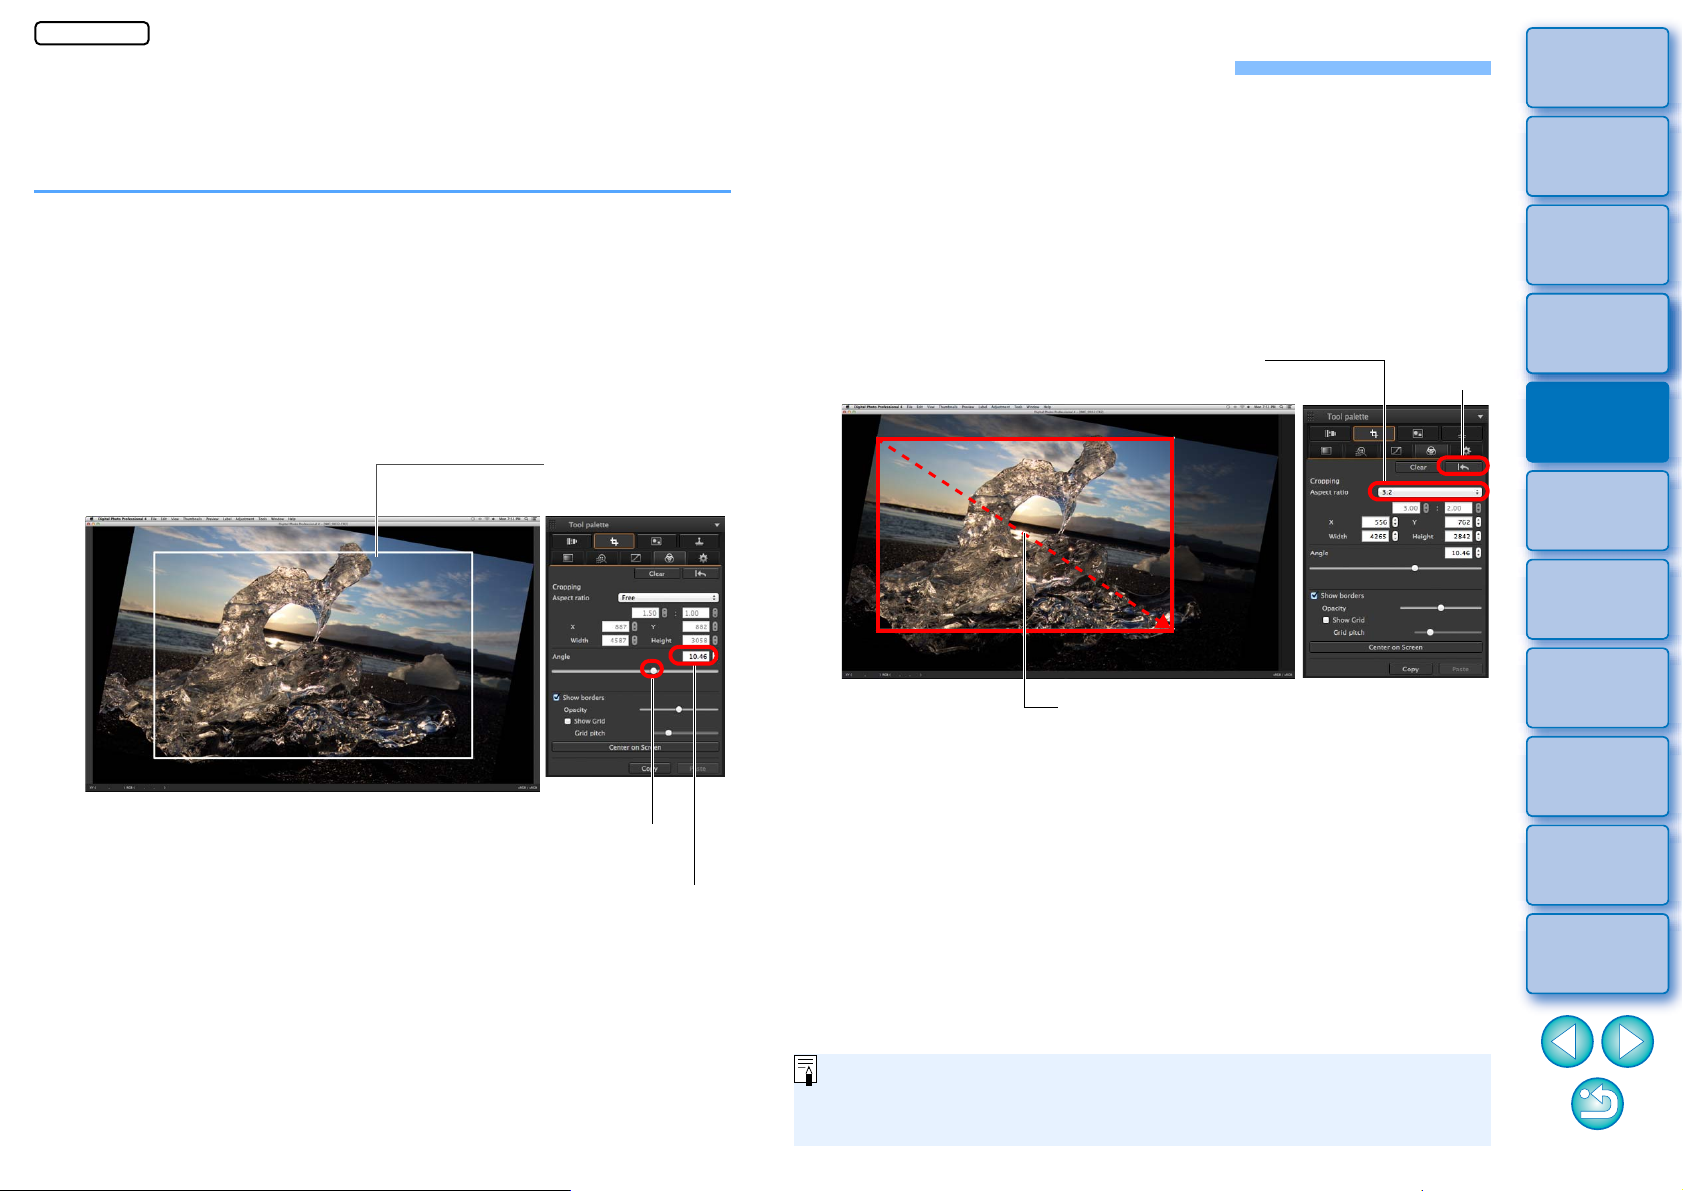
Editing with the Trimming/Angle Adjustment Tool Palette
You can crop only the part of an image you need, or change the
composition of an image where an image shot horizontally becomes
vertical. You can also adjust the angle of an image before cropping.
1
Select the image to be cropped.
2
Display the Trimming/Angle Adjustment tool palette.
You cannot make adjustments with the Trimming/Angle
Adjustment tool palette in a window that only shows thumbnails.
3
Adjust the angle of the image as needed.
Trimming/angle adjustment window
Use the mouse (click
/
) to adjust the angle or directly enter
the adjustment angle (0.01-degree increments; adjustable
range: –45 to +45 degrees)
Drag (0.01-degree increments; adjustment range: –45 to +45
degrees)
Largest possible
trimming range
If you click [Center on Screen], you can display the trimming
range in the center of the window.
When correcting lens aberrations, it is recommended to perform
lens aberration correction before adjusting the angle of the
image.
If you have only adjusted the angle of the image, the image will
be cropped at the largest possible trimming range.
4
Select a ratio and drag the trimming range.
The trimming range can be moved by dragging.
You can enlarge or reduce the size of the trimming range by
dragging the four corners of the trimming range.
Cancel
Select a trimming ratio
Drag the trimming
range
When aspect ratio information is attached to an image shot with any
supported camera other than the EOS 5D Mark II, the displayed
trimming range is based on the aspect ratio information.
JPEG/TIFF
Loading ...
Loading ...
Loading ...