Loading ...
Loading ...
Loading ...
22
AVR
Set Up the AVR
Set Up the AVR
In this section, you will configure the AVR to match your actual system’s makeup. Although
it’s possible to configure the AVR using only the remote and the messages on the AVR’s
front-panel display, it is easier if you use the on-screen menu system.
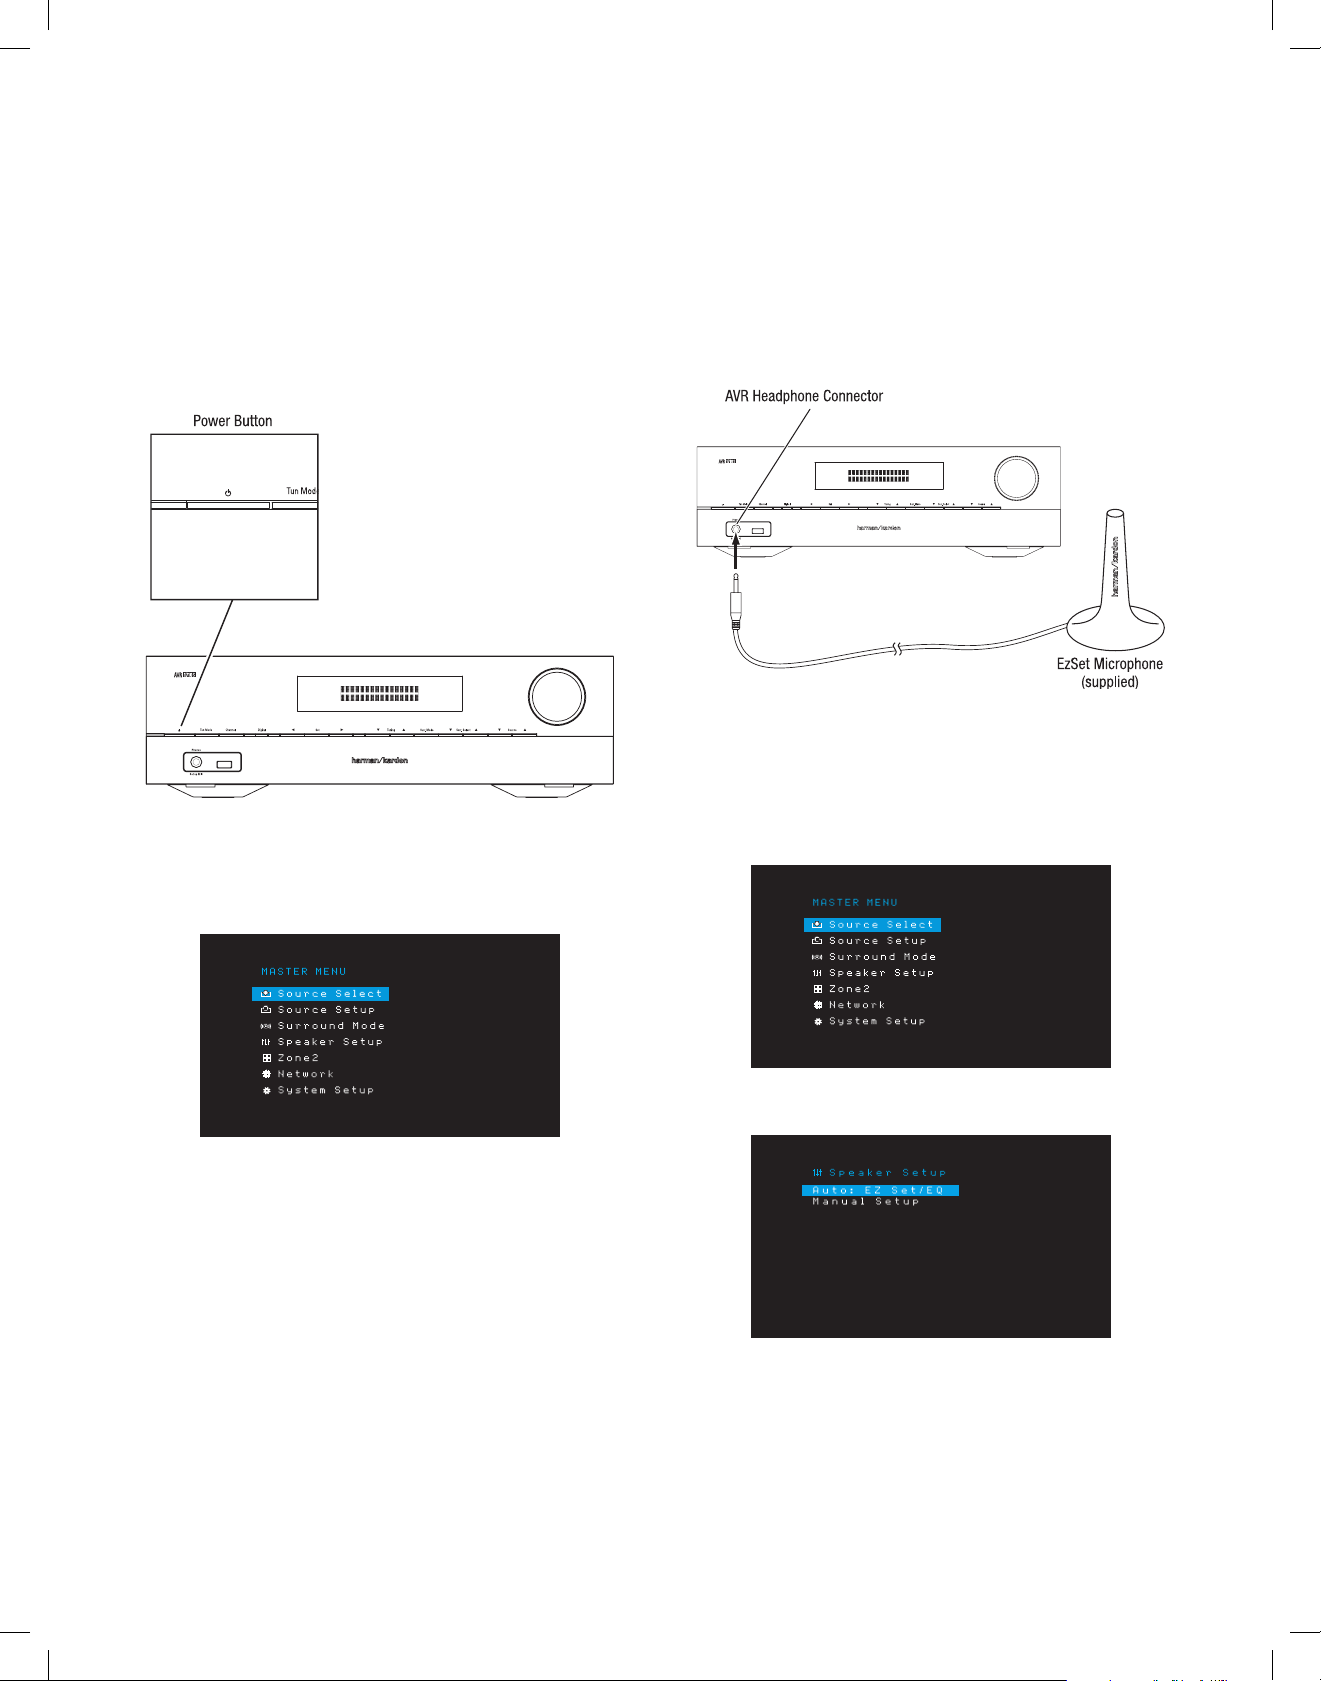
Turn On the AVR
Press the front-panel Power button.
Using the On-Screen Menu System
To access the menu system, press the OSD/Menu button on the remote. The OSD/Menu
Menu will appear, and if a video source is playing, the menu will automatically re-size so
the picture will be visible behind the menu.
NOTE:
The actual on-screen menus may differ slightly from the illustrations in this
manual.
The Main Menu system consists of six submenus: Source Select, Source Setup, Surround
Mode, Speaker Setup, Network and System Setup. (The AVR 1710S/AVR 171S also have
a Zone 2 submenu.) Use the Up/Down/Left/Right buttons on the remote or the front panel
to navigate the menu system, and press the OK button to select a menu or setting line,
or to enter a new setting.
The current menu, setting line or new setting will appear in the front-panel Message
Display, as well as on screen.
To return to the previous menu or exit the menu system, press the Back/Exit button. Be
certain all settings are correct, as any changes you have made will be retained.
Most users should follow the instructions in this Set Up the AVR section to configure a
basic home theater system. You may return to these menus at any time to make additional
adjustments, such as those described in the Advanced Functions section, on page 29.
Before beginning the following setup steps, all loudspeakers, a video display and all
source devices should be connected. You should be able to turn on the AVR and view the
main menu when you press the AVR button. If necessary, reread the Making Connections
and Set Up the Remote sections before continuing.
Configure the AVR for Your Speakers
1. Plug the supplied EzSet/EQ microphone into the AVR’s Headphone connector.
2. Place the microphone at ear height in your listening position.
3. Set the volume control on your subwoofer to approximately the halfway point.
4. Turn on your TV and select the TV input where you connected the AVR in Connect Your
TV or Video Display, on page 15.
5. Press the remote control’s AVR button. The AVR’s on-screen display (OSD) Main Menu
screen will appear on the TV.
6. Use the remote’s Up/Down/Left/Right and OK buttons to select “Speaker Setup.”
TR00306_AVR_OM_161S and 171S_EMEA_B.indb 22 26/05/15 2:29 pm
Loading ...
Loading ...
Loading ...